It seems like just about everyone does this mod sooner or later, and I chose a little later. 17 years a little later.
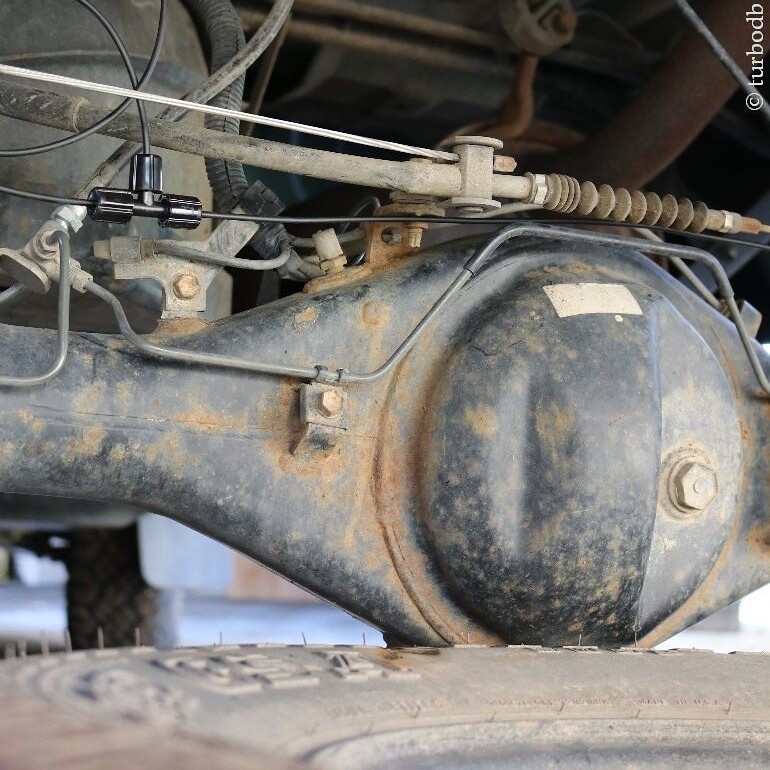
The fact that we have to do this mod at all is a bit unfortunate. Designers at Toyota placed a breather for the rear differential right on the diff housing, which means that if you submerse the diff in water when it's hot, the contraction of air in the diff could suck water into the diff, destroying it.
Sounds great, right? Yeah, clearly no.
The fix is pretty simple: add an extension to the breather to move it up out of the reach of any water crossing. The hardest step is finding the right parts to do the mod. Luckily, others have gone before, and the parts have been well identified:
-
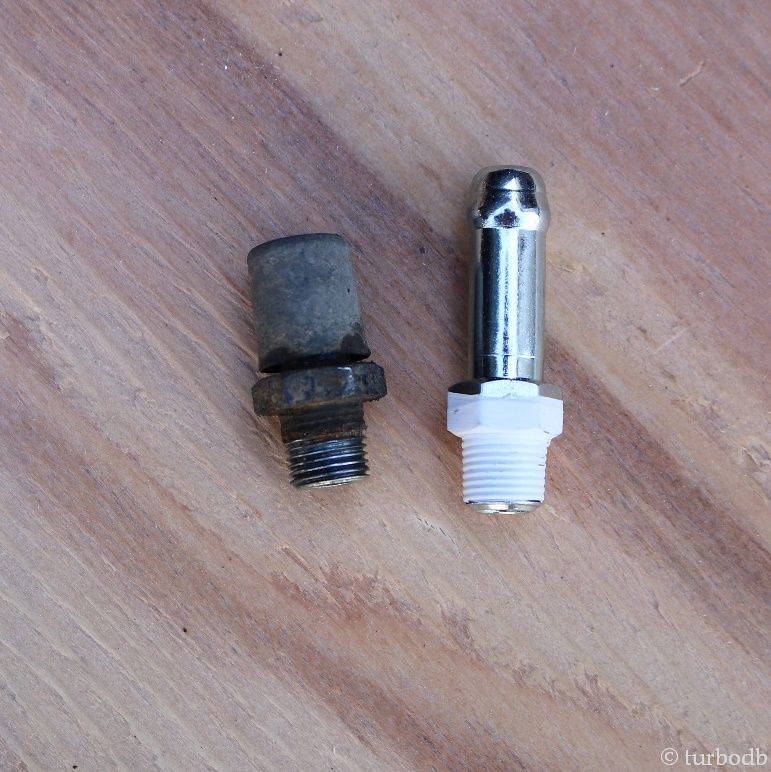
- 90930-03136 Plug Breather (or, this Dorman 924-284 is cheaper and works just as well)
- 90404-51319 Union
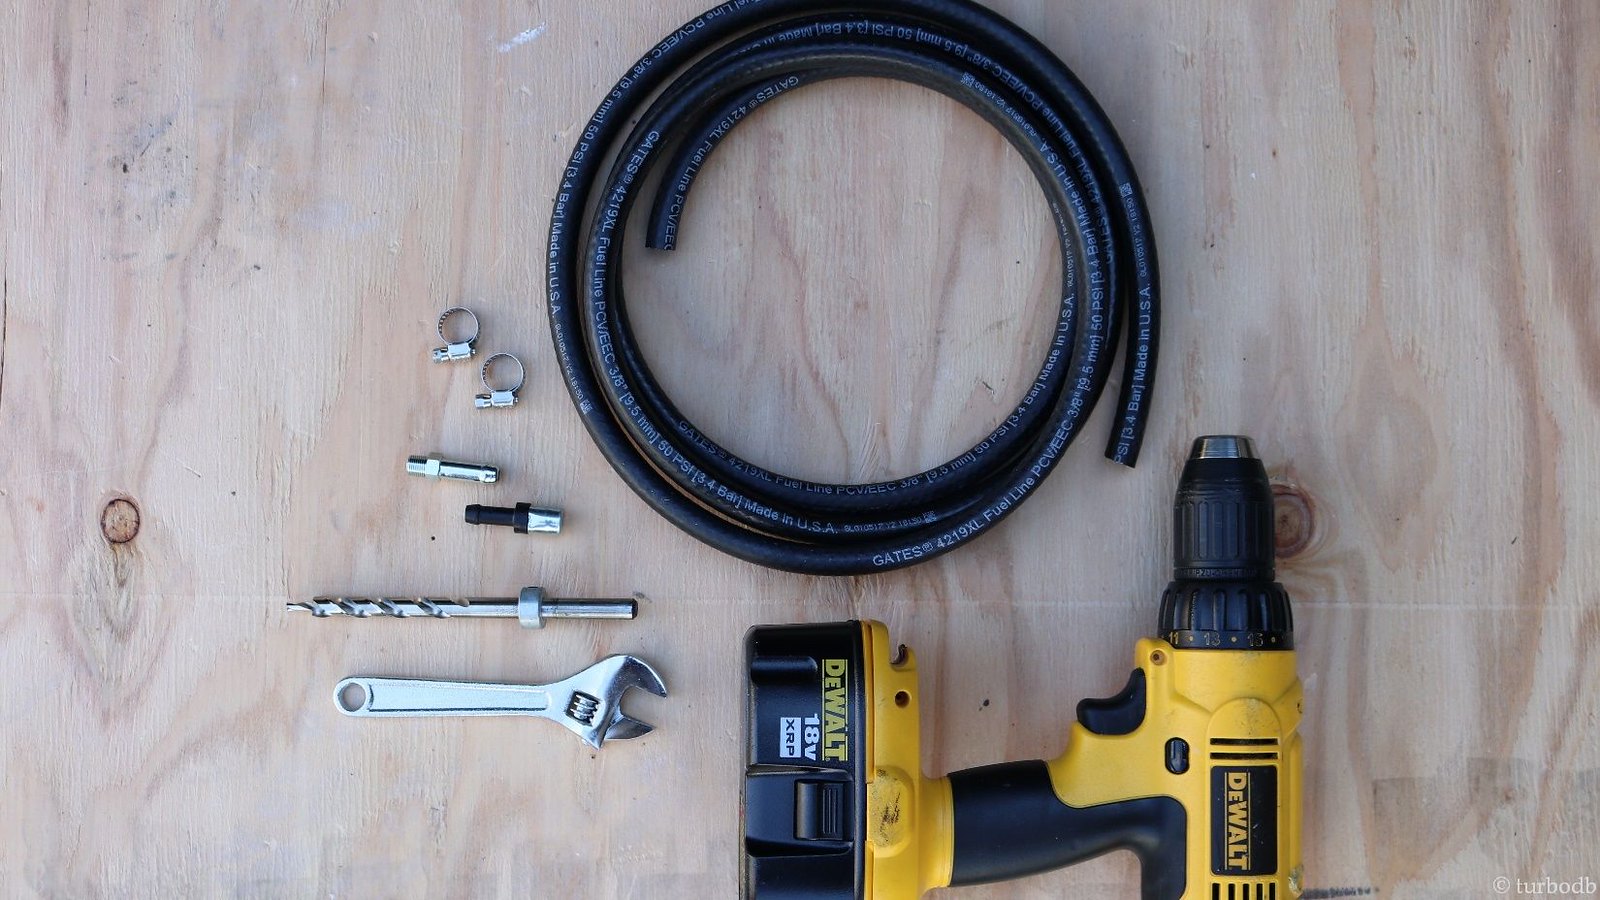
You'll also need a few other odds and ends, and tools:
- Two stainless steel hose clamps
- A length of 3/8th inch fuel line (8' is plenty, I used about 6' to get to the fuel door location)
- Slot screwdriver
- Drill (if you're going to drill a hole for the relocated breather)
- Adjustable wrench
- A few zip ties
Everything in hand, the entire process took less than 30 minutes:
1. Drop the spare, to get a bit more room to work under the truck.
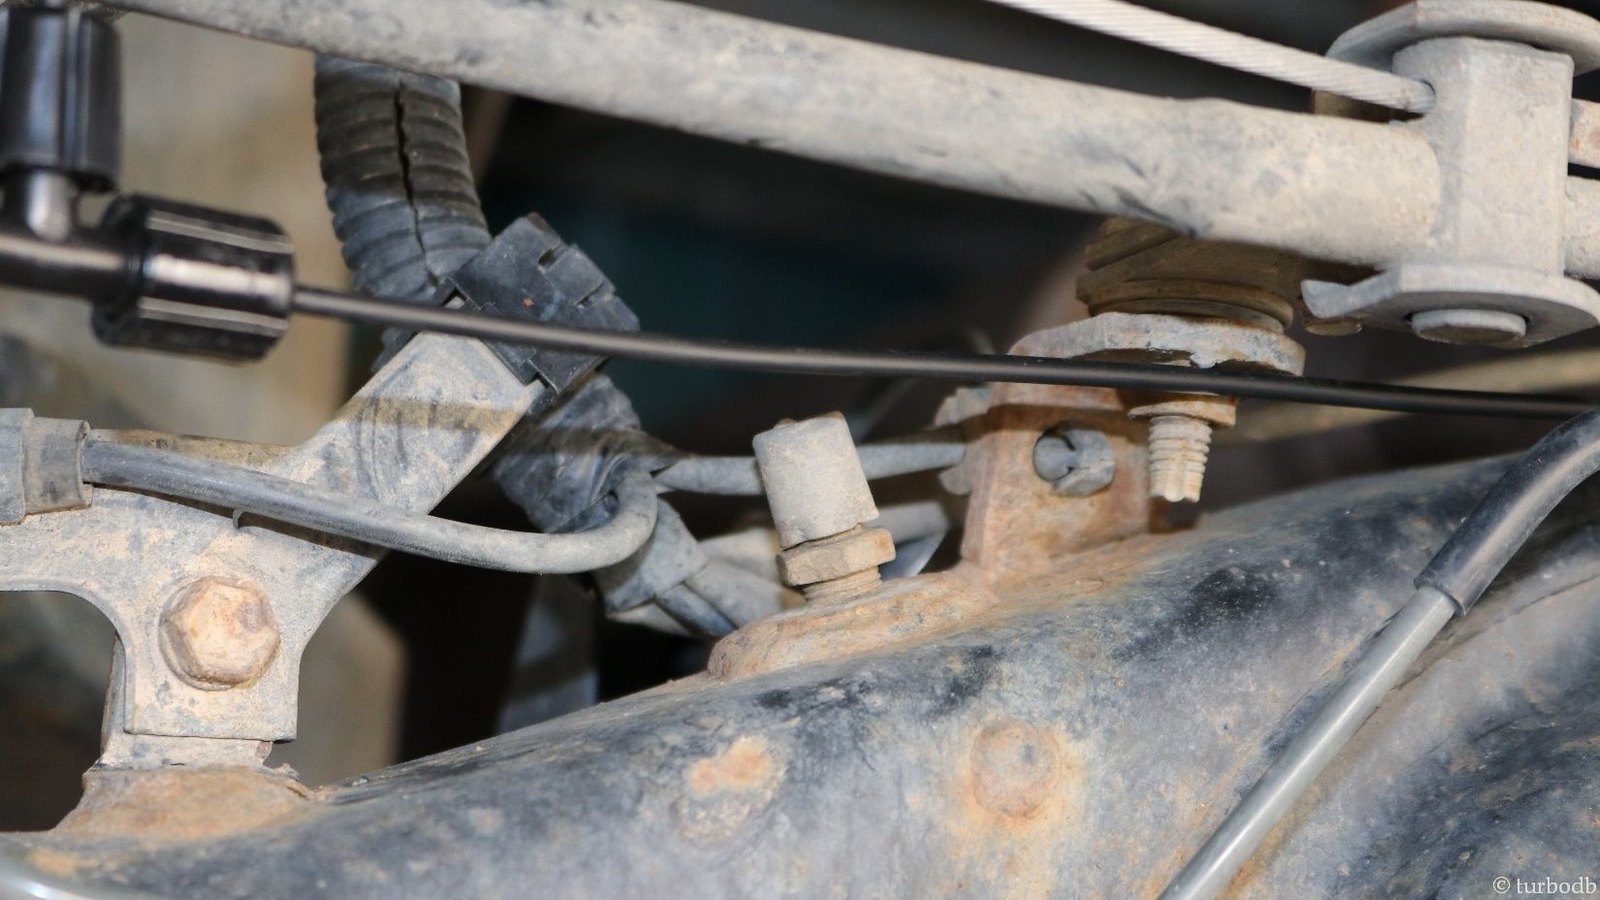
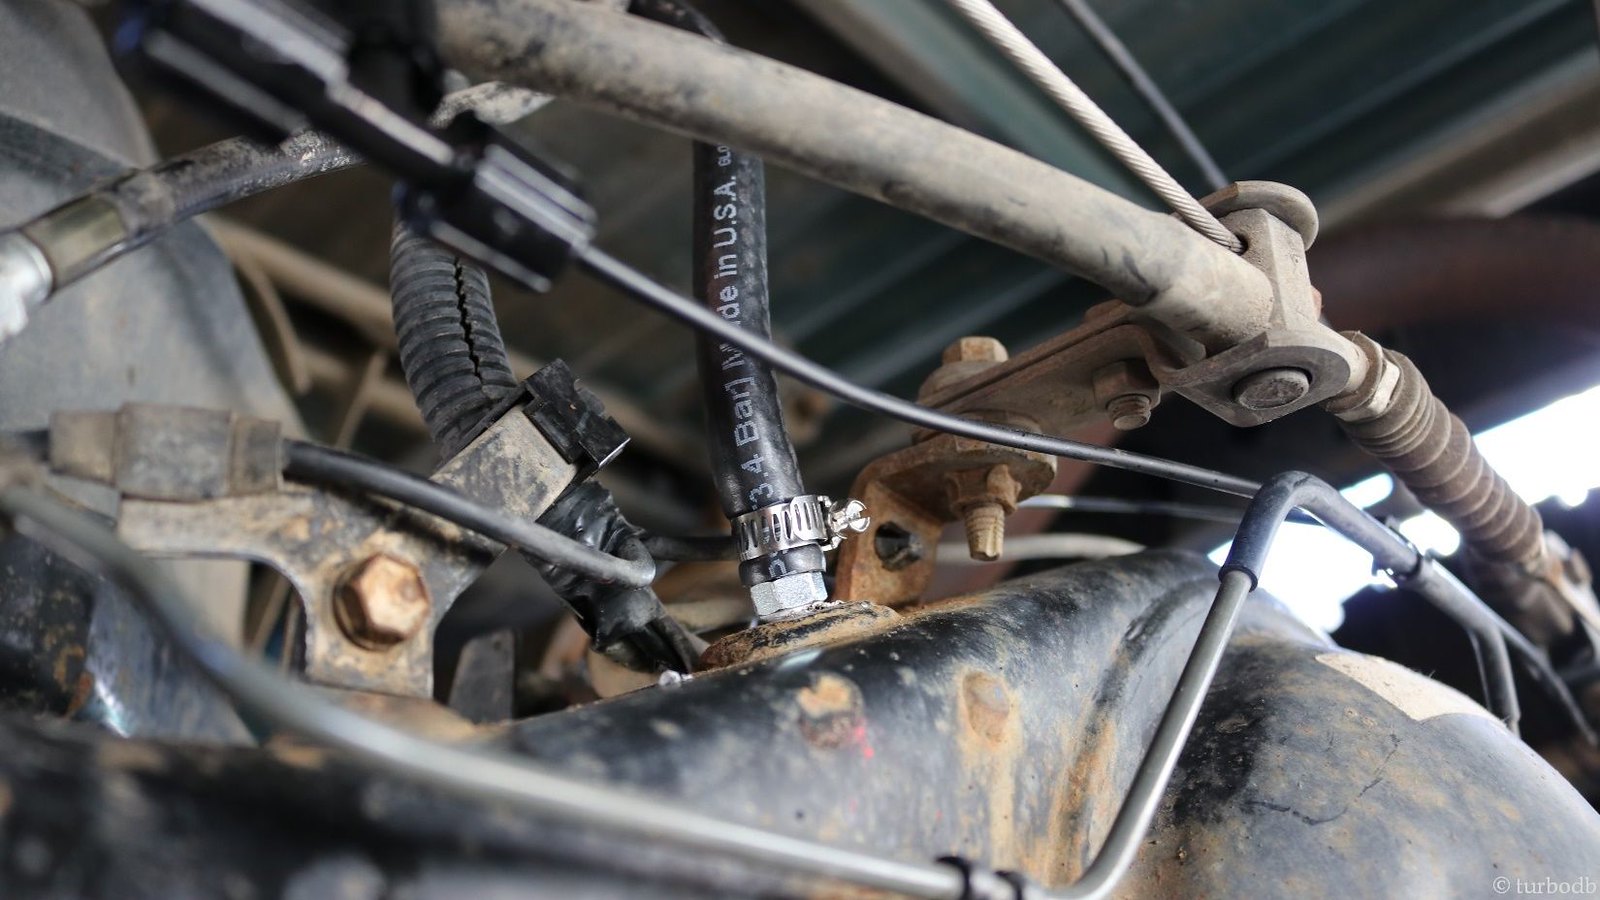
2. Clean around the OEM breather (so nothing falls in your diff as you make the swap, and then remove the OEM breather, prep the Union, and install it.
3. Attach the fuel line to the Union with a hose clamp and run the other end to the location you'll install the new Plug Breather. Zip tie it as you go, and don't forget to allow for rear axle droop (leave some slack).
4. Attach the fuel line to the Plug Breather with the other hose clamp.
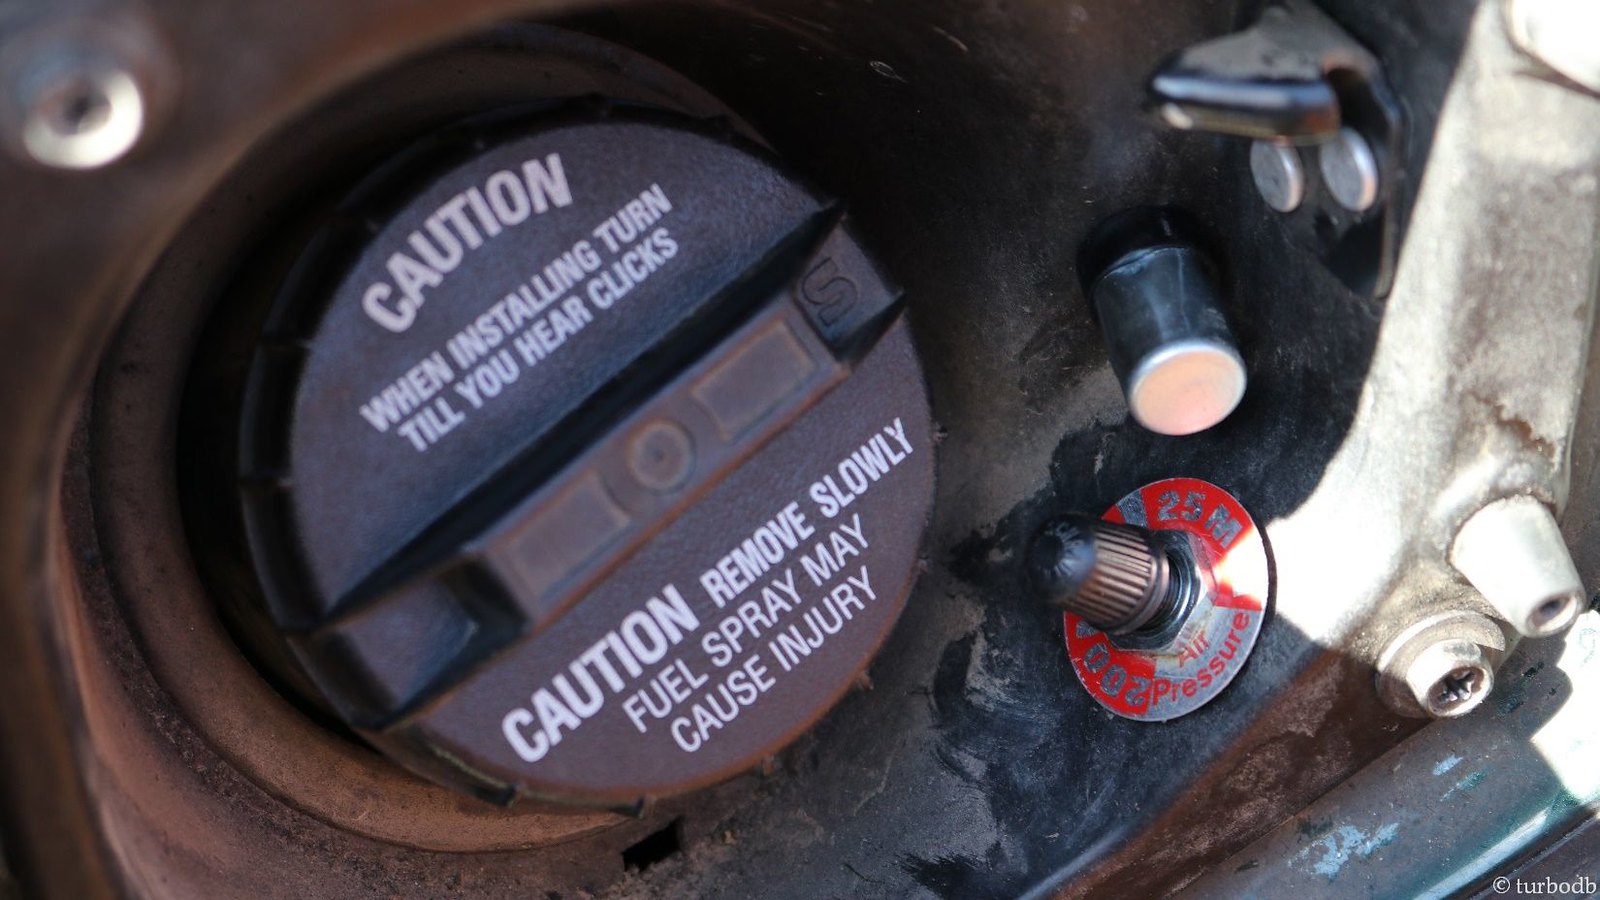
So there it is, installed behind the fuel door, next to the valve for the air shocks. Getting a little crowded in there, but still fits nicely. Why didn't I do this sooner?
I did this along with the rear axle seals and bearings. Good advice, can't hurt to be cautious and make sure that the diff can breathe nicely!
Awesome to hear this worked out for ya Wyatt. By all means, feel free to reach out with questions any time!
Did you just do the rear diff? Would these same parts work on the transfer case and front diff? Do they need it just like the rear? As in would the same risk of water entering the housing exist on the front diff and transfer case?
Justin - that's a great question. Turns out the answer isn't a simple yes/no (as often seems to be the case, ehh? 😉 )
Hope that helps!
That does help a lot! Thank you! I'm new to building trucks for off-roading and I want to do everything I can do protect my investments instead of just riding em hard and putting em up wet like I did with my Chevy trucks when I was younger and dumber.
The real problem is water going in through the the top of the transmission and transfer case two shifters.
Hey Ricky, While there are breathers on the t-case and transmission, I wouldn't call them the "real problem," per-se. They are significantly higher than the rear diff and their position up in the tunnel makes them less likely to get coated/plugged with mud or submerged for an extended period of time. But, if you'd like to extend them as well, it wouldn't hurt a bit. Will be a bit more work though, as you'll likely need to drop the two in order to get access to the breathers!
If you do, take some photos and share with the community!
A very nice rear diff mod and write up.
I did this easy peasy mod today.
How much slack in the line do you need for a stock suspension/no lift?
When you're down there, you can see the brake line (going up to the driver side of the frame). Put at least a bit more slack in the line than you have with the brake line, so that both can extend the same difference.
I did this many years ago for my 2003 Tacoma. Now I need to do it for my Lexus GX470.
Any tips on how to get the fender liner detached from the fender itself? I started to mangle the liner's plastic studs trying to gain access to the rear of the filler neck, so I left it partially in place. But that made this job quite a bit more difficult. Got it done in the end, though, cheers for the part numbers + pics.
Hey Greg - to get the fender liner detached, there are a bunch of bolts and plastic clips that need to be removed (which usually destroys the clips, probably what you mention as "studs"). The easier way - which looking through this write-up I didn't mention (but will add, thank you), is to remove the cover from the fuel filler - those four screws around the perimeter. Then, after removing the gas cap, you can pull that entire cover out and get access to the rear of it easily to install the breather.
Hope that helps! ?
Ahh, I didn’t even notice the 4 screws, ha. Figured I must have been doing things the hard way.
Thanks, now I know for my next Tacoma… 🙂
thanks for the write up! is it easier to get the breather by dropping the spare or removing the screws for the fuel filler?
thanks so much!
Updated reply, I was reading your question too quickly...
The breather, in its original location, is on the rear axle housing, so you should be able to see/access it without dropping the spare. That said, there's definitely more room under there if you drop the spare, so I always do (actually, I've permanently moved my spare, since having it under the truck isn't always a great idea if you actually need it 😉). As for the fuel filler - removing the four screws and pulling the plastic insert out of the recess (you might have to remove your gas cap to do this) makes it much easier to get the new breather installed up there. Hope that helps!
I am fixing to do this MOD, but I am going to run mine behind the left tail light.
Nice. You can run it wherever you'd like that's higher up.
How come folks just do the differential breather mod without tying in the differential locker breather? Is this an oversight or am I missing something? If water can submerge the differential breather I would think it could submerge the differential locker breather just as easily.
I think there are three main reasons for this:
Obviously #3 isn't really a "reason" not to move the locker breather, but it is a reason you don't hear about it. And not hearing about it means that even those who have a locker don't think about it. Which is fine, generally, due to #1.
Hope that answers your question!
I didn't realize that's where the e-lock breather is on the Taco and yes in that case it does makes sense. On my 5th gen 4runner the breather for the e-locker was just mounted to the rear crossmember. Not much higher then the pumpkin. #2 makes sense for the Taco and point noted regarding the path of least resistance and breathing the cavity. On the 4runner I'd think folks would still want to keep it from being submerged and creating an entry point for water into the differential.
I may just be overthinking. I had the rear seals go on my 3rd gen and upon inspection the breather didn't appear clogged at all so I'm being extra cautious with my 5th gen.
Ahh, yep, I was referring to 1st gen Taco/3rd gen 4Runner. On a 5th gen 4Runner - and likely on new Taocs - I think it's a lot more common to relocate the locker breather as well. I've helped a couple of my 5th gen 4Runner buddies do just that! 👍