
Every now and then - but on a reasonably regular basis - I get asked what I "shoot with." While I generally think of that term as something reserved for professional photographers, I figured it couldn't hurt to spend a bit of time walking through my process - because hey, maybe it'll help someone get started, or maybe someone with a lot more experience than me will give me a tip or two!
A wee bit of history...
While I've always liked to capture imagery of the beautiful places I've been, and I've loved sharing the stories with my family at our gatherings, I've never fancied myself a photographer. As a kid, I remember using a film camera that was about the size and shape of an ice cream sandwich, and had a flash that would "plug in" at a 90° angle and give 10 exposures before being trash. I bought my first digital camera in 1999 - a Toshiba PDR-M3 that sported 1.3 mega pixels and 1280 x 1024 resolution. I look at the photos it took today and think to myself...why'd I even bother? 
From there, I made my way through several digital cameras - always, honestly, more into them because they were techy gadgets as opposed to some underlying love for photography. I'm sure I don't remember them all, but I had - at least - a Sony DSC-S85 with the purple bubble gum memory stick; a Canon Powershot S410, as well as a PowerShot SD850 IS and PowerShot Elph 330 HS. Each one was better than the last, and of course I I liked that it they all had optical zoom. It turns out that I also really liked the color space that Canon's seemed to use (saturation levels, tones, etc.) and so stuck with them as the years passed.
Eventually though, I followed the tech trends and moved away from a standalone camera and started using my smartphone to capture the moment. I mean, it's just so convenient - I lost the optical zoom, but I gained the ability to not have to carry a dedicated camera.
I thought I'd found my final solution.
My phone of choice - and I've tried a lot of them (I used to try a new phone every week, a perk of my job) - has been the Google Pixel. Yep, the first one, and not the XL. I've owned three or four of them, and still use the 128GB variety today. Amazing how well that phone - now over three years old - has held its own.
At some point though, I thought it might be nice to dork around with a DSLR a bit - mostly so I could get a really fast shutter time for action shots. So I purchased a Canon 80D kit at Costco (which came with an 18-55mm and 55-250mm lens) for what seemed like way too much money.
It sat around unused for a long time - day-to-day photos with the Pixel were everything I could ask for.
Then, in August 2017, I went on The De-Tour. Was an interesting experience because it was the first time I'd met all "the guys," (that I now camp with regularly) and I was shooting ~75% of the photos with my Pixel and 25% with the Canon DSLR.
Everyone else on the trip was giving me total shit for it - they all used DSLRs. But I knew something they didn't - my Pixel phone was way better than any phone they'd ever used...probably just as good as their "fancy" cameras. 
When I got back, and it was time to organize the photos and write up the trip, I was totally blown away by how much better the DSLR photos could be with a bit of editing in Lightroom. I mean, the colors would pop, the detail was amazing, and I could zoom on things in amazing ways that the Pixel just didn't allow.
Maybe those guys had been onto something, but don't tell them I said that! 
What I "shoot" now (as of 2019)...
As of 2021, this section is now out of date as far as equipment goes, but the concepts still apply. Updates below.
From that point on, I've basically only used the Canon 80D. I wouldn't say I'm an expert by any means at this point, but I've definitely learned a lot since I started using it - getting better and better at both the framing of shots and post-processing in Lightroom. Like anything, it's a learning experience and something I enjoy.

As far as the camera goes - the 80D is great, but not cheap. Even more important though is the lens you use. Both of the kit lenses that came with it (18-55 and 55-250) turned out to be pretty crappy and I don't use either of them any more (in fact, I sold them on craigslist). Instead, I've purchased two new lenses - the Canon EF-S 18-135mm IS USM Lens, which I use for 80% of my shots and is a truly amazing lens. And the Canon EF-S 10-18mm IS STM Lens, which I use for wide angle shots.
It's also worth mentioning that the memory card you get can make a big difference in how quickly you can take multiple action shots (which is a big benefit of a DSLR). They are cheap, so get a card that is both fast and large - at least 64GB, and ideally supporting a sustained write speed of at least 90MB/sec. Personally, I've been a fan of the SanDisk Extreme Pro 128GB MicroSD with Adapter, which has never let me down and stores ~2 weeks of RAW photos for me.
Until 2019, that's as far as I got with equipment. It was more than I needed (frankly, it still is) and I was happy with the results. Plus, I hate spending money and didn't want to splurge for a few other niceties.
This year I finally broke down and bought two of those niceties.
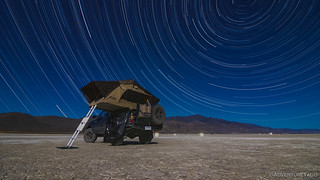
A tripod. I was able to get away without one for the first two years because I have a really steady hand. Somehow - I have no idea how - I'm able to shoot clear shots at shutter speeds nearing half a second. But, as I've started to try new things with the camera, I've found that low light shots - sunrise, sunset, and star trails - are things that I really want to experiment with. And that means multi-second exposures - something no human can do. So, I recently purchased a MeFOTO Roadtrip S tripod, and it's fantastic.
A belt clip. One of my biggest "complaints" about carrying a DSLR is actually carrying it around. I mean, that's the amazing thing about phones, and the reason they are the perfect solution for 95% of photos. This year, I found the Peak Design Capture Camera Clip V3 and figured I'd give it a try. This allows the camera to be clipped into your belt - rather than held in the hand, or using the shoulder strap, which I always find cumbersome - so the weight is carried on your hips, and it's easily unclipped for a quick shot. This little contraption makes it possible for me to hike with the camera - finally!
Taking the pictures...
I'll be the first to tell you that a DSLR can be overwhelming. There are so many settings and modes. It's intimidating if - like me - you are a point-and-shoot or phone photographer. Now, as with anything complicated, those with more experience will tell you that you have to shoot in full manual mode. I'm here to tell you that is just not true - like most things that are complicated - it's fine to ignore 90% of the complications and still get great results.
Personally, I shoot in aperture priority (Av) mode, and I find that for landscapes, that generally works spectacularly. In fact, even in Av mode, I generally don't change the aperture itself - I leave it at 8.0, resulting in landscapes that are mostly in focus. Along with two other little tweaks to Av mode, I've found that I can get amazing photos with less work than full manual, so why not?
- For nearly all photos, I lock the ISO speed to 100 rather than leaving it on Auto and letting the camera decide. Lower ISO speeds (and 100 is the lowest) result in less "noise" in a photo, but require slower shutter speeds. In most conditions, that's totally fine, because except for low-light conditions, the shutter speed is still super fast.
- I almost always shoot at -1 exposure values (or between -2 and -1). I find that it's much easier to recover shadows than it is to fix areas that are way too bright, and shooting on the darker end also results in more vibrant, saturated color - which I like.
And then, I just take tons of photos. This is key in my mind - always look for interesting angles, compositions, etc. and then take the shot. It may or may not turn out, but it's the only way to get more experience and learn. I'm constantly surprised how a shot that I didn't realize would be super cool, is - because of the angle or the way the subject was cropped (composition) in the frame. Of course, when you do run into these little "cool" discoveries, remember them so you can do the same thing more purposefully in the future!
Taking pictures is the easy part; the real work happens after...
One of the reasons the DSLR just sat around for nearly a year after I bought it was the fact that photos "straight out of the camera" look terrible. Seriously. I'd never experienced that before with any of my other cameras, and I knew it wasn't a problem with the camera; rather, it's because once you move to a DSLR, the manufacturers assume you're going to want to do your own post-processing (color, exposure, etc.). Point-and-shoots do all that for you when they create a JPG, so I had no clue where to even start with the processing.
I mean, at the very least, I was going to need to buy software. And I'm not a huge fan of the whole "spending money" trend that seems to be all the rage. So the camera just sat there.
In the end, as I've mentioned previously, I opted for Adobe Lightroom - I use the always-up-to-date Lightroom CC version on a yearly subscription. And it's amazing what it can do. This isn't an amazing photo, but it's amazing to see the difference between what came off the camera, and what was achievable after processing.

My photo processing workflow looks something like this:
- Take the SD card our of the camera and put it in my computer; copy all the photos into a temporary folder.
- All the photos look like crap at this point, but I sort through them and put the ones that I think have a chance of being good into a separate "keep" folder. My mental goal at this point is to keep ~30-40% of the photos.
- I name all the photos. Start with the date and time, and then some description of what's actually in the photo. It's so much easier to understand a photo named "2019-10-04-103524 Tacoma overlooking Grand Canyon.jpg" than something like "IMG_0726.jpg."
- With everything named, I import the photos into Lightroom, and process them. I adjust all the various sliders for exposure, contrast, shadows, etc. and also add masks as necessary to darken/lighten or otherwise develop the photo. Essentially what people used to do in a dark room, but is now done on a computer.
- As part of the developing process, I also delete a bunch more photos that I wasn't able to develop well. When I'm done, I generally have 25-30% of the original number of photos I took for the day - so something in the 50-75 range on a normal day.
- Development complete, I spend the time to tag all my photos. People, places, and important things (trucks, pets, etc.) are noted. This, along with good file names, makes searching for photos in the future possible - and we all know how hard that is with our cell phone photos.
- Finally, if there are any really great photos, I give them a star rating of three stars (out of 5) so I can find them in the future.
And that's it! Nothing to it, right? 
As is - I hope - evident, this is clearly not a quick process. I enjoy it at times (like when I'm done), and despise it others (like when I'm not done). I'd say that it takes me on the order of four hours to process the photos I've taken over the course of a "normal" day. So, for a two-week trip, we're talking about 50-60 hours of photo processing. Yikes.
If I had to give some advice...
So now as far as cameras and lenses go, I think these are the most important things:
- Make sure you get a camera that supports RAW shooting, and then always shoot in RAW - it allows you to do a lot more post processing.
- Be willing to spend the time to learn. Know that things will be tough at the beginning but that they'll become more natural over time. Give yourself a year or two just to get comfortable, even though it seems like a long time.
- It's not just about the camera setup. It's also about post-processing. A tool like Lightroom, where you can tweak exposures, saturation, etc. will really take your results to the next level. Get the monthly or annual subscription, it's worth it (and I hate subscriptions). And again, there's a learning process.
- Don't forget the lenses. Shoot with whatever you get to start, but remember that eventually a lens can make a difference.
- After you feel "comfortable" with your camera, mentally force yourself to try something new. New angles, new compositions, new exposures. Keep the process of taking photos interesting and try to find unique ways to capture the moment.
And of course - take lots of photos! I take - on average - 200-300 photos per day on a typical adventure. You can always delete the ones that suck (I rarely end up with more than 50 a day that I keep), but you never know when something you thought was going to be "just meh" turns out to be one of your favorites. That's exactly what happened to me with this photo!

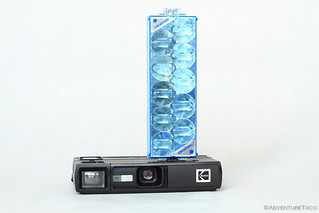
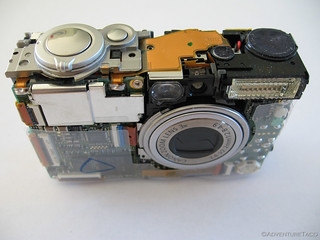
Well, I ran over my 80D and favorite lens with the Tacoma. It wasn't pretty and I wasn't happy, but it happened, and you can read about it in Tragedy in the Tablelands. I'd already been pining after a new, full-frame mirrorless camera, but of course, with a perfectly working setup, I was unlikely to get one.
So, I used this opportunity to pick up a brand-spanking-new Canon R6, and two lenses - an RF 24-240mm f4-6.3 IS USM and a wide angle RF 15-35mm F2.8 L IS USM. It was an expensive day, but my hope is that I really like the new setup.
Canon R6 Update:After using the new Canon R6, and the associated RF lenses (an RF 24-240mm f4-6.3 IS USM and a wide angle RF 15-35mm F2.8 L IS USM) for several trips, I've finally put together my thoughts on the new system. In general, I don't feel like it's a huge change from the Canon 80D and EF-S system I was using before, but there are definitely some things I like better and some aspects of the old system that I miss. To find out all about it, check out Involuntary Evolution to a New Camera and Glass (Canon R6)!


There is some good info here, thanks for sharing it.
A little insight to anyone to photography that might read this:
One thing to keep in mind with newer digital cameras is that the lowest ISO setting is not always the least noisiest. Some camera bodies have the same amount of noise at 200 and 400 ISO speeds as they do at 100. Some even have less at very high ISO settings then they did a mid level settings.
A few test shots taken at the same time/location in Tv mode (shutter speed being kept the same for every photo) and only bumping your ISO setting up every shot will show you where the "noise level" is for your camera. Being able to bump your ISO up to 200 or 400 could dramatically increase the number of "keeper" photos you take. Camera shake can ruin a lot of great morning/evening photos as well as dark camp site photos. The knowledge that you can run a higher ISO can also allow you to turn off any image stabilization you might be using if battery life becomes an issue.
Thanks Keith! I've done a bit of digging on this myself - as I've heard that on Canon DSLRs, the 100, 160, 320, 640, ... ISOs will give less noise due to the sensor size. It's always hard to find info that is bulletproof, but something I found interesting for my 80D is that it's essentially ISOless - that is, increasing ISO with an 80D (specifically) increases the noise - due to how the light is processed.
Interesting read here, and interesting to see how the 80D is different than a lot of Canon's other models from : http://dslr-astrophotography.com/iso-values-canon-cameras/
That is a great link you posted. Their graphs make it easy to see at what point you start to lose image quality due to increased ISO levels. Your 80D does seem to be pretty much ISOless, where as my 6D is quite forgiving on the noise front up to about 1600 (although I almost never shoot above 800 except at night). My old 1D MkII is about in the middle of the two.
I see new (and some old photographers) get caught up in the specs about noise levels and are afraid to push the ISO up because of "all the noise it will have in it". then they fail to get the shot because of camera shake. Like everything in photography (and life), it is a trade off.
Regardless of how and what we shoot, it is great to see people like you sharing your adventures through still images. Call me old school, but I much prefer still photos to a video for trip reports.
I think this is a great point:
I see new (and some old photographers) get caught up in the specs about noise levels and are afraid to push the ISO up because of "all the noise it will have in it". then they fail to get the shot because of camera shake. Like everything in photography (and life), it is a trade off.
Shutter speed is definitely an important piece of the puzzle and one I'm always aware of. It's much easier to post a bit of noise (or even a lot of it) than it is to fix (if it's even possible) blur!
Excellent post - especially the emphasis on...post work 🙂
Do you consider the focal length to shutter speed "rule"? Keep the shutter speed as fast as 1 over the focal length (ideally, double) - so 100mm shot should be 1/100 minimum or 1/200 ideally to help-ensure crisp photos.
Thanks! Glad you liked the post. I've never actually heard of the focal length/shutter speed "rule" so I guess I don't consider it, hahahahaha! I'll have to think about it on the next trip and see if it changes anything.
I am in a bit of an interesting situation with the 80D where it is ISOless (see this comment) so I generally do my best to leave it at 100. That's not to say the photos at other ISOs might be just as good as other cameras and *even better* at ISO 100, but regardless, since there's a difference I try to use it to my advantage.
I honestly don't believe I've ever read a write-up on this topic, better than what I've just read. Thank you, thank you, thank you.
I have been living this lifestyle for the last ~10 years and have followed in step with your journey from camera to camera and am currently using my iPhone 7 and I have yet to pull the trigger on a quality camera like your 80D.
This write-up along with your pictures from your more recent trips has giving me the push I need.
I completed the WABDR June of 2019 and though I appreciate the pics I took along the trip, they are nothing like yours so I sit here now and think what a waste it was to had not captured better shots.
Again, thank you for this write-up. It couldn't have been anymore perfect.
You’re welcome, Travis! I’m glad you enjoyed the post. Making the transition to a better camera is fun and a whole new learning experience, but it is always important to remember that even without photos, a trip is never a waste.