December 30, 2017.
I've removed my dash trim (at least, the driver side) more times than I'd care to admit, and figured it was time to write up the procedure - because I remember how daunting it was the first time.
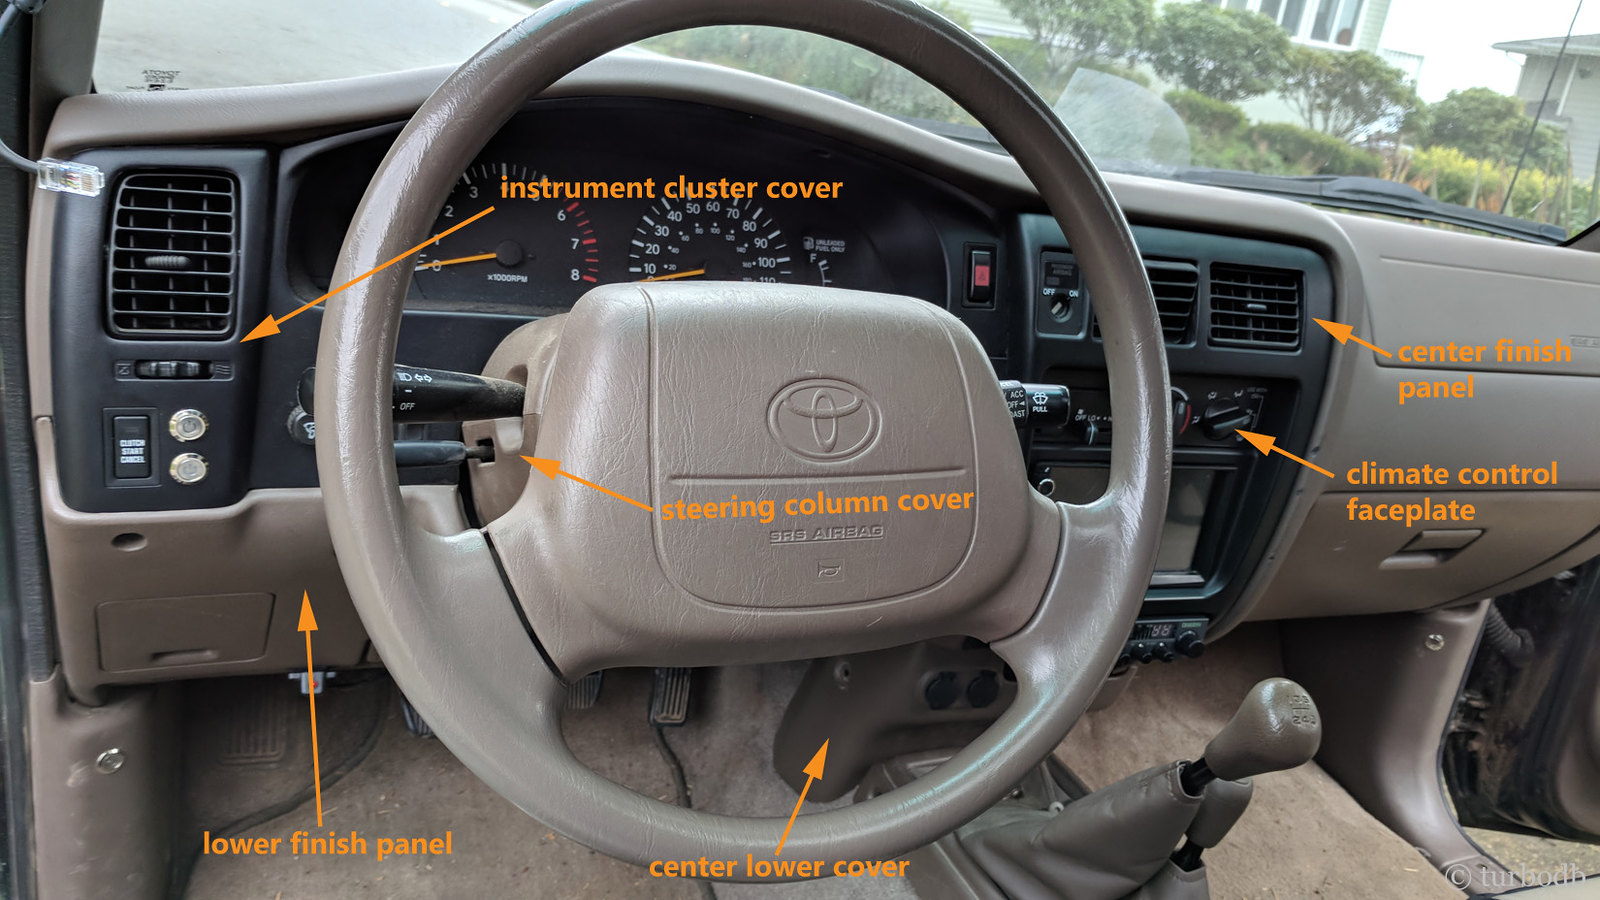
Removal starts at the bottom-front of the center console, in front the gear-shift, and works it's way up and counter-clockwise to the instrument panel:
- Center lower cover
- Climate control faceplate
- Center panel finish
- Lower finish panel
- Ignition bezel and clock
- Steering column cover
- Instrument cluster cover
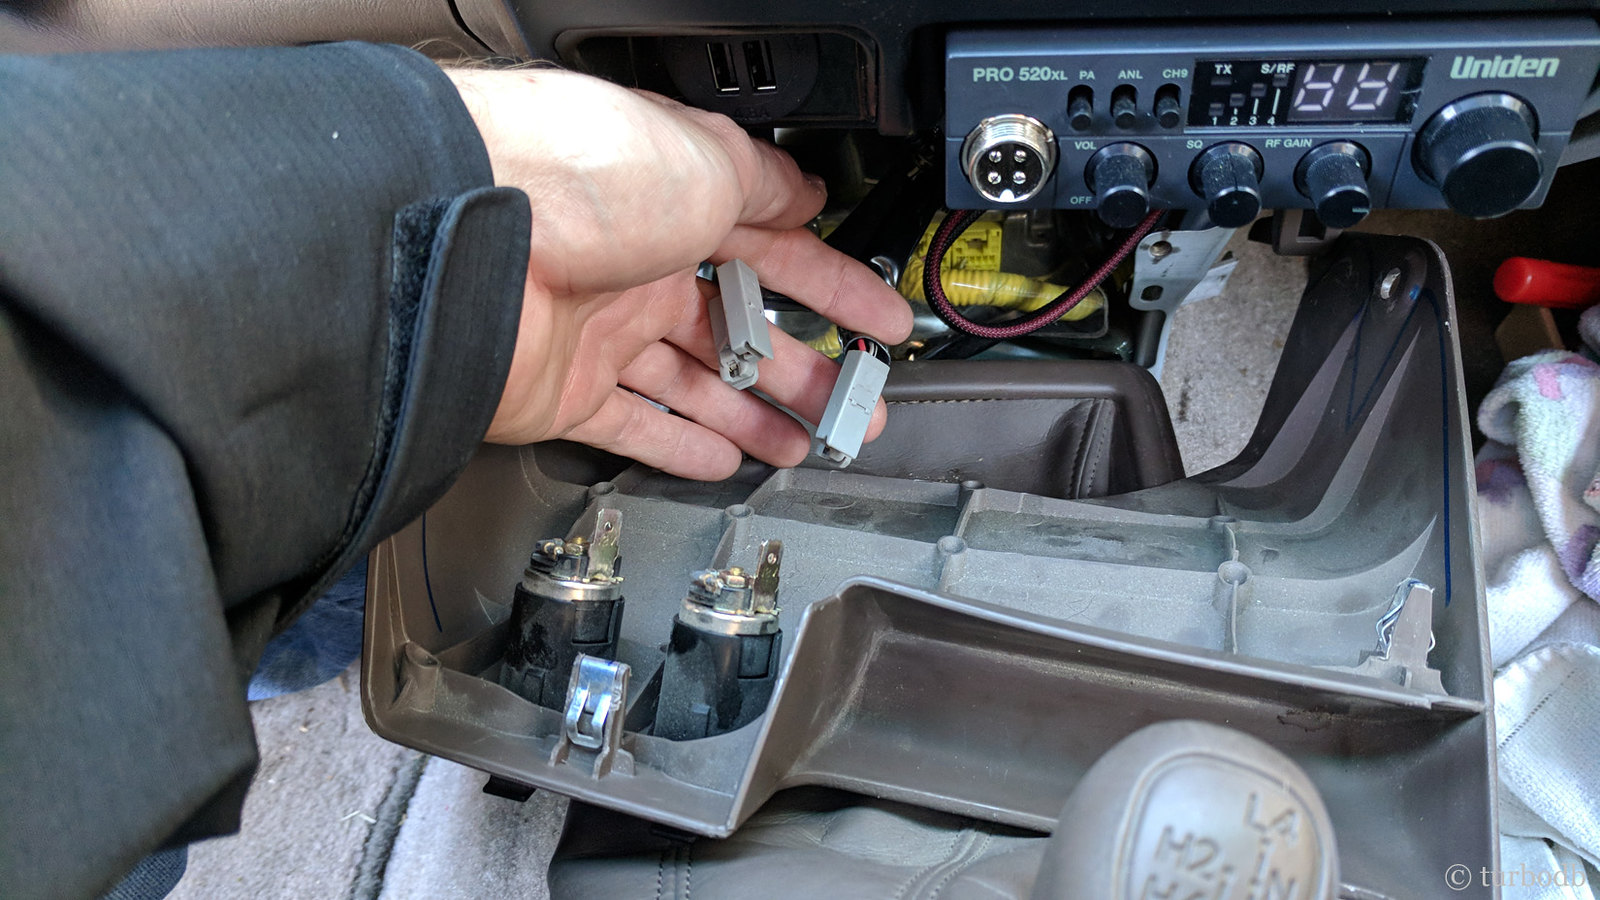
Start by removing the plastic center lower cover (which contains the two 12v power receptacles. There are two small plastic clips holding this in place, and to remove them, use a screw driver to push in the center of the clip.
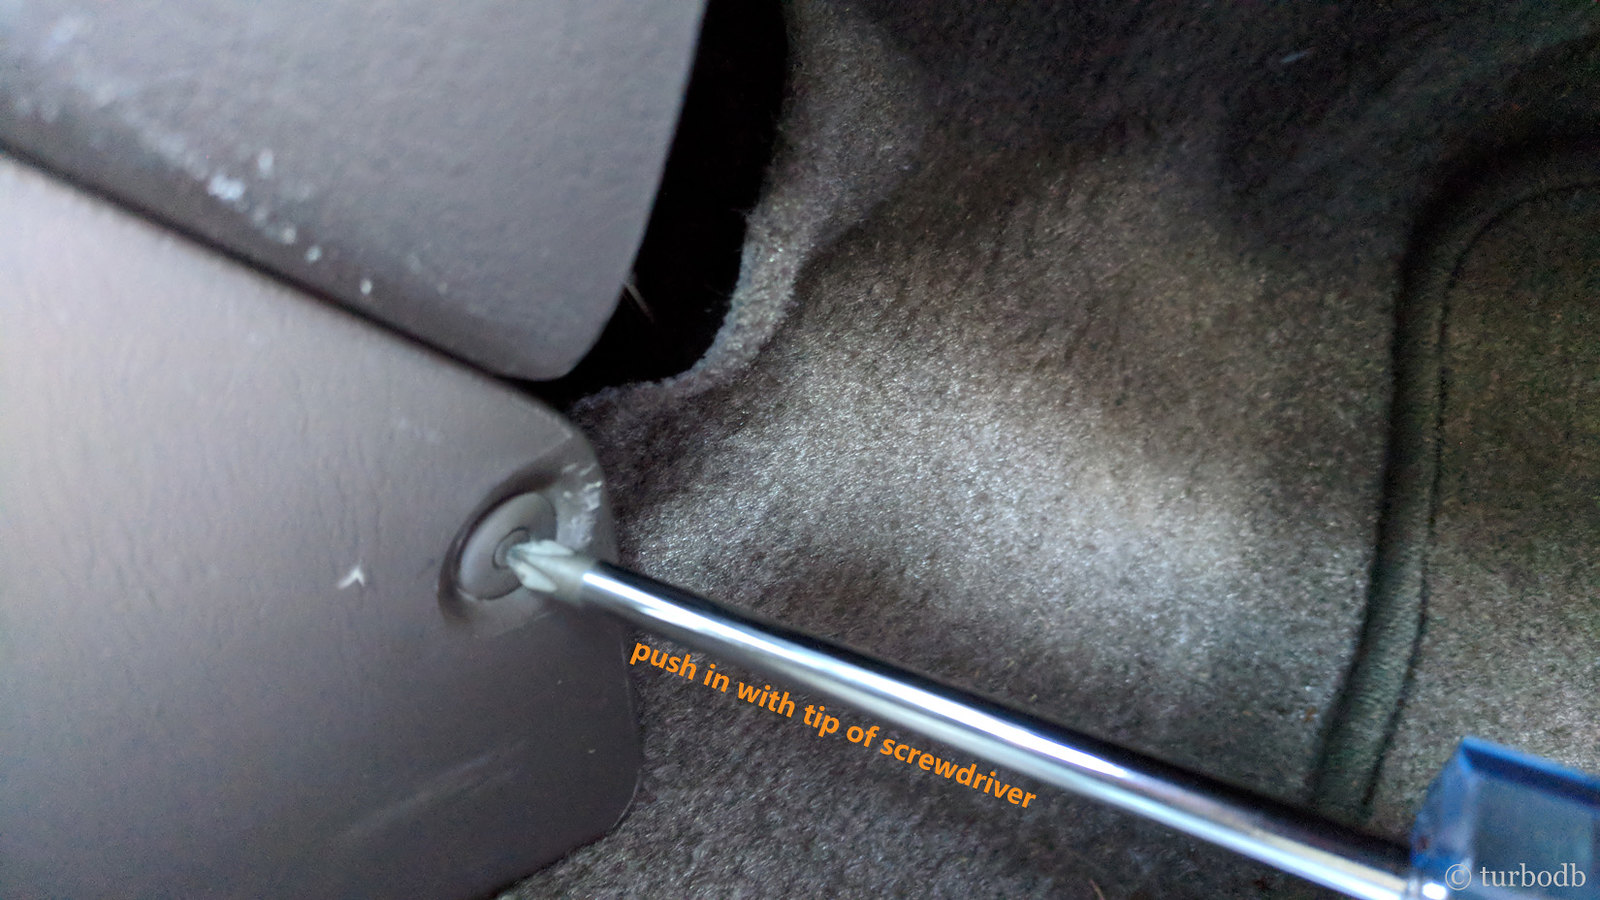
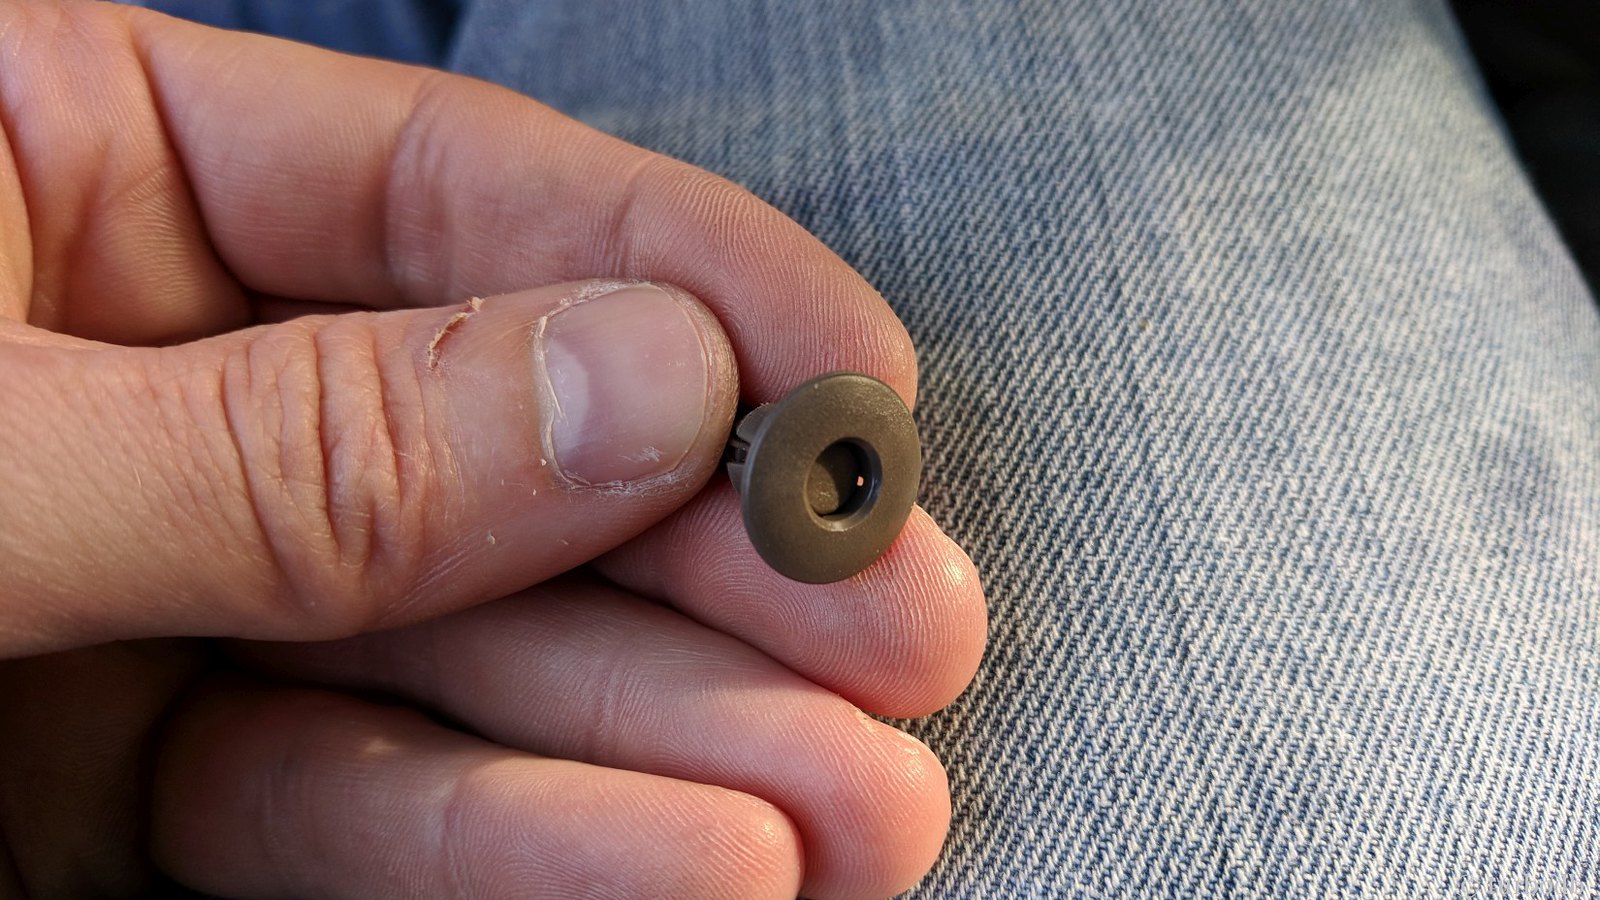
Then, pull straight out to release the two clips. Once these are released, pull the cover out just far enough to unplug the 12v outlets, and then remove and set aside the cover.
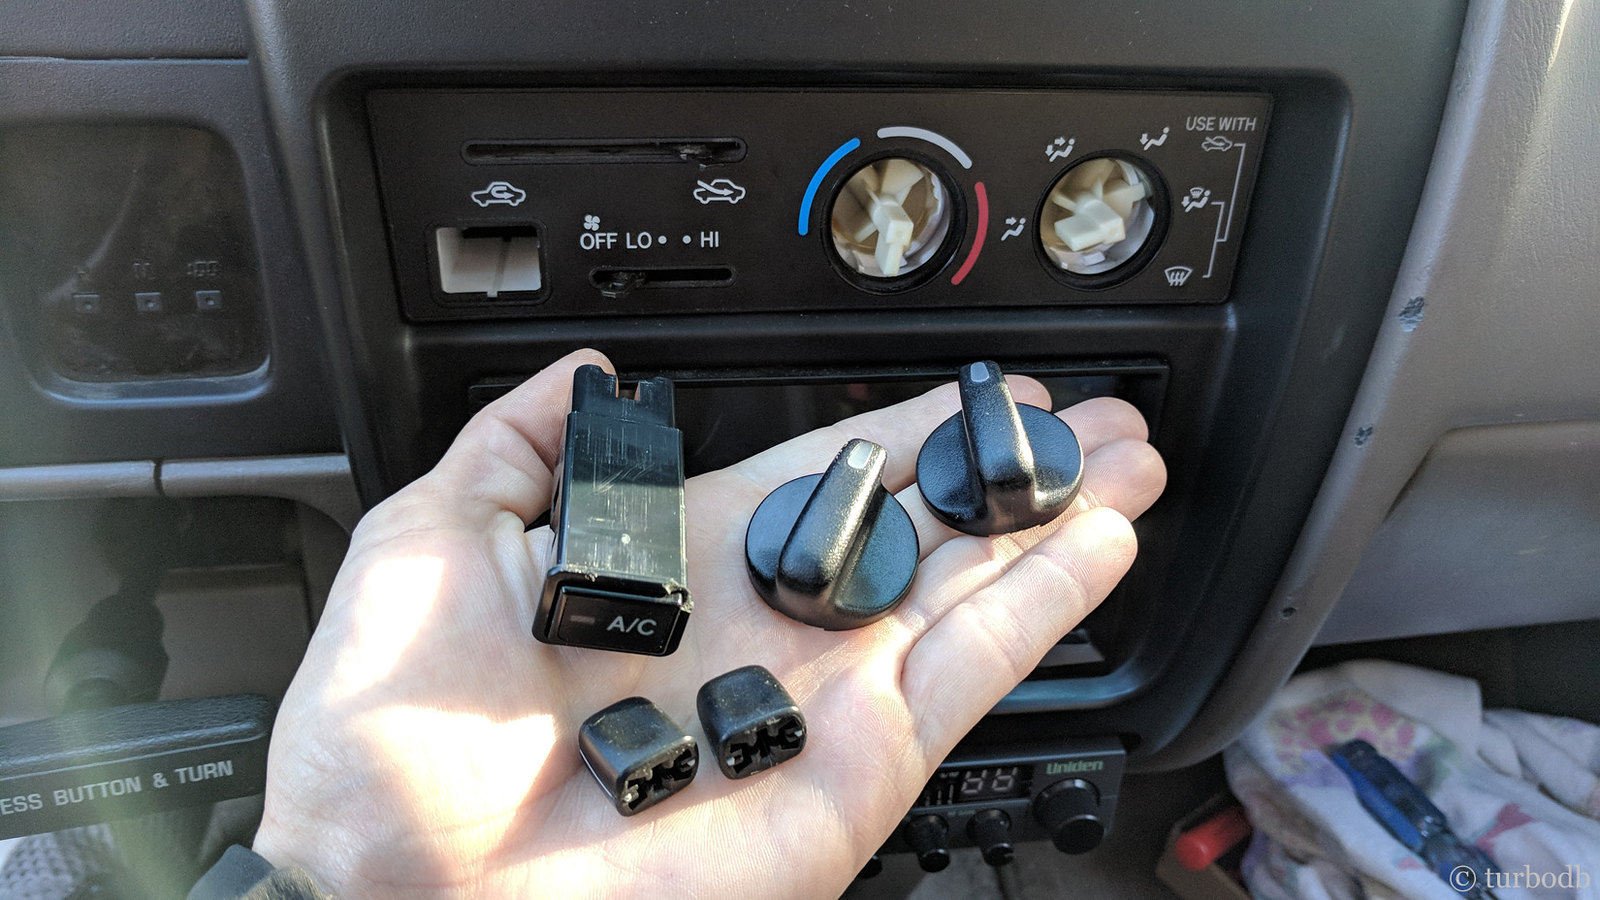
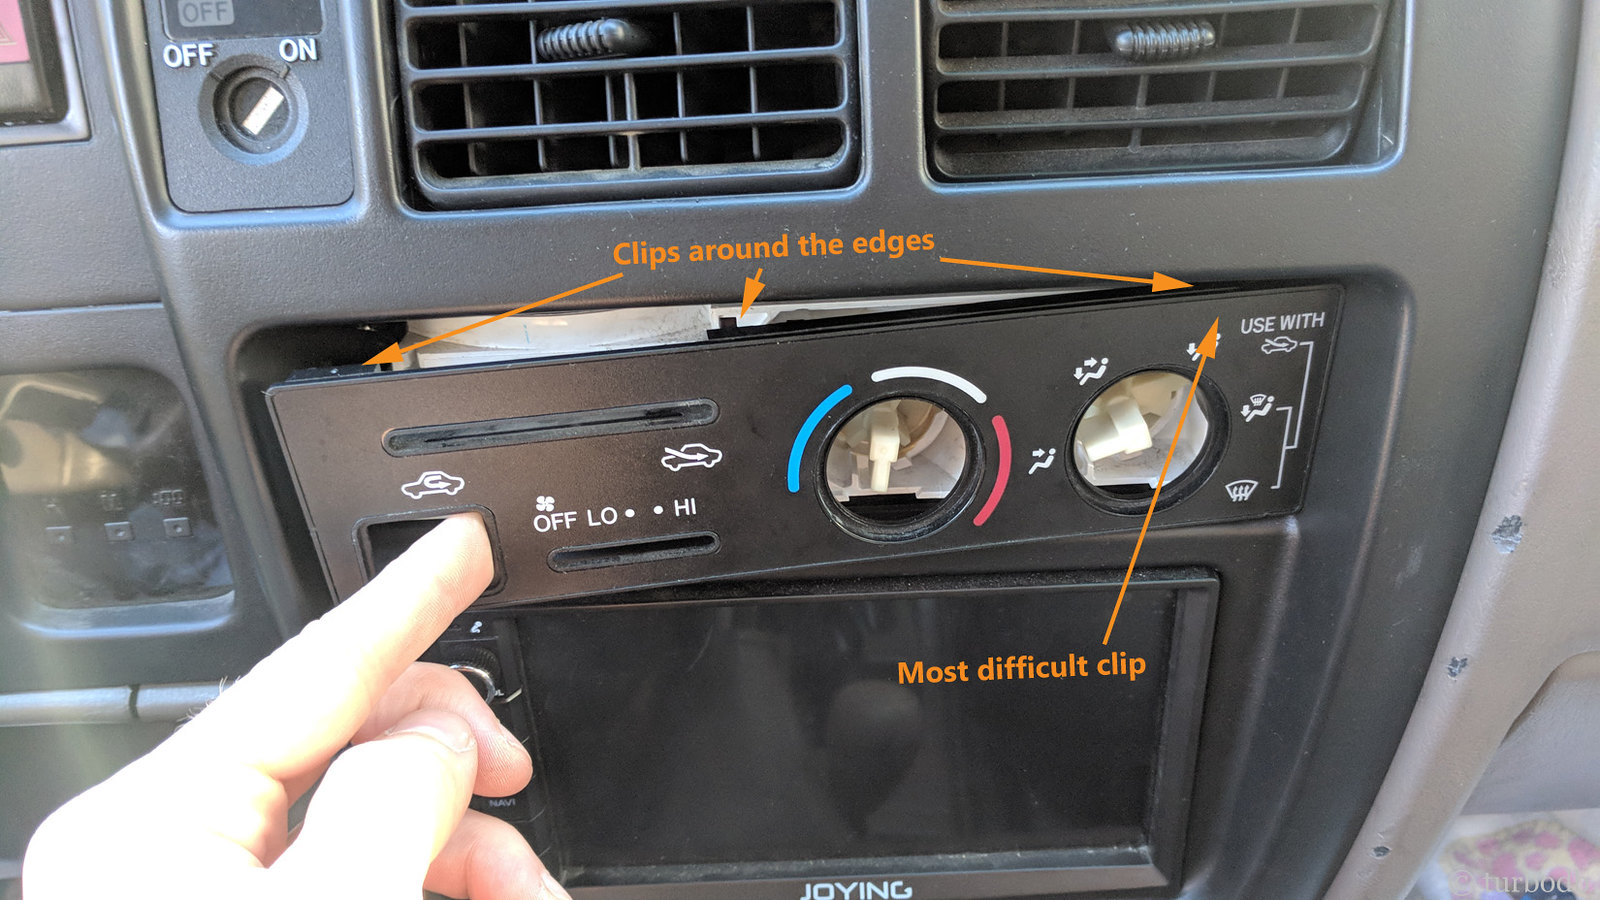
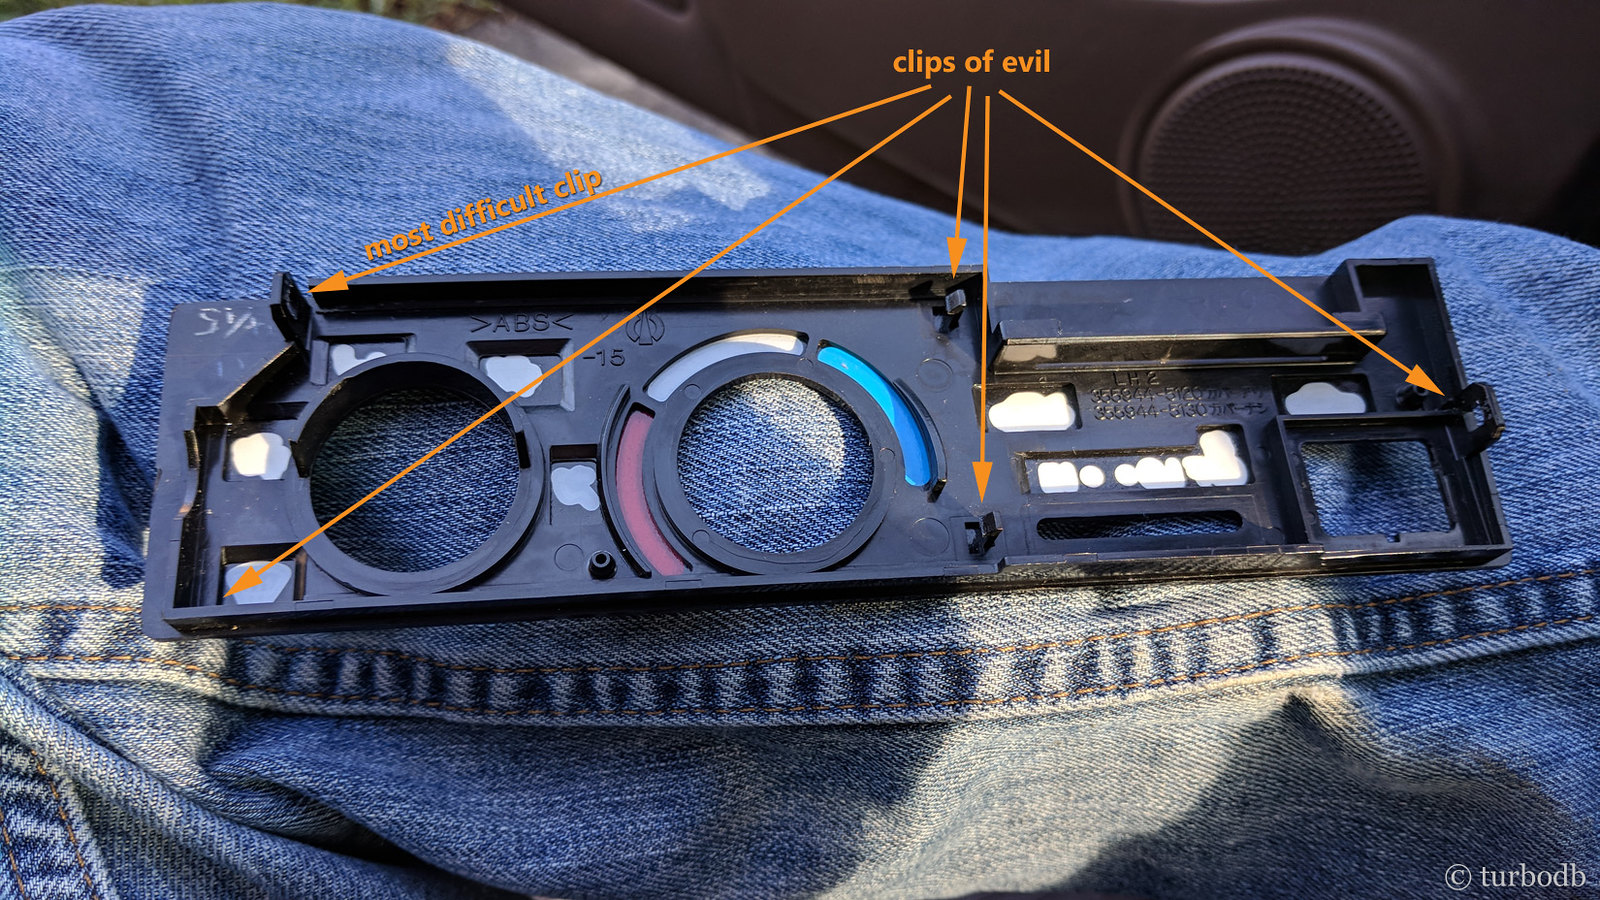
The next piece to remove is perhaps the hardest piece to remove without breaking - the climate control faceplate. Here, you first remove all of the plastic control knobs/levers (they simply pull off) as well as the AC button (which pulls straight out).
Then, slowly pry the face off - there are no screws, just several clips around the perimeter of the faceplate. GO SLOW. BE GENTLE. WIGGLE it various directions. Some clips will come out easier than others, and it's easy to get anxious and break the last clip or two - for me, the last clips are always on the right hand side, and the top-right is the worst. Be patient and it will release.
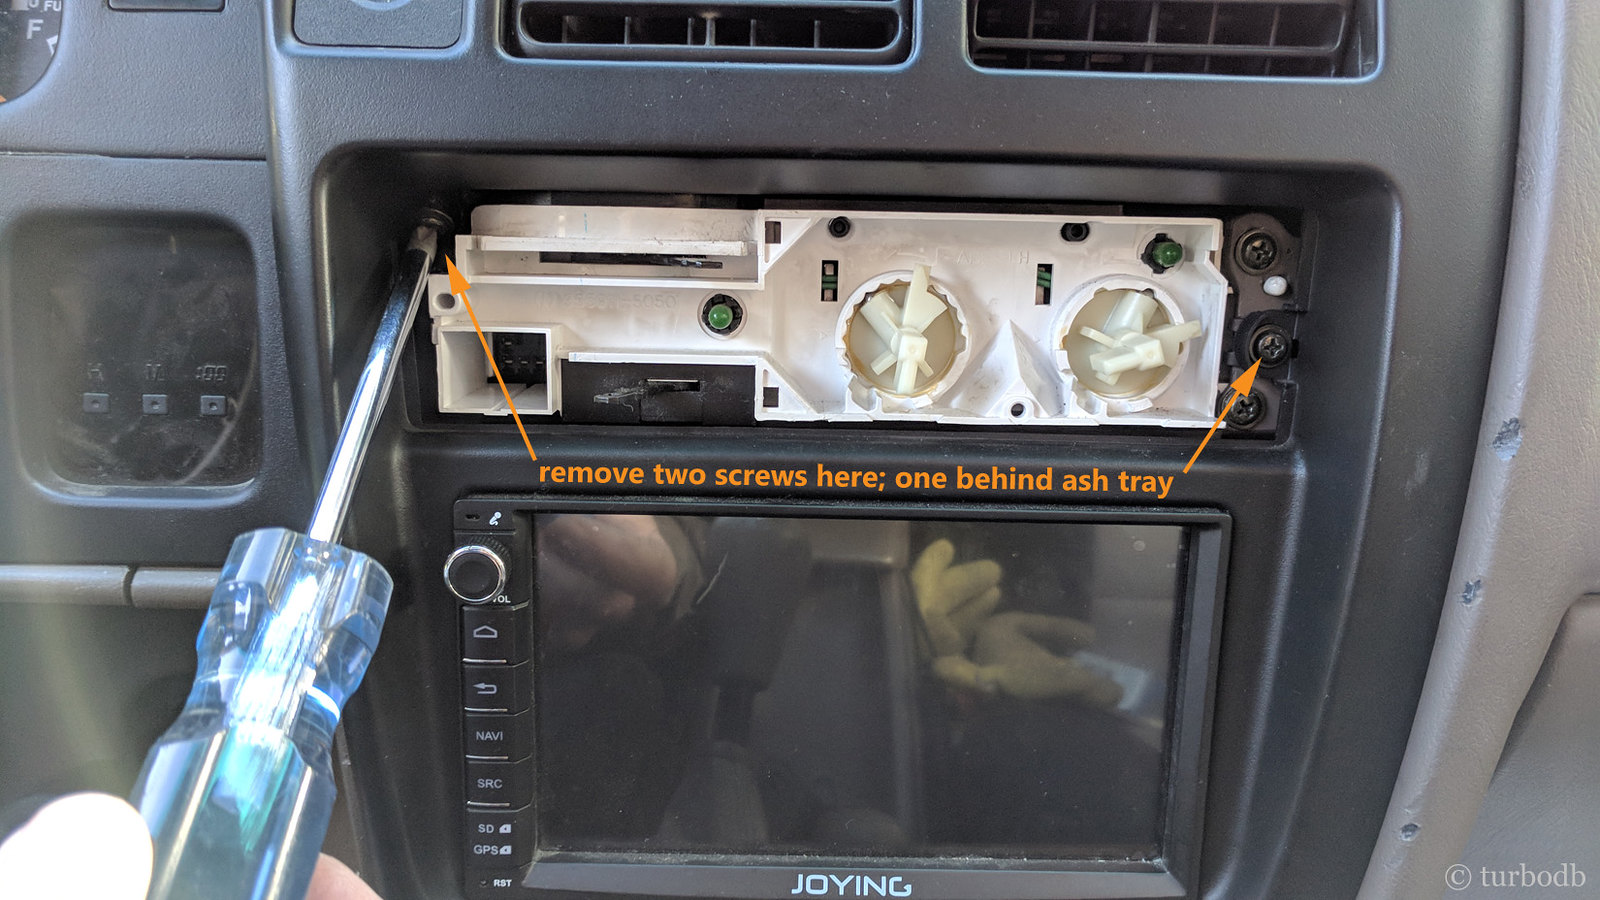
With the climate control faceplate out of the way, it's time to remove the center panel. This panel is held in plate by three screws: two in the climate control area, and one behind the ash tray. Start by removing the ash tray, and then the screw behind it. In the climate control area, remove a single screw in the top-left corner, and the middle screw on the right.
Then, slowly pry the center panel by pulling directly out. Start at the bottom and work your way up - the clips are unlikely to break, but do this gently as there are several wires attached. At the top, there are two clips and the A/C vents that hold the piece on, so you may need to apply a little extra force - but as long as you're pulling straight and don’t pull too far, you should be OK.
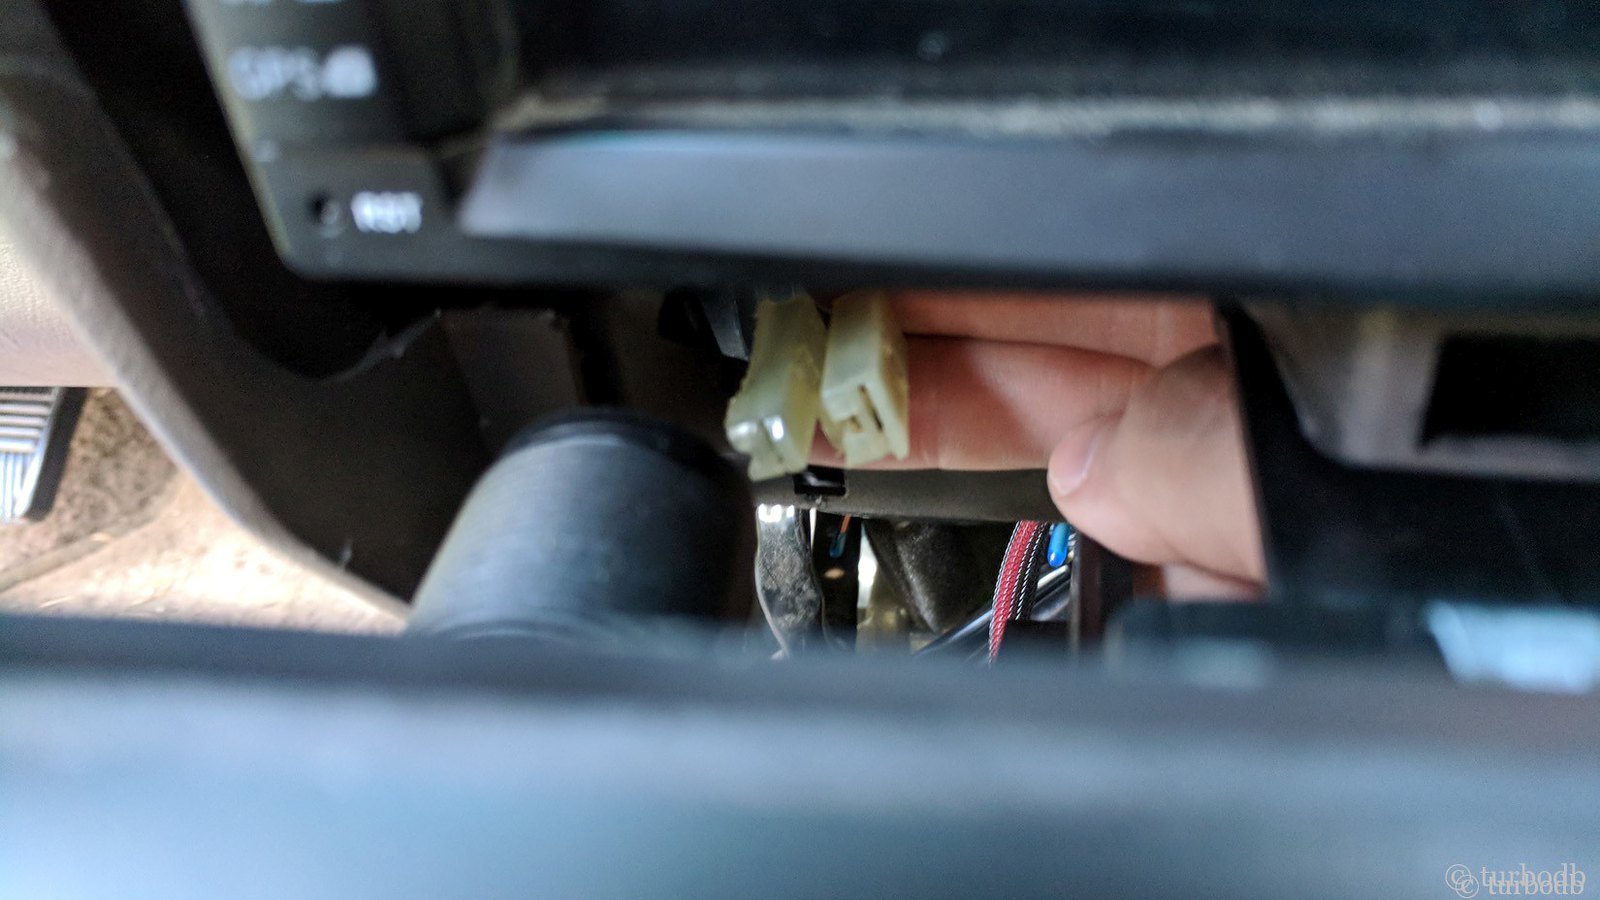
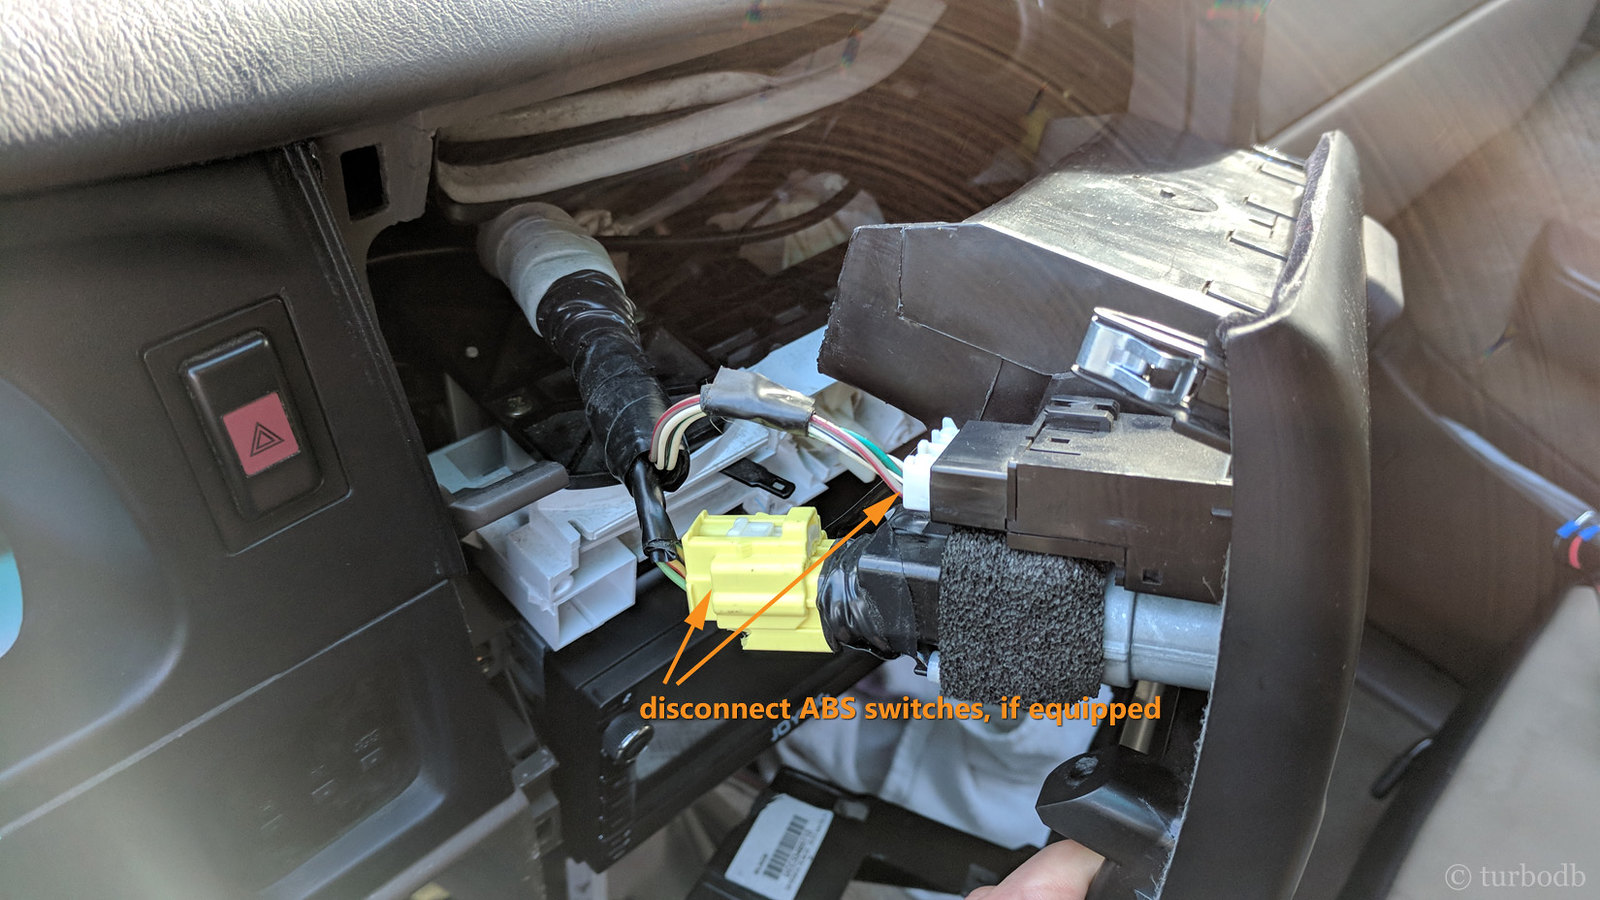
As the center panel comes out, disconnect the wires for the cigarette lighter and ashtray light at the bottom, if you have them, the ABS switch (two plugs) at the top.
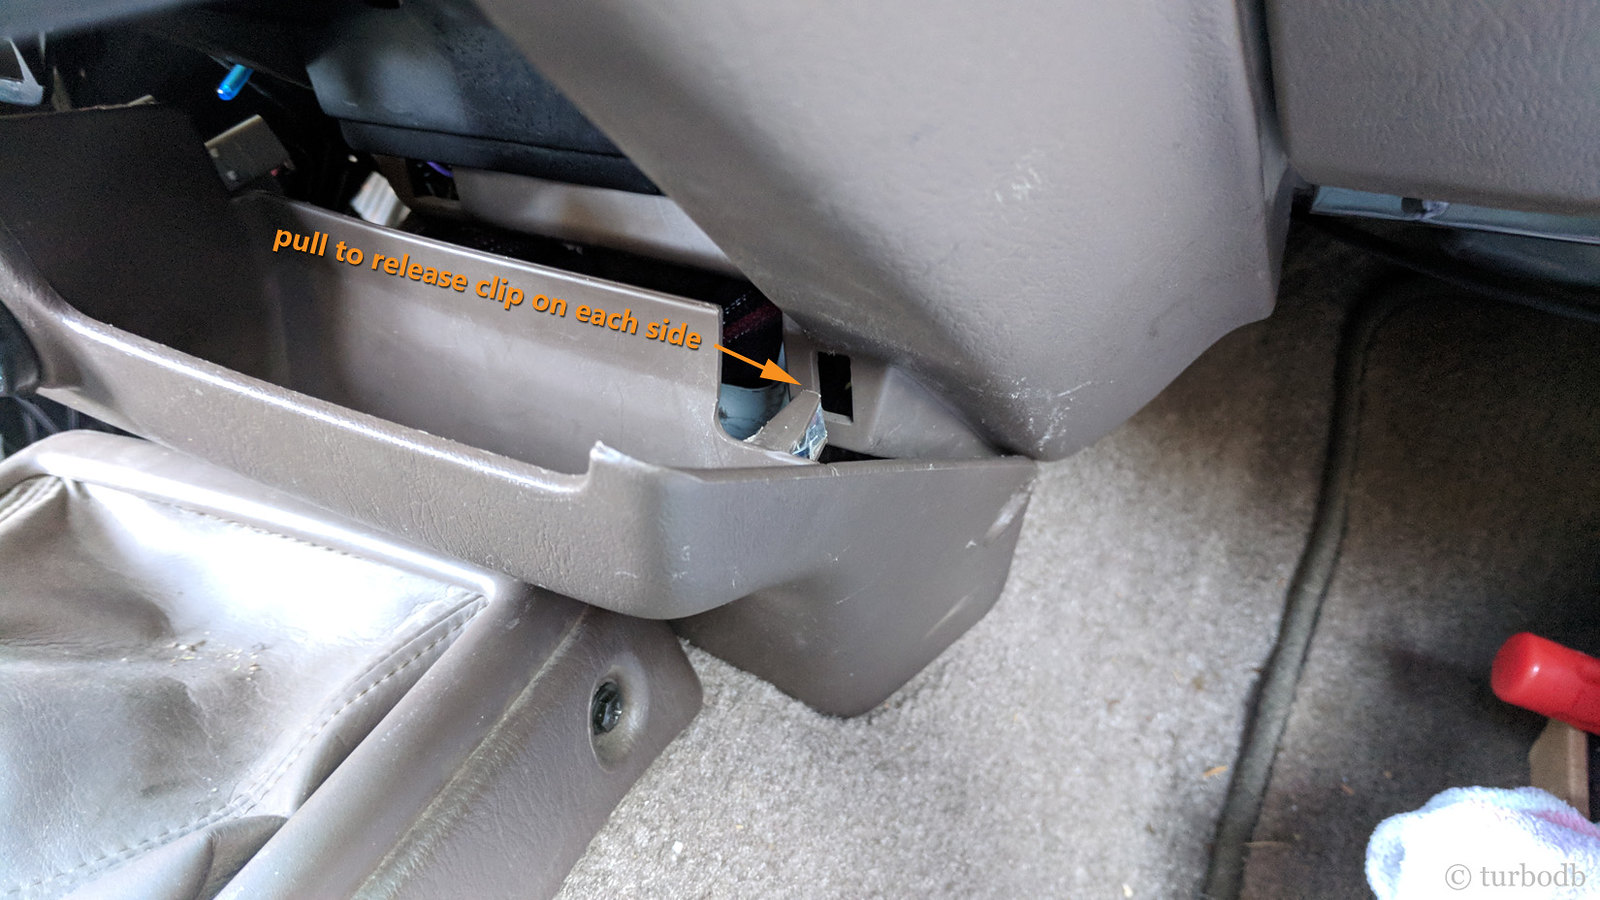
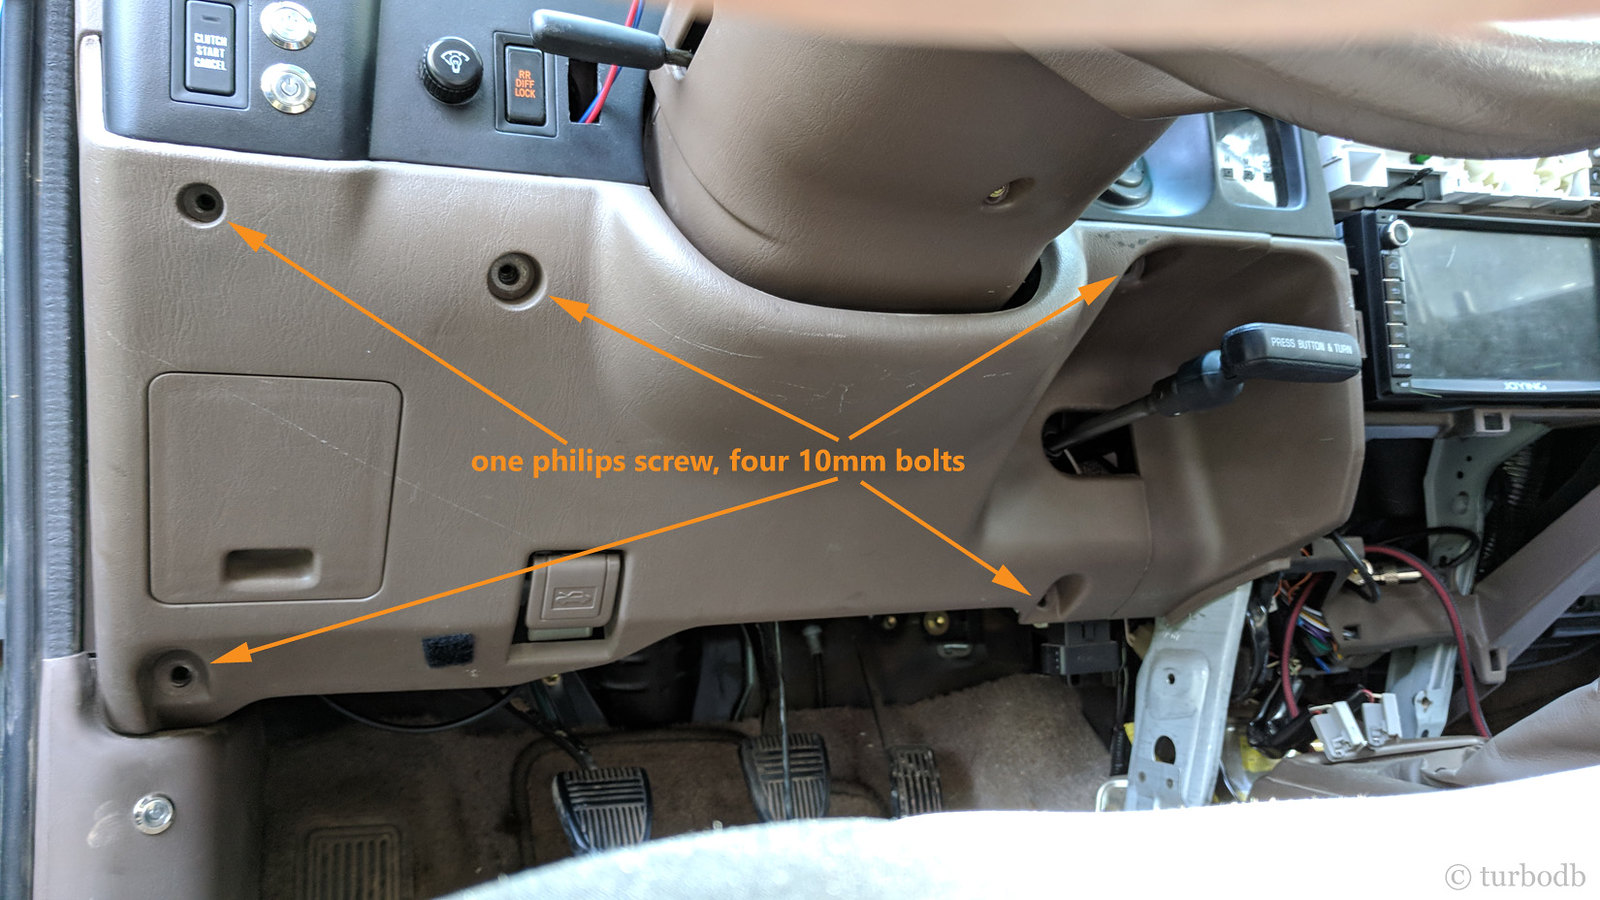
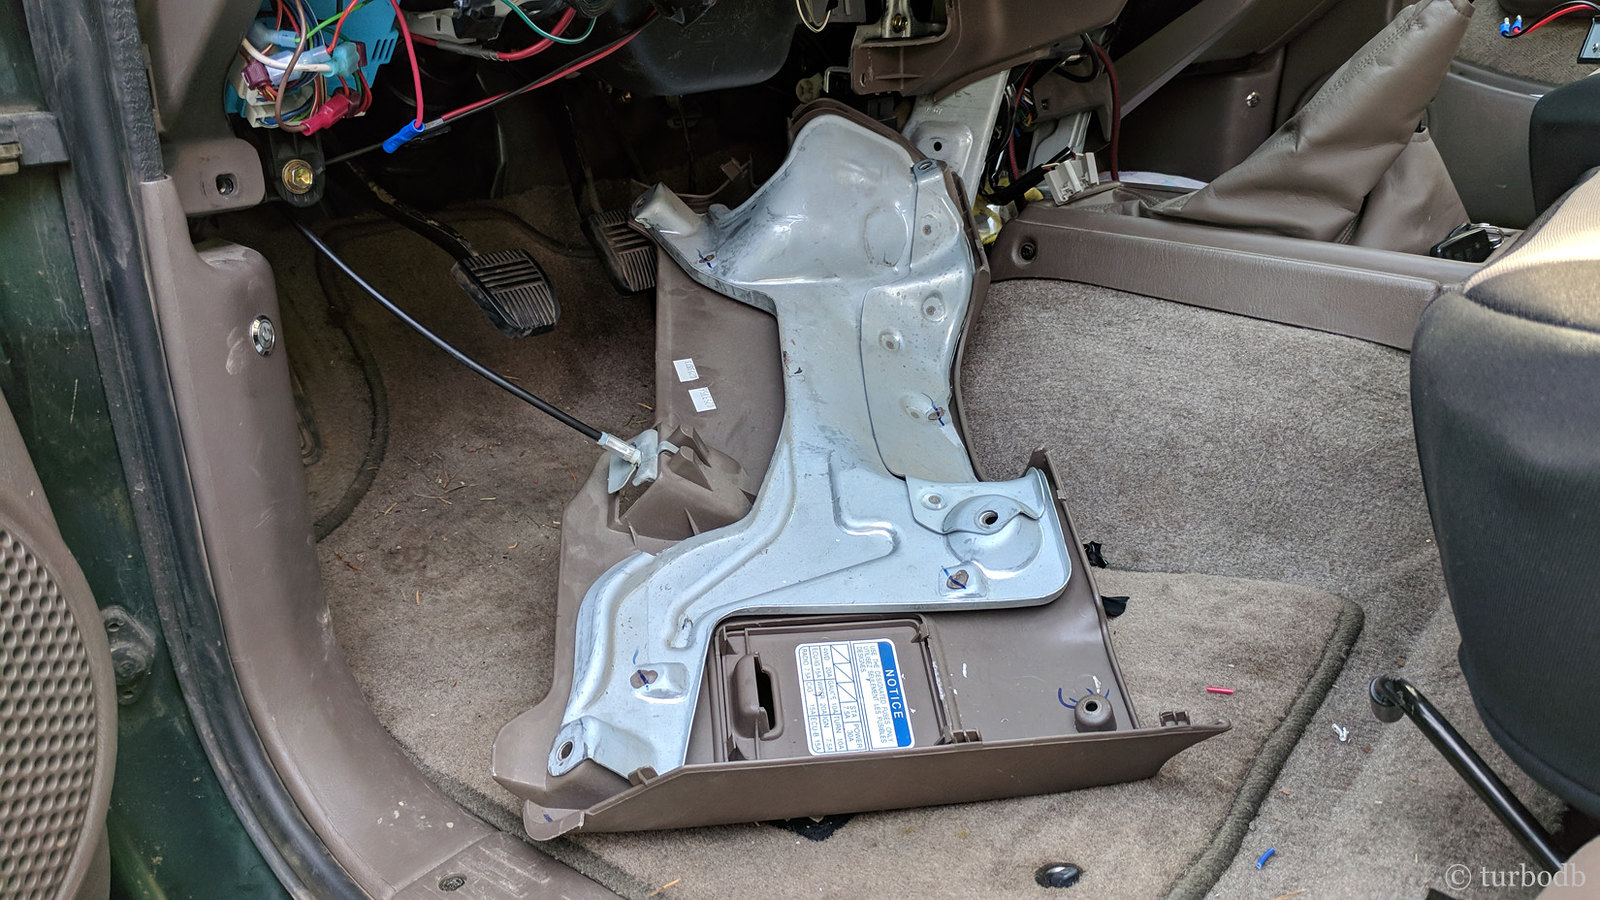
Next, it's time to remove the lower finish panel in the driver footwell. This one is easy - a single Philips screw and four 10mm bolts hold it in place. Remove them and pull the panel down. Be careful as the hood release cable is still connected - so just leave the panel in the foot well for now.
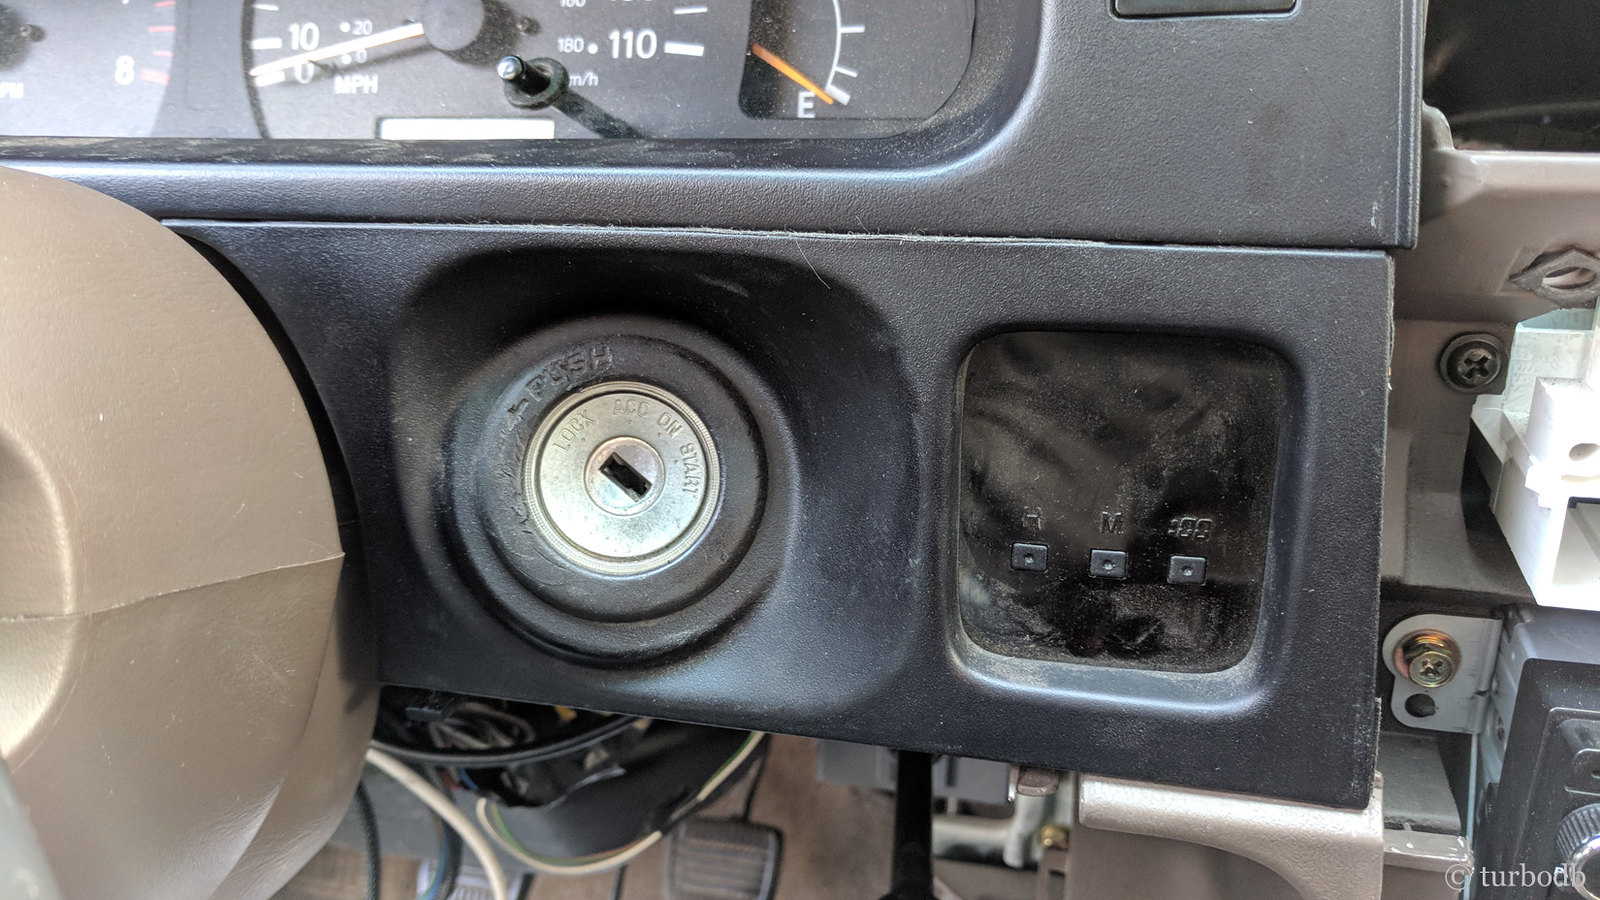
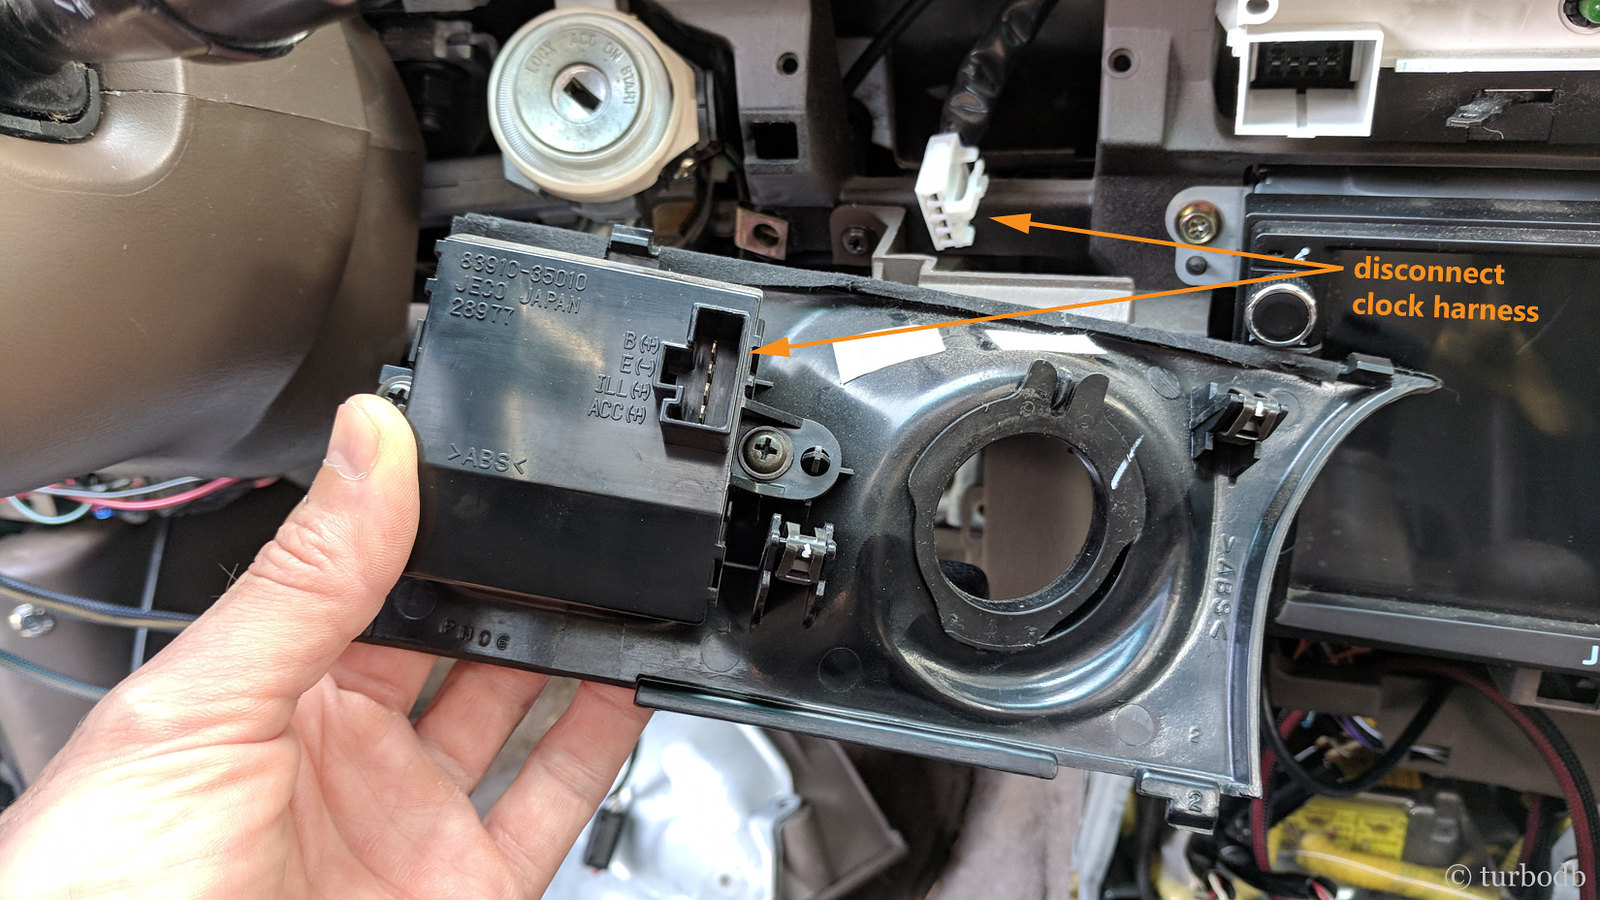
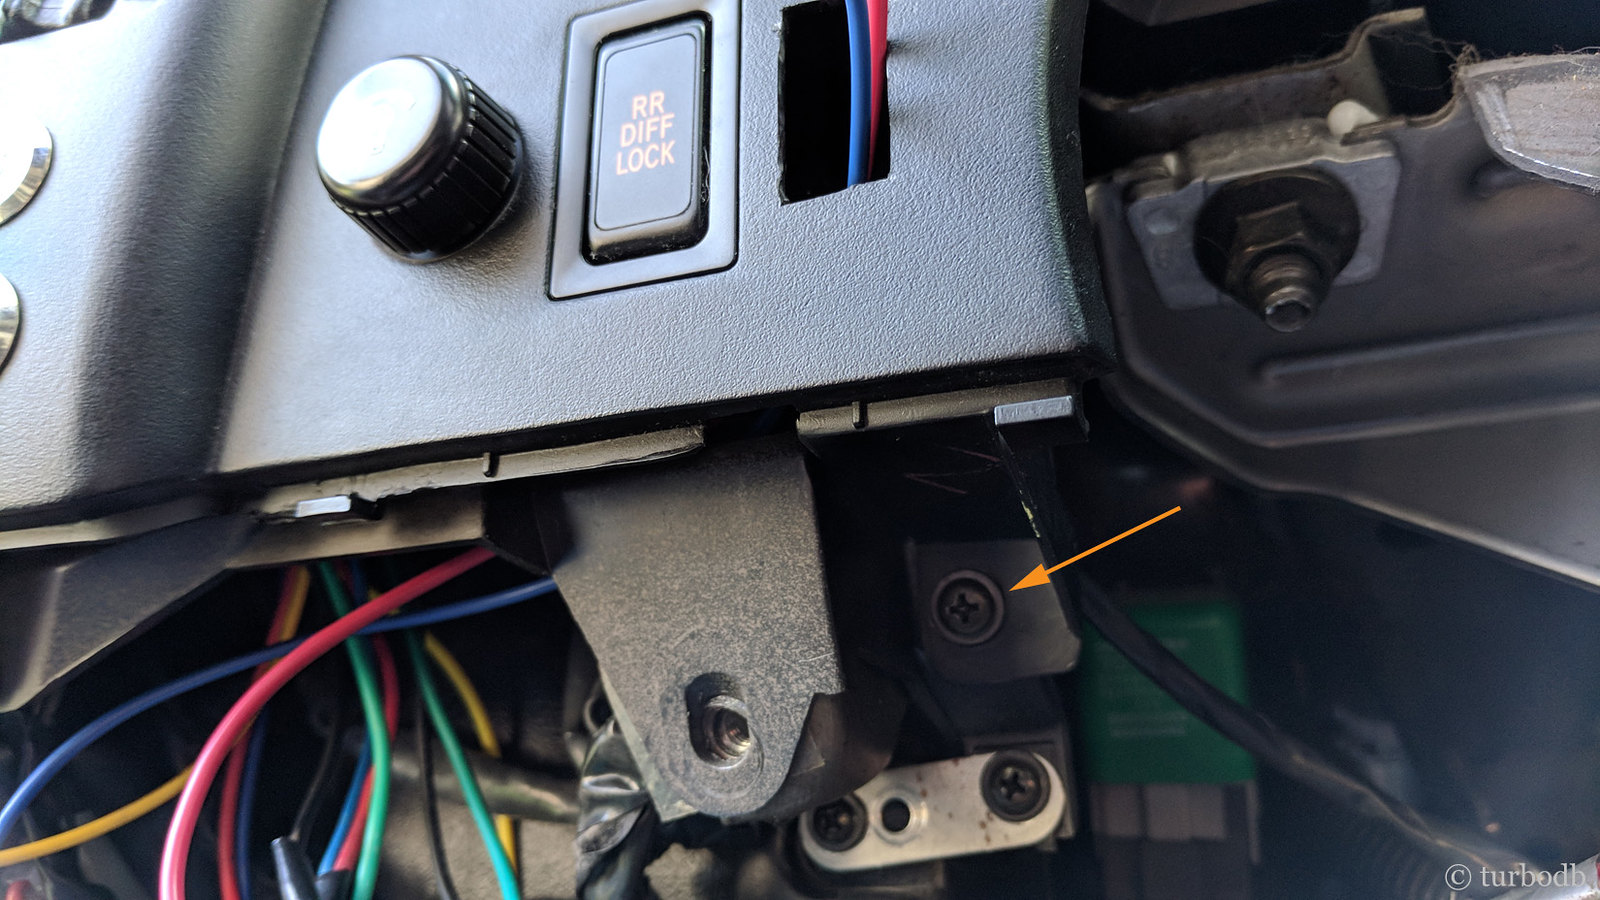
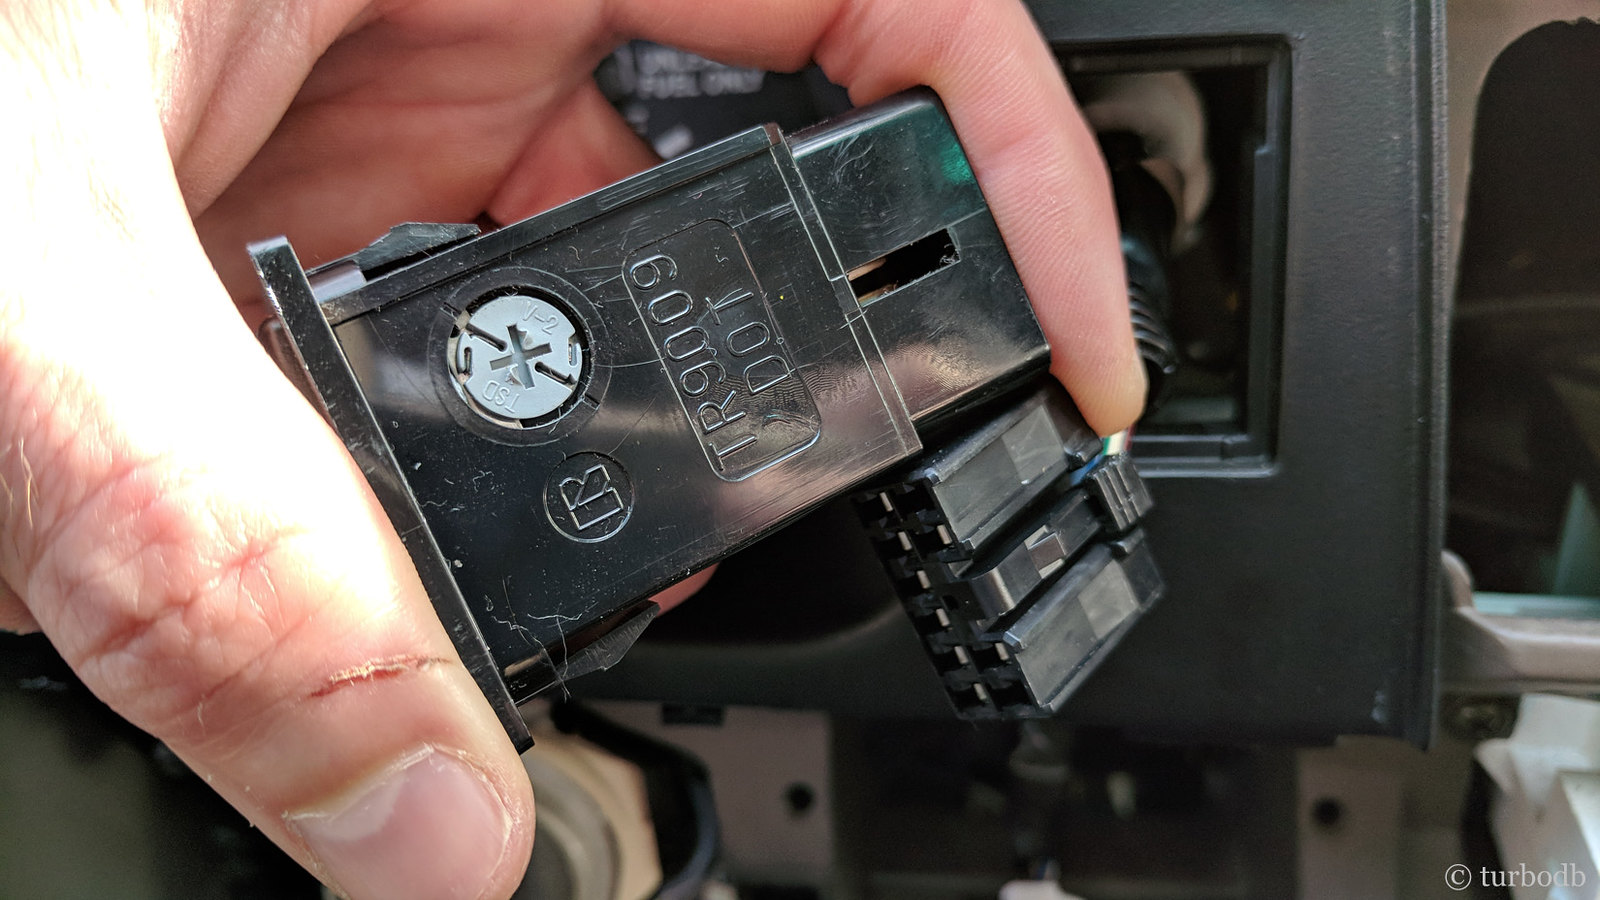
With the lower trim removed, the starter switch bezel and clock are the next piece to remove. This piece is held in place with clips only, and just pulls out. If you have the clock, don't pull too hard so that you can unplug the clock harness before setting the piece aside.
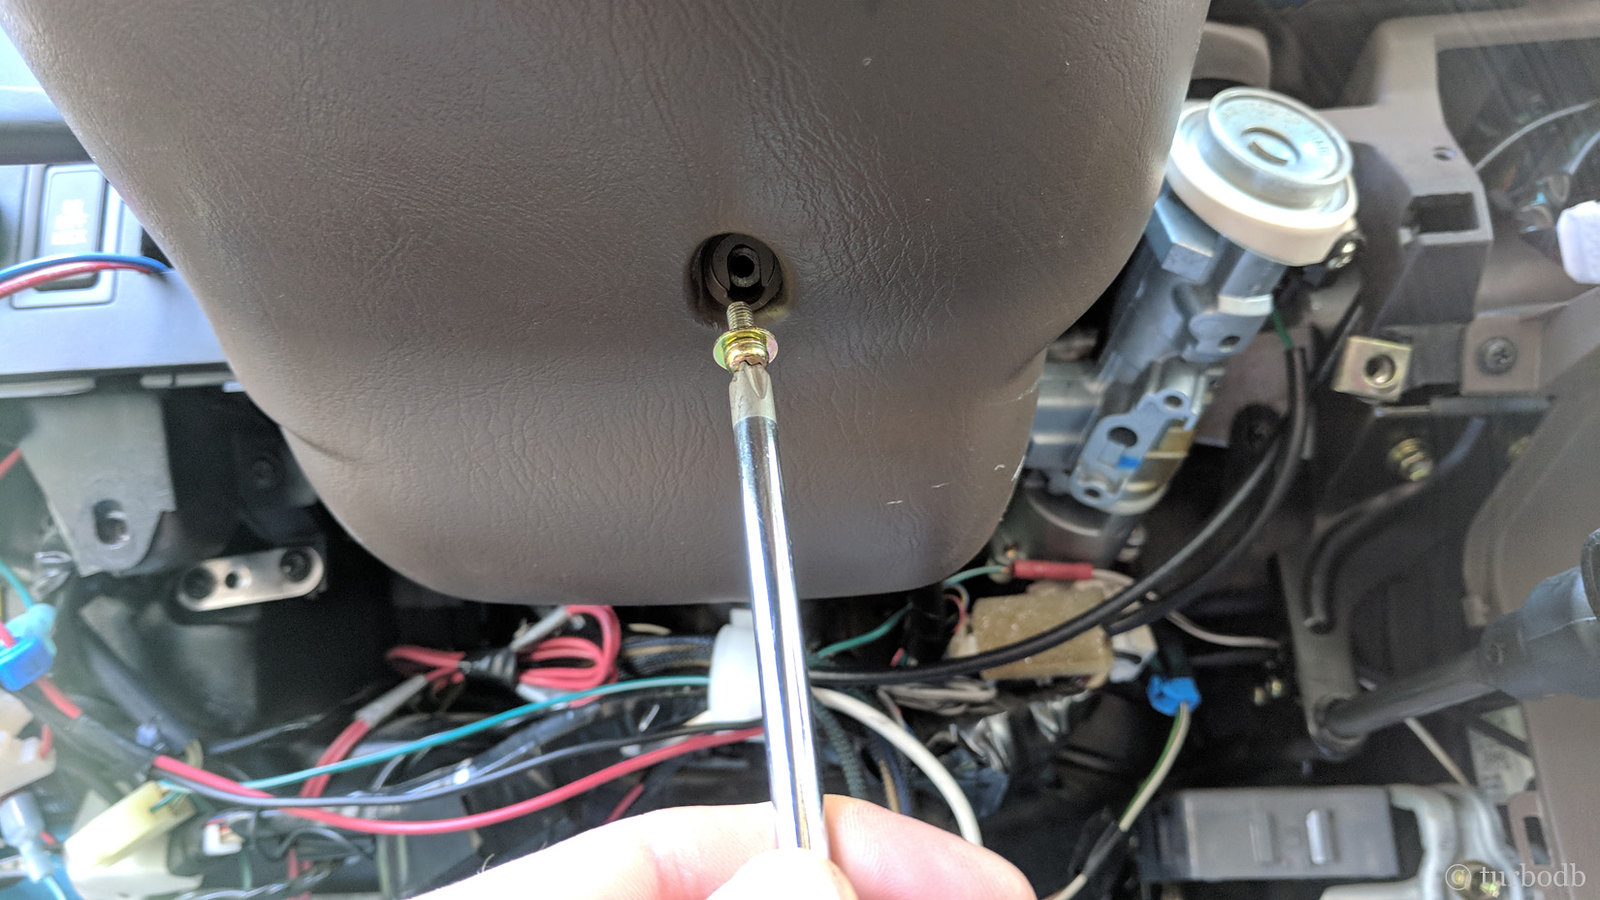
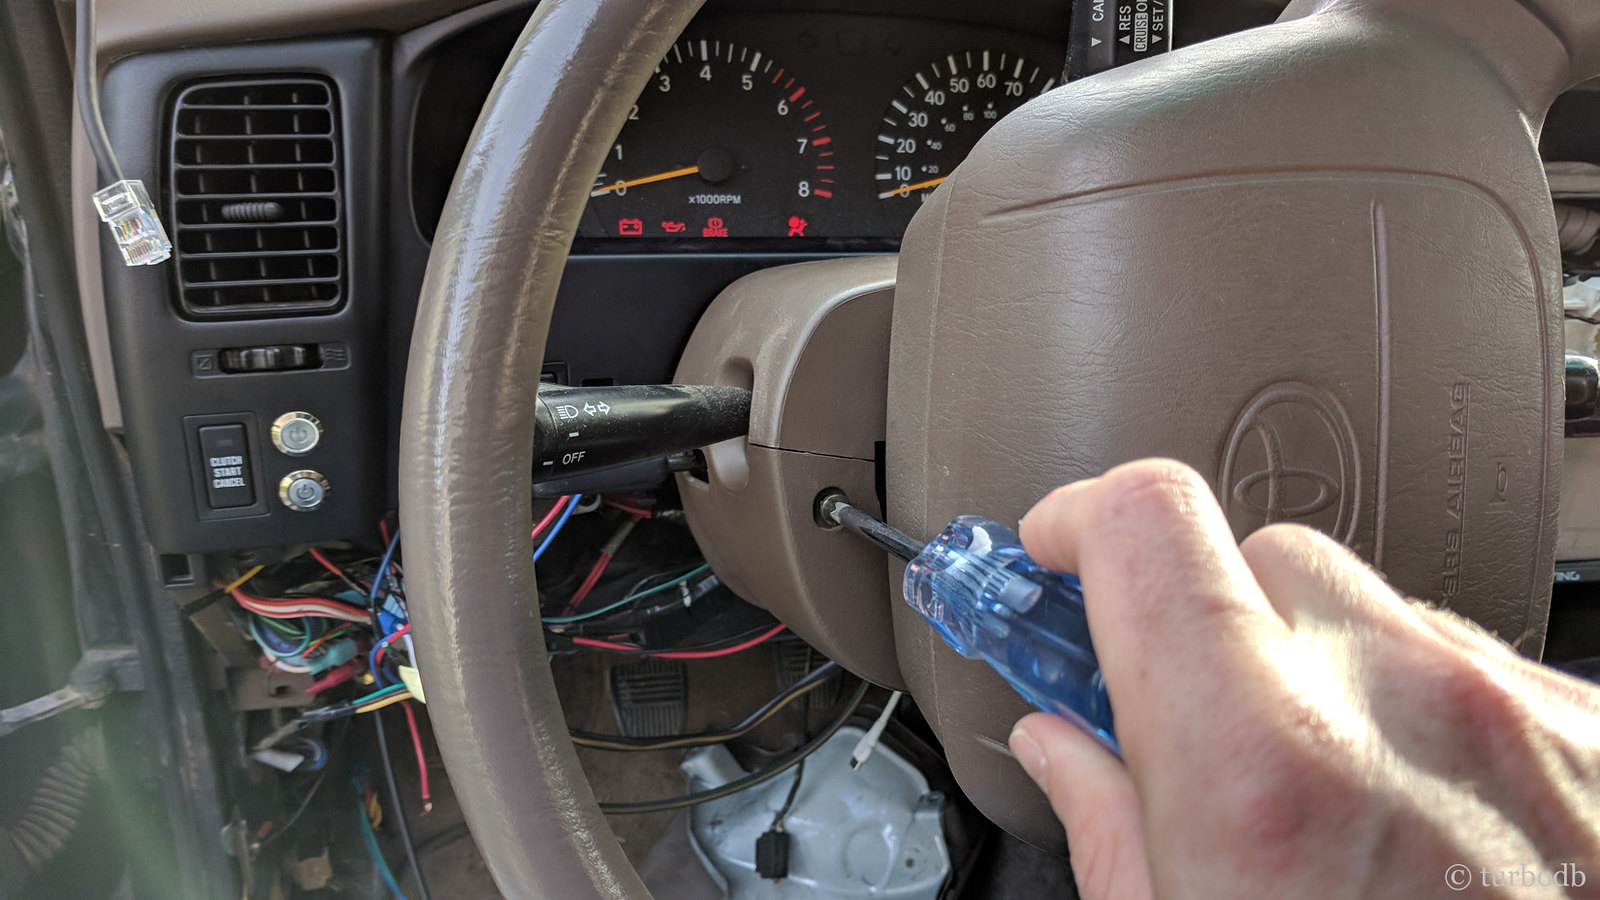
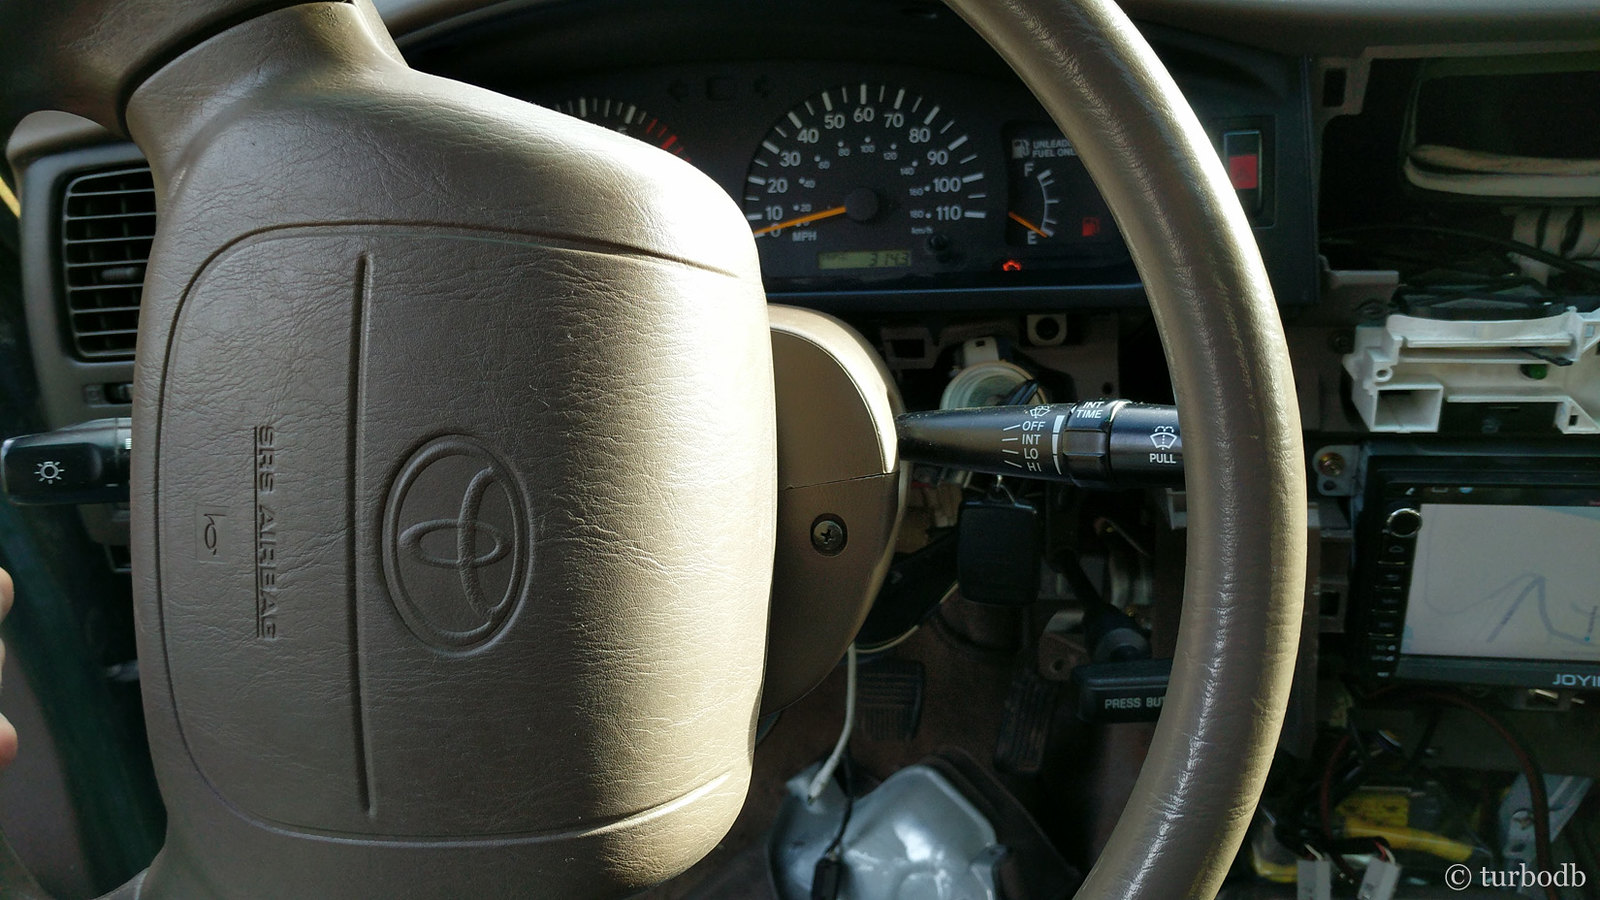
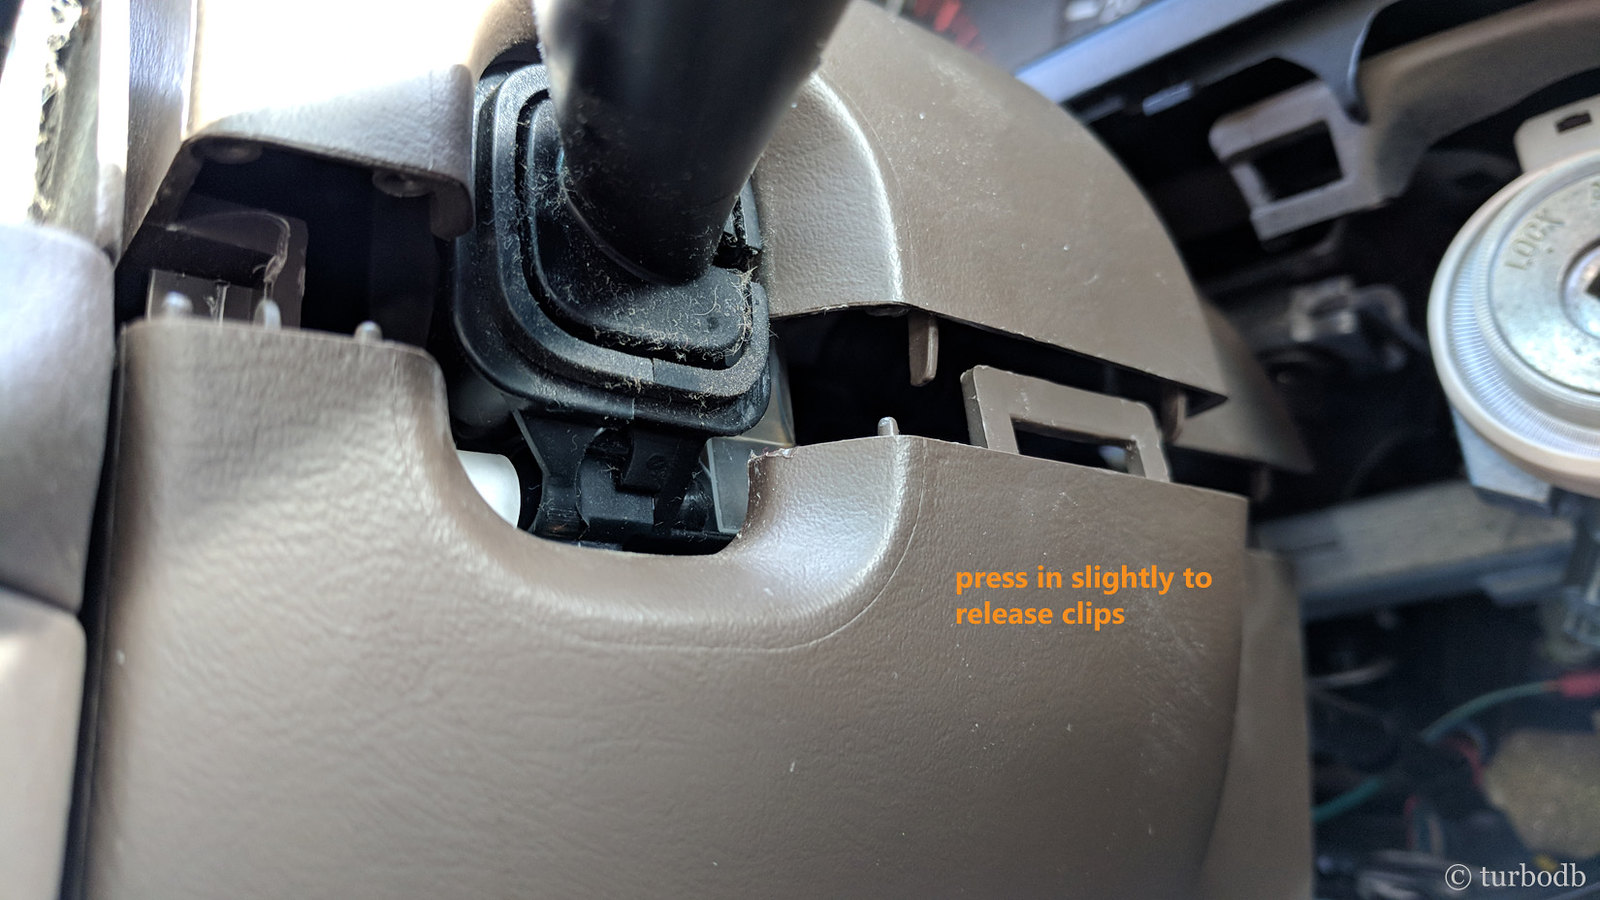
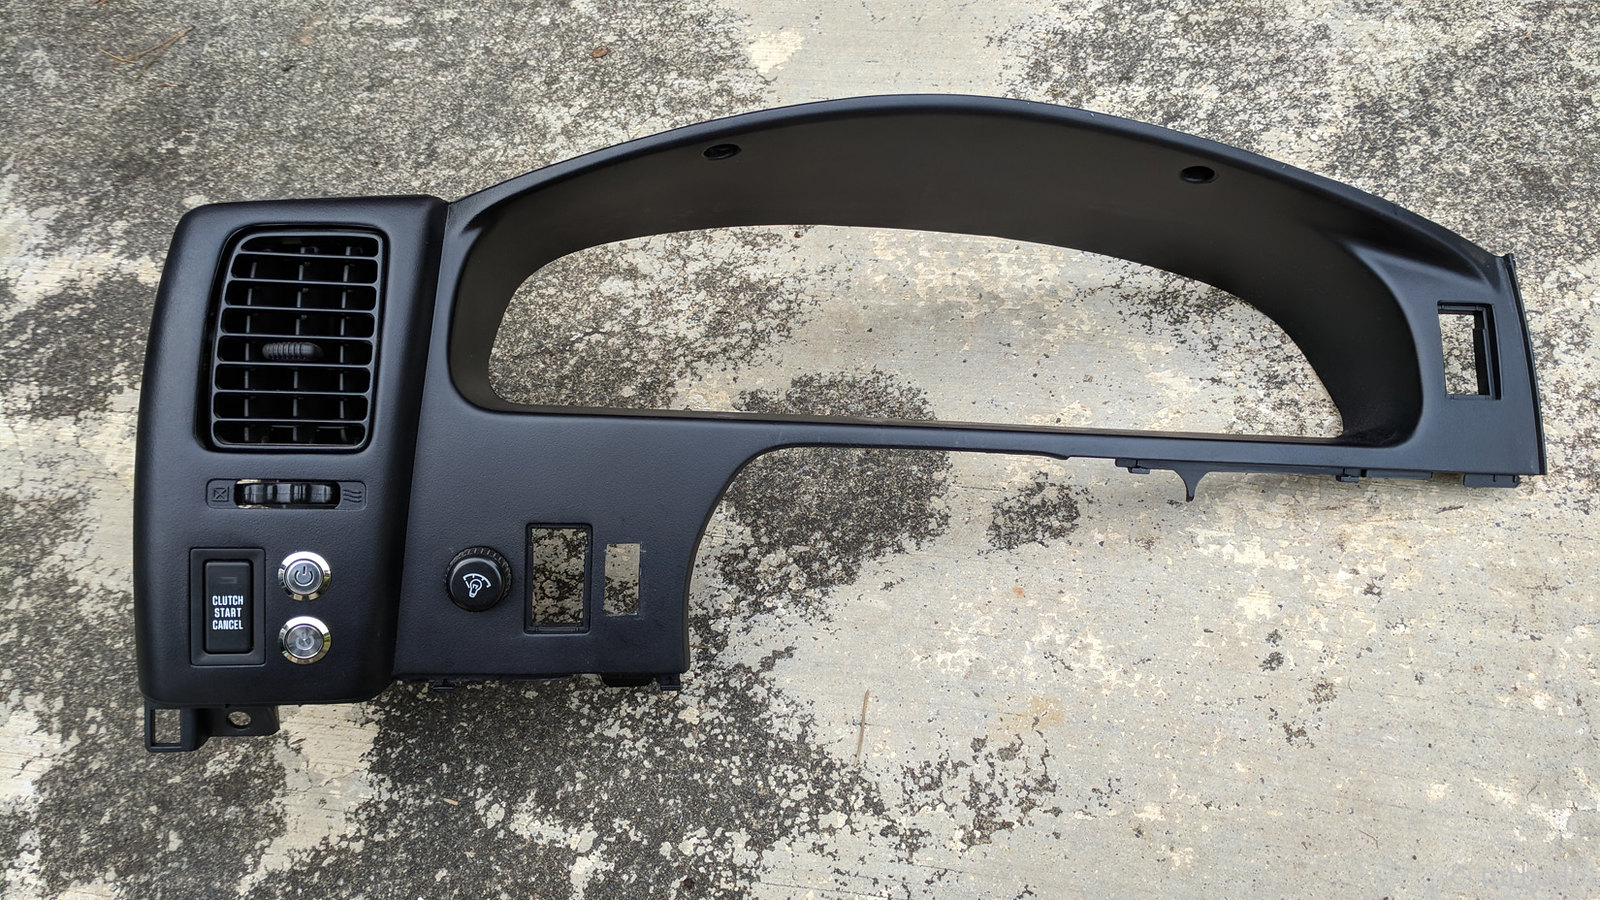
To remove the final piece of the dash - the cluster finish panel, around the instrument cluster - you first need to remove the steering column cover. Start by removing the single Philips screw on the bottom piece of the cover, and then turn the steering wheel 90 degrees left and right to access two screws behind the horn. Then, separate the upper and lower covers carefully (by pressing in slightly on the bottom piece to release the clips) and set them aside.
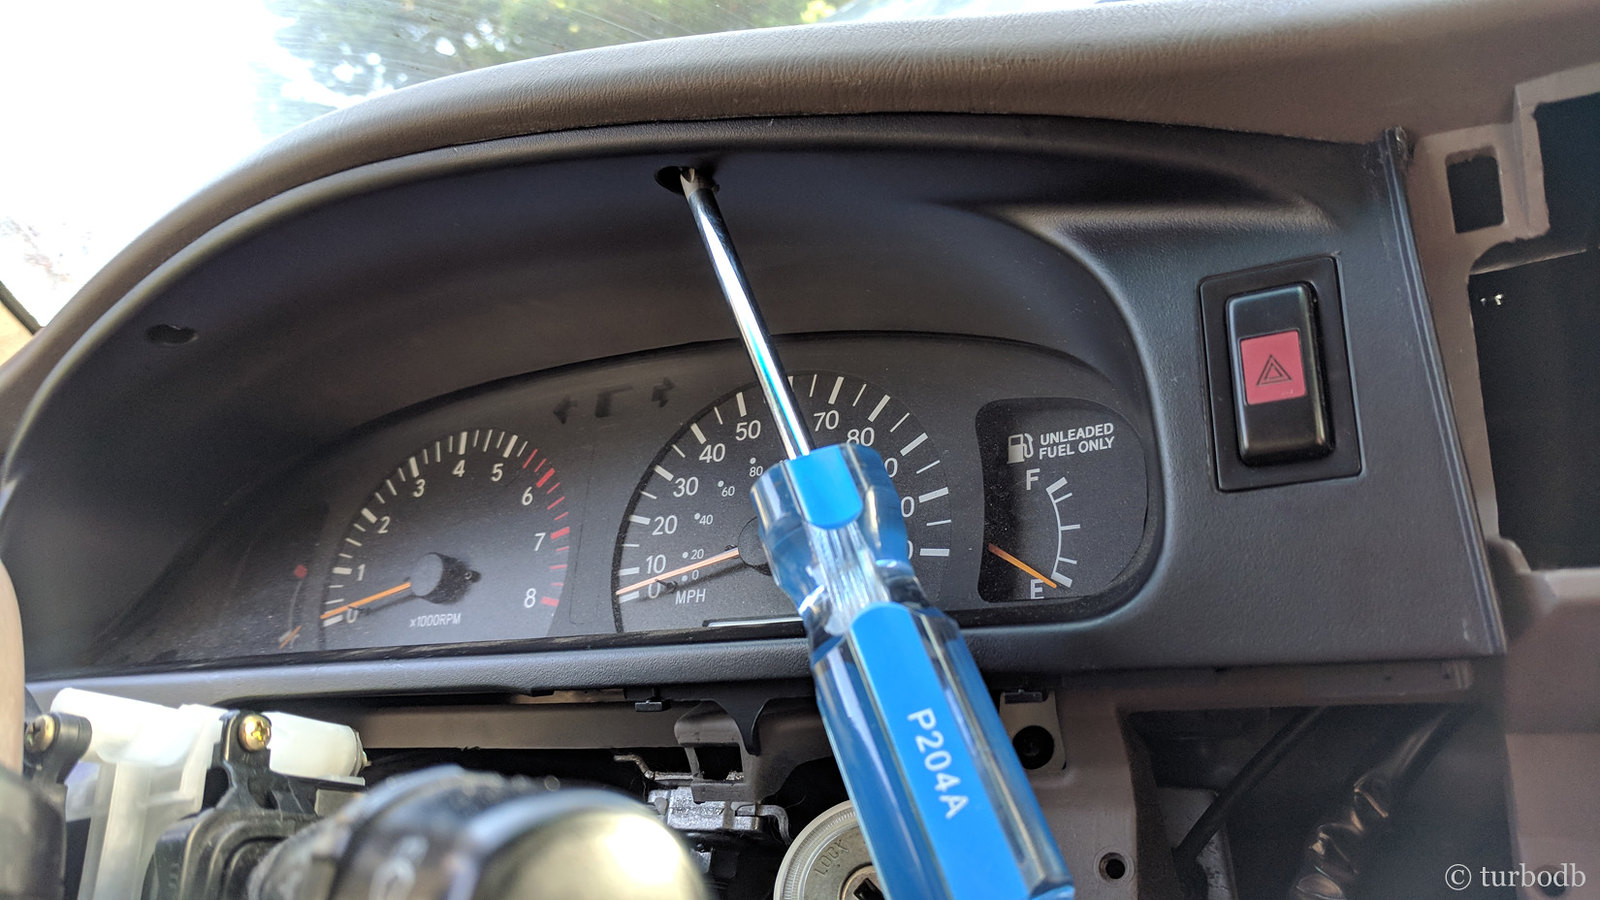
With the steering column cover removed, there is now room to slide out the cluster finish panel. Start by removing three Philips screws - two at the top of the panel and one on a tab just below and left of the steering wheel.
Next, pry the cluster finish panel away from the cluster, but just slightly, for two reasons:
- You may notice that the panel "sticks" in the top-left corner - this is the friction connection of the AC vent. Go slow here, so that you can control how far out you pull the panel when it releases.
- There are several switches that need to be disconnected at this point (some of these may not be present on your truck, or you may have more, like ECT):
- Hazard light switch
- Rear diff lock
- Interior light dimmer
- Clutch start/cancel
Each one of these has a different connection mechanism, so take it slowly and curse Toyota engineers as you go. Eventually, you'll get each one disconnected (and in some cases, the switch may remove itself from the panel, which is fine (and can make disconnecting it easier).
With all the switches removed, you can now remove the cluster finish panel. The dash trim is removed.
Removal of the instrument cluster is straight forward - there are 4 Philips screws, two per side. After removing those, pull out the cluster carefully and disconnect the wiring harnesses.
Installation is the reverse, and (I find) much easier than removal.
Thanks for this. I am also intimidated 🙂 but the right side of my instrument cluster no longer illuminates. I am wondering if they're all pretty much plug and play, and I can just buy one that looks the same and add bulbs (for the 4WD, e.g.) or will they require programming or...? Your clutch replacement tutorial brought me to your site, and I'll be forever grateful, regardless.
Hi C - no need to be intimidated; turns out that removing the dash trim isn't that big a deal (well, after having done it quite a few times now)! In fact, I just removed mine while I was out on the trail - a mouse had gotten in behind the dash, and there was no way I was leaving that little guy to chew through my wires and die back there. LOL.
Anyway, as far as the instrument cluster goes - there are actually some "brains" in the cluster itself for the odometer, so if you get a new one, you'll need to get it programmed to have the correct mileage. I'm not sure exactly who is allowed to do that and what sort of documentation you need for it, but as you can imagine, it's a "touchy" subject should the truck ever be sold in the future.
Instead of replacing the entire cluster, have you considered just replacing the bulbs? To my knowledge, they are replacable, and then you don't need to worry about the odometer at all!
Yeah, I'm considering replacing just the bulbs, but it SEEMS like more than one went out at the same time, which is making me worried it's a board/circuit issue. I'm not sure how to tell, TBH, but the right side of the speedo and everything to its right are dark. It just seemed unlikely that all those bulbs would burn out at the same time, so I thought I'd get my ducks in a row, part-wise, before I pulled everything. In other words, I'm not necessarily buying a new panel yet, but I'd like to know what I should get, if that's what ends up happening.
Gotcha. Well, I’d try the bulb route first - there are fewer bulbs in there than you might expect. Not only is it easier, but it’s also a lot cheaper than getting a replacement cluster! Then, if the bulbs don’t fix it, you can always get the cluster. Of course, depends on how long you can be without the truck!
Getting it reprogrammed isn’t impossible, and is something you should be able to get info on/done before you start removing the old cluster, so you might just ask at a dealership about that if you want to pick up a new cluster and have it ready to “swap” when you do the work.
Huh. I'm seeing in another forum that there are actually only FOUR bulbs in total for the instrument panel, so maybe it is just one bulb that's burnt out! I sure hope so... Thanks for the tips.
Yep, I probably wasn't clear enough, but that's exactly what I meant when I said there fewer bulbs in there than you might expect! They aren't hard to replace, either (beyond getting the cluster out), so it's definitely worth going that way first IMO.
Did it! Super easy, and the new green LEDs look really cool! Thanks so much for the help.
Nice! Shoot me a photo by replying directly to this notification email; I'd love to check it out!
I think you forgot to explain how to separate the emergency brake cable from the plastic panel. Is there an easy way to do that?
Your write-up meets all requirements for being - EXCELLENT! Excellent photos, no wasted words, everything that makes write-ups easy to understand!
Thank you for the time and effort you've taken on all of your projects to simplify the job for the rest of us DIY mechanics!!!
Thanks Skuddle, glad you find them useful! I've gotten a ton of help as I've learned over the years, so it's always nice to be able to give back a bit.
For the e-brake cable, I think you mean the hood latch? (The e-brake cable is the lever that pulls toward the driver, and isn't attached to any of the plastic dash trim.
I generally leave the hood latch attached, and just leave that piece in the footwell while I do whatever work I need to do on the dash, but it's easy enough to remove if you need to, though it can take a bit of fiddling. To remove it, remove the trim to the footwell so you have access to it, then pull the latch to expose the cable going into the back/bottom side. You'll see there that the cable seats (sideways) into a small recess that captures a plug on the end of the cable. Remove that plug from the retainer and you should be able to entirely remove that piece of trim from the truck.
Thanks for you reply!
Yes, I think it's the hood latch cable. You might want to change your reference from emergency brake cable to hood latch cable. Here's what I read in your procedure:
"Next, it's time to remove the lower finish panel in the driver footwell. This one is easy - a single Philips screw and four 10mm bolts hold it in place. Remove them and pull the panel down. Be careful as the emergency brake cable is still connected - so just leave the panel in the foot well for now."
Nice catch, thanks! I've updated it to be correct now. 👍