
May 7, 2019.
Roof rack built, we now had a place for @mrs.turbodb and I to sleep, but what about the whole reason we decided to get the 4Runner in the first place? We wanted to have something more comfortable for @mini.turbodb!
The idea was for her to sleep in the back of the 4Runner - "downstairs" as she likes to call it - but for that to work, I needed to make the back storage area just a little higher so that it would be level with the folded down back seat.
Not only that, but I knew that we'd want a nice place to store the 50 qt ARB Fridge/Freezer, and it wouldn't be bad to get a flat work surface for making meals and whatnot on when we were in camp.
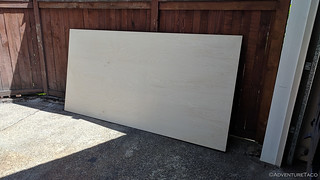
With those things in mind, I set out to make what I thought would be the perfect organization platform - functional, reasonably inexpensive, and as light as possible. To that end, I decided that the construction would be primarily ½" shop-grade Baltic Birch plywood. This would be lighter and less expensive than ¾" ply, and would also be plenty strong with it's 7-layer (but really 5 + veneers) construction. A rough estimation suggested that one sheet would be more than enough.

My next order of business - having once again decided that I would wing the design as I had with the 4Runner roof rack - was to start measuring the space where the organization platform would live. I broke out my favorite trusty tape measure and a pencil and paper and started writing down numbers.
No, not random numbers. The size of the rear storage area.

As I was measuring, I realized that I was completely wasting my time. Toyota had done this for me already - or rather, they'd done it for all of us, and likely other folks had realized it well before I had. So I stopped measuring and headed back into the shop, with the perfect template for what I planned to build!

A bit of tracing and it was time to cut. At approximately 40-inches in depth, the first cut was easiest with the track saw, and the rest were a combination of track and jig saw - close to the line on the curves, but leaving just a hair of material that I removed with the belt sander. Yes, I was approaching this a little more precisely than necessary.

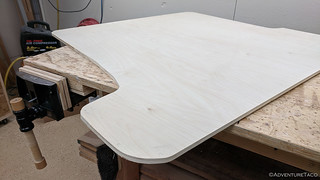
A quick test fit showed that what I'd created was perfect - it fit into place and wouldn't slide around. And, it was still about half-an-inch lower than the folded-down back seat. Perfect, since the next steps involved adding a bit of height.

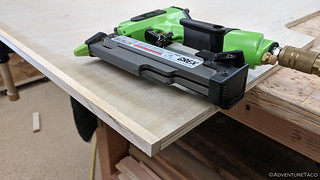
First though, a piece of maple edging. While this is likely not really necessary - since who cares if this thing gets a little banged up - I liked the idea of providing a bit of protection for when people slide things in and out of the back of the 4Runner. Glue and a few pin nails held this in place nicely.
Oh, and I should mention at this point - it's simply amazing how much faster it is to build things using wood as opposed to metal. Definitely my favorite medium despite all the metal fab I've been doing of late.
With the edging on, the next step was to install a few 9/16" runners on the bottom of the panel. The purpose of these was threefold:
- Raise the panel approximately ½" so that it was flush with the back seat. (Bear with me, I know I'm repeating myself.)
- Provide some additional thickness for the drawer supports (that would hold the ARB fridge) to screw into.
- Provide a small void under half of the panel for a slide-out table. More on that shortly.

With the runners in place, the next order of business was building the pull out "drawer" for the fridge. I modeled this off the one I built for the Tacoma since it's worked so well (with minor modification). The only difference on this one is that I decided to rabbit the bottom into the drawer sides for a bit more strength and rigidity. So I quickly machined some maple bits (for strength) and got ready to put everything together.

A few screws to hold the drawer sides together, a few more to hold the drawer rails to the platform, and finally even more to attach the drawer slides to the drawer sides and rails and I was nearly done. The only thing left to do - cut a simple piece of plywood that could pull out as a work surface.

And with that, it was time to test it out again. Or really, place it in its final location in the back of the 4Runner.

One of the quickest projects since it was made of wood, this is one that I think we'll get a ton of use out of. And, perhaps most importantly, @mini.turbodb loves it. And she cant wait to get setup "downstairs."
So cool!!
Is that 4runner still available for sale?
Nope, 4Runner is gone.