May 12, 2018.
We all know how it goes - the list of things to do to the truck is so long that we have to prioritize. And often, that prioritization favors form over function. And from time to time, I've been as guilty of that as the next guy, for sure.
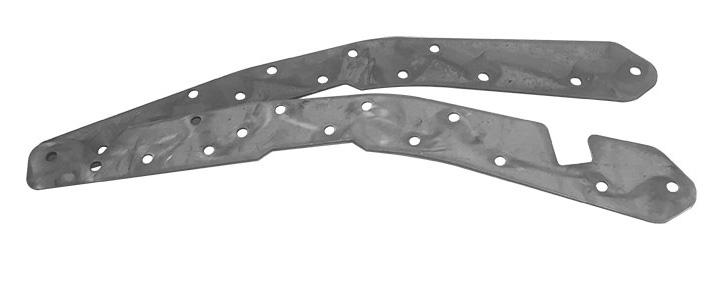
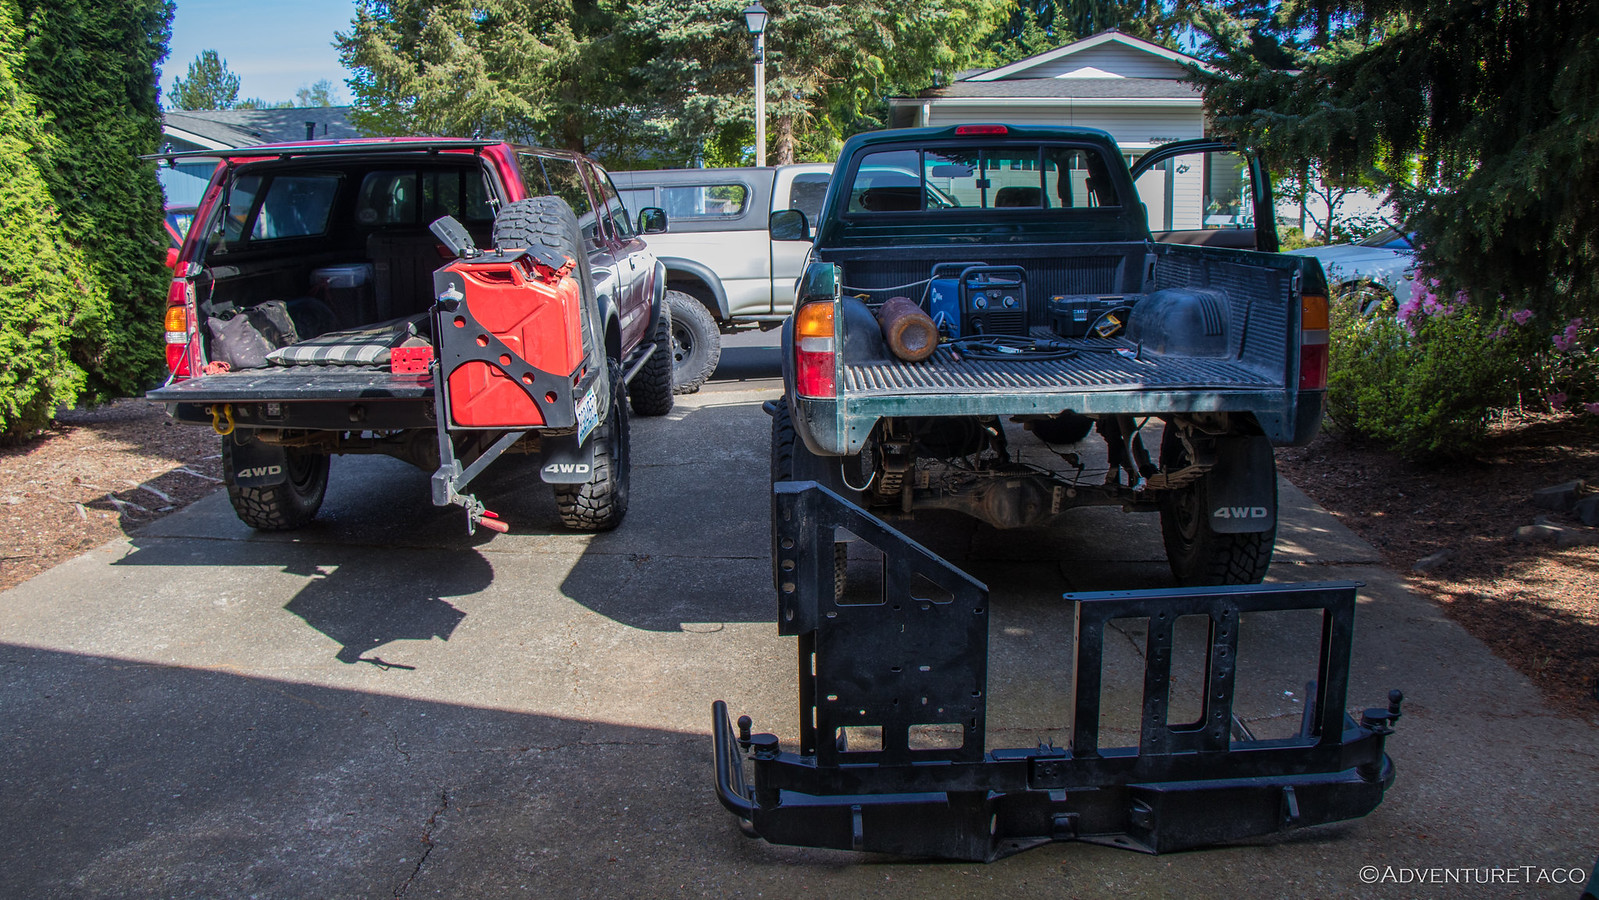
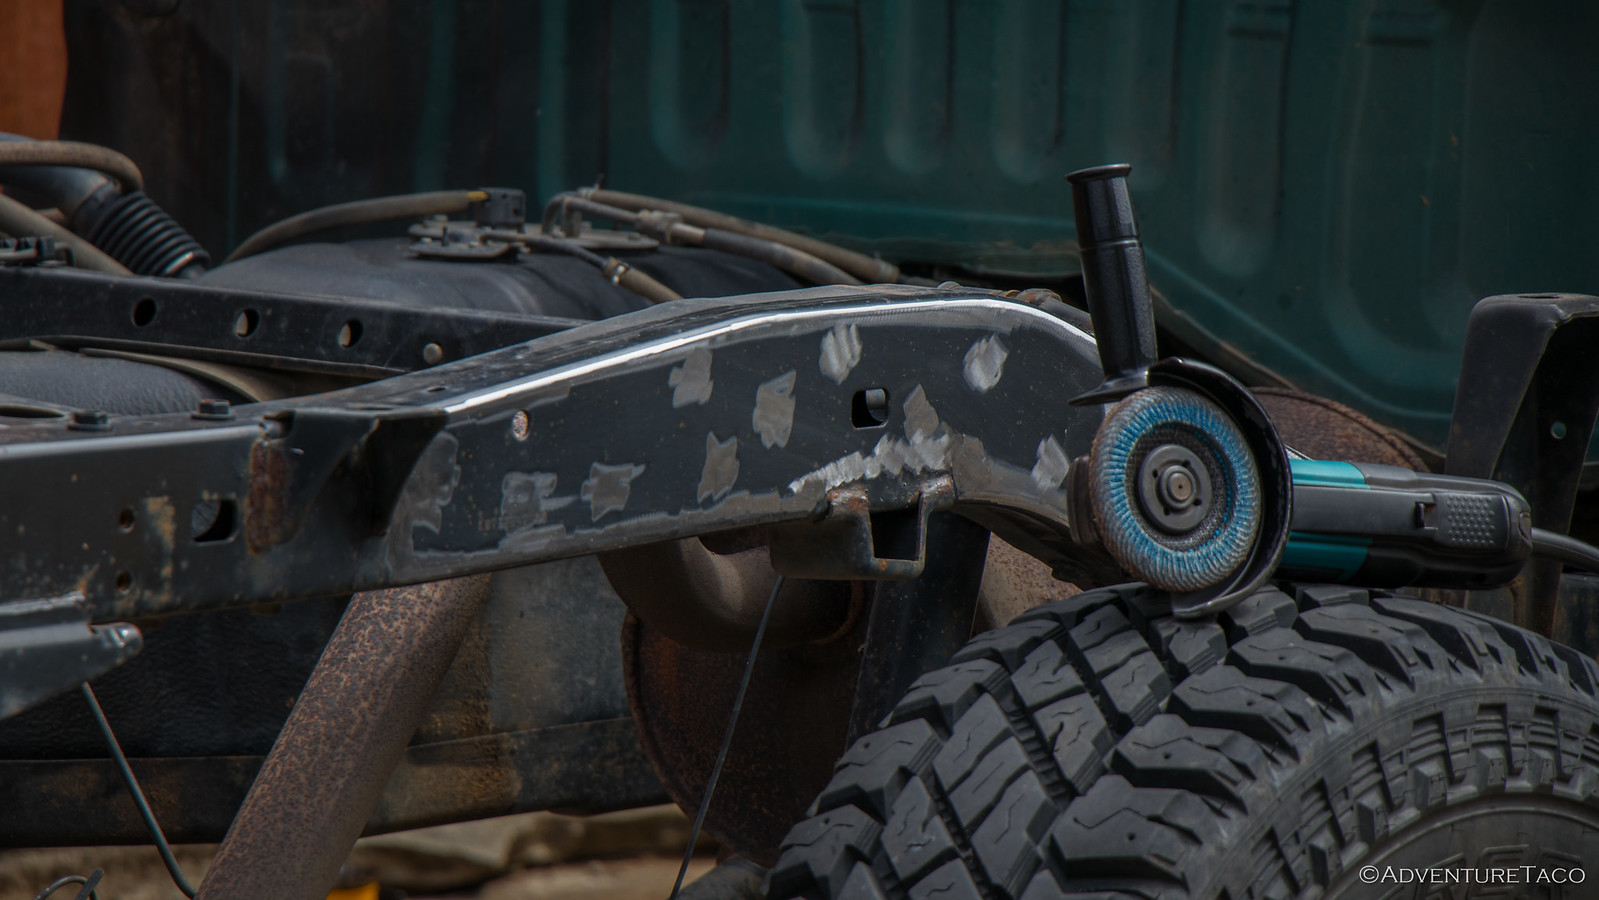
But not this time. This time, I knew that I needed the function with the form, lest I do irreparable damage to the Tacoma. So, when I installed the dual swingout CBI rear bumper in January, I purchased a set of frame reinforcement plates at the same time from @cbi offroad fab - knowing that with all that extra weight hanging off the back, that it was only a matter of time before my frame was going to get tweaked.
Now, I know what you're thinking - that I'm using with incorrectly here since I installed the bumper (form) in March, and it's now May that I'm finally getting around to the reinforcement plates (function).
I would suggest that you should stop all that thinking; it just bogs you down in details - I gave thinking up completely several months ago, and it's quite liberating. At any rate, let's get back to the story.
Knowing that summer (and more, longer adventures) was fast approaching, the shop day at Mike's was going to be the perfect time to remove the bed. I figured I'd make that whole process easier by getting the swingouts off the bumper before heading over - you know, so we didn't have to lift the bed up over them during removal.
The passenger side swingout came off just fine - a little persuasion with the dead blow was all that was needed. The driver side on the other hand... well, it turns out I can jack the rear of the truck completely off the ground using that swing arm. It wasn't coming off!
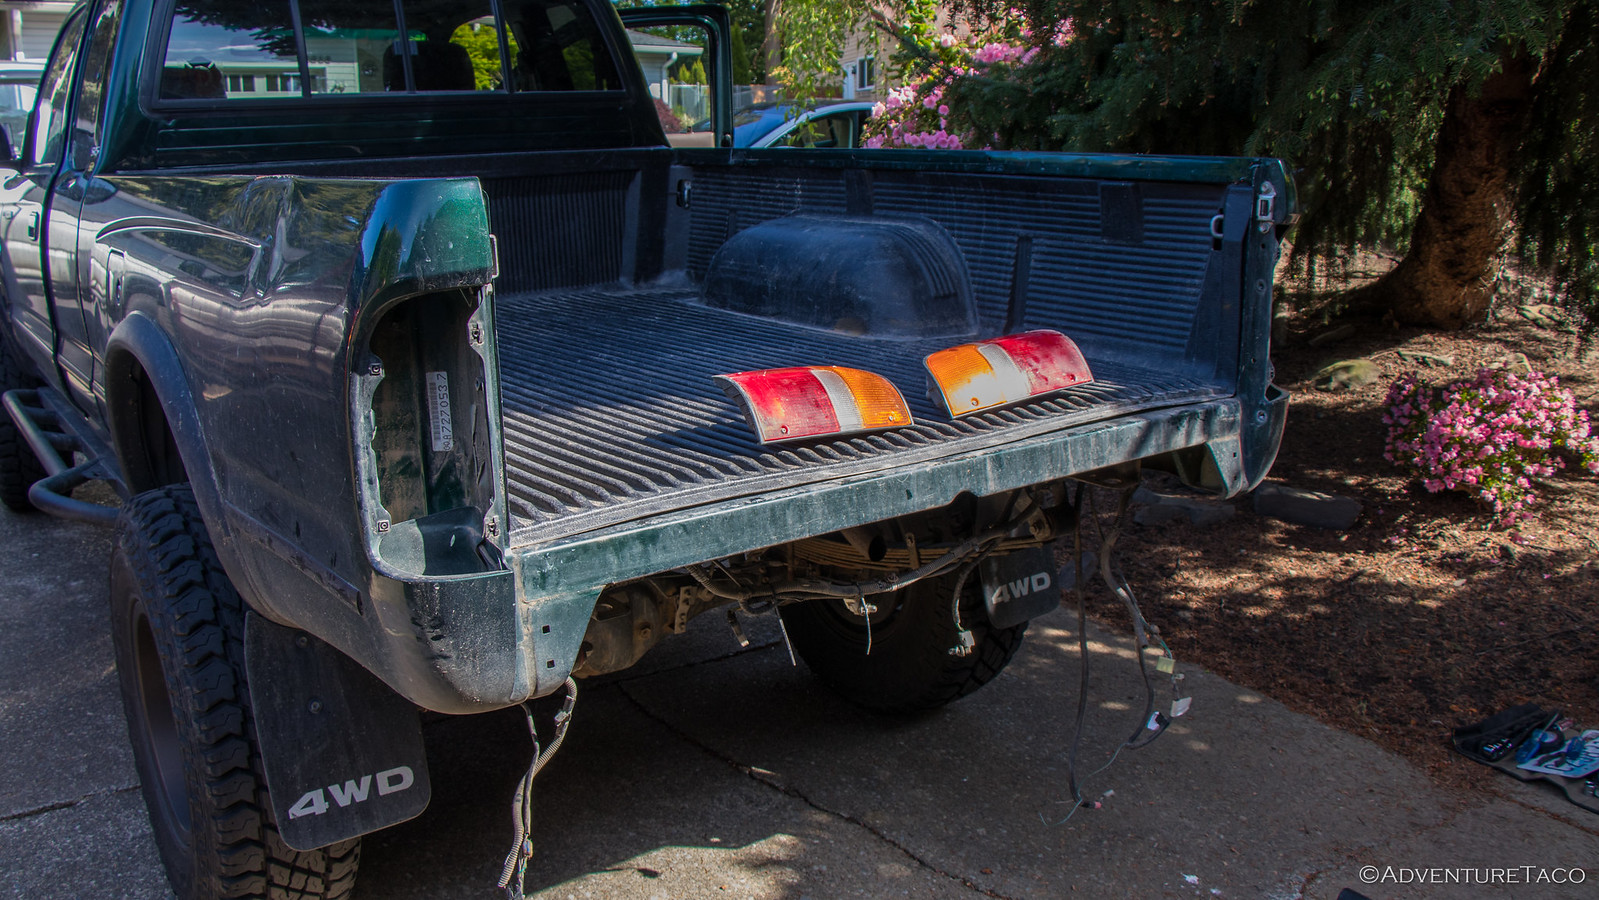
Unfortunately, that wasn't a huge surprise to me - getting that arm on was nearly a press fit, so I resigned myself to simply removing the tailgate, and then waiting to got to Mike's to take off both the bumper and bed. The tailgate came off easily enough - just two bolts on the bottom, and two screws holding the cables on the top - and I dare say that I like the look!
Of course, no tailgate leads to problems - just ask @mrs.turbodb 😛 - so the look is only temporary.
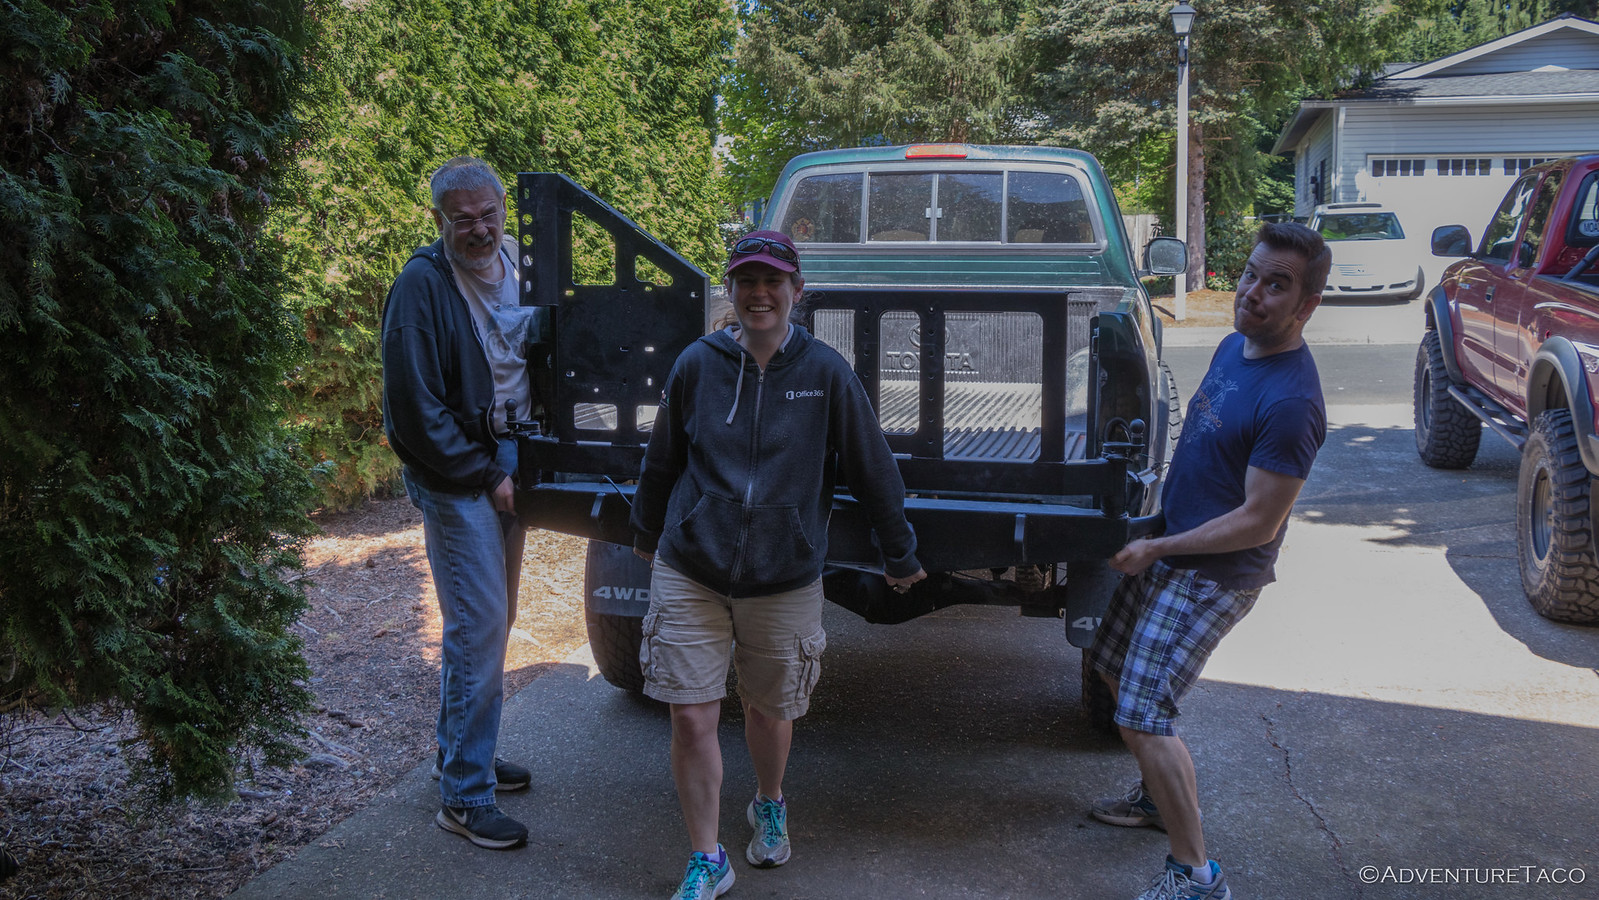
At Mikes, removal of the bumper and bed was a simple 15 minute affair, thanks to help from @Digiratus, @Speedytech7, and @drr. Additionally, the fact that we were all lifting bits off meant that photos were impossible - clearly, it's time for a drone, to capture such action shots at a couple hundred bucks a pop! 
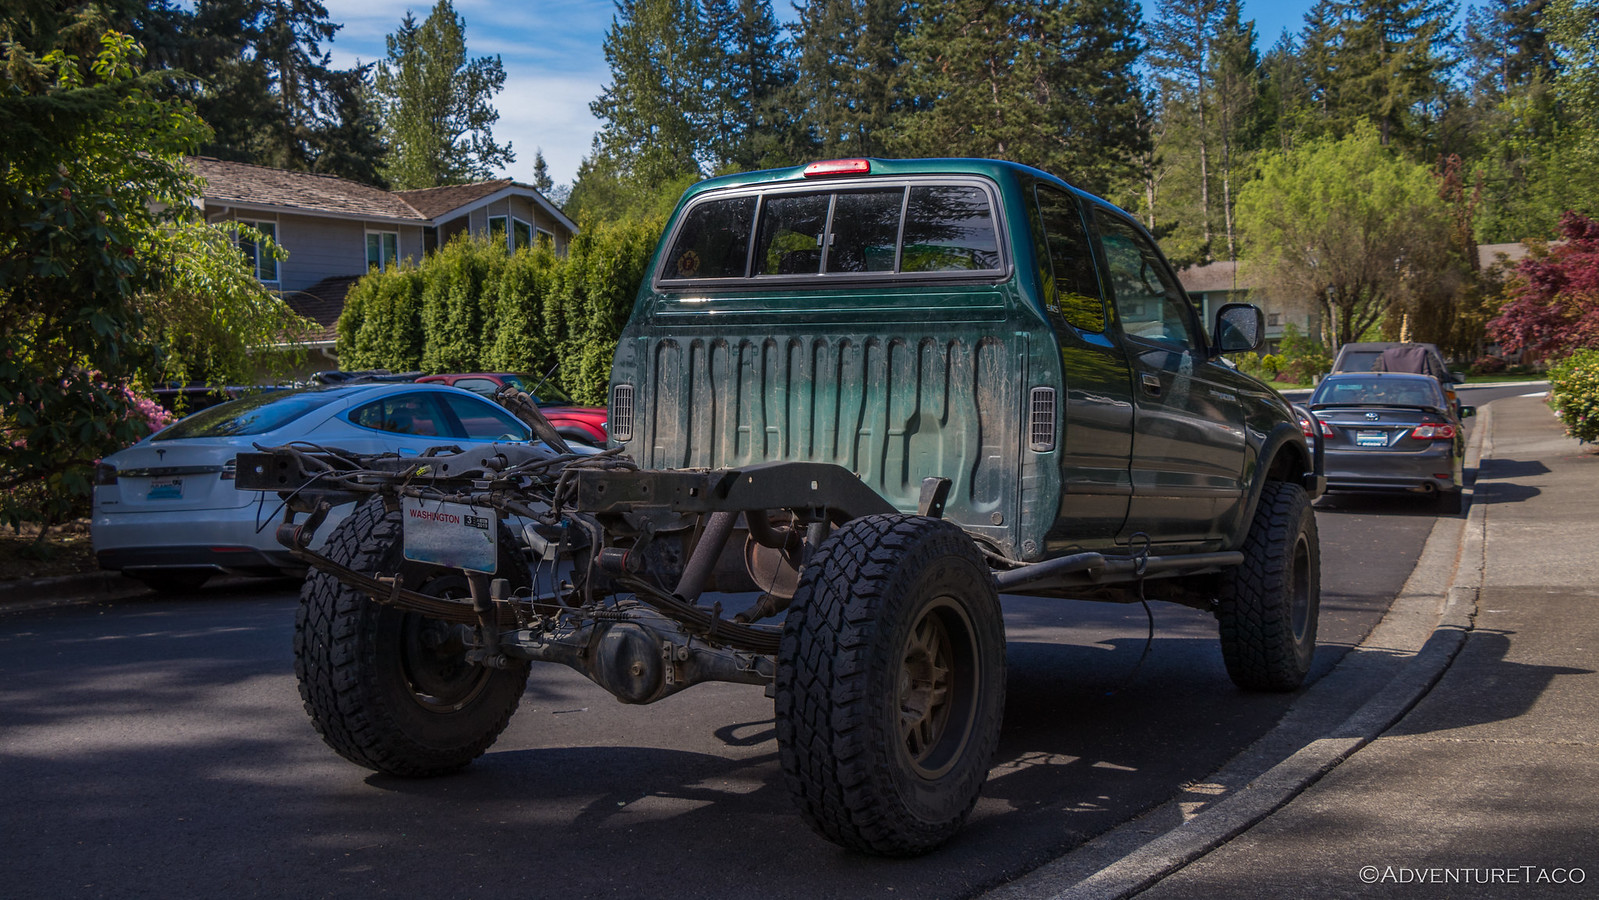
Without the weight of a bed or bumper on the back of the truck to cushion the ride, the drive home that evening made me realize just how smooth the truck was on the various washboard roads I've complained so much about in the past.
Not that I won't continue to complain about them in the future!
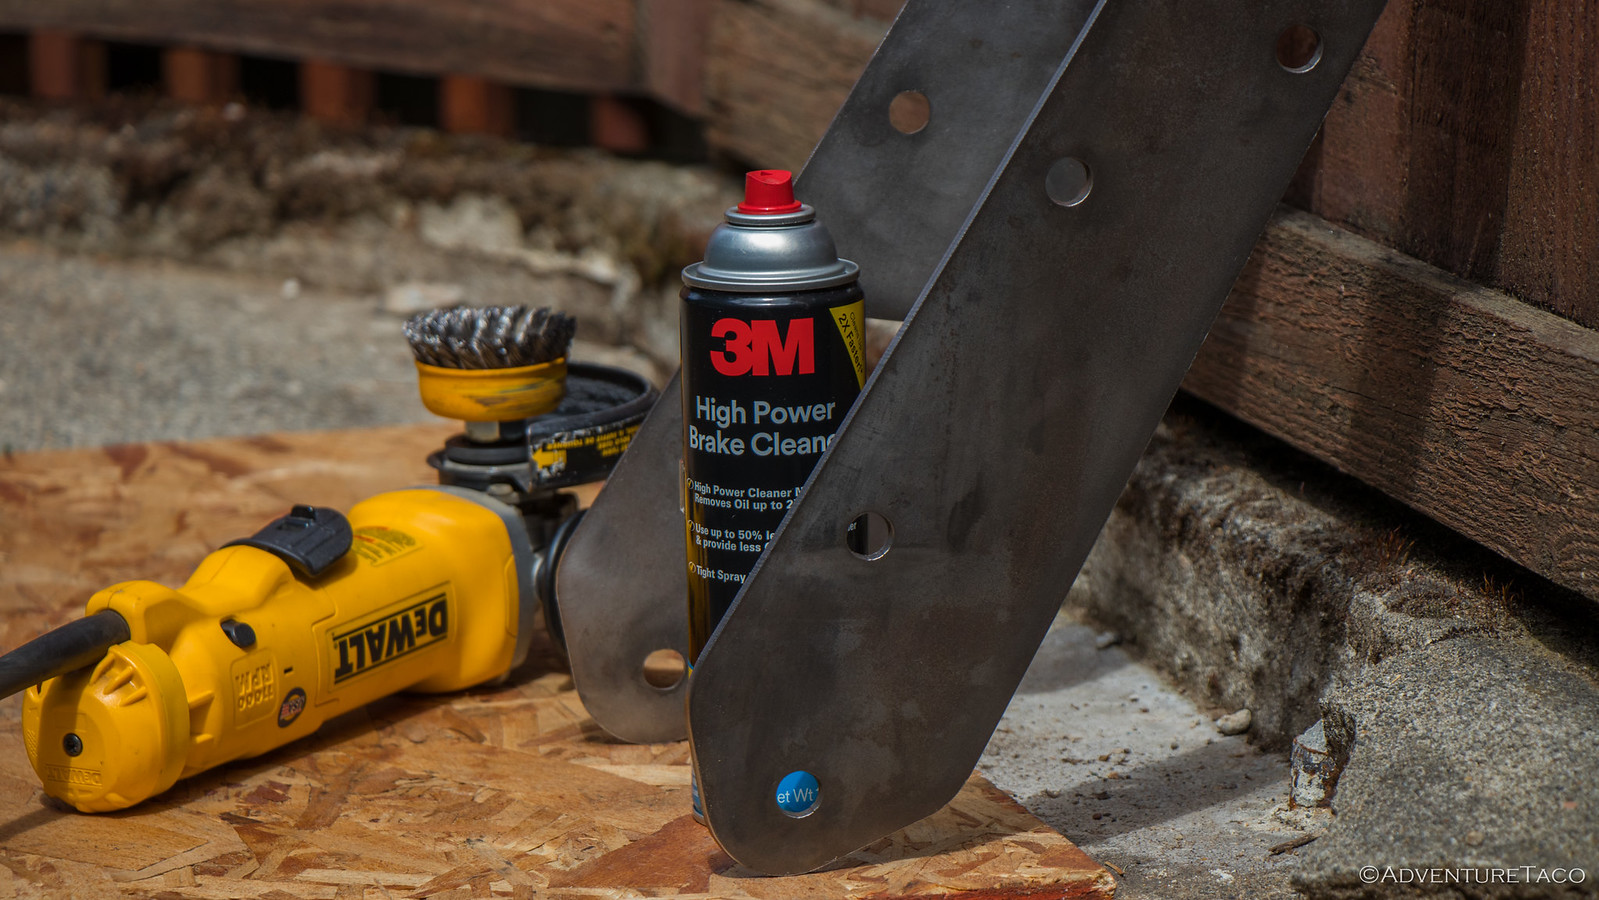
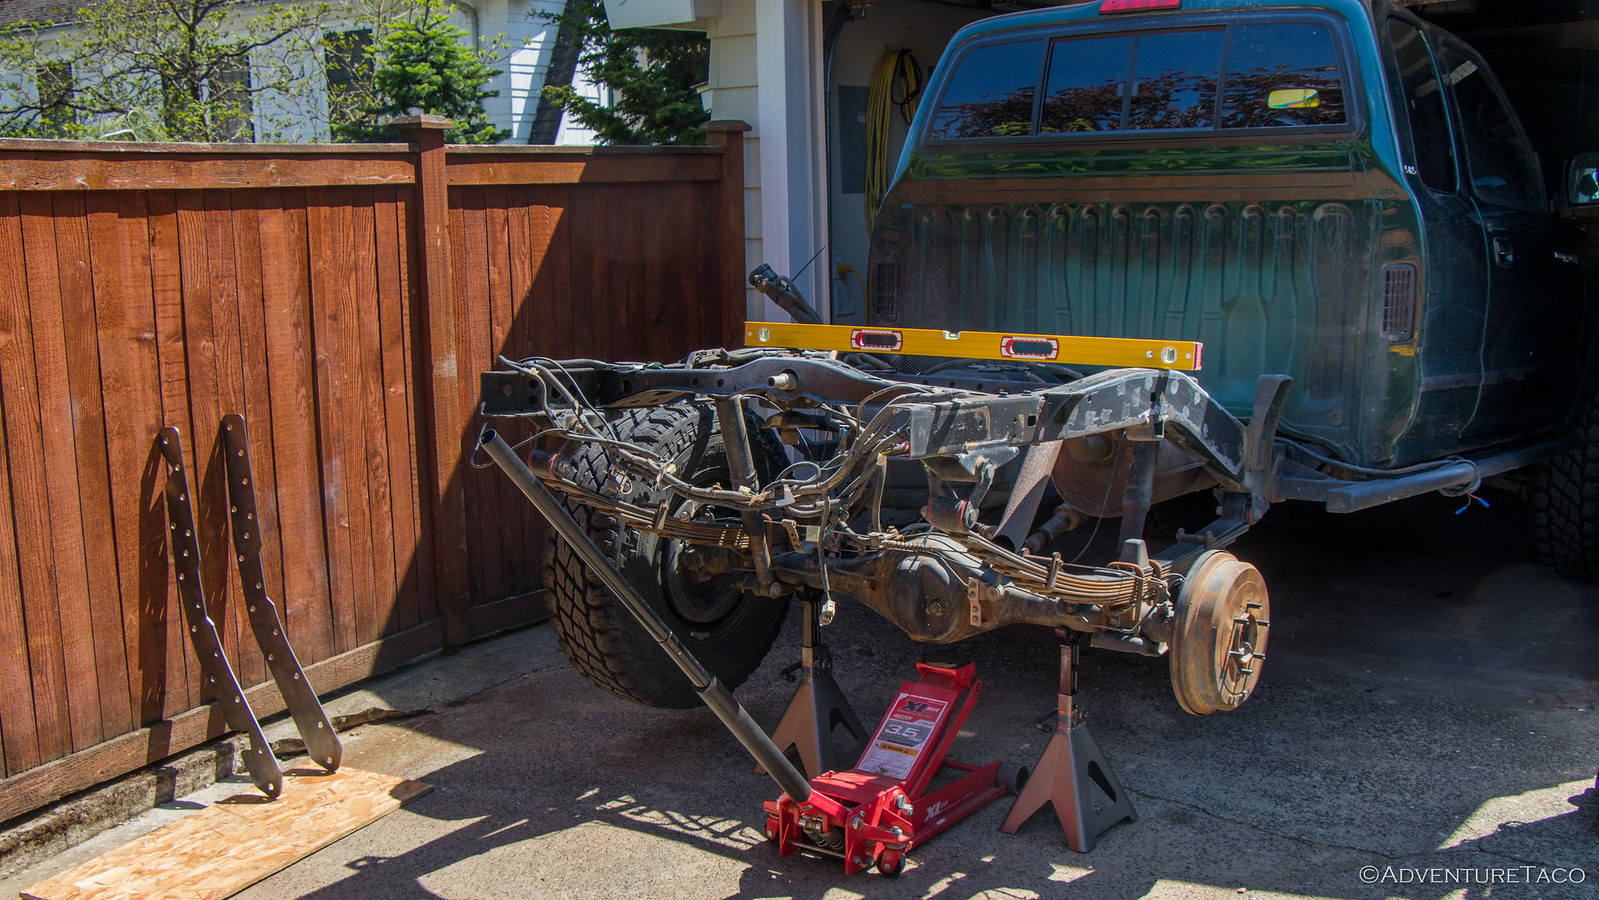
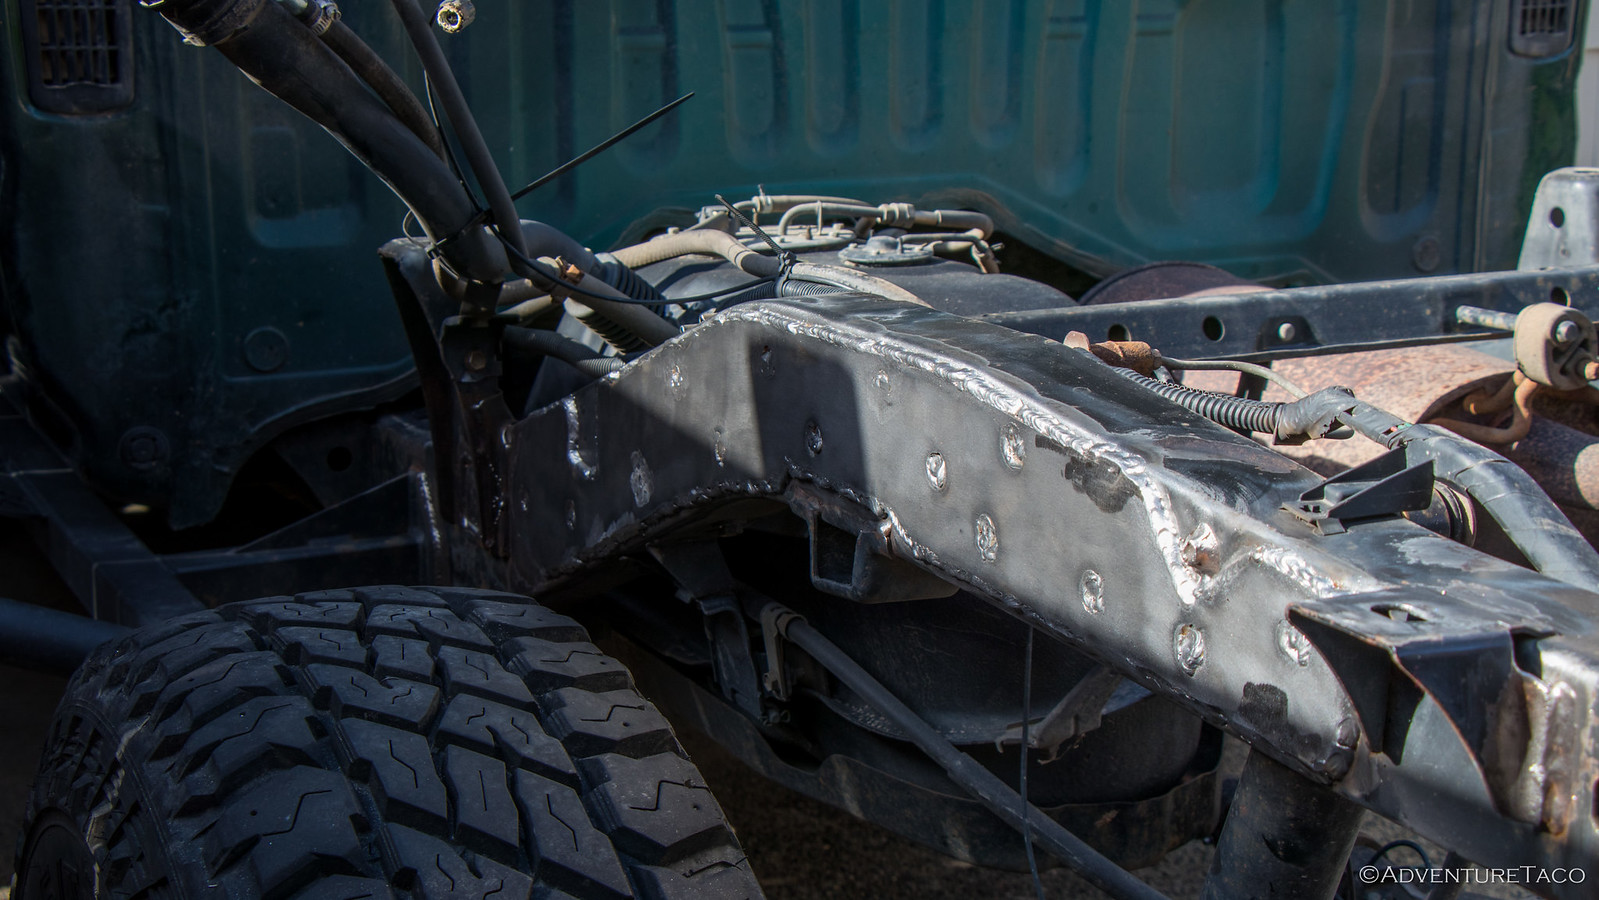
At any rate, the next step was removal of the spare tire carrier - something that's much more easily done with access to the bolts from the top, and mock-up of the reinforcement plates on the frame so I could make sure they were going to fit, and trace their outline with a sharpie.
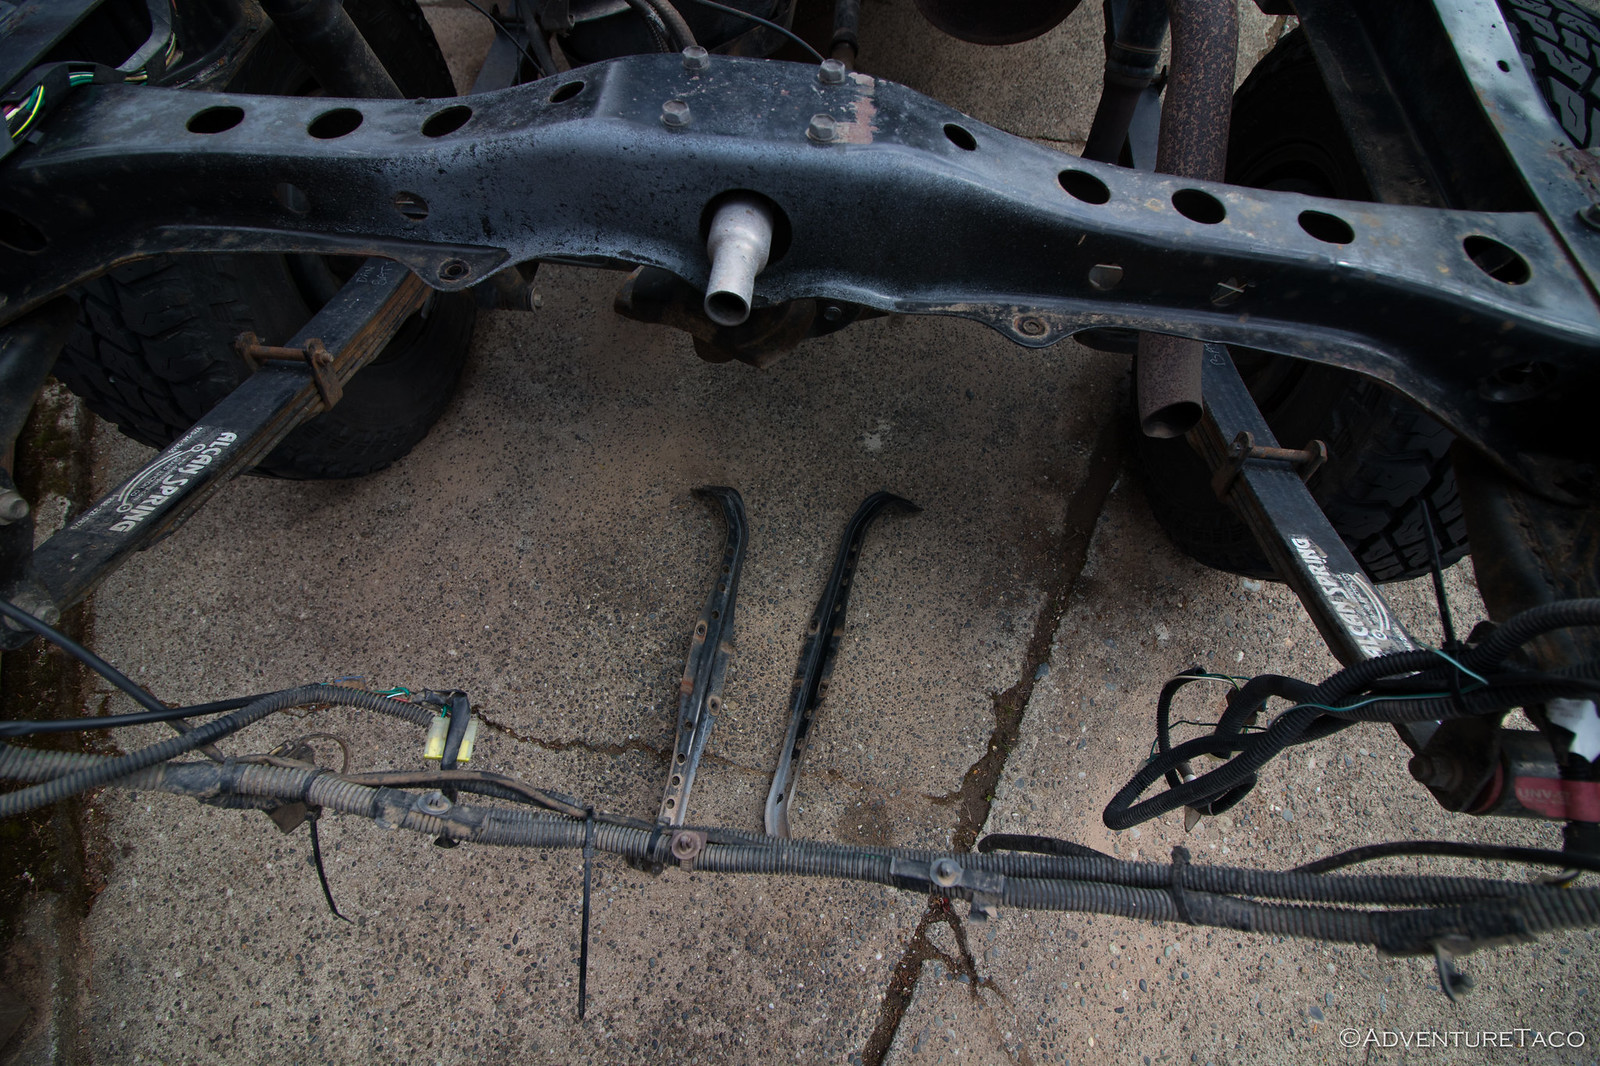

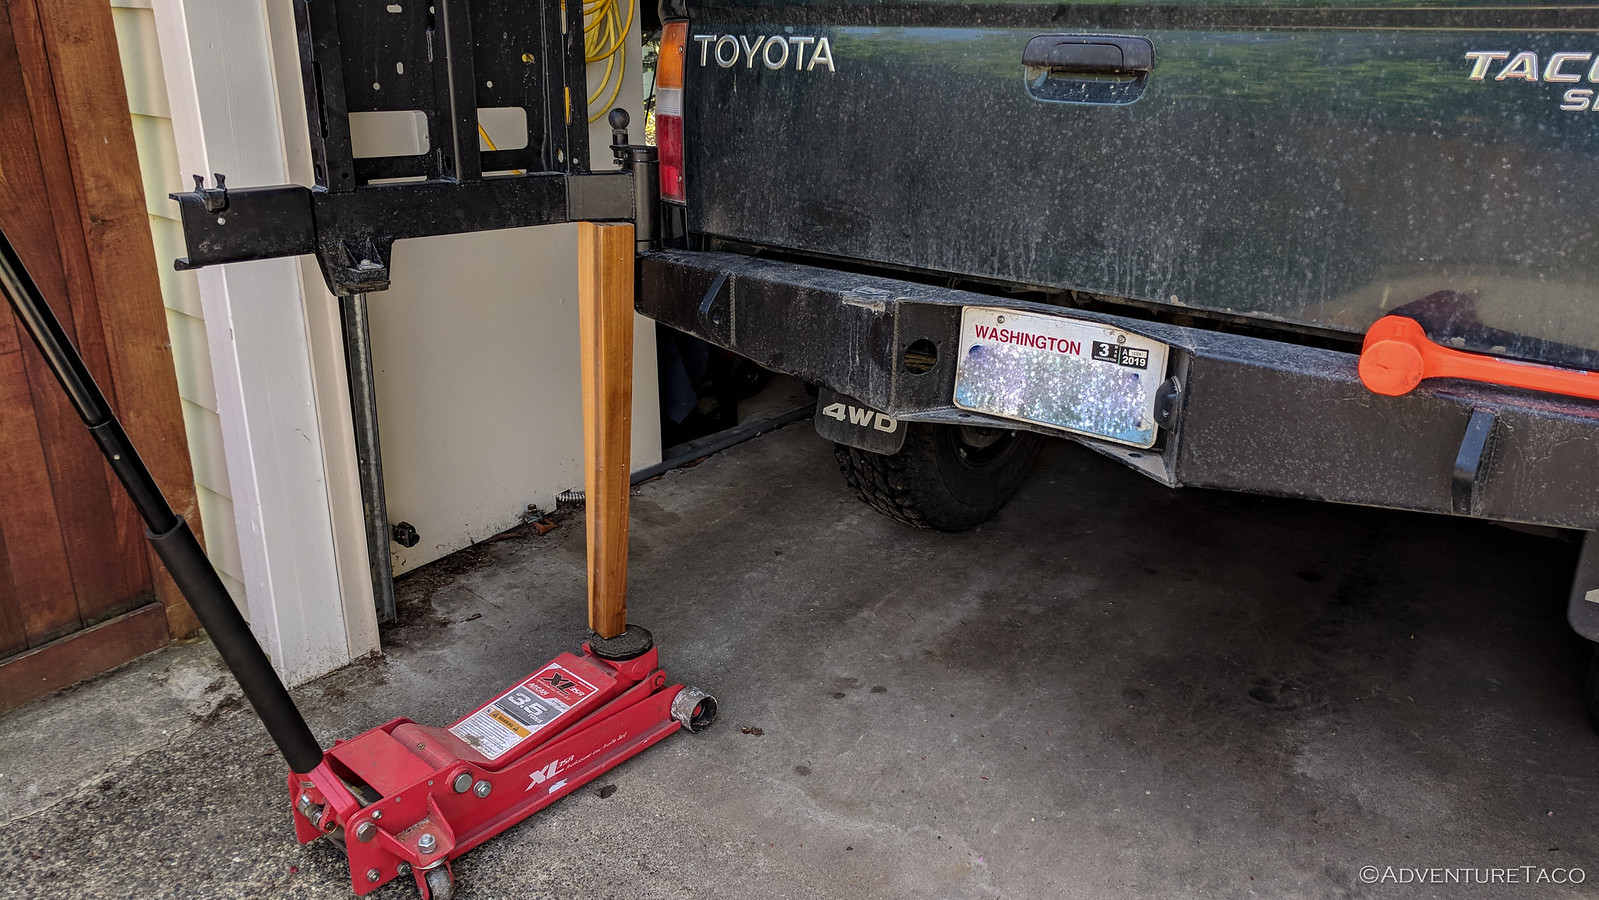
And then, it was time for metal prep. This isn't the most fun part of the project, but I dare say it's the most important. Shiny metal welds so much cleaner and stronger than dirty metal that it's insane. So, I spent some time - a good 45 minutes - with the flap disk on the frame, a wire brush on the reinforcement plates, and degreaser and mineral spirits everywhere to get all of the parts nice and clean in all the spots that would see a weld. Lastly, I decided to remove the tires and make sure the truck was level before getting going...
Because how much would it suck to weld your frame into a tweaked position because the truck wasn't level? (Hint: Suckage would be high.)
Finally, I was ready to get welding. I started by tacking the plates in several places around the perimeter on each side of the truck. And then, I started stitching. This is not a fast process - by design. The idea is to weld a couple inches of plate to the frame, move to another (cooler) area of the frame and weld another couple inches, and then let that side (passenger) of the frame cool down by moving to the other side (driver) and welding a couple places over there.
You do that so that you don't heat up the frame too much, which can both cause it to twist, as well as weaken the metal in the frame itself - both things you want to avoid when you're ultimate goal is to reinforce the frame!
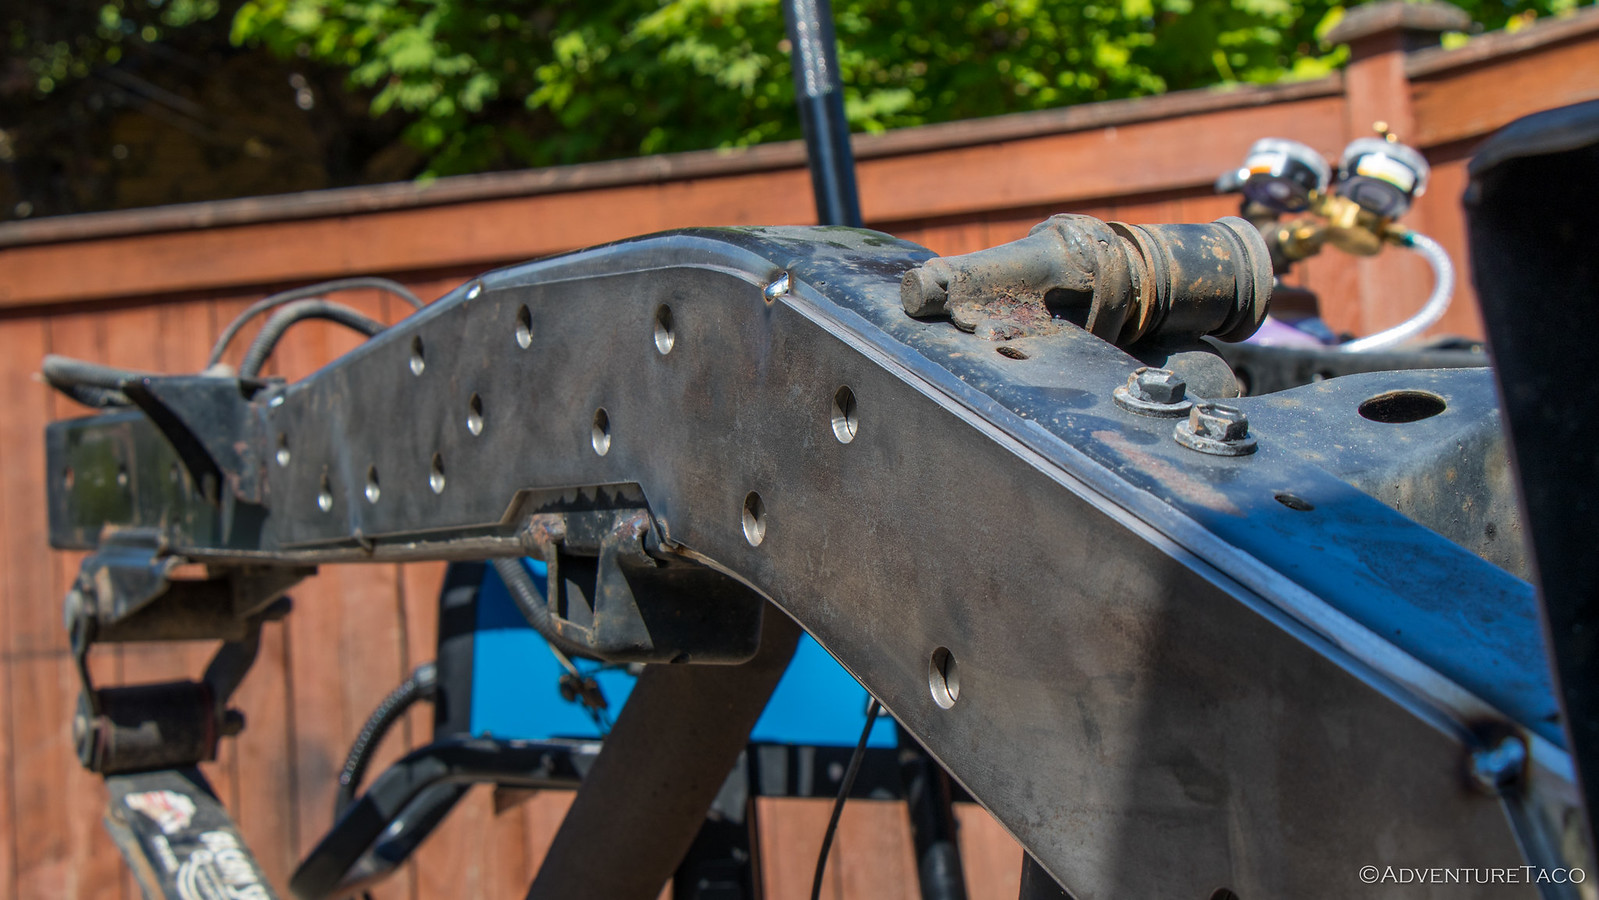

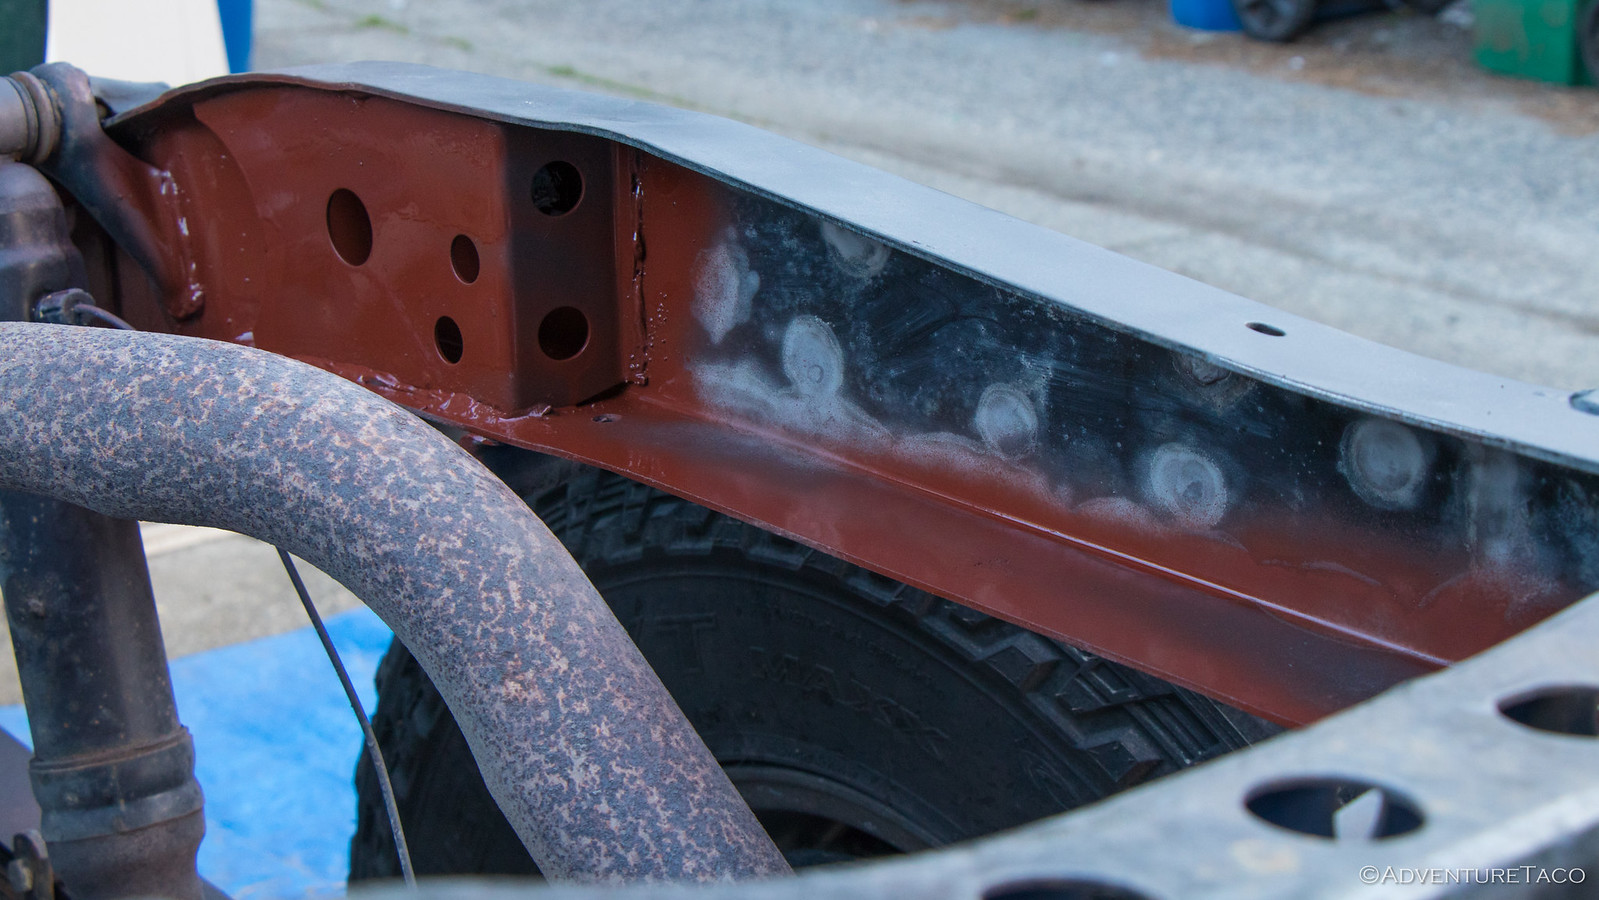
In the end, and after several hours, the plates were welded completely around their perimeter, as well as rosette welded in all of the holes for additional strength. I figured that this was the surest way to prevent water infiltration between the reinforcement plates and frame, since rust there would be near impossible to treat.
Welding done, I put the truck away for the evening and came back the next day to get the bare metal painted up. A bit of griding and a lot of wire brushing got everything looking good, and then two coats of primer and two coats of paint were applied in short order.
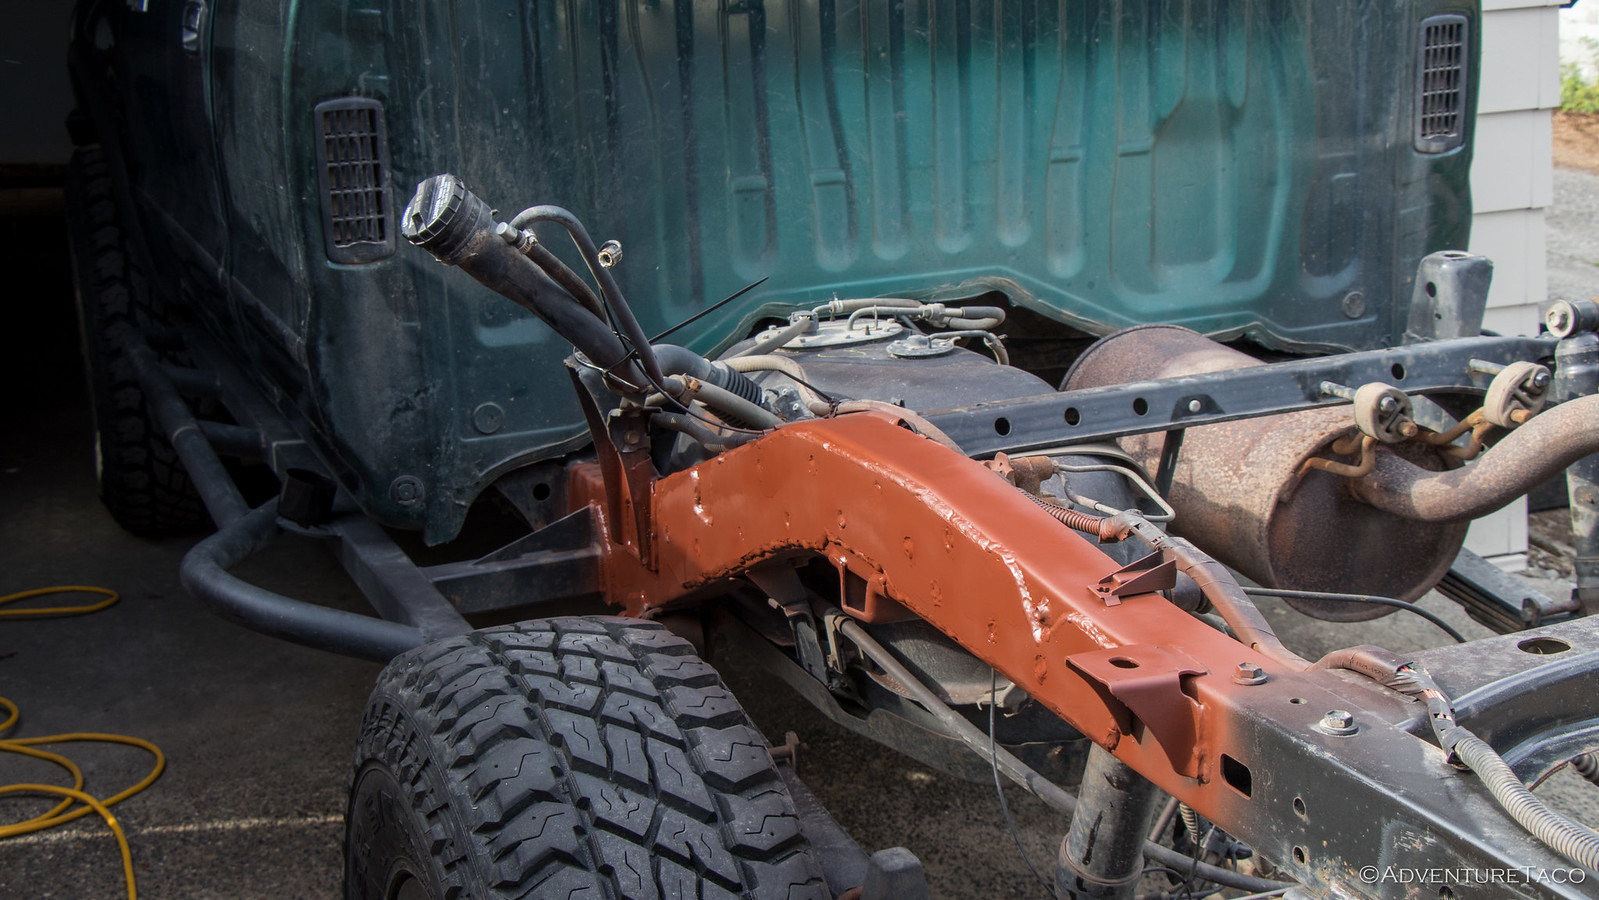
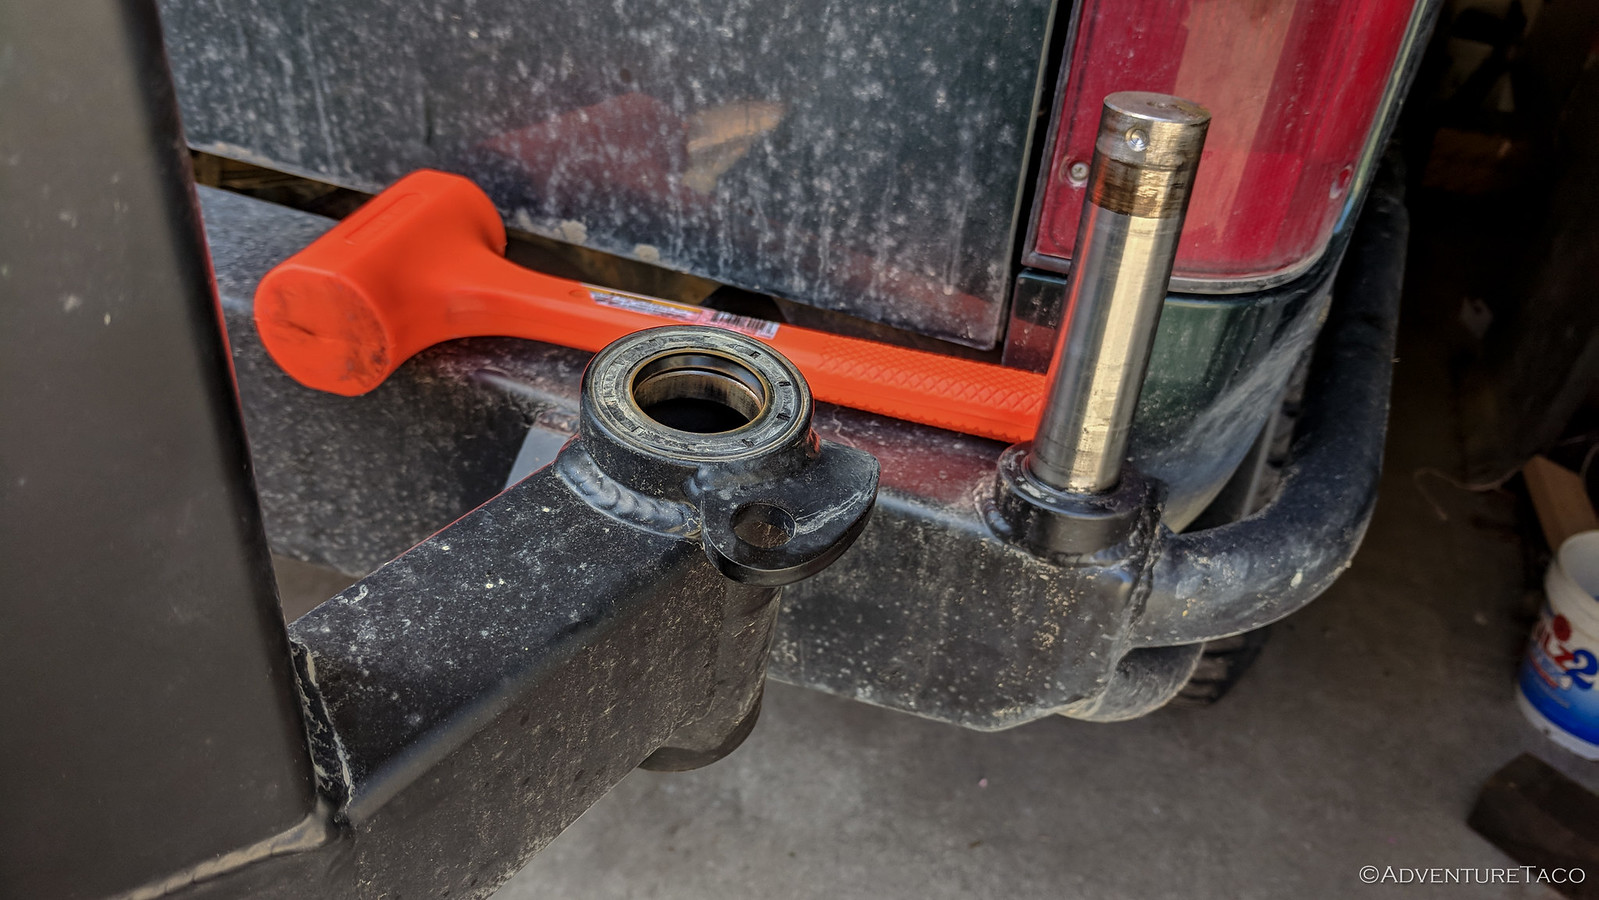
And with that, I was done with the plates. But I wasn't done with the frame - not by a long shot. You see, getting good welds between the plate and frame meant that I'd heated up the frame enough to burn the paint off the opposite side. That's good - because it helps you know you've got a strong weld - but it means I needed to do something to prevent rust from forming.
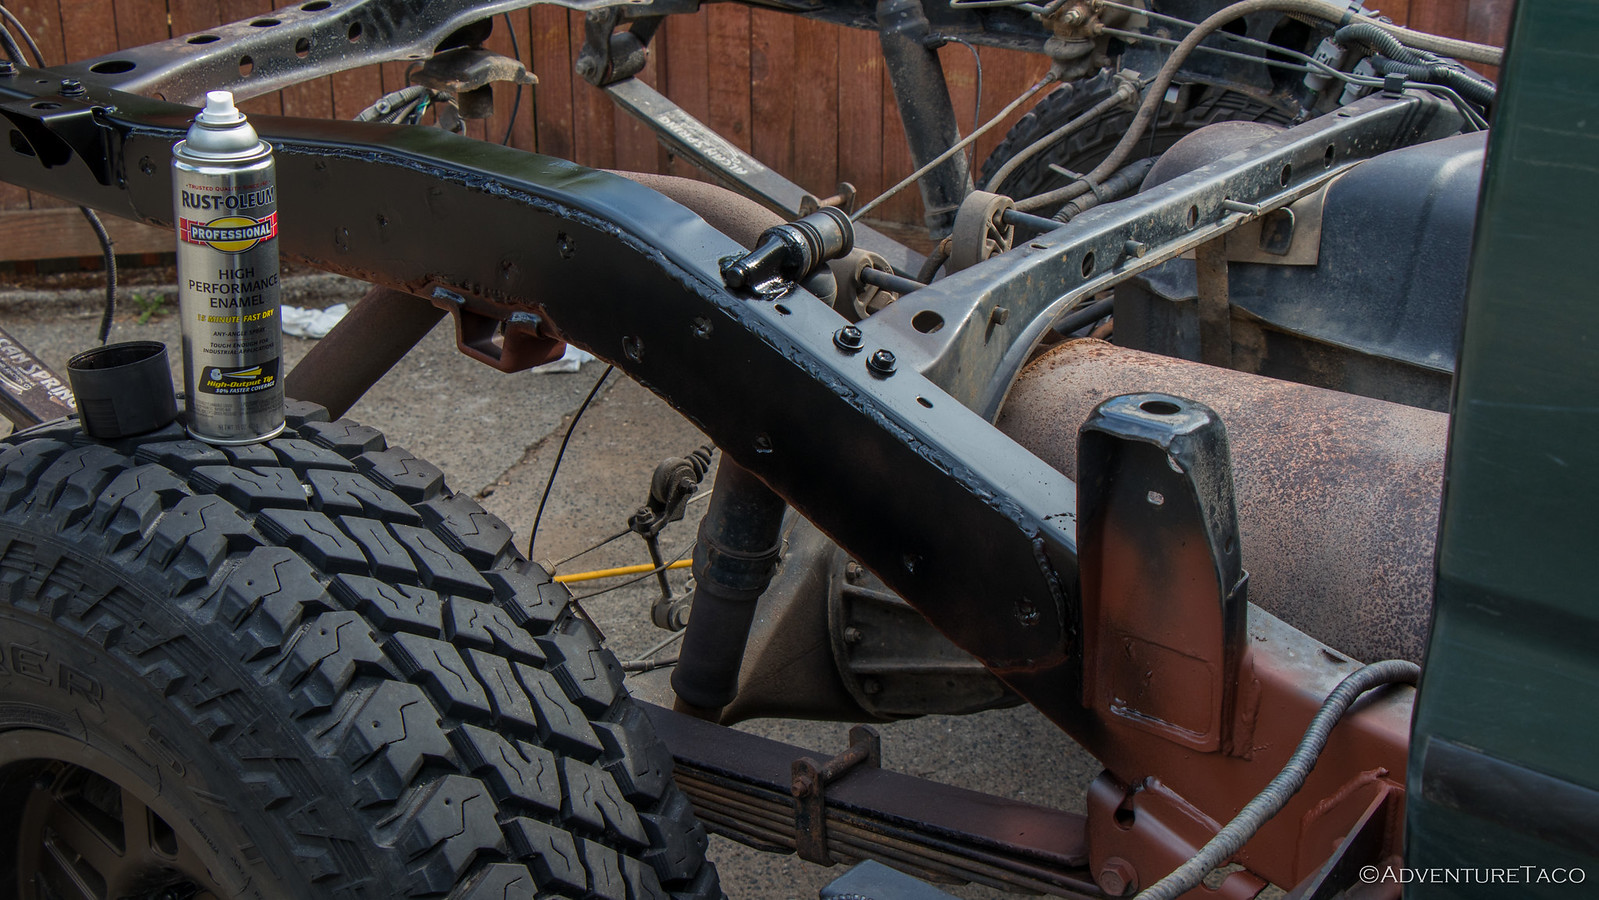
My solution: buy a new sand blaster (Campbell Hausfeld AT122601AV), so I could reach the interior parts of the frame that would be impossible to reach with a wire wheel. Plus, I'd get a new tool!

While a bit messy, I had a blast! (ba dum dum) I wasn't sure if my little compressor would be able to provide adequate air flow - and the reality is that it couldn't. I could blast for ~5-10 seconds and then wait for ~20-30 while it re-pressurized the tank, but when it was blasting, it worked great. Paint came off easily down to bare metal, and the surface was left with a bit of roughness - perfect for paint. I even spent some time cleaning up my rear diff, since I happened to have easy access.
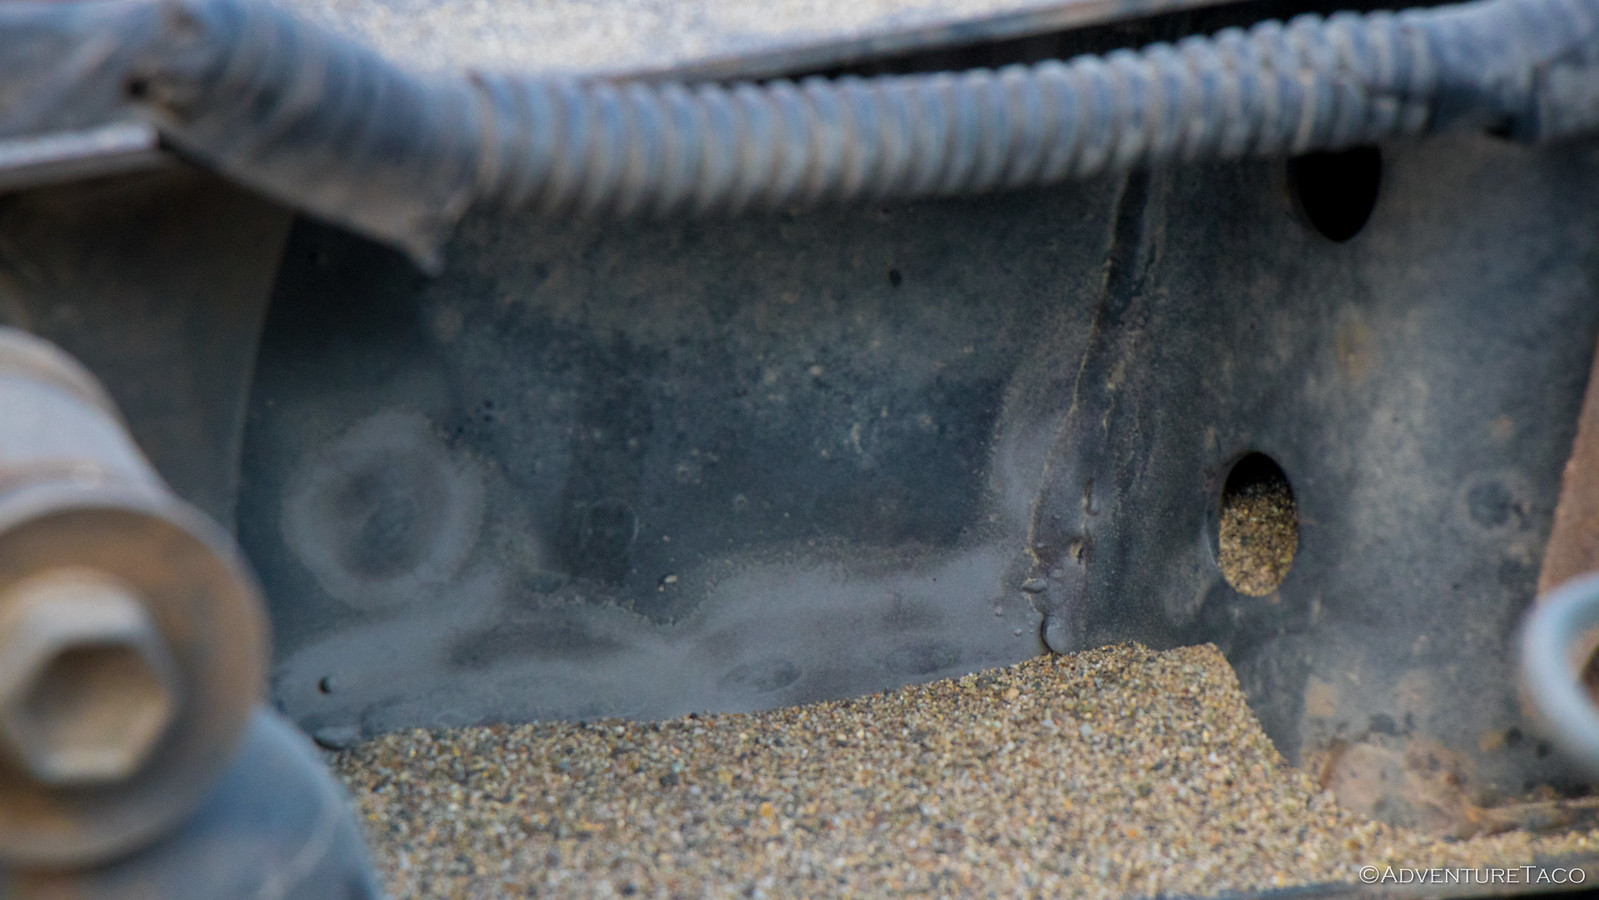


Of course, the entire time, I was extremely happy to have my 3M respirator and earplugs, because it was super dusty and noisy. I'm sure the neighbors loved it! When I was done blasting, I spent a good 20 minutes blowing sand out of every little crevasse in the frame before wiping everything down again with degreaser and mineral spirits to prep for paint. And then, it was time to hit it with primer and paint, just like the outside - trying to get into every nook and cranny in the frame.
With that, the frame reinforcement was done, and the rear of the truck had never looked better. Well, it probably had when it was new, but I never really looked at it then.
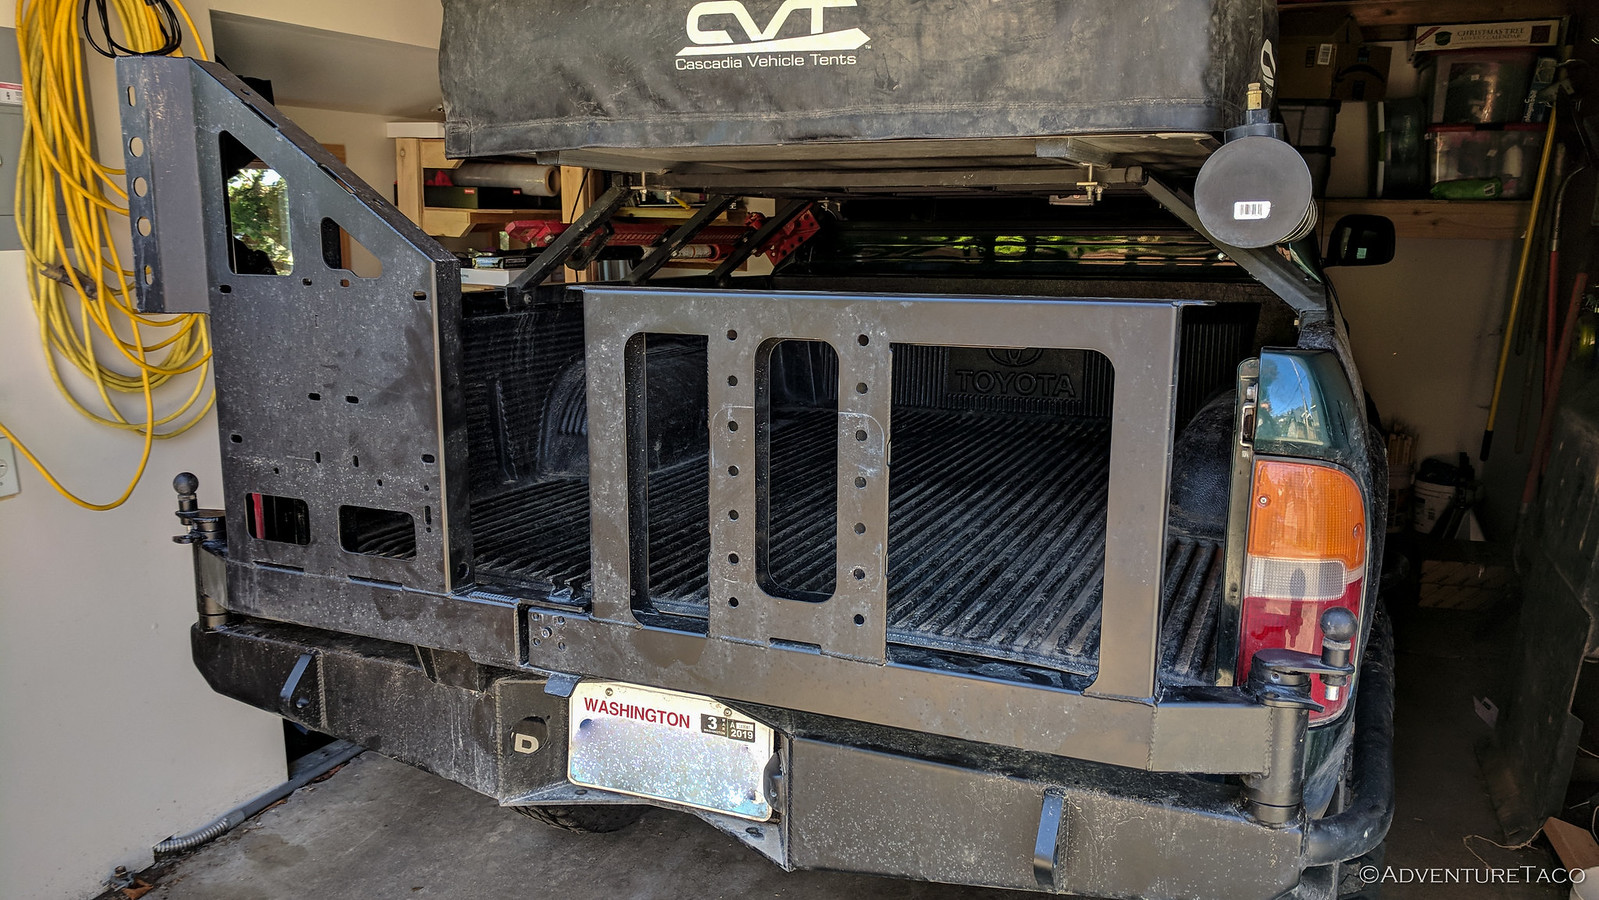
A couple days later, I headed back to Mike's with @mrs.turbodb and a buddy from work, and they helped me lift the bed and bumper back into place. We tightened down all the bolts, and I reinstalled the tailgate, bed rack, and CVT.
It was nice to have the truck back to normal, and know that I could worry just a little less that I was putting form before function.
Who would have guessed that Bigfoot (your Dad) would have raised a maniac!?
OK Mr. Jeep racer. ;-P
I can't believe you did all that!
I'd never be able to get it back together again :+)
Not too hard, there are only six bolts that hold the bed on.
This looks like a great project, but you should know that the reinforcements you added on likely did little to reinforce anything at all. This is due to the structural properties of c-channel. The strength of the channel is found in the upper and lower pieces, called the flanges. The vertical middle part, which you welded the reinforcement to, is called the "web," and carries very little stress at all. This is why nearly all factory holes in the frame are in the web rather than the flange.
The way to strengthen a frame is to increase its Resist Bending Moment, or RBM. In other words, you make it harder to twist. Adding material to the web, as you did, does almost nothing to make the piece harder to twist. The way to reduce twisting is to make the flanges thicker, wider, make the web TALLER, or add extra flanges, which IMO is the most feasible way. For example, by overlapping a piece of angle steel over the rail, welding it to the rail with horizontal welds following the MIDDLE of the web, where there is nearly zero stress at all. Placing a weld in an area that experiences stress may cause it to crack the weld or the rail or both.
Thanks for the thoughtful info; a lot of it I agree with you on! The point of a project like this isn't to reduce the twisting, so much as it is to increase the vertical strength (a bit) to accommodate the additional weight that's always in the bed of the truck.
The twisting of the frame is actually important - at least IMO - when you're out on a trail. In fact, these frames were meant to twist a good bit and making them too rigid can have other side effects (stress on other components). Now of course, one could beef up those other components as well, so there are workarounds to it all.
The other option some people go for is boxing the rear frame. It's a lot of work, but does give the extra strength/rigidity you're alluding to.
Hello! I have been doing a lot of research on how to reinforce my truck a 1994 ford ranger with the idea of putting a 500 hp motor on it. Wanting to use stock suspension with caltracs. I came to the conclusion that I'll be putting a couple of x braces and adding tubular crossmembers to reinforce it and that should be good enough. I'm also considering adding another form of reinforcement on the frame rails in the way you suggested. I'm considering imitating what safe t cap does with their frame rails.
https://www.autorust.com/product/center-frame-section-setart-128-1-s/
So I'm wondering if you haven any thoughts or recommendations for my situation?
Hey John, I think the safe-t-cap system is pretty good. I know a couple guys who have used them on Tacomas and been quite happy. I don't know about your particular situation, but it seems like it should work well. The cross-bracing will be where you get most of your strength though, obviously.