For two years now, my A/C hasn't really worked. At some point - 17 years after it was originally installed - it developed a slow leak. As spring turned to summer in 2018, I noticed that - as Nelly might say - "it's getting hot in herre," even as I cranked up the cold.
For a while, I ignored it. There was no way I was ready to tackle the A/C system from a skills perspective - or so I thought at the time - and I knew that taking it to a shop was going to be rather expensive.
As one does, I opted to play it dumb. I putzed over to my local Toyota dealer and asked them if they could recharge the A/C because it wasn't blowing cold anymore. At least - I figured - I'd find out how bad the leak was based on how long the charge lasted!

Naturally, the service tech at Toyota noticed the lack of refrigerant in the system and probably also performed a vacuum test. Shortly after, the service manager notified me that I had a leak, and that the tech was going to charge the system and add some dye so they could determine the location of said leak.
Or so they thought! After charging the system, the service manager came back out and let me know that the system seemed to be holding pressure, and they couldn't find leaking dye anywhere. And then he said something really cool - he told me to monitor the A/C and that if it lost charge over time, that I should bring it back in and they'd apply the recharge fee to a more thorough diagnosis.
I was super happy with that. ...though, I realize now - after doing this job myself - that the $165 I paid for the recharge is about $150 more than the materials they used to charge the system! 
But hey, I don't want to take away from my joy at the time!
Anyway, I made it through spring and most of summer with at-least-kinda-working-A/C, but by the end of summer, it was quite clear that things were a bit on the sweaty side. But summer was over and I let it go till the next spring, when I took it in again to the same service manager and said, "Hey, remember how you said you'd apply that recharge fee to a diagnosis?" 
And, to his credit, he was like, "Yep, let's do it!" 
At any rate, three hours later, I was walking out of Toyota with a charged system and a bit more knowledge of the leak. It seems the tech poked around for a while under the hood and couldn't find anything - despite another dose of refrigerant and dye - and then used a refrigerant detector tool to sample the air coming out of the vents. Sure enough, it triggered, and the diagnosis was not good.

Now, a curious reader may wonder, "What, pray tell, recommendation did Dan decline?" Well, I declined the $3,800 estimate to repair the system. Because, well, blue book value on the Tacoma is probably right around that amount. And, I hoped - even if I had to take the entire dash out to do it - that I could fix the A/C for a fraction of the price.
And I thought that because it was now two years later, and I was a bit more comfortable poking around in the truck. For better or worse.
Present Day
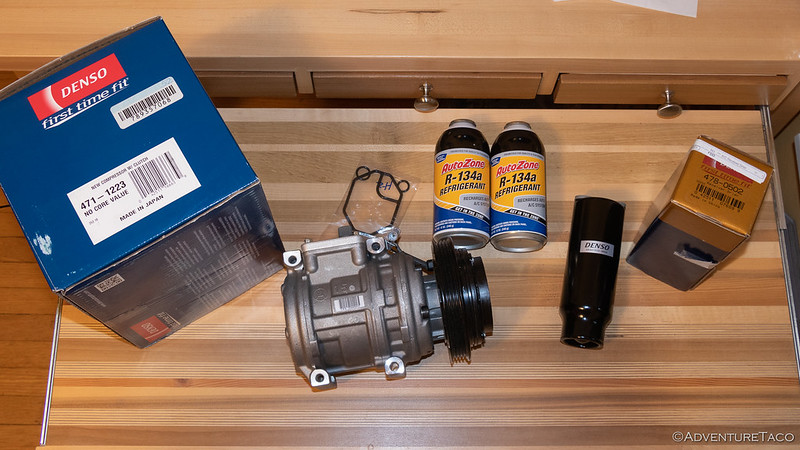
With summer coming - again - I knew it was time to get off my butt and make the A/C work. Knowing that the problem was inside the cab, I figured I might as well replace all the parts there just so I wouldn't have to wonder if it wasn't really the evaporator core, and so I purchased all the parts that I thought I'd need.
- A/C Evaporator Core (88501-04030) - the main component, air is cooled as it's blown over this radiator.
- A/C Pressure Switch (88645-04040) - monitors pressures in the system, and turns off the A/C if pressures aren't within certain tolerances.
- A/C Expansion Valve (88515-22240) - manages how much refrigerant flows throughout the evap core, so the core doesn't freeze.
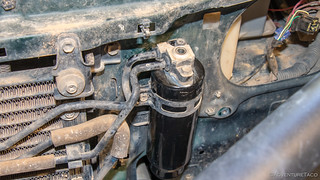
I also did a little looking around online and discovered that any time you replace a component of your A/C system, it's also a good idea to replace the Receiver/Dryer, so I picked up one of those as well:

My wallet a little lighter, I wasn't done hemorrhaging cash quite yet. I still needed to pick up a couple special tools and some miscellaneous supplies. Still, I'd be well under the quote I'd gotten from Toyota.
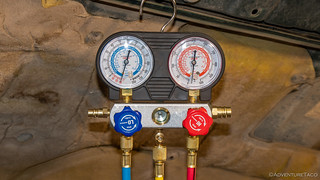
- A/C Diagnostic Manifold Gauge Set - this gauge set would allow me to test the system and to charge the system with 134a refrigerant once I knew it would hold pressure.
- A/C Vacuum Pump - working in tandem with the manifold, the vacuum pump removes all air (and more importantly moisture) from the A/C system prior to charging.
- 2, 12oz cans of 134a A/C refrigerant - this is the stuff that makes it chilly.
- A/C Can Tap for R134A Refrigerant - connects the cans of refrigerant to the manifold gauge.
- Santech MT2580 A/C System O-Ring and Gasket Kit - I figured that I might as well replace any o-rings that I came across during this process, and this Santech kit is made specifically for our Tacomas.
- A/C PAG46 Oil - 8oz - this oil is used to lubricate various parts of the system.
- 10ml (10cc) syringe - used to measure the right amount of PAG46 oil into the system.
- And of course, a few standard tools:

All that in hand, I could procrastinate no longer!
Doing the Job
What follows here is the saga of my specific repair. If you're interested in the step-by-step, with lots of photos version of this job, check out
Replacing the A/C Evaporator Core on a 1st gen Tacoma
(or 3rd gen 4Runner)
So, as one does, I got started by with the Receiver/Drier. I'd hoped that I could simply remove the grill and access it - but that wasn't the case; the entire driver side headlight assembly - and corner light - had to be removed. No big deal really, except that when I went to reinstall the lights, I'd misplaced all the bolts and nuts... which meant a trip to Ace Hardware to pick up replacements.
It turns out that this was a good place to start because replacing the Receiver is reasonably easy. In 20 minutes I was done, and that meant I'd built up a bit of confidence!

Next, it was on to the Evap Core itself. The process of removing it is reasonably long and detailed - though not really that hard, and definitely not the horrible experience that I'd been led to believe - and another couple hours later, I had the Evap Core sitting on my workbench, its housing removed.

I could smell victory. Or maybe that was my own sweat.
At any rate, I continued to follow the instructions I'd put together, and soon I had everything installed back in the truck and had my A/C Manifold Gauge hooked up to the system in order to pull a vacuum. Things really couldn't have been going better, I thought... prematurely.

To my delight, the cheap vacuum pump did just fine with my big-old compressor and I pulled a full -30inHg for half an hour while the compressor hummed away in the background. Sure that I was going to be charging up the system in no time, I turned off the compressor and futzed around on my phone while I waited to ensure that the system maintained the vacuum for another 30 minutes.

And this, my friends, is where the trouble started.
After 15 minutes, the system was down to -25inHg, and by the time 30 minutes had elapsed - well, there was clearly a problem and I was bummed. I put everything away for the afternoon and went inside, not sure what my next steps should be. Did I just pay $270 for a new Toyota Evap Core, only to have it be no good?! And, was I really so unlucky as to have an evap core fail in the truck and then get another faulty one when I went to replace it?
I stewed for an hour or so, and as I was relating the story to @mrs.turbodb, I wondered out loud - I wonder if I should go to Harbor Freight and get another manifold gauge, just in case the leak isn't in the A/C system at all.
It was a genius idea that someone brighter than me would have had hours earlier. With 20 minutes until Harbor Freight closed, I jetted down and picked up a second manifold gauge and also grabbed a Refrigerant Leak Detector - a neat little tool that detects R134a in the atmosphere and sounds and alarm when it is detected. I figured that if worse came to worse, I could use it to find where the leak was.
The next day, I hooked up the new manifold gauge set and once again pulled a good vacuum @ -30inHg - but I didn't get my hopes up until an hour later when the gauges were still sitting at -30inHg.
Success!
Except, no. See, it turns out that I'd forgotten to open the Schrader valves on the high and low pressure lines in the engine bay - so all I'd done was hold a vacuum on the manifold gauge itself. 
Of course, when I correctly setup the manifold and tried to hold vacuum on the system, I was once again foiled - though, this time the vacuum only dropped from 30inHg to 27inHg in half an hour. At least this time, I knew that the manifold wasn't the thing leaking - or rather, it wasn't also leaking.
I broke out the Refrigerant Leak Detector and poked around the engine compartment - focusing on the bits I'd replaced - the Receiver/Drier, and the connections through the firewall, as well as around the compressor and condenser. No alarms.
Hesitant to see the results, I moved into to the cab and stuck the sensor into the air vents. Sure enough, it triggered! Somehow, someway, I had a leak in the brand new evap core I'd bought from Toyota. So, I pulled it all out and tested it with the detector. Yep, even though I couldn't see any of the dye leaking out anywhere, the detector was sure that this thing was hot.
Well damn.
So, I called up the (non-local) Toyota dealer from which I'd ordered the evap core, and the parts manager was actually great. I told him the situation, and speculated that perhaps the reasonably fragile evap core had been damaged in shipping and he offered to send a prepaid return label, as well as refund my purchase price once he received the return.
Which was great, except that it left me without an evap core.
I considered getting one at partsgeek.com, but that would take a week or more and still involve shipping - so in the end I decided to pay twice as much (but still half of Toyota) and head down to Napa and pick one up locally.
The build quality on the Napa evap core didn't look quite as good as the OEM core, but one thing it did have going for it was that it came with a gasket attached to the inlet and outlet - a gasket that kept the entire core pressurized like a soda can until I removed it to install the pressure switch and other components that I'd purchased for the job.

And boy, was there pressure released when I removed the gasket. That was a good thing, because it meant that I knew that any leak in the system now was not a result of the evap core.
So, I set about putting everything back together for the second time - now, much more confident in my movements - and I pulled a -30inHg vacuum on the system. Triple checking that I'd opened and closed the right valves on the manifold, I left it alone for 45 minutes - my fingers and toes metaphorically crossed.
It worked!
After such an ordeal, you can imagine my joy when I returned to find the same -30inHg readout on the manifold.
I set about charging the system - a reasonably easy process after everything else I'd been through and then wrapped up the job by reinstalling all the bits I'd removed in order to get at the components I'd replaced.
Now - the question remains - is it really fixed? I don't know - only time will tell, but by all measures it should be - and if it's not then I guess my next step is to replace the A/C compressor and condenser, since those are the only components I haven't replaced at this point!
But hey, for now, the truck is COLD. Fun times 
 .
.

Update: 5 July 2020
The A/C isn't fixed. It worked great (held the charge) for about a week and then stopped blowing cold. So, there's more to come regarding this saga...

