February 14, 2017.
You may recall that no too long ago I decided to purchase a CVT, and then of course realized that the truck would need a bed rack to attach said CVT. That led to my Millermatic 211 acquisition, and the realization that this bed rack was the beginning of yet another expensive hobby (metalwork).
Excited to get going, I started looking for bed rack designs. I wanted something that
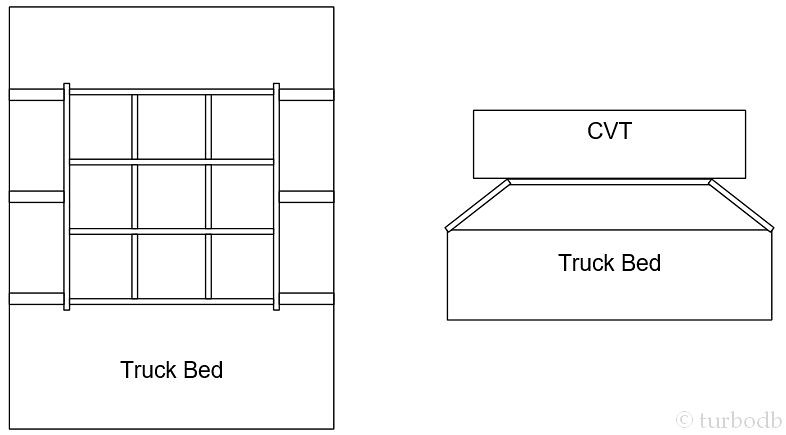
- would support the CVT - both on the road as well as deployed
- would position the top of the CVT "in-line" with the top of the cab - for looks, to minimize drag on the freeway, and to give as much storage underneath as possible
- was as light weight as possible (no need for a huge rack)
- would be a good place to mount additional gear (hi-lift, shovel, rotopax, etc.)
Of course, I wanted all of this before I did any actual measuring of the bed, cab, CVT, and additional gear - so it was only semi-realistic. Details.
After spending a bit of time on TacomaWorld, I stumbled across @Box Rocket's bed rack design that he built for himself, and then a couple other folks several years ago. It seemed like a good contender (if he was still making them, I'd probably have just purchased one) with a couple minor tweaks - namely, I wanted it to ride a bit higher, and I didn't need it to have the tie-downs or light mounts (since I was just going to mount my tent on it). Oh, and I needed something to protect my bed rails - I wasn't sure of his design there, but I didn't want the legs of the rack to scratch up the rails too much (even though I'd have to drill them to attach the rack).
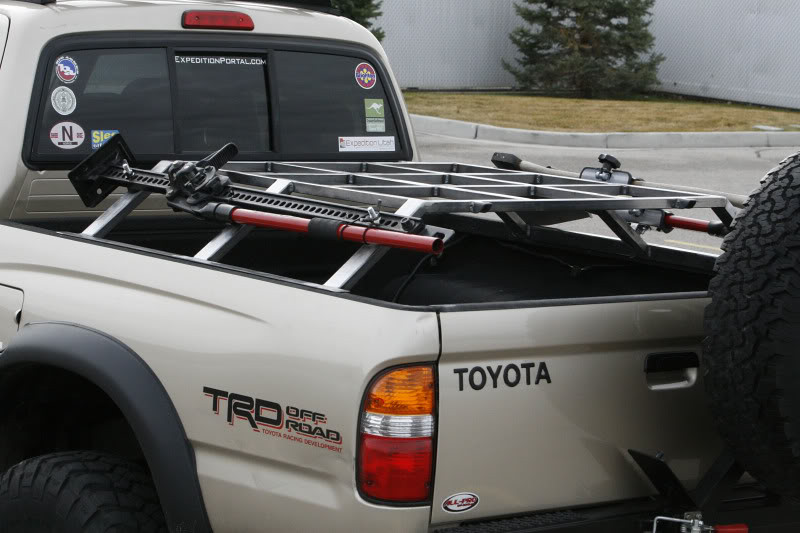
So, I sat down for a couple hours in the bed of my truck with a tape measure and dimensions of my various "things to haul" to figure out exactly what I wanted. In the end, I came up with a design that I was happy with and met all my criteria but one: I wouldn't be able to mount the rotopax. Unfortunately, the two gallon containers that I have (fuel and water) were just slightly too large to mount on the support arms and have clear the bed rails and bottom of the CVT when it was deployed.
We all make compromises, and this one seemed relatively minor. Plus, it leaves open the possibility of a swing-out rear bumper in my future, which I like the look of (even though I don't love the weight profile).
Having built pretty much all my own furniture, as well as constructed the better part of three homes, I'm completely at home in a hardwood warehouse or lumber yard. But boy, my first trip to the steel yard was nerve racking. I didn't know the right terminology, didn't know where to look for what, and just generally felt out of place.
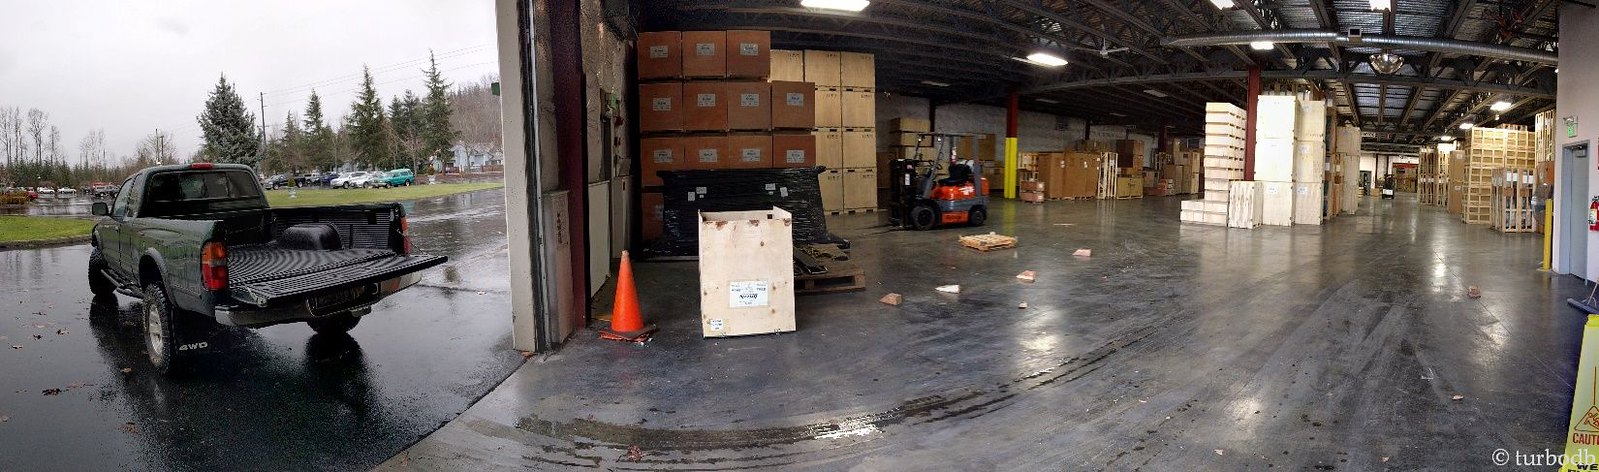
But I walked out with what I needed for the rack, as well as some supplies to build a welding table.
Turns out, the rack is bigger than the table, so building the table first was a bit of a waste of time (though it did get me some practice). And after building the table, it was time to build the bed rack.
Not having any tools for working with metal, my first order of business was to get something to cut the steel I'd purchased. For the frame of the welding table I'd used a grinder, and boy - the accuracy of those 45 degree corners left something to be desired. So, I looked around and finally decided that a horizontal/vertical bandsaw was going to be the most versatile option for my new hobby.
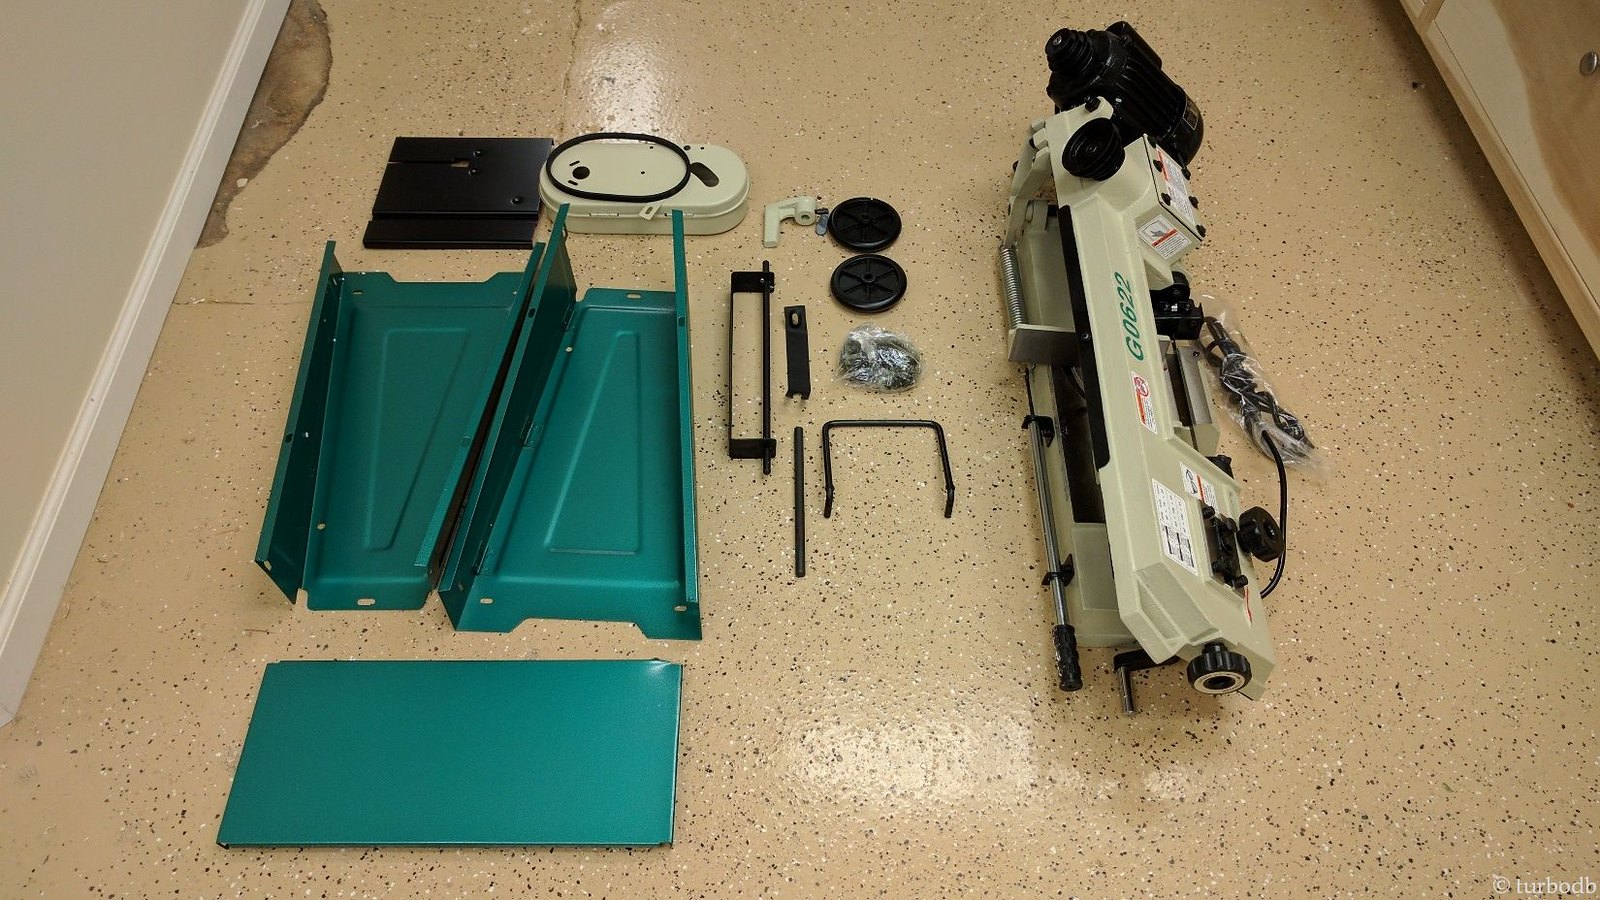
So it was off to Grizzly tools, to pick up my new G0622 metal bandsaw. As you may have noticed - the rack is getting cheaper all the time!
November 2023: Grizzly no longer makes this bandsaw, and their replacement is 3x the cost, so I can't really recommend it. The good news though is that several seem to come out of different doors at the same factory, so if you want a nice, small bandsaw for occasional use, this WEN BS4664 seems like a great alternative!
Smaller than I'd expected, it was easy to put together when I got home.
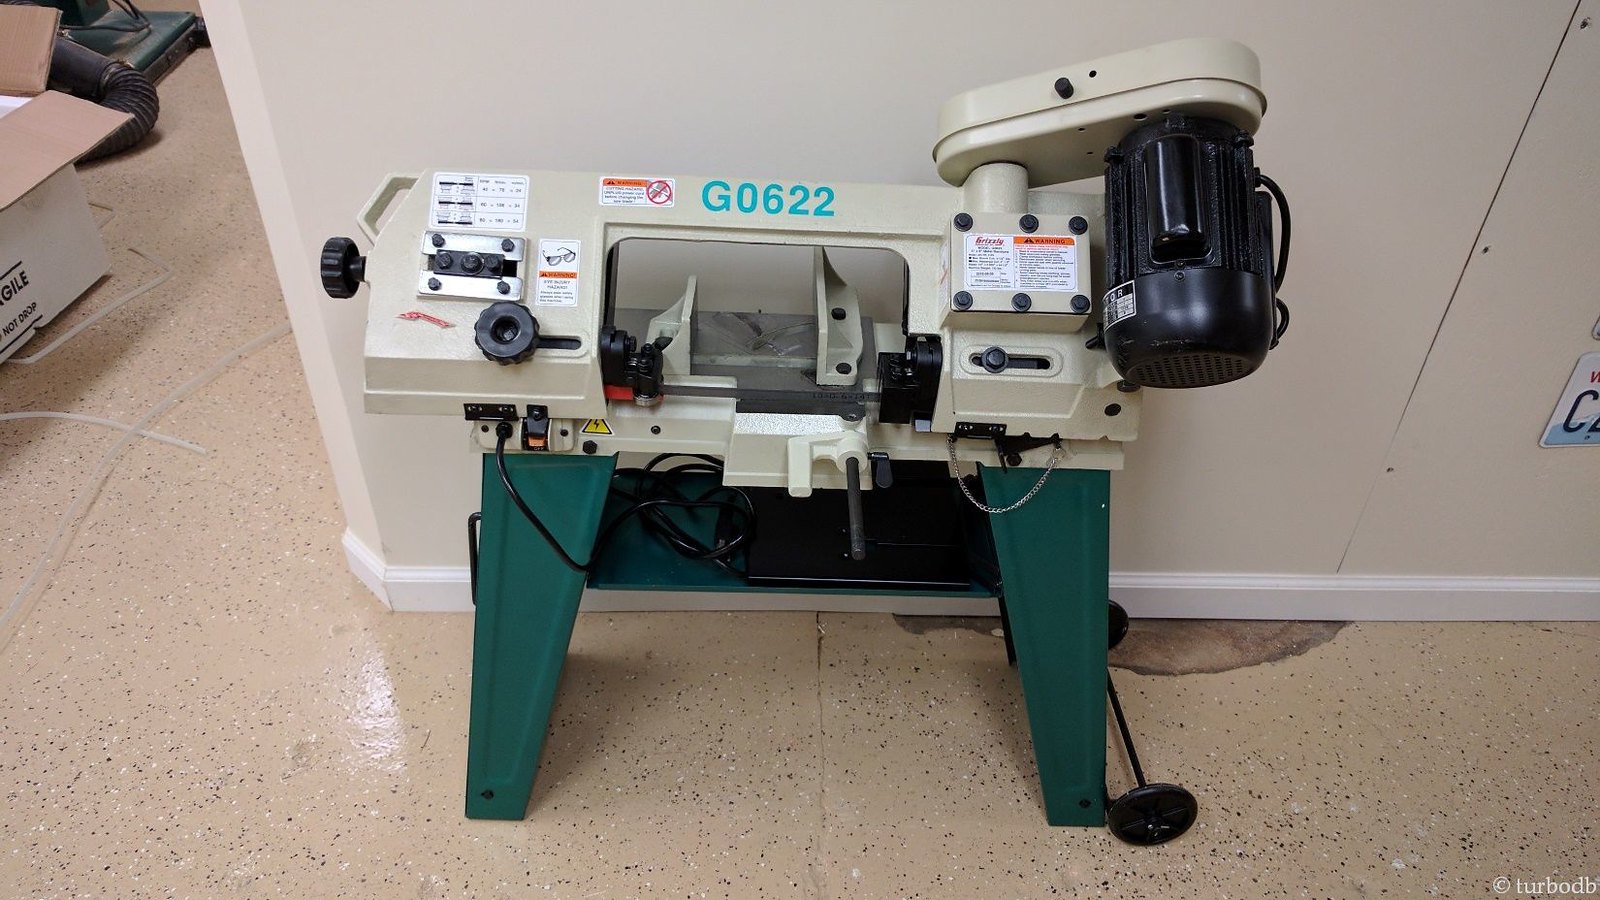
Assembled it worked great, and being a bandsaw, I felt right at home using it - although I have been careful to keep it quarantined from the rest of the shop - I don't want to get the oils and metal shavings mixed up with my wood.
But I still wasn't ready to build my rack.
One of the issues I'd been running into as I measured for the rack in order to make a detailed set of plans was that I had to keep moving between the truck and the shop. That was a pain, especially in the 35°F weather we were having. Plus, I knew I wouldn't be able to build the rack in the truck.
So, it was time to build a jig. A full-size mockup of a first gen Tacoma bed, along with various brackets and tabs that would enable me to more accurately measure, assemble, and weld this puppy together.
But there was a catch. And I liked it. I'd make the jig out of wood.
Would it work? Maybe. Would it be sturdy enough? Maybe. Would it burn up as I welded? Maybe (but I hoped not).
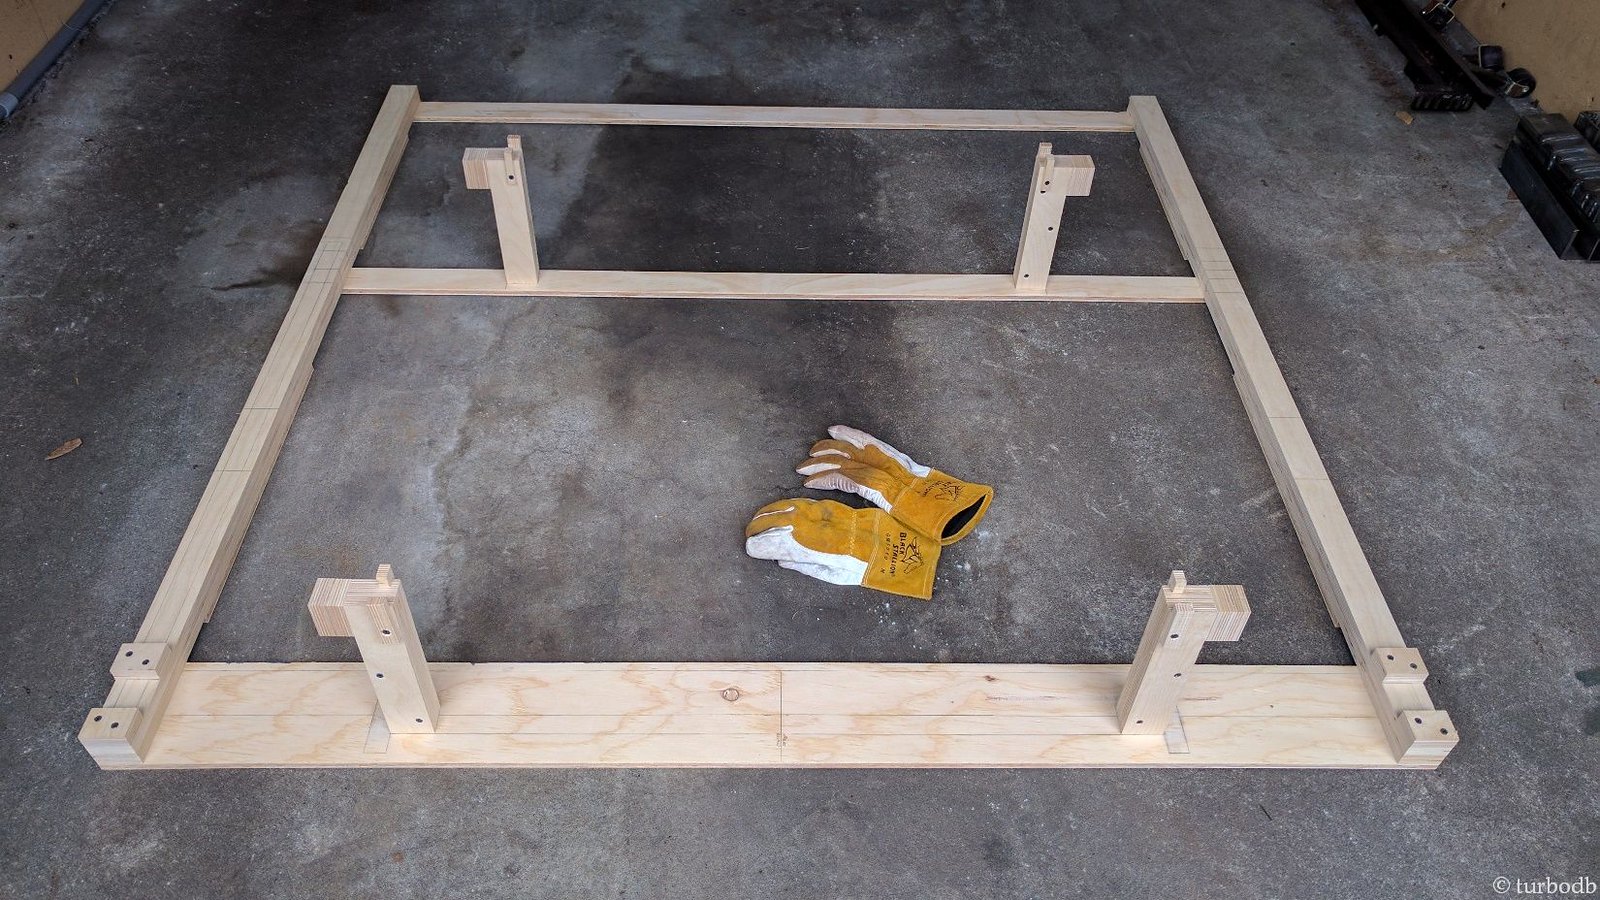
In the end, the rack came out just fine - relatively quick to build, great for alignment, and seemingly sturdy enough for actually welding on. Plus, now I could build more racks (more easily) if this first one actually worked out. Maybe even enough to pay for all this new equipment!
Boy, I sure am getting ahead of myself.
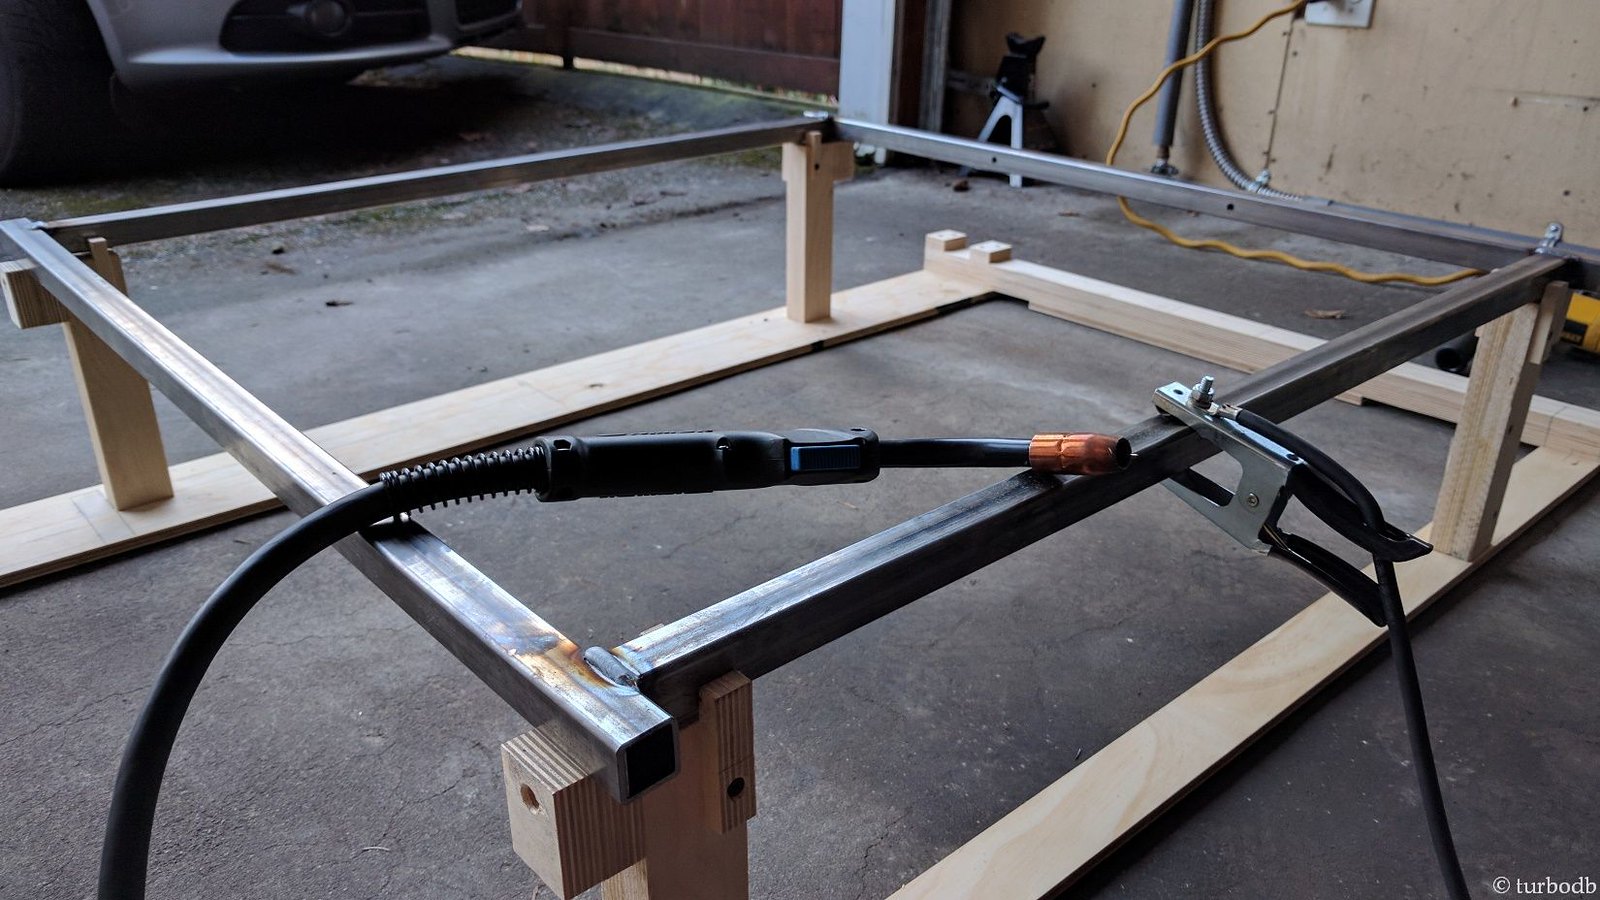
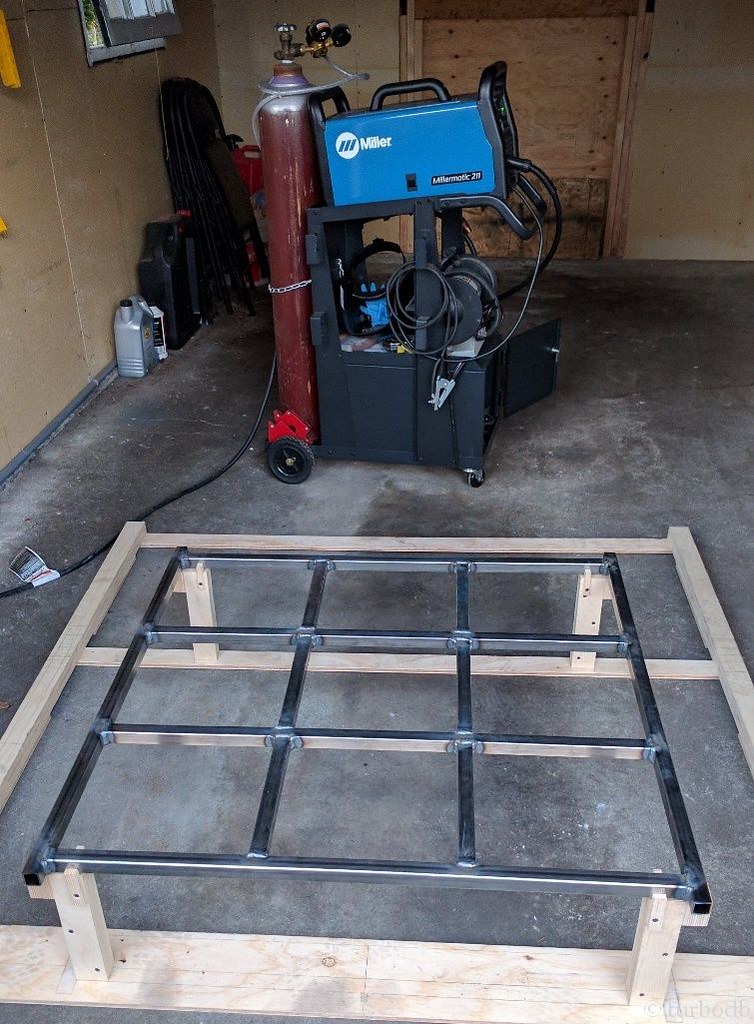
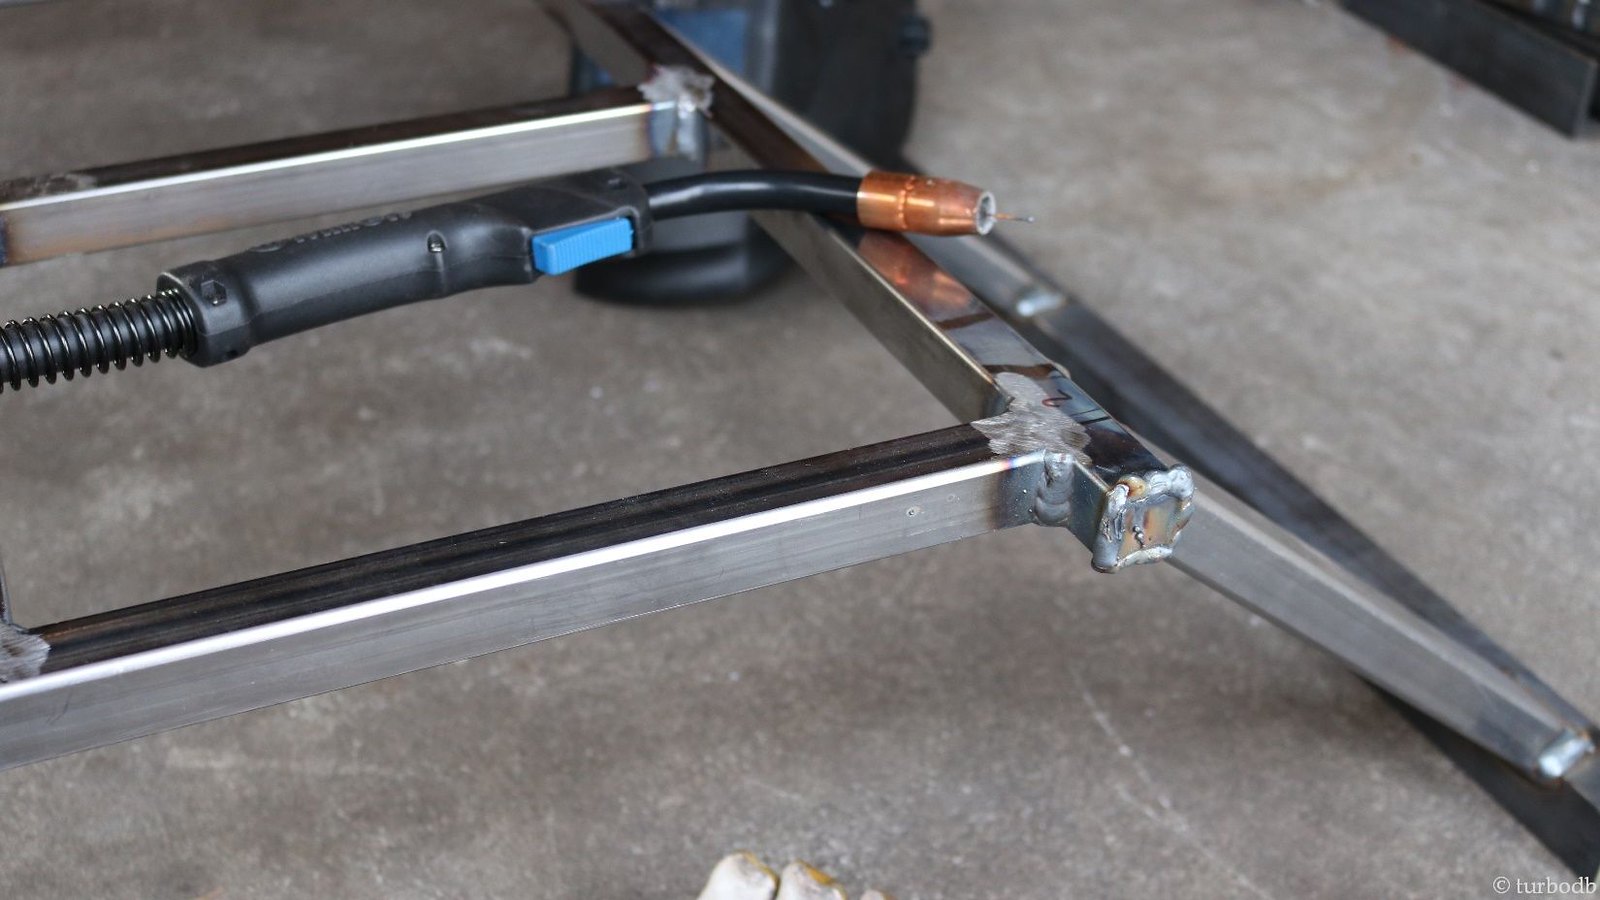
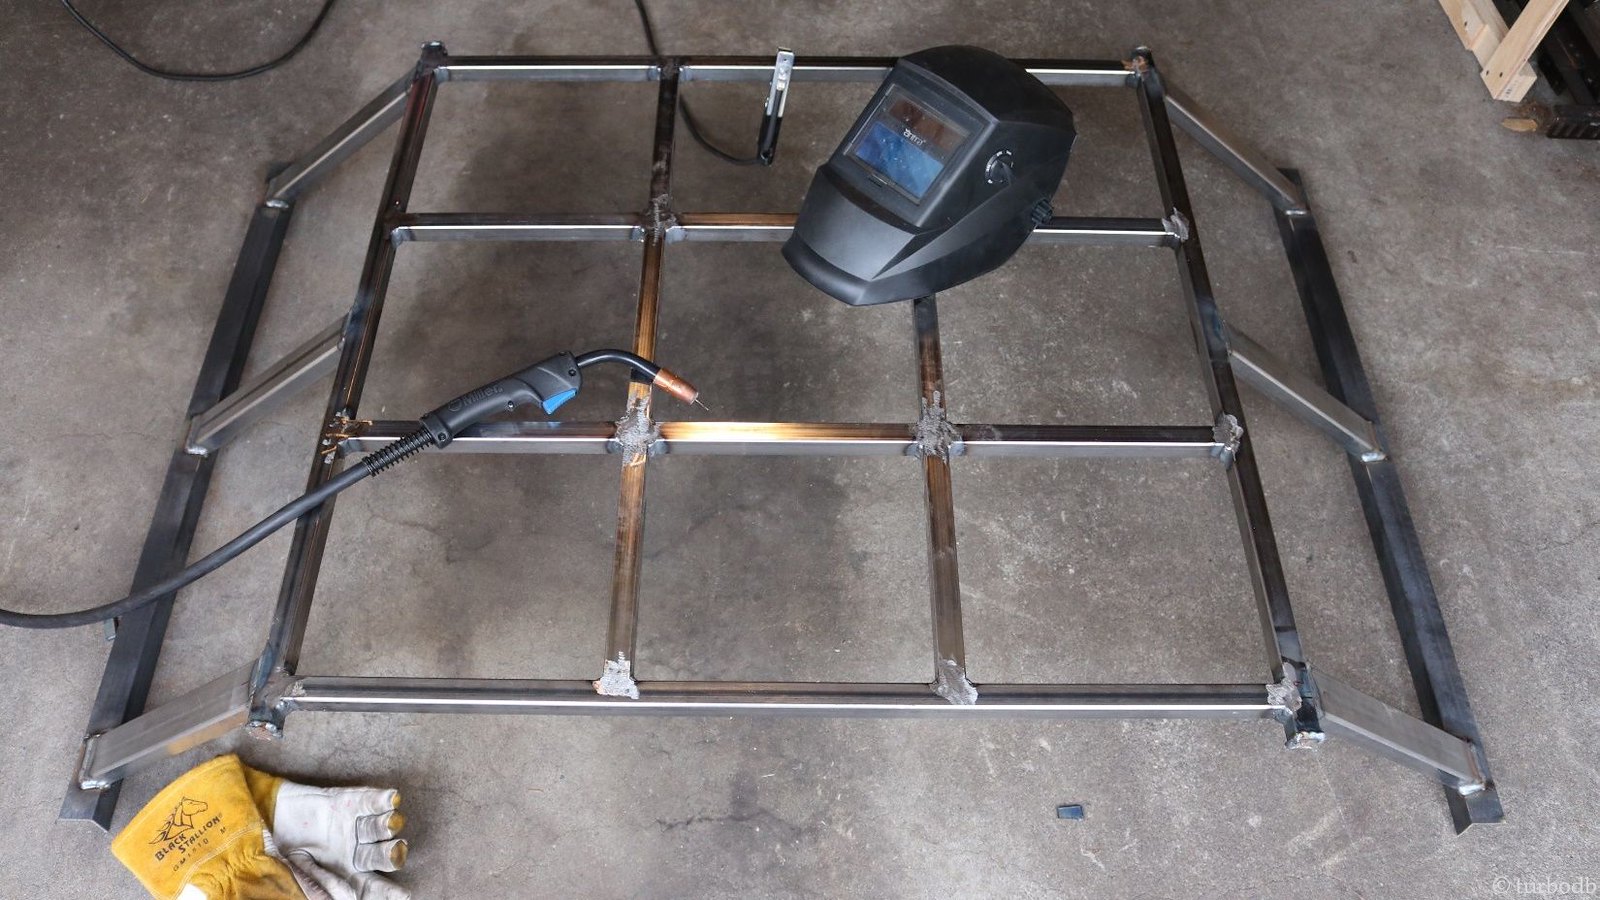
With the rack built, the bulk of the parts cut on the bandsaw, and an in-the-garage temperature of 29 degrees, I setup the frame of the platform and started tacking everything together, following along with full welds. Before long, I had a frame.
And not long after that - the platform of the rack was complete.
And the jig wasn't a pile of coals. Success!
The welds weren't the most beautiful I've ever seen, but they were better than my first welds a month ago, and I knew I'd be grinding them down anyway, so it didn't matter too much.
Of course, so far, I'd stumbled through the easy part. The legs of the rack were next, and those were a bit more complicated.
But first, we were off to Hawaii for ten days!
With ten days to think about how hard the legs were going to be, I was itching to get going when we returned. The next weekend I set about building a template, when I realized that I could make the legs stronger by notching both ends of the legs, so they cradled the rack and the sides of the bed.
Of course, this would also make my fabrication life much harder. It was a no-brainer. Notches!
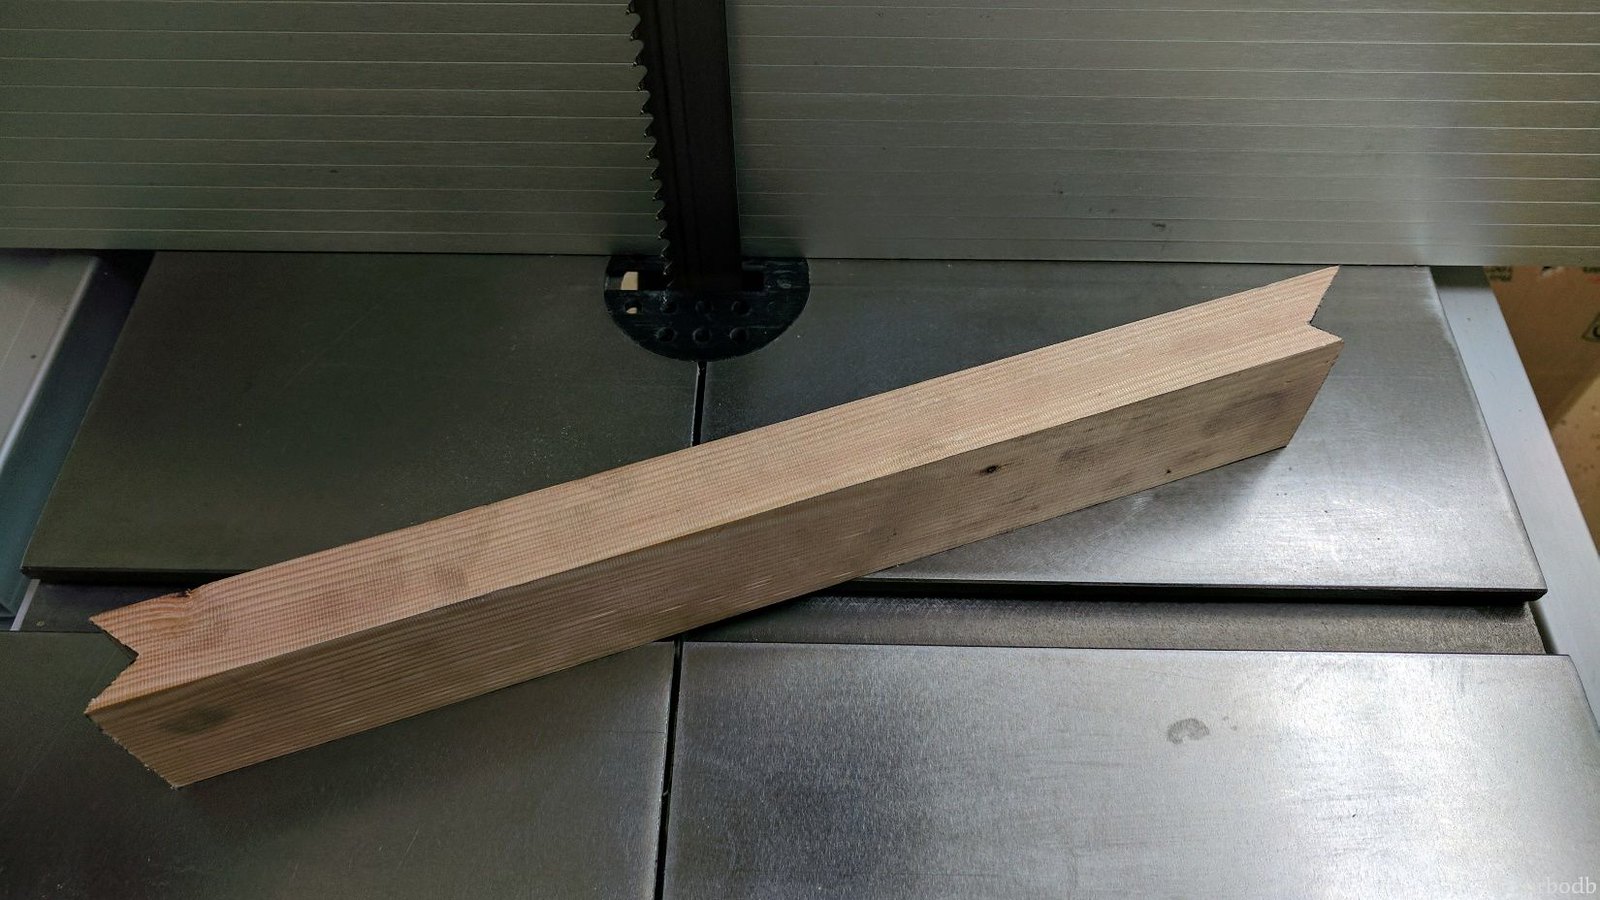
Template built, I traced the pattern onto a piece of metal tubing and tried to figure out how to cut it efficiently on my bandsaw. Ultimately, I don't think I ever found anything - and a task that would take me 15 minutes with wood, took me a good couple hours. But in the end, I had six legs.
…that when I test fit them, were all 1/8th inch too long.
No problem with wood, but with metal - well, it's a problem. At least for me. I ended up grinding each and every one down (a bit too much) ...in another hour. Sigh.
But then, with some more welding and a bit of grinding (and by a bit, I mean a lot - they say you're either a welder or a grinder…and I'm clearly still a grinder), I had a bed rack. And to my surprise, it seemed to be the right size to fit a 2000 Tacoma pickup bed.
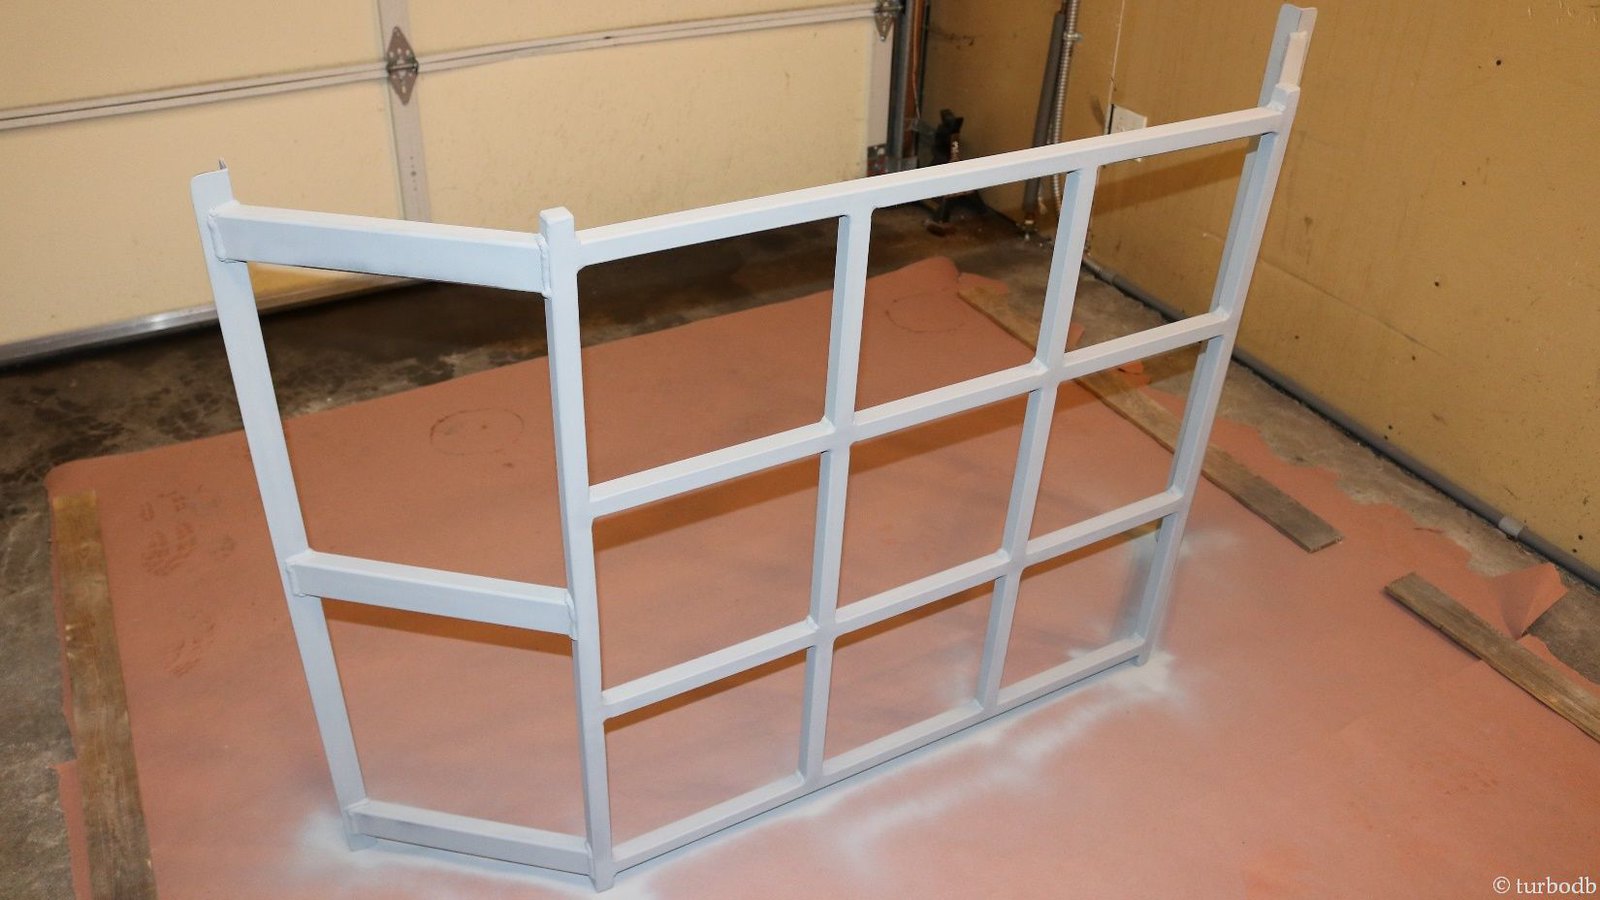
All that was left was prep for paint, priming, and painting. Naturally, that would take two weekends - because in prepping for paint, after using a wire cup on the grinder, I painted on some phosphoric acid (to convert any rust and prevent future rust). After rinsing off the acid, rather than eliminating rust, the entire rack flash rusted. "Minorly upset," I set it aside until the next weekend, when I could go over the entire thing again with the wire cup.
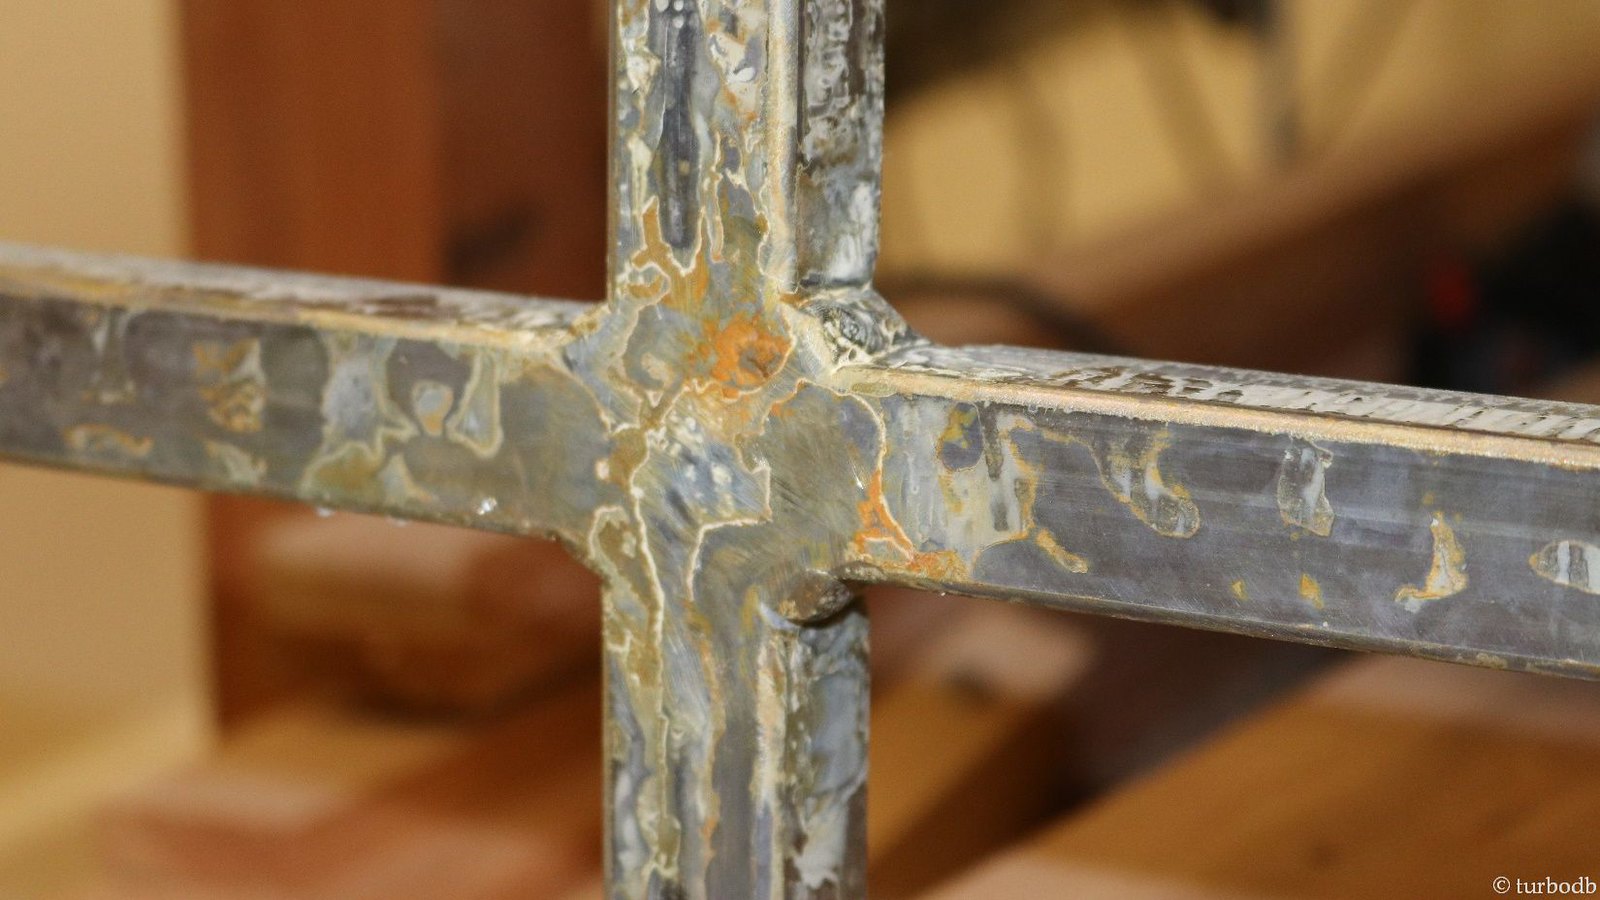
Some grinding later I was ready for paint - but with temps below 50F, I wasn't sure that I'd get good adhesion, so I warmed up the garage using a propane heater and then sprayed on some Rustoleum primer and two coats of rubberized undercoating with no hiccups. Then, it dried for a week.
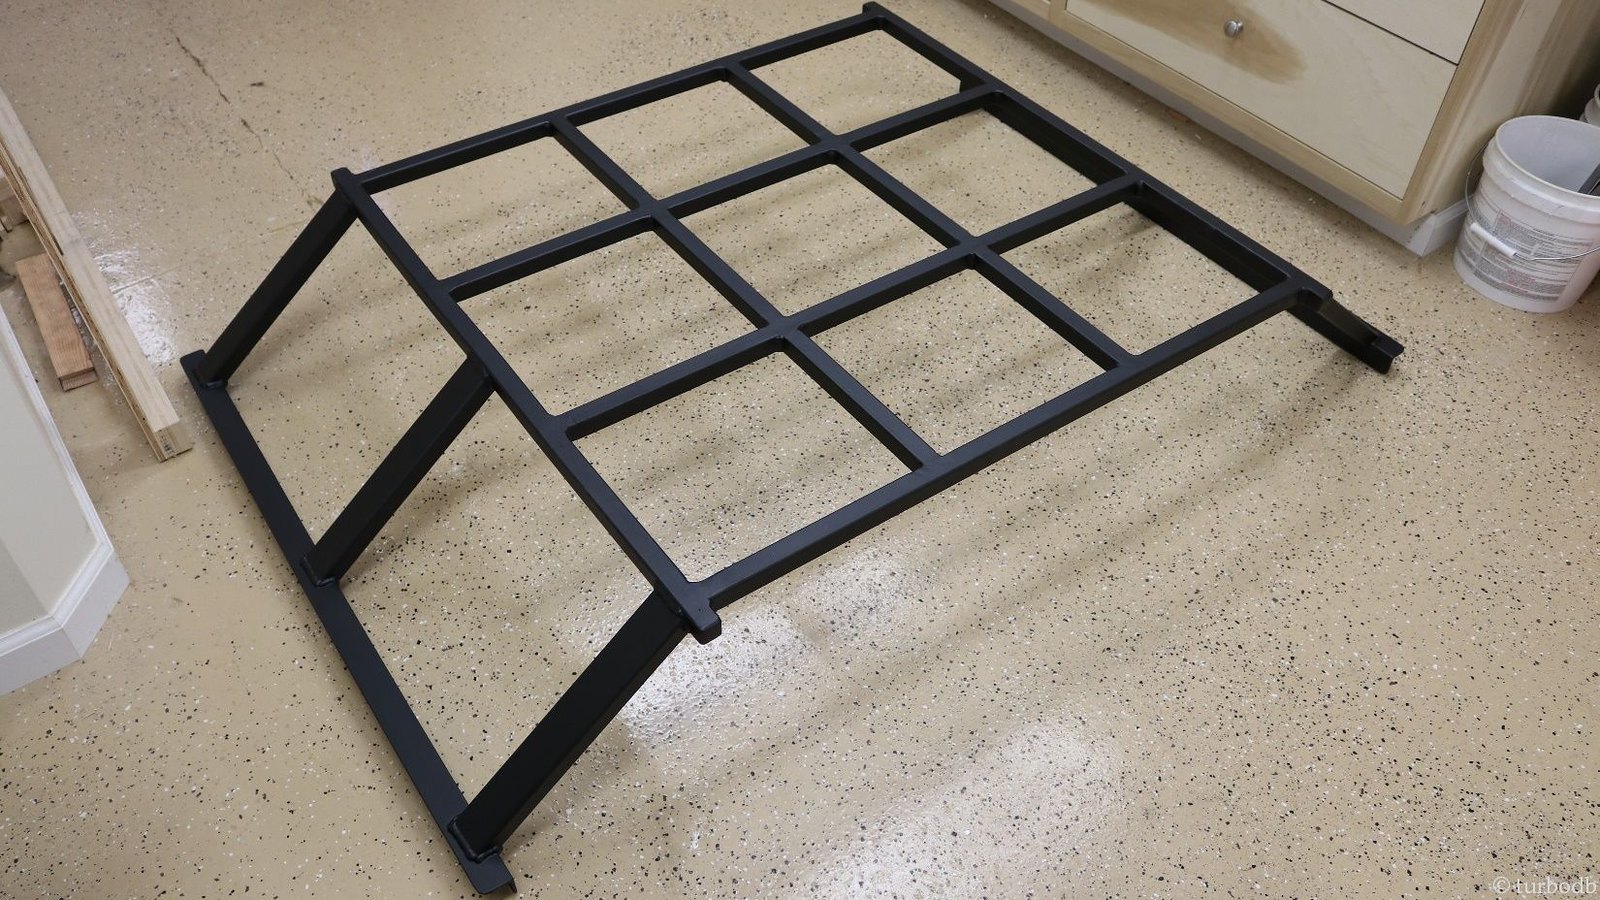
After all of this, installation was easy. A bit of high density rubber to protect the bed rails, and it fit like a glove.
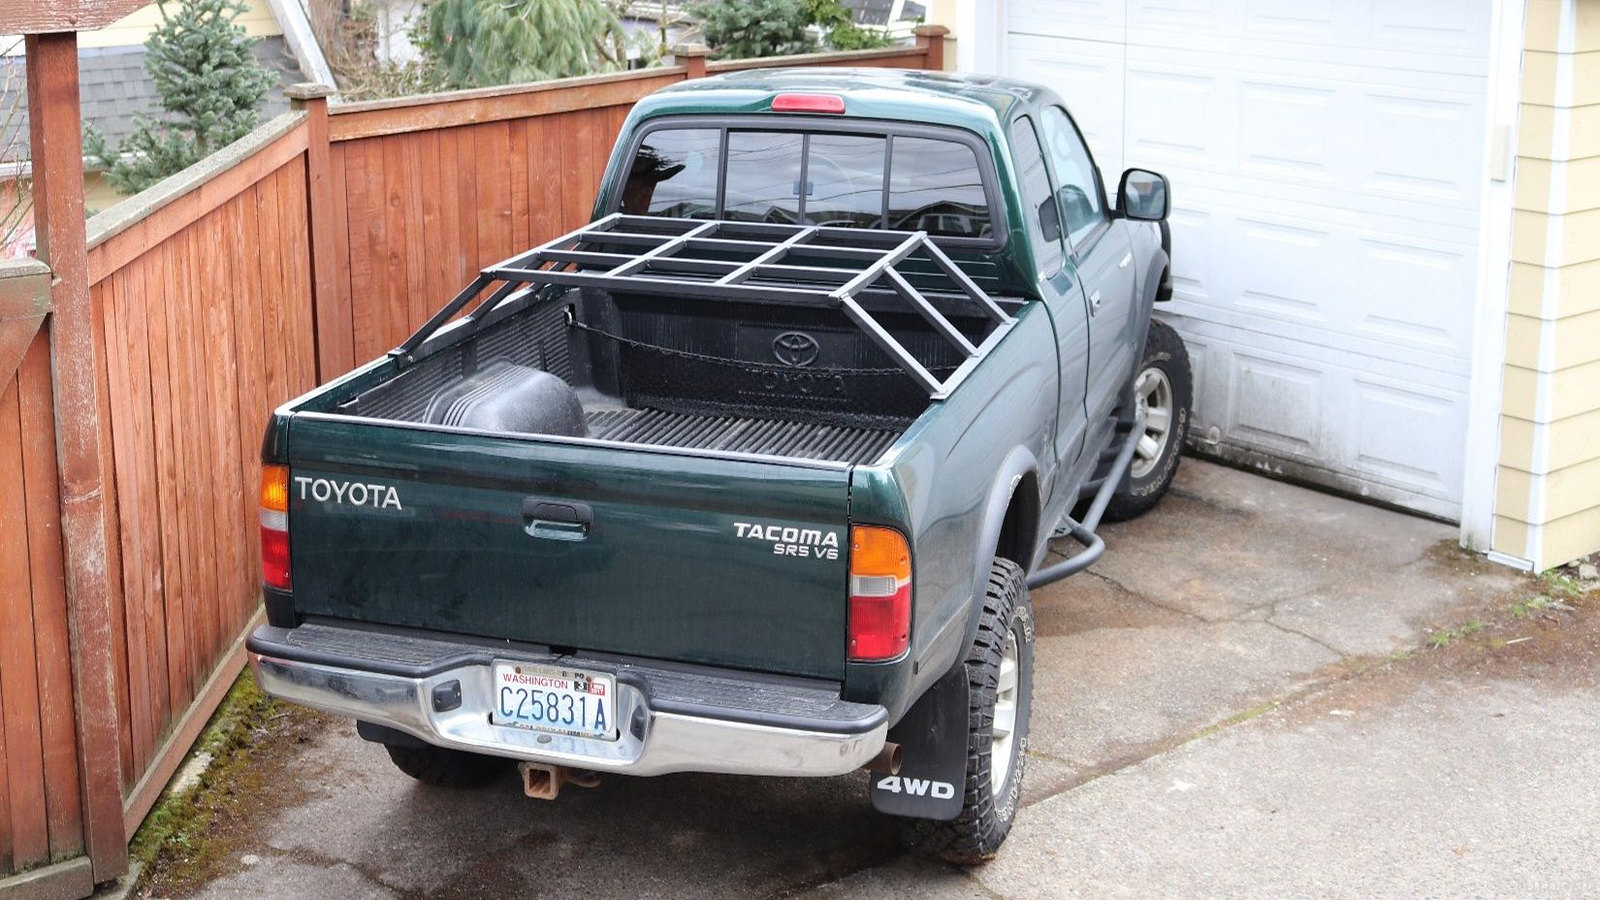
Looking back, this was a great project. I mean, it cost me about five times (or more) what purchasing a set of bed bars from Relentless would have cost, but I had a great time. And who knows - there might just be someone out there who wants me to build them one…for the right price!
Now, I just need to pick up that CVT!