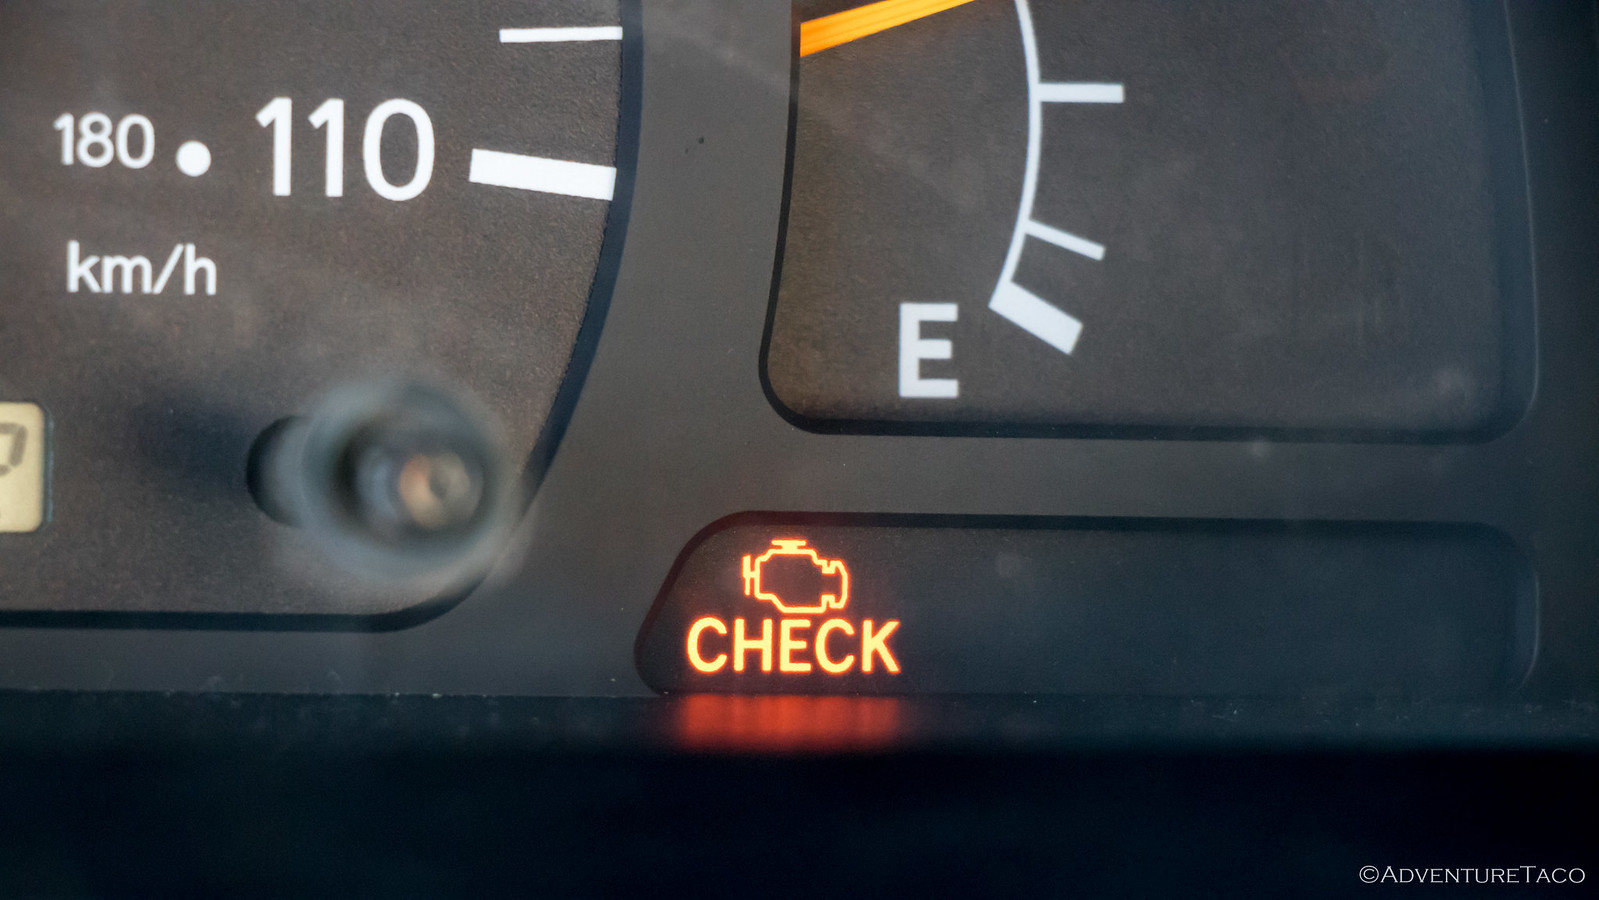
I was ready for adventure - running solo, I was returning to Death Valley, having only just wet my appetite on our first trip back in January. With 2500 miles to go, I knew I had a lot of driving ahead - but I was ready - or so I thought - when, less than 50 miles in, the Check Engine Light (CEL) came on.
I've covered the details of the first hours of diagnosis in my Back to Death Valley trip report, so if you haven't read that (and are interested), I'd recommend starting there. The plan here is to go into what happened when I returned - the process of chasing the P0171 source, and getting it fixed.
It's long, and wordy, and follows my learning process. If you already know everything here, sorry about that!
- - -
Upon my return, I started with a bunch of research into what can cause the P0171 code on a 96-04 Tacoma, which is set when Long Term Fuel Trim (LTFT) and Short Term Fuel Trim (STFT) exceed 15% for an extended period of time (over the course of two trips). It's not a small list, and I'm sure that even what I uncovered isn't complete:
- Dirty or malfunctioning mass airflow sensor (MAF)
- Vacuum leak
- Malfunctioning air/fuel ratio sensor (AF)
- Fuel injector clogged
- Fuel filter clogged
- Fuel pump weak
- Malfunctioning positive crankcase ventilation valve (PCV )
- Engine coolant temp sensor malfunction
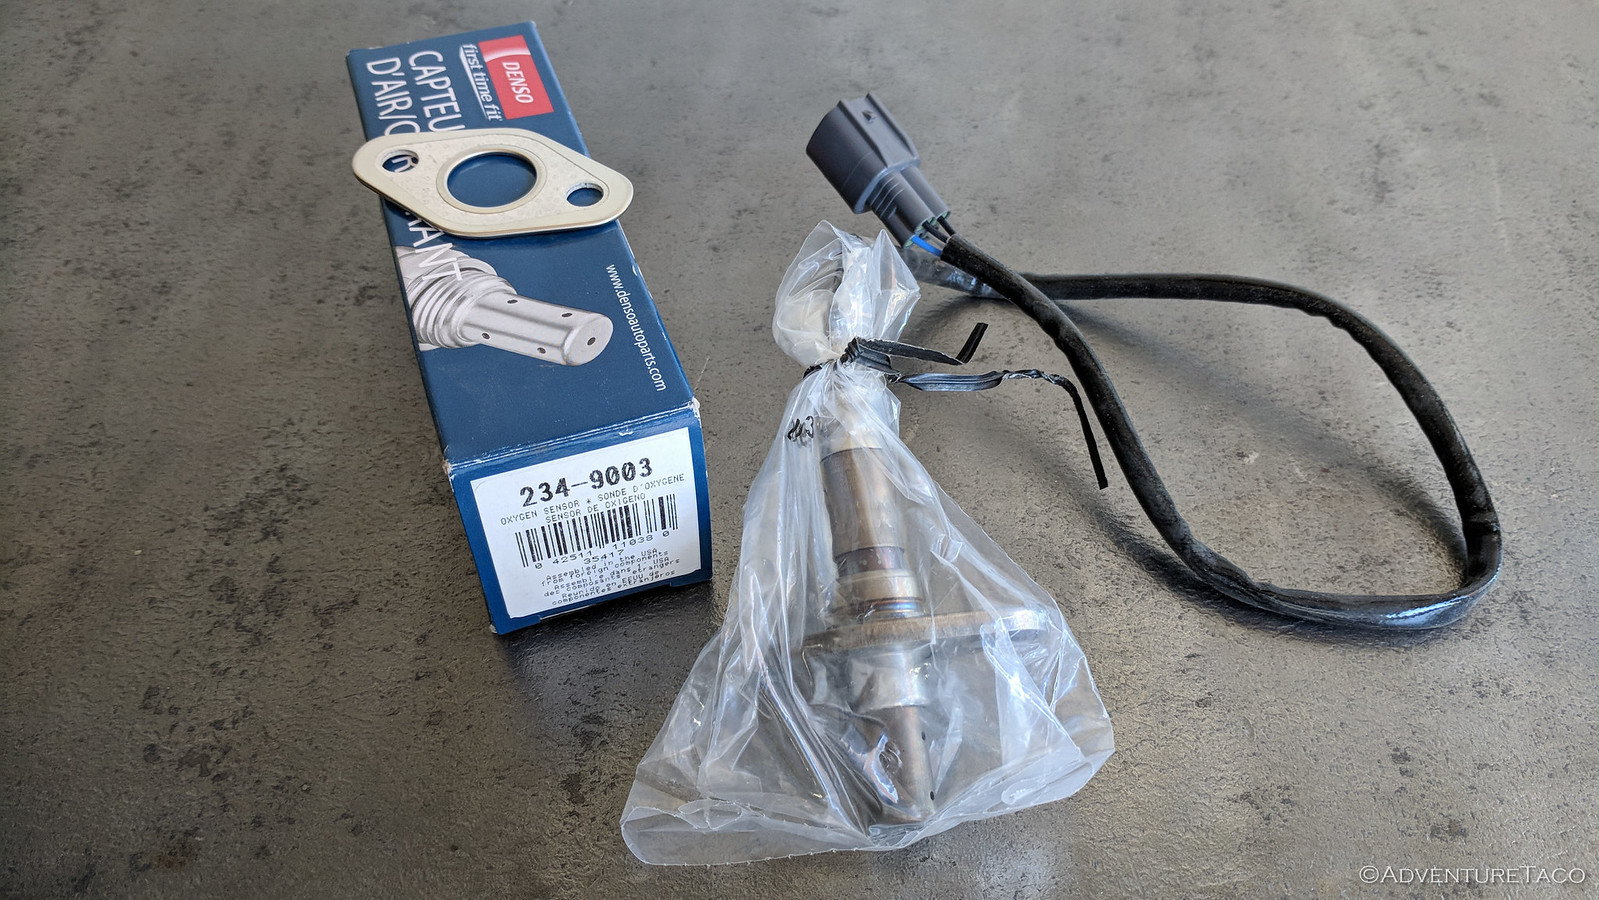
I decided that I'd try a multi-pronged approach, largely centered around what seem to be the most common culprits - a vacuum leak, the MAF, and the AF sensor. I ordered a new Denso (OEM supplier) MAF sensor (197-6020) and AF sensor (234-9003)*, as well as a new OEM fuel filter (23300-62010), so that they'd arrive as soon as possible.
* Note: the AF Sensor varies for engine/transmission combos on a 1st gen Tacoma:
- Denso Air-Fuel Ratio (O2) Sensor for MT 5VZFE (234-9003)
- Denso Air-Fuel Ratio (O2) Sensor for MT 2.7L (234-9002)
- Denso Air-Fuel Ratio (O2) Sensor for AT (234-9001)
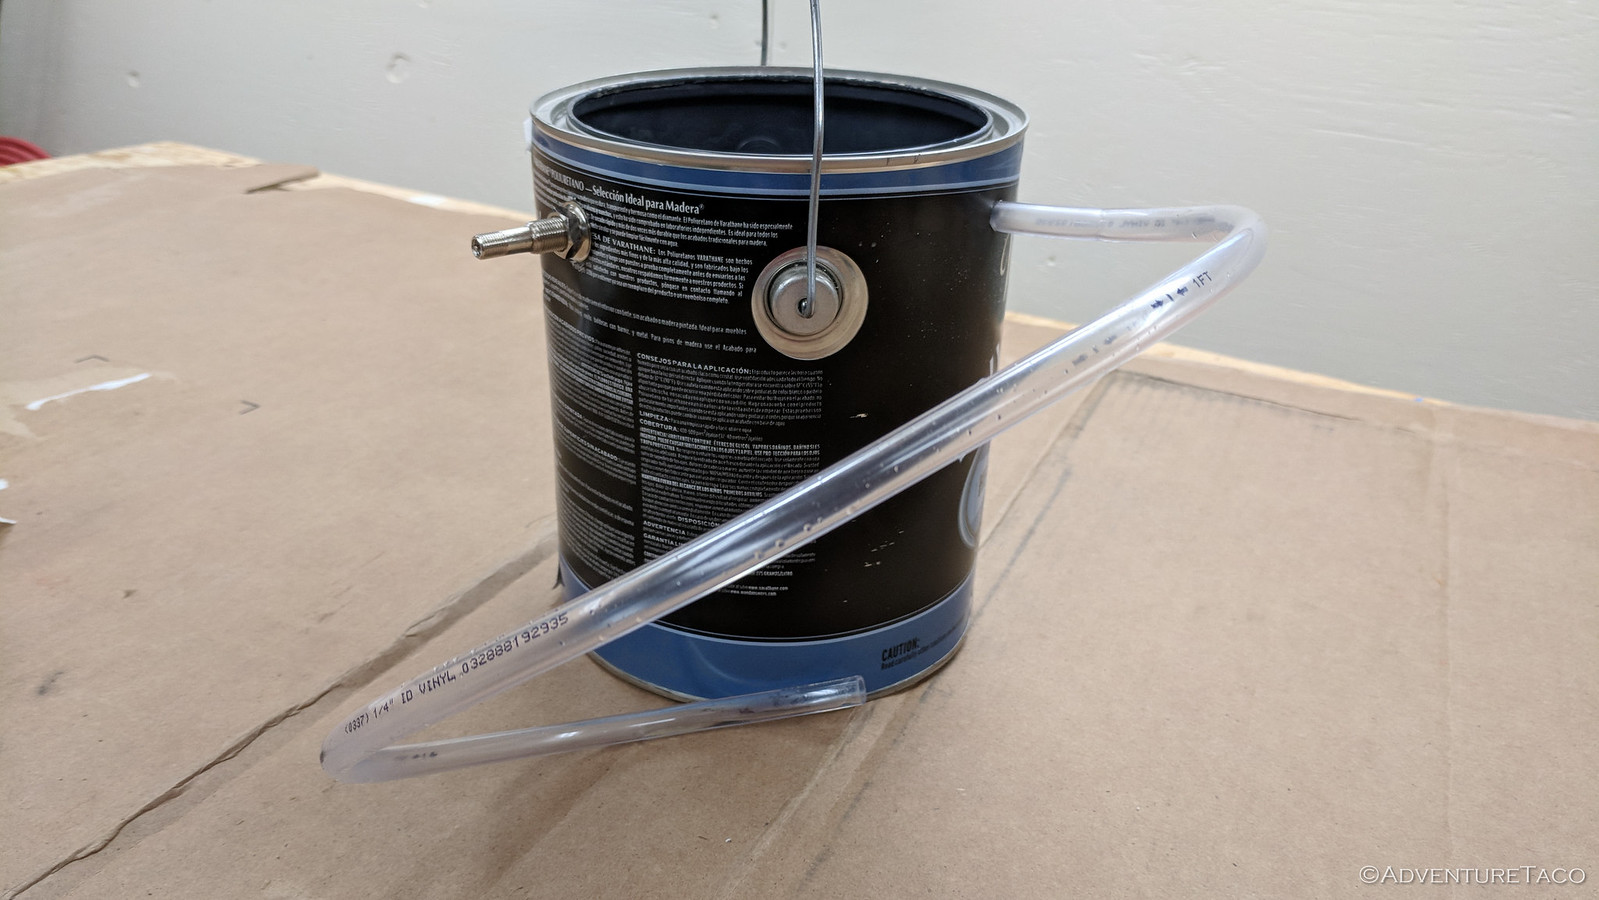
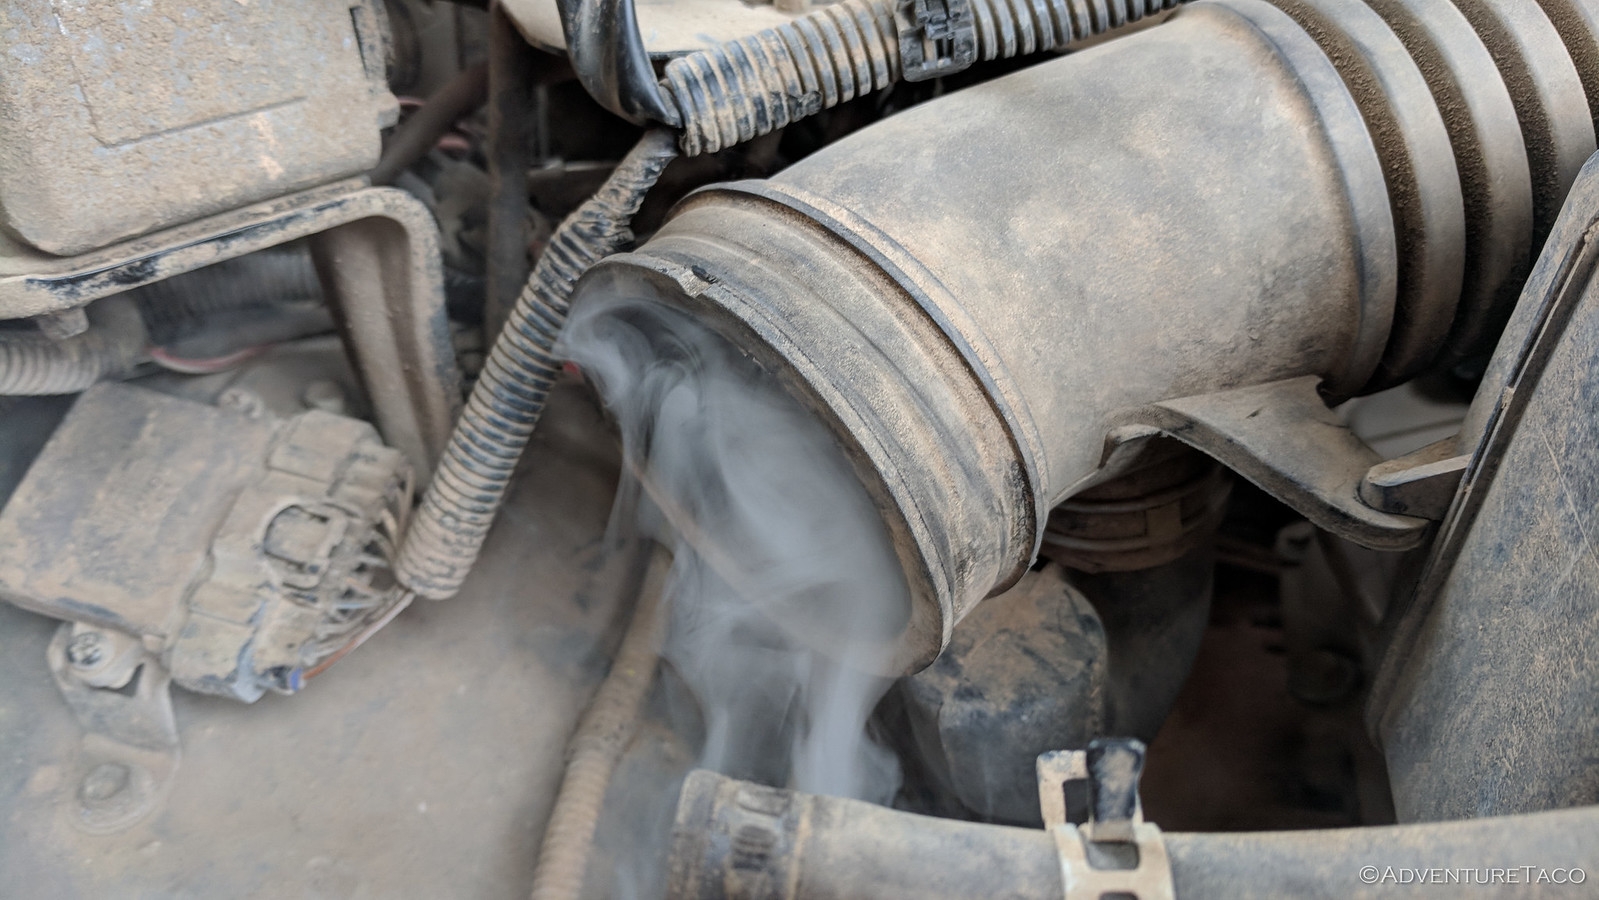
Having already cleaned the MAF, I started by looking for a vacuum leak. I'd done this by spraying starting fluid in the engine bay in hopes of hearing the engine rev while on my trip, but I figured a smoke test was in order. So I grabbed an old paint can, a length of hose, and an air valve to construct my own personal smoker.
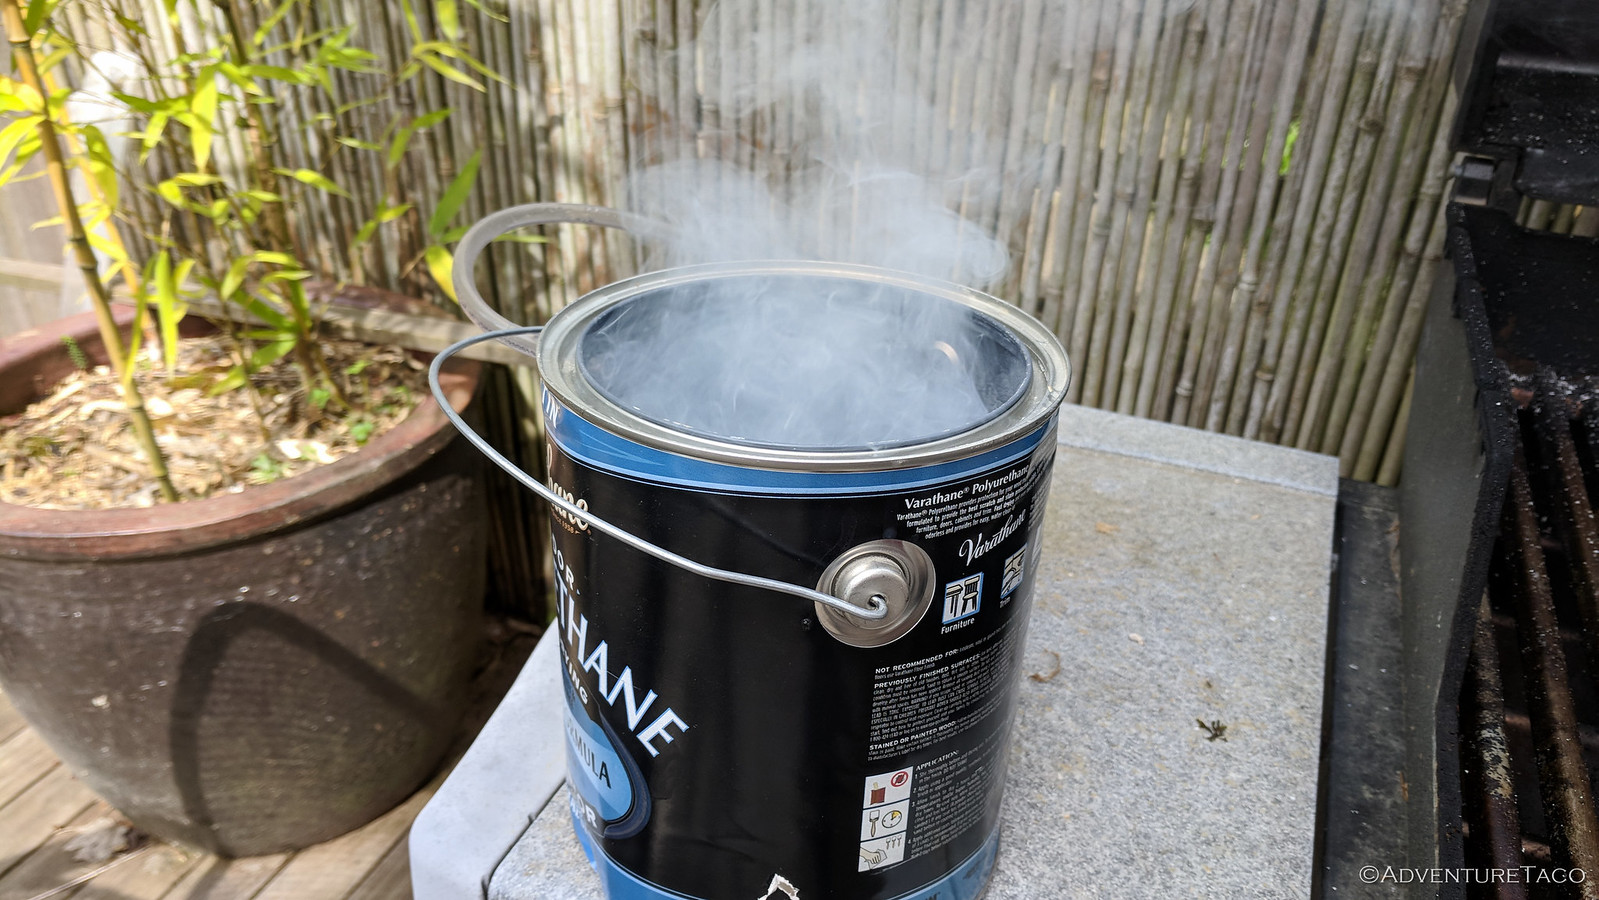
Then, I built a fire. My plan was to sprinkle a bit of olive oil on them inside the paint can to generate smoke, and then to push the smoke into the system with a bit of air pressure (just a couple psi - I didn't want to blow any hoses off in the process).

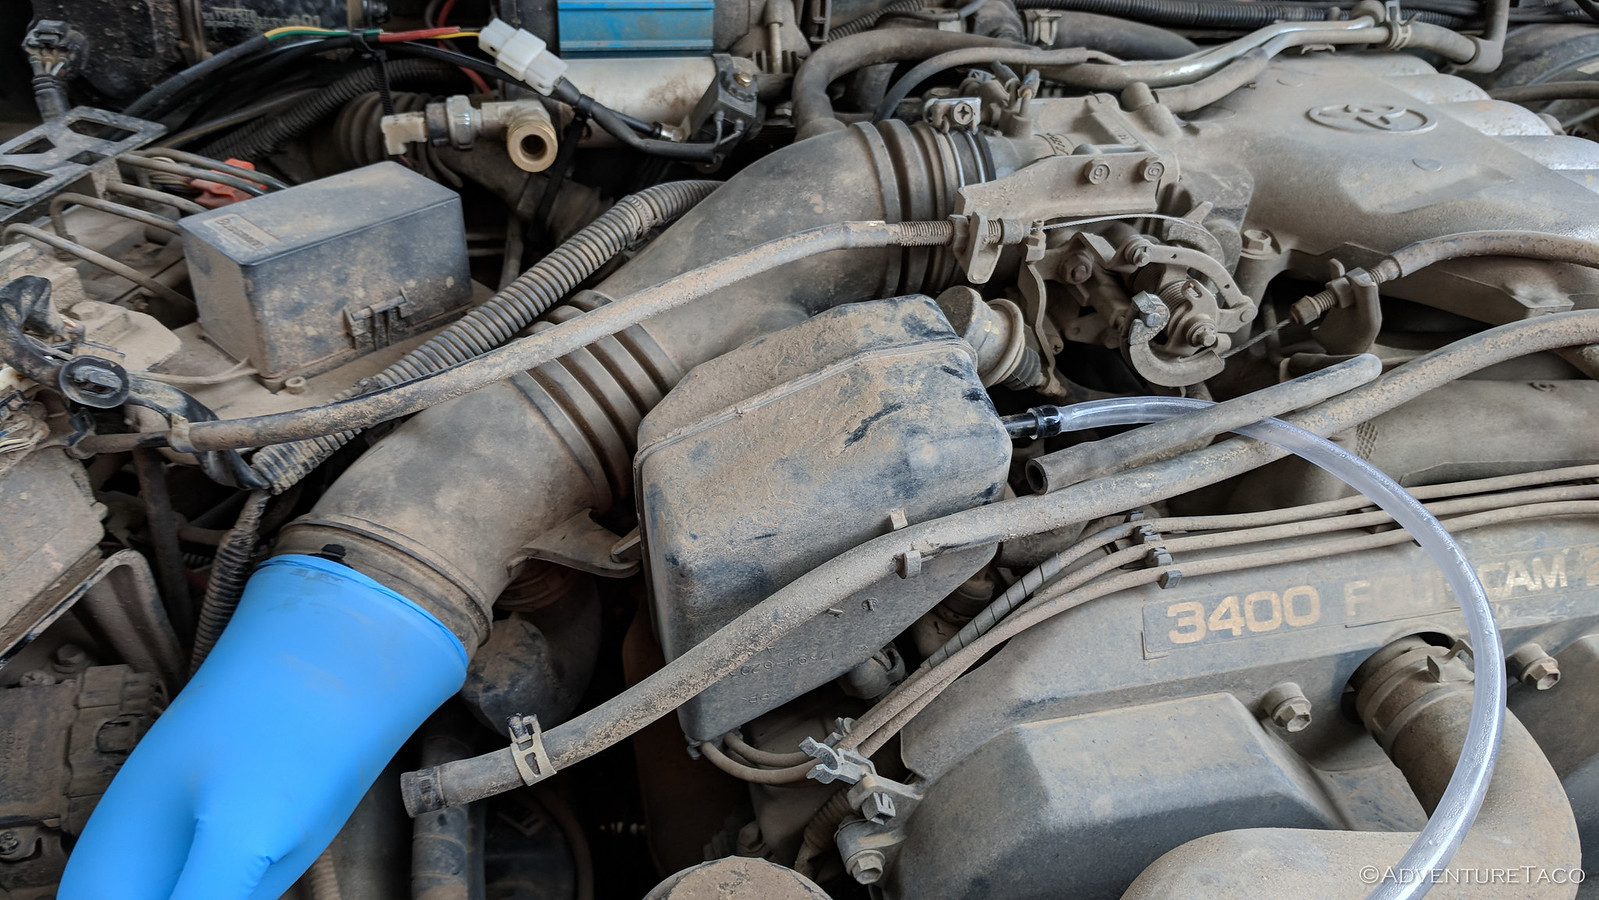
I was generating lots of smoke, so I removed the air box (filter + MAF) and covered the intake with a blue glove. Then I hooked up the clear hose and sent the smoke into the system. There was plenty of smoke getting in (and coming out once I took off the blue glove), but as I'd found with the starting fluid, I had no leaks.
With that (as unlikely as it was, since it seems that P0171 is most commonly caused by a vacuum leak) I was confident that I could start focusing elsewhere. Taking stock of the data I had seemed to make the most sense, and so I pulled up the screenshots I'd taken when I was on the road to Death Valley.
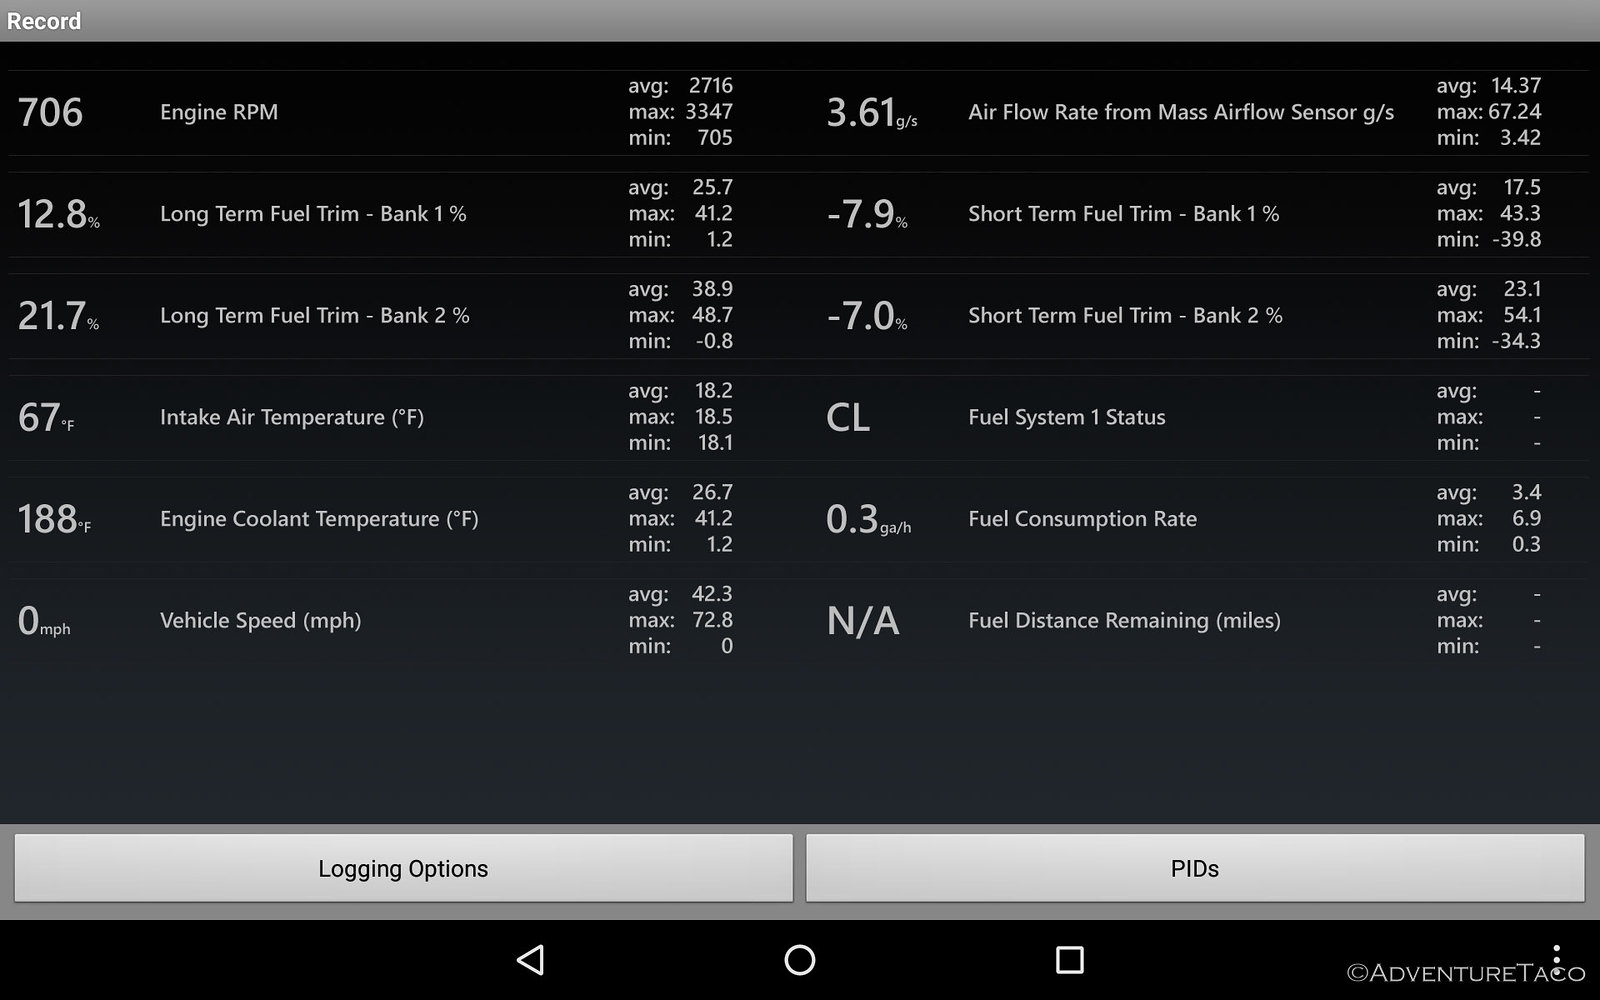
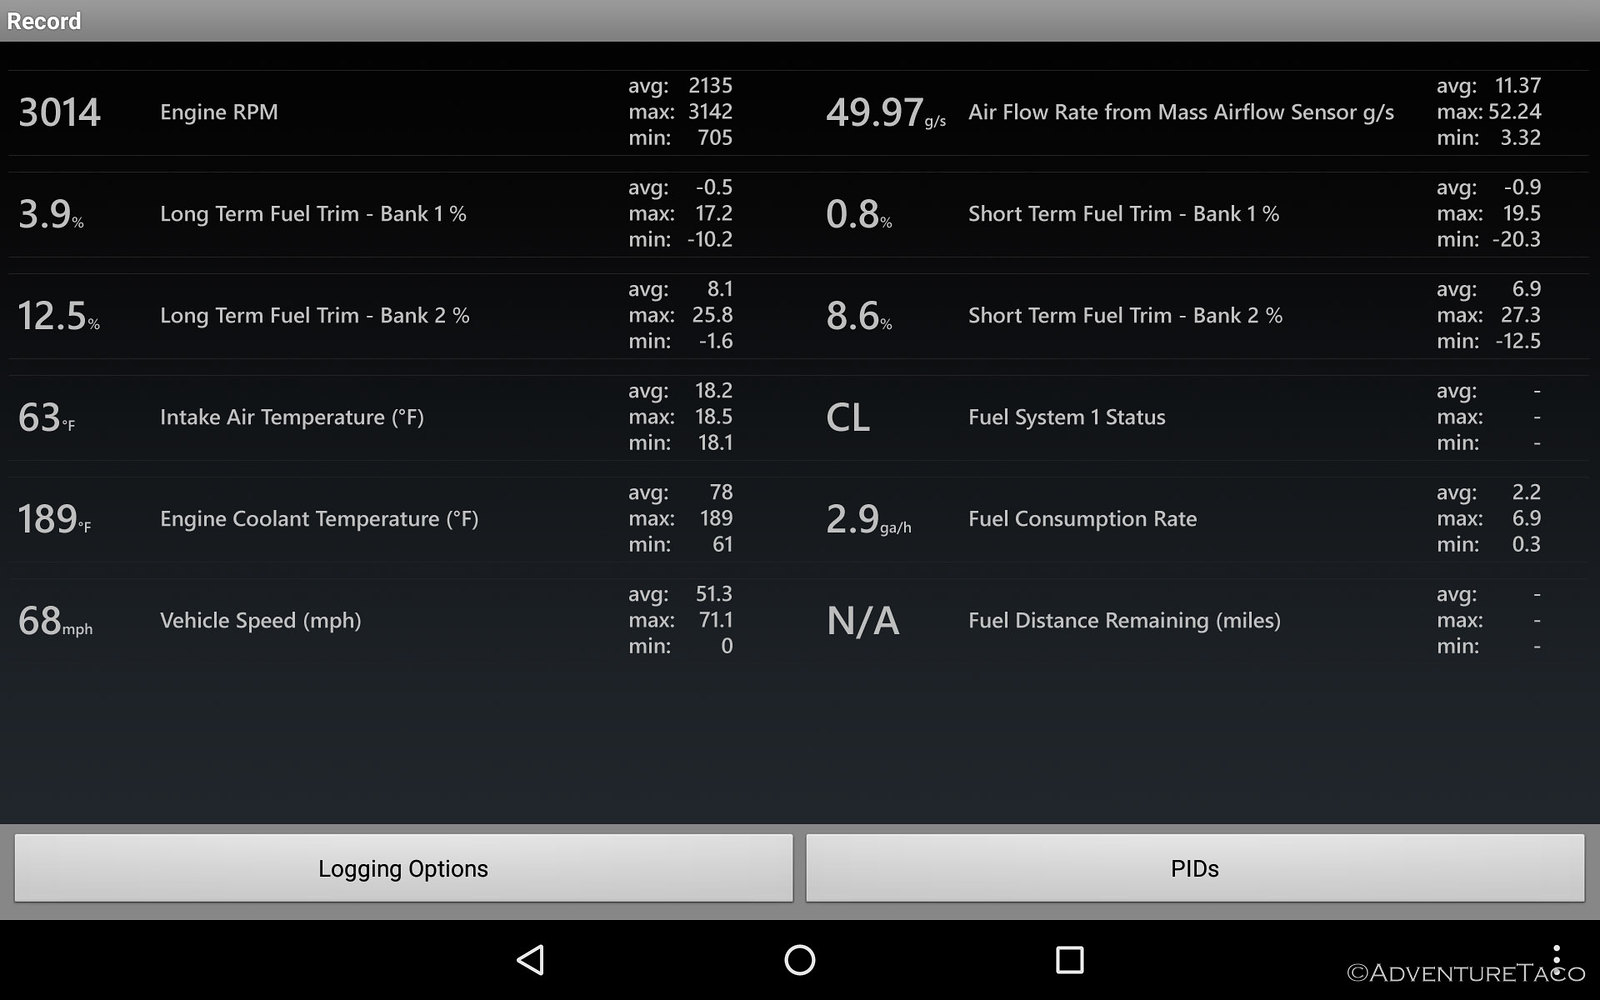
Fuel Trim Data At Idle
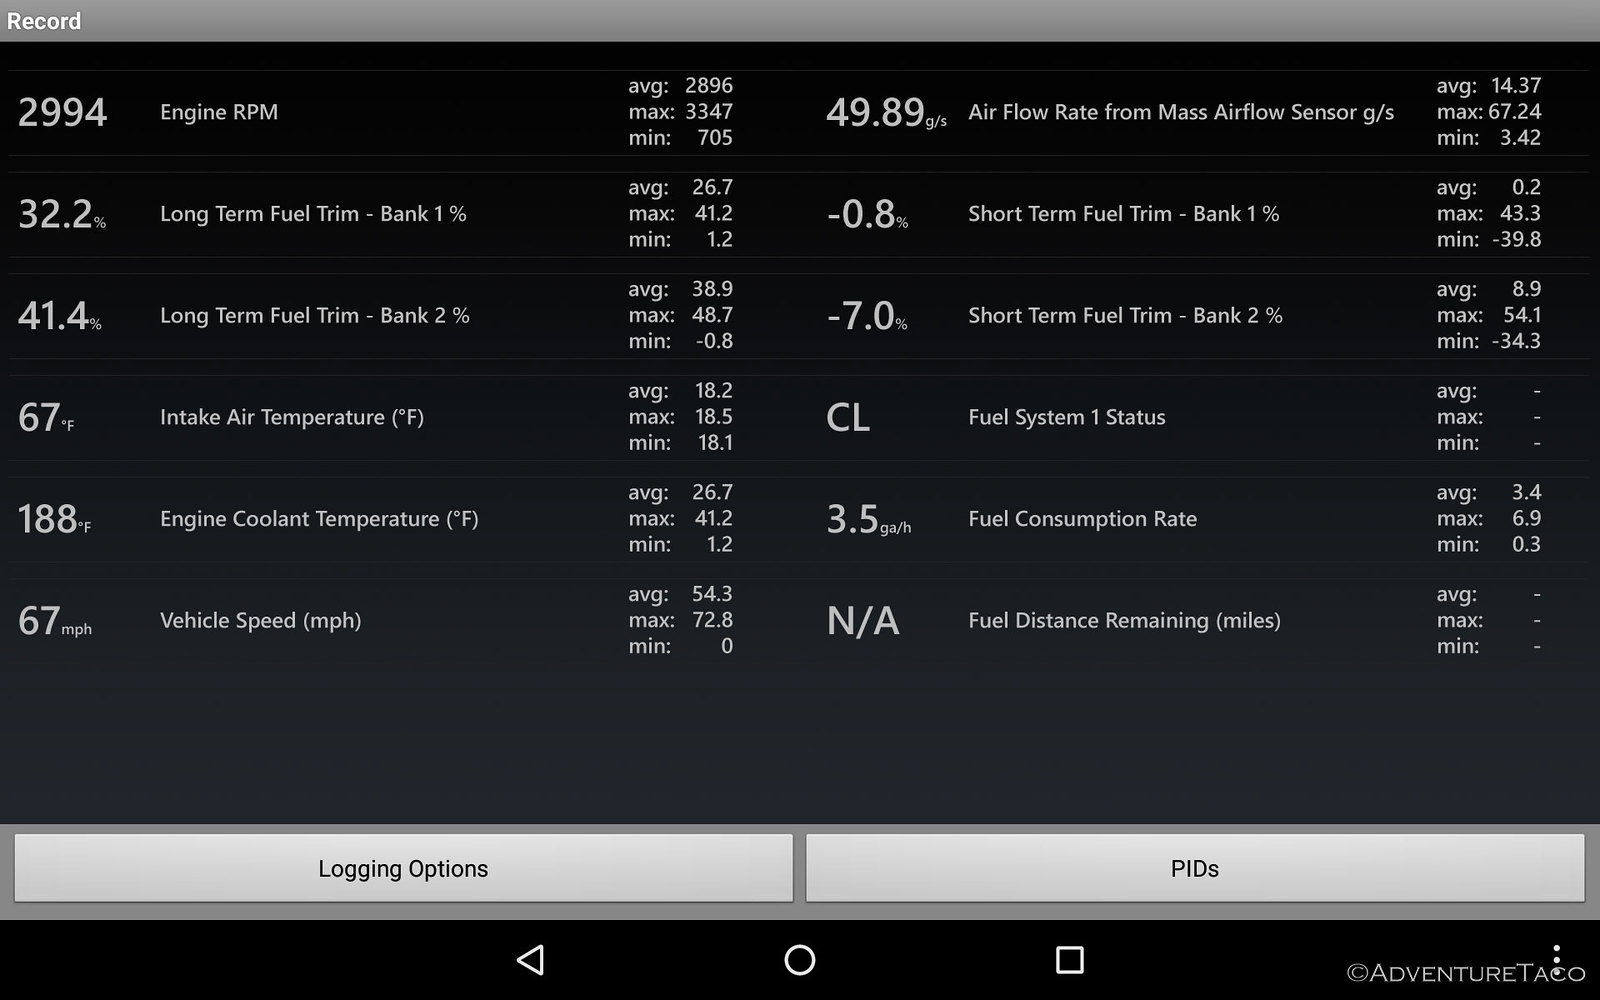
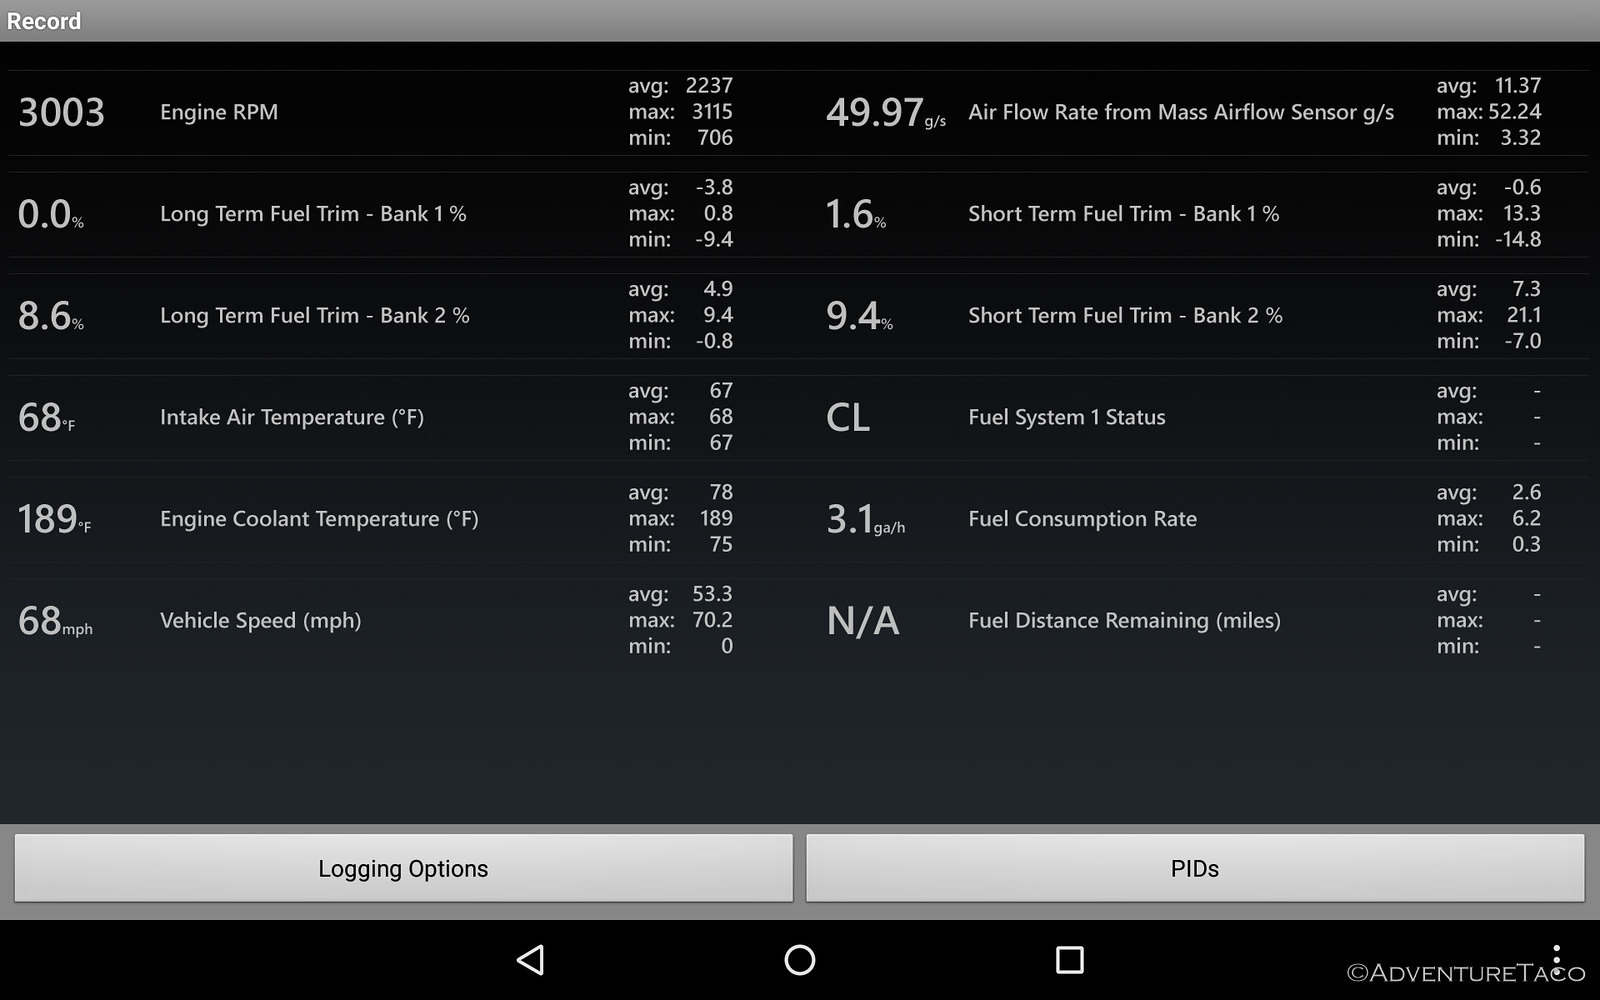
Fuel Trim Data Under Load
A bit more reading and YouTube research suggested that I should tackle the MAF sensor next for a couple of reasons:
- Generally, if you have (more) reasonable fuel trims at idle, and they get worse under load, then it's unlikely to be a vacuum leak; it's more likely the MAF. This seemed to describe my situation - my idle fuel trims were in the 0-10% range, and then get really bad at higher RPMs and loads.
- MAF rate should be around 1 g/s per liter of displacement per 500 RPMs. That would mean that at ~705 rpm idle and 3.4L, it'd be around 4.75 - so a reading of 3.6g/s was a bit low.
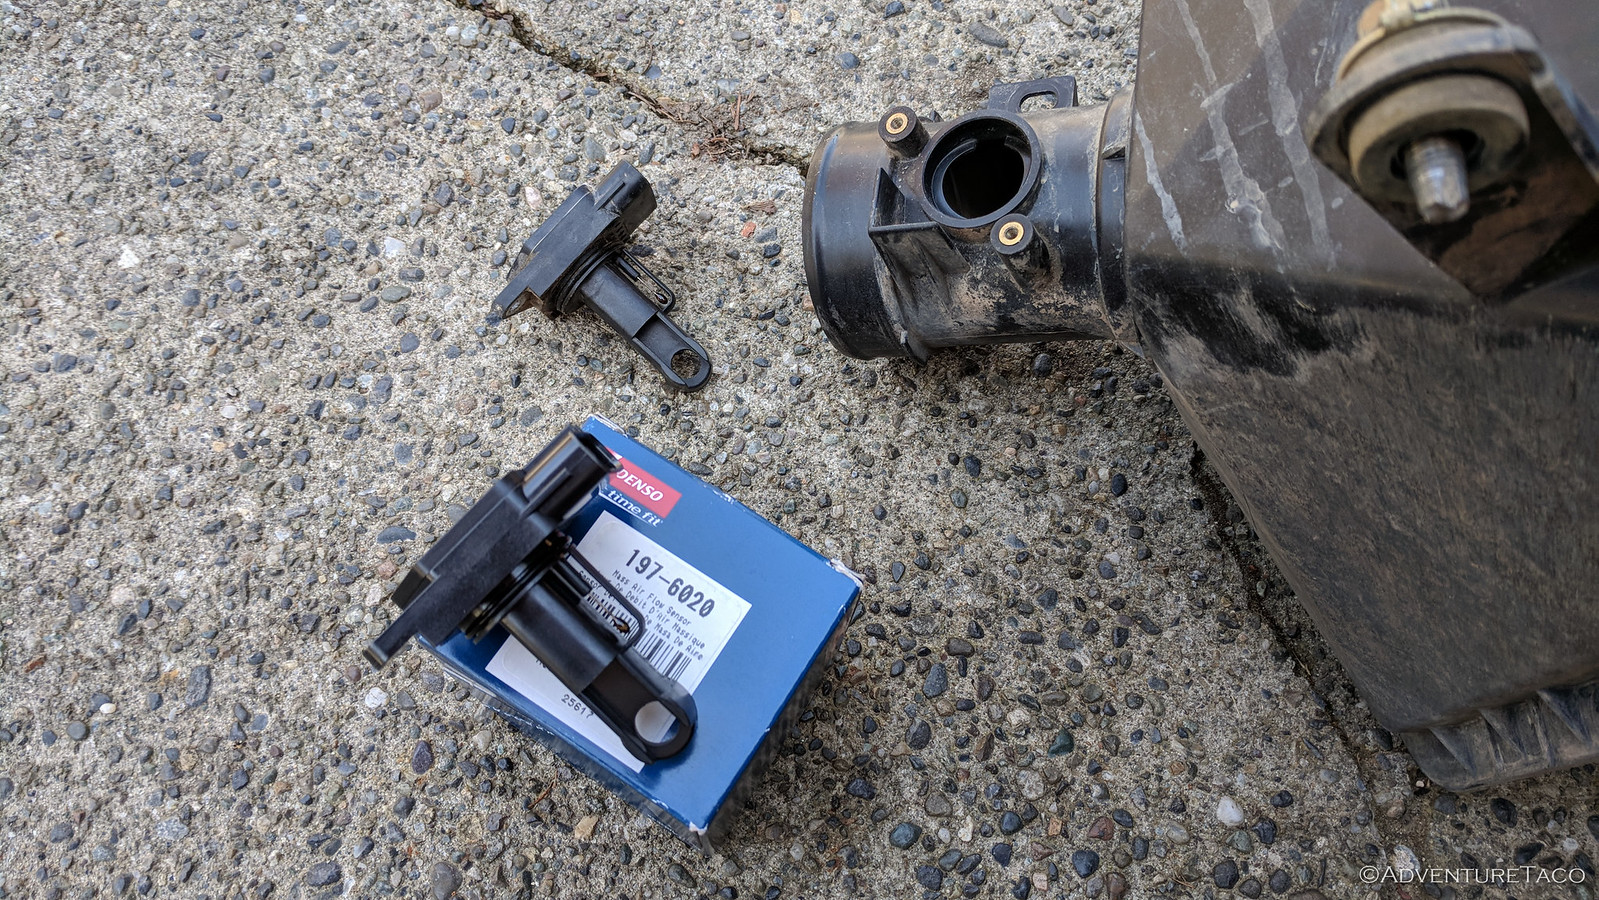
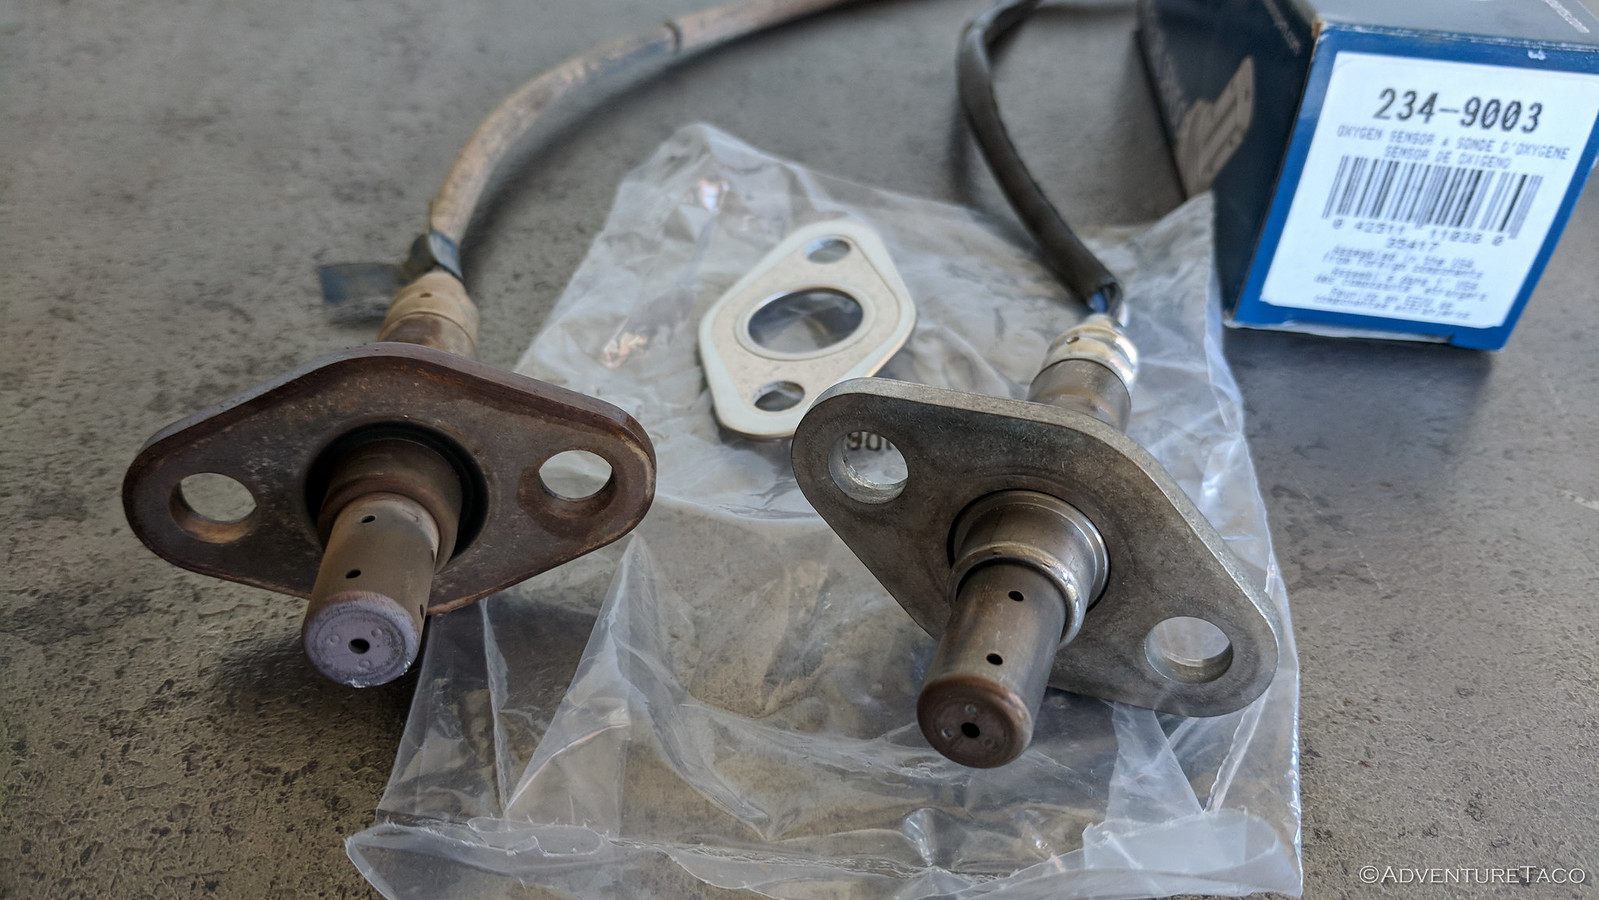
The new parts arrived shortly, and looked to be identical to those in the truck.

I had the air box out in a few minutes - something I can do in my sleep now - having taken it out several times in the last couple days, and it was a simple matter of pulling the old MAF sensor, replacing it with the new, and plugging everything back in - easy peasy.

And then I went for a test drive. And the numbers under load were quite a bit better (idle was already "OK" so I was no longer focusing there). Bank 1 was actually looking quite good and Bank 2 was much better than it'd been. It was still on the border of what I'd call "in spec," but compared to what I was seeing previously, it was a big improvement.
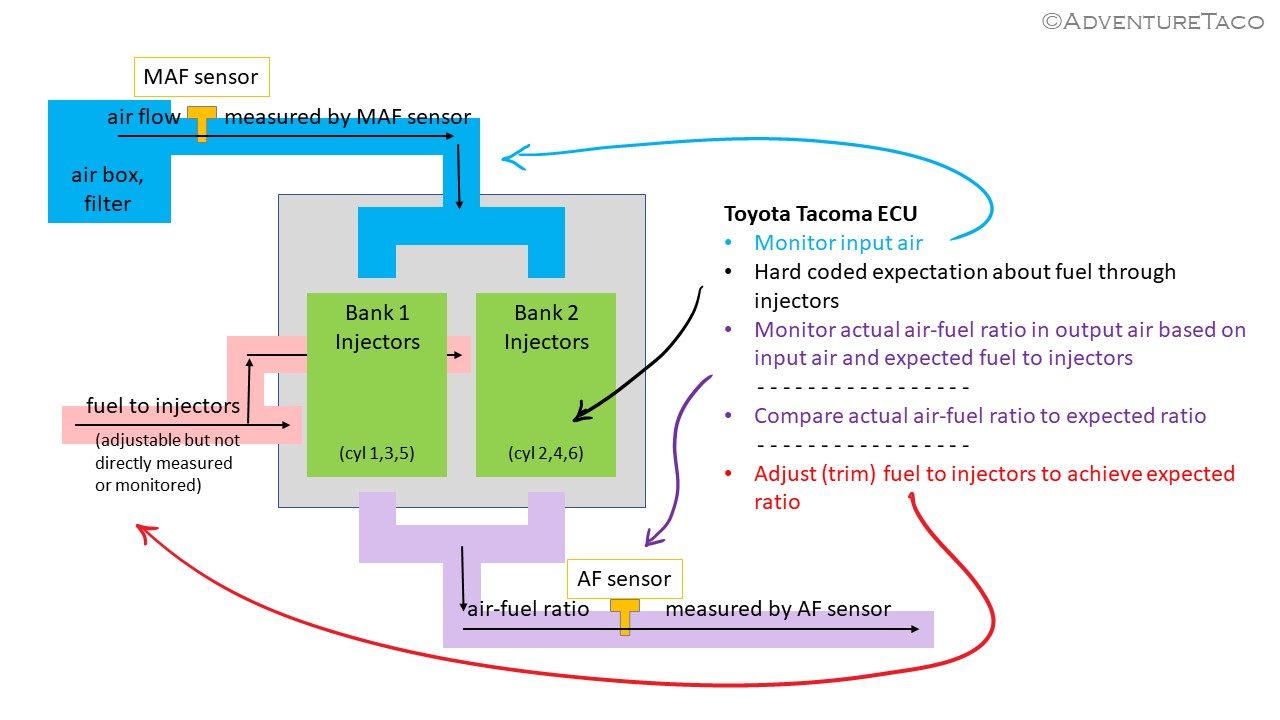
At this point it was time for a bit more learning on my part. I wanted to know more about how the fuel trims were determined - because the only two sensors I was looking at (MAF and AF) were significantly before, and significantly after the two cylinder banks where fuel trim was being oscillated.
On a first gen Tacoma, it works something like this (as I understand it) - the truck's computer reads the airflow over the MAF sensor to know the amount of input air. It also knows when and how much fuel an injector should be releasing into the cylinder. And, it knows how far the combusted air needs to travel in order to get to the AF sensor and what the air-fuel ratio should be at that sensor. So, as it sends the air-fuel ratio back to the computer, if those numbers aren't as expected, the computer adjusts the fuel into the injectors to achieve the expected result.
It seemed to me that I was now in a situation where my sensors were probably working correctly - and here's why: Bank 1 looked good - the MAF sensor was reporting some amount of air intake, that air was flowing through the engine, and the AF sensor was reporting an air/fuel mix that the truck computer interpreted as needing (essentially) no tweaking - thus, LTFT on Bank 1 was around zero. The "problem" was that there was still some fuel trimming on Bank 2 - possibly because something could still be a bit off there. That could be a result of:
- a problem with the AF sensor
- a small error in estimation at the ECU of when air should be passing the AF sensor from each bank
- injectors that needed cleaning
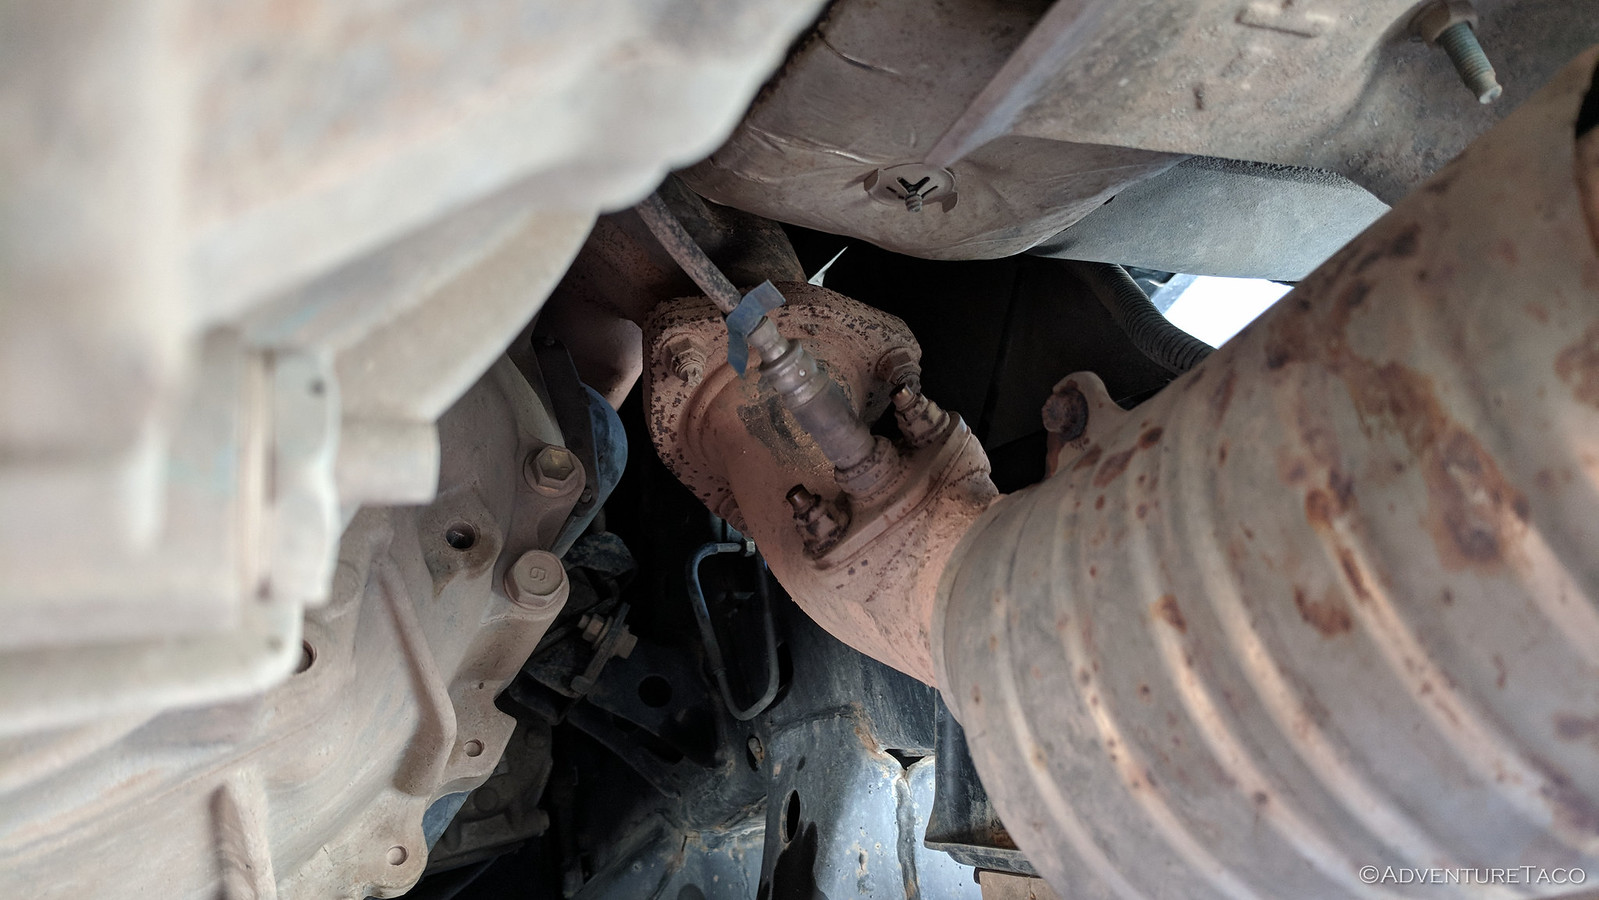
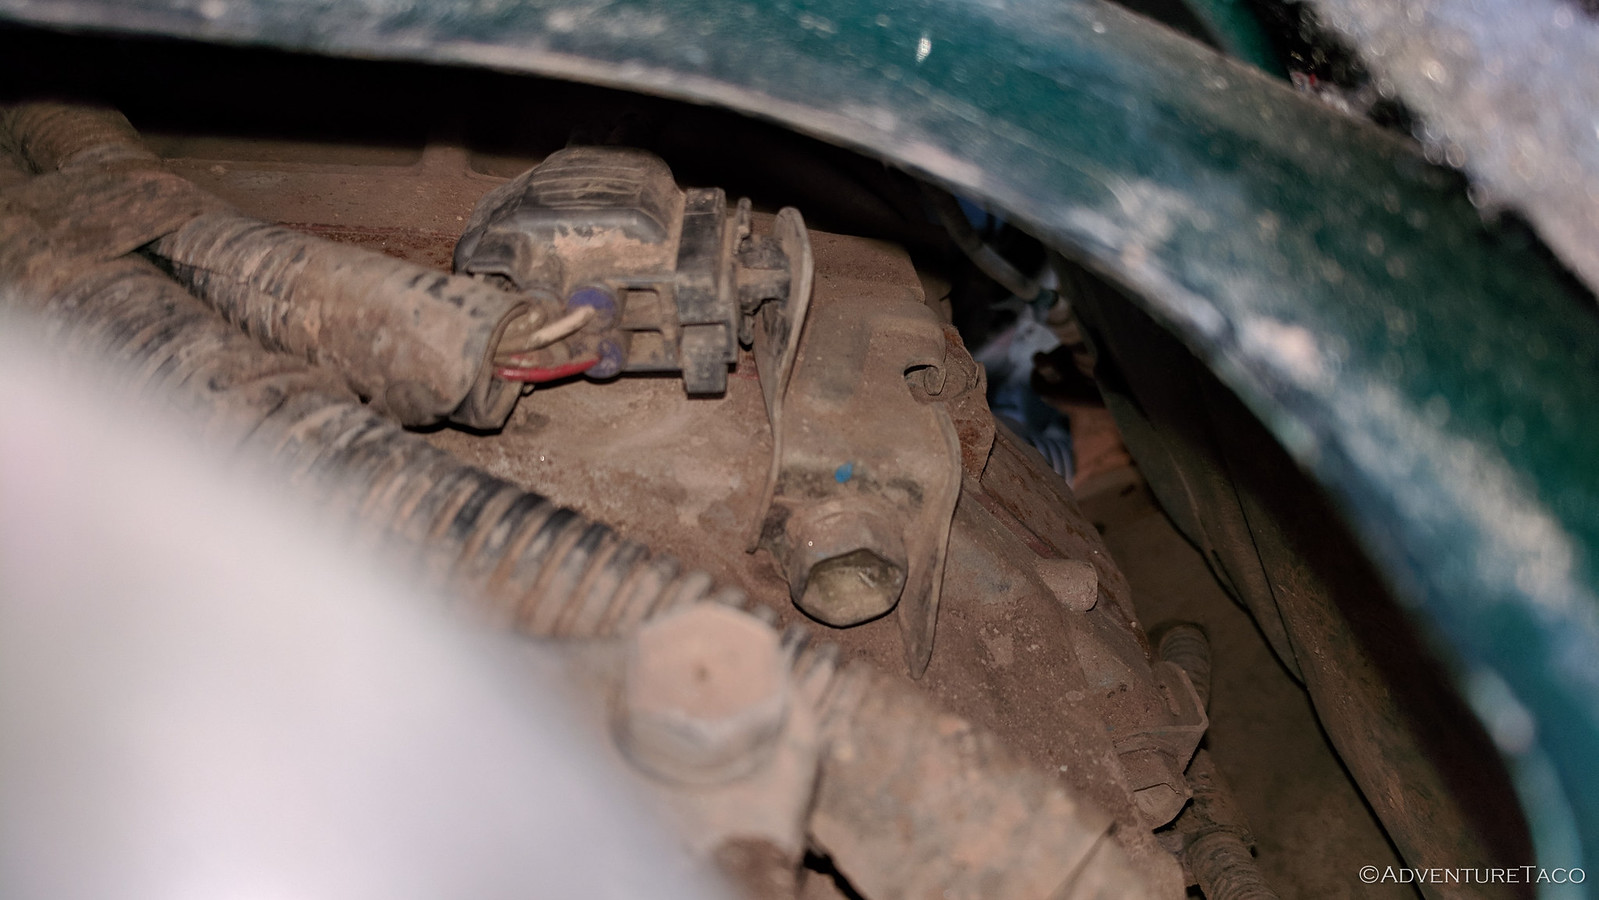
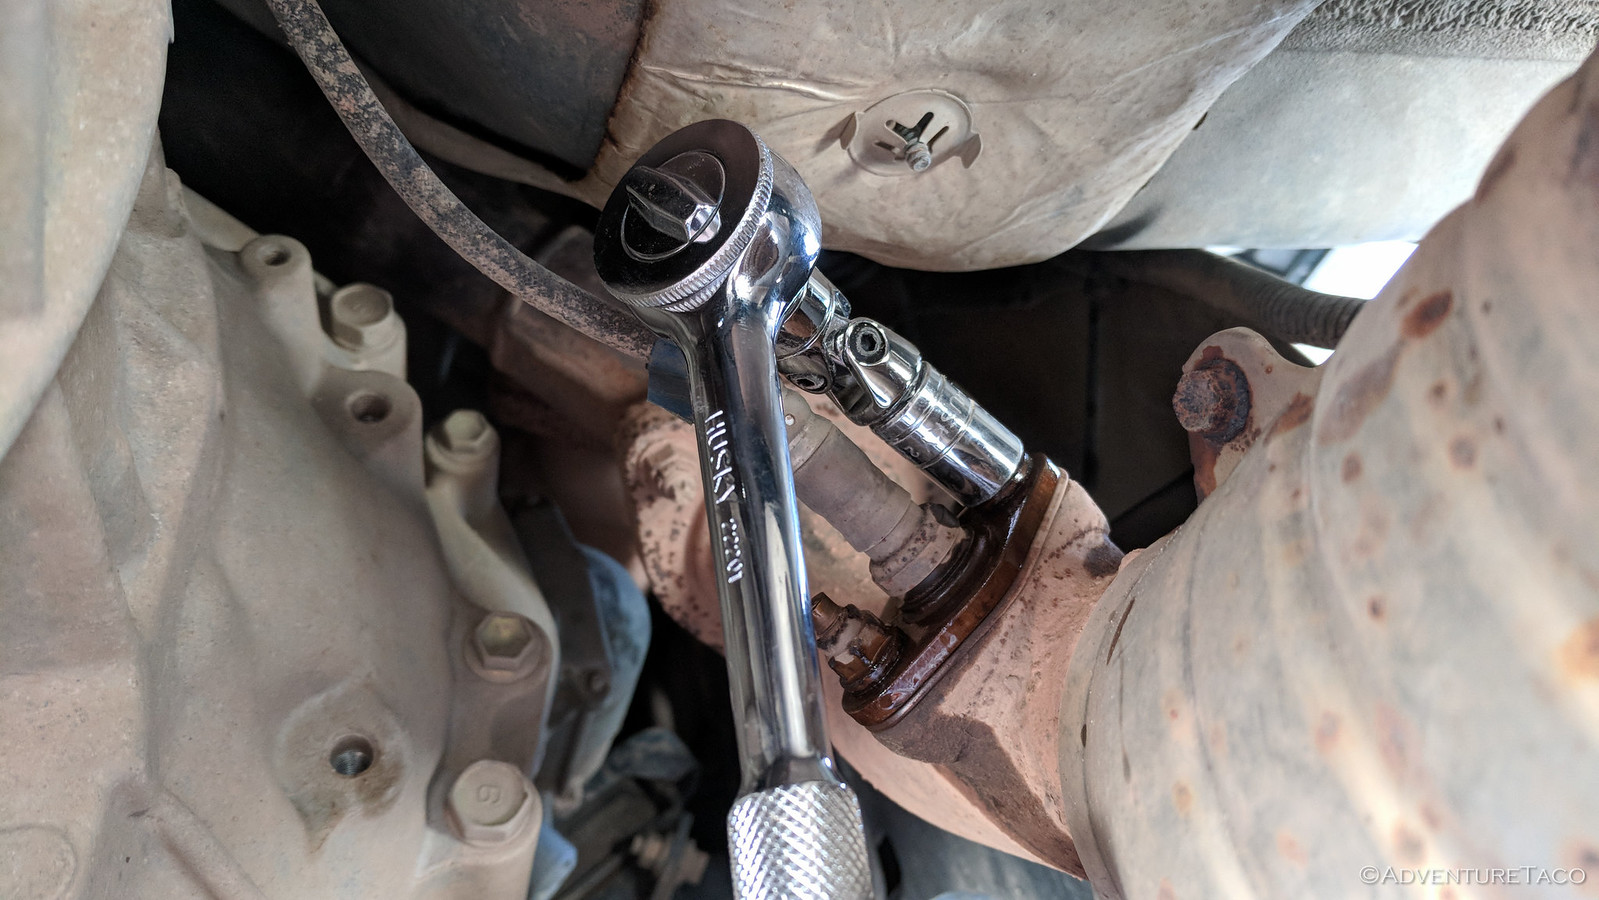
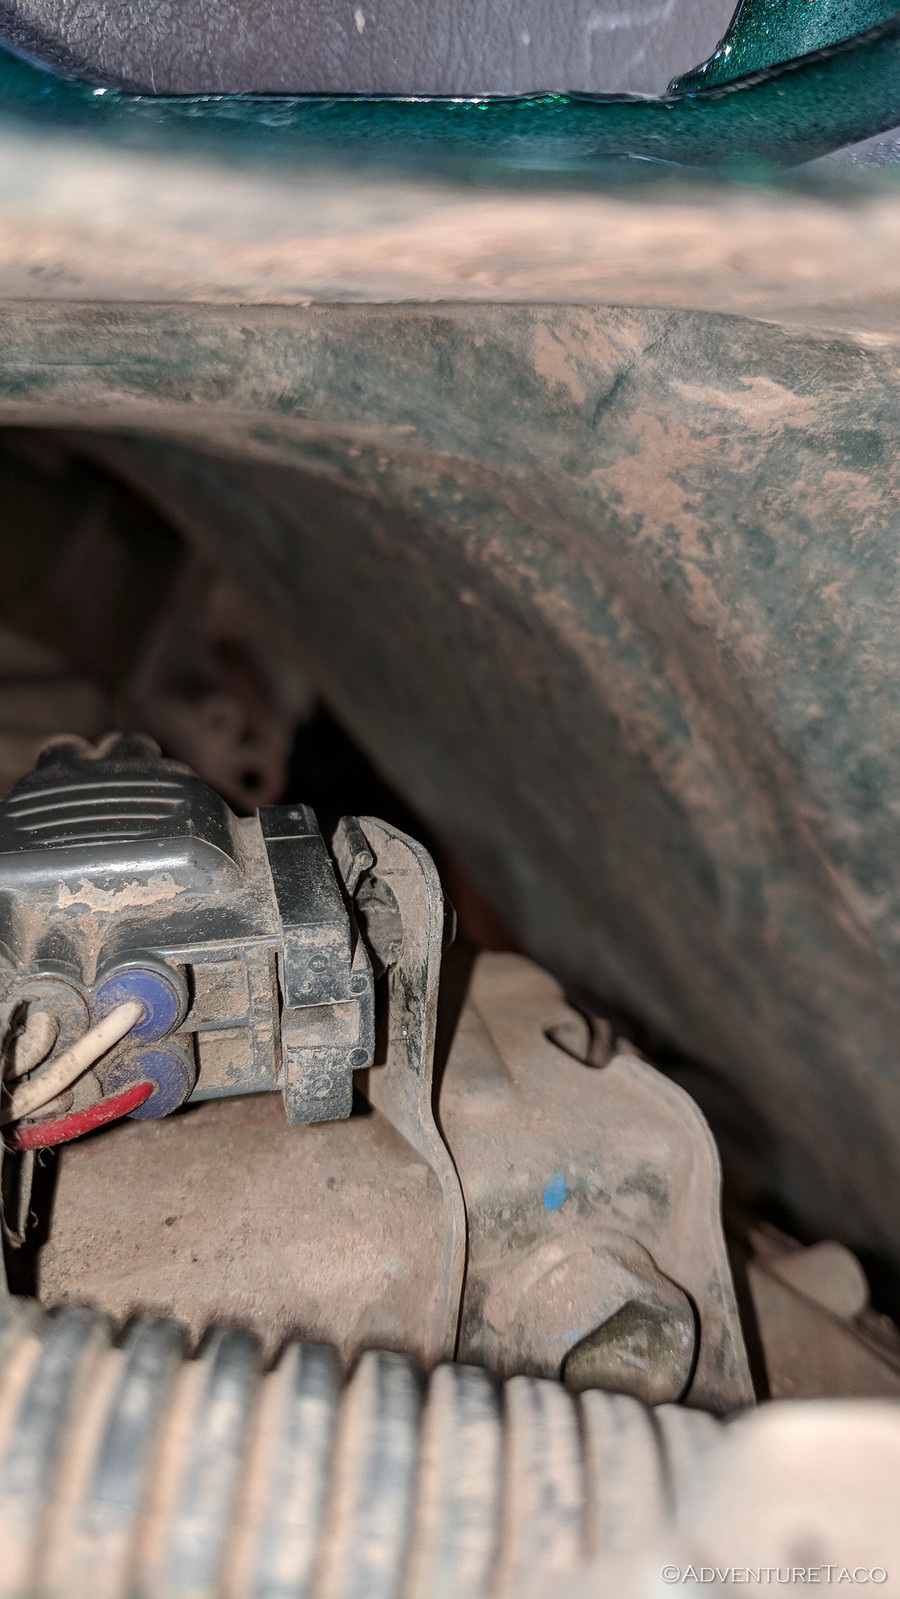
I figured that since I had a new AF sensor, I'd replace that next. At the very least, it'd be reasonable to do that at 90K miles and I'd be able to use the original as a trail spare - so I set about the process, which is straight forward but very tight. I started by disconnecting the battery (not sure if this is necessary, but seemed like good practice). I then found the AF sensor - it's on the passenger side, just forward of the first catalytic converter - and sprayed the nuts with some penetrating fluid, since they were quite rusty.
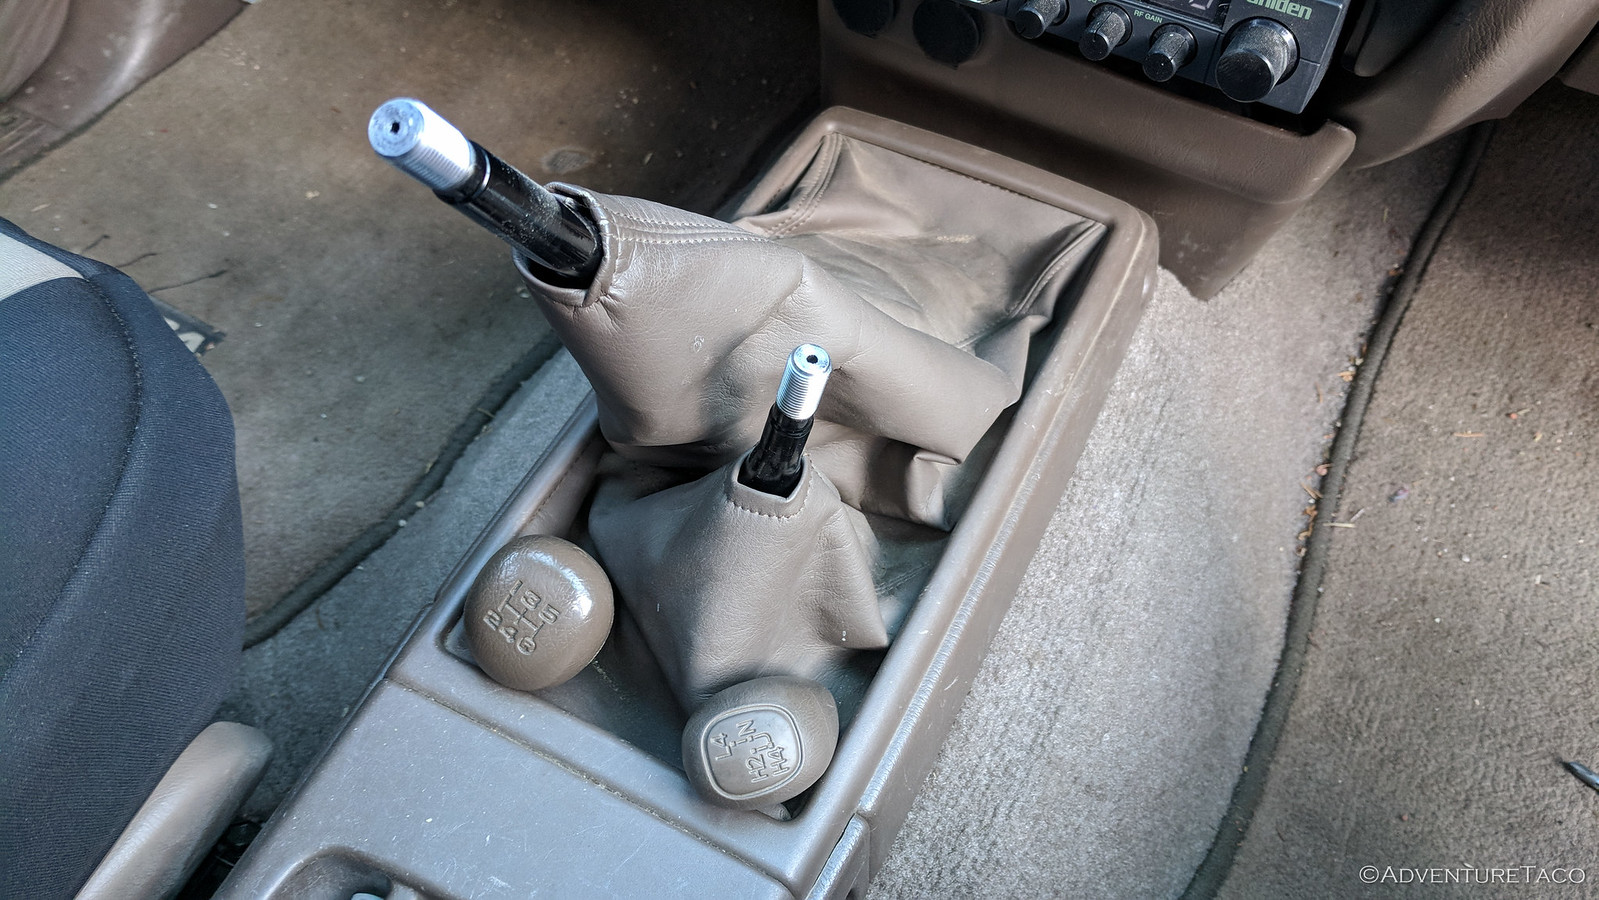
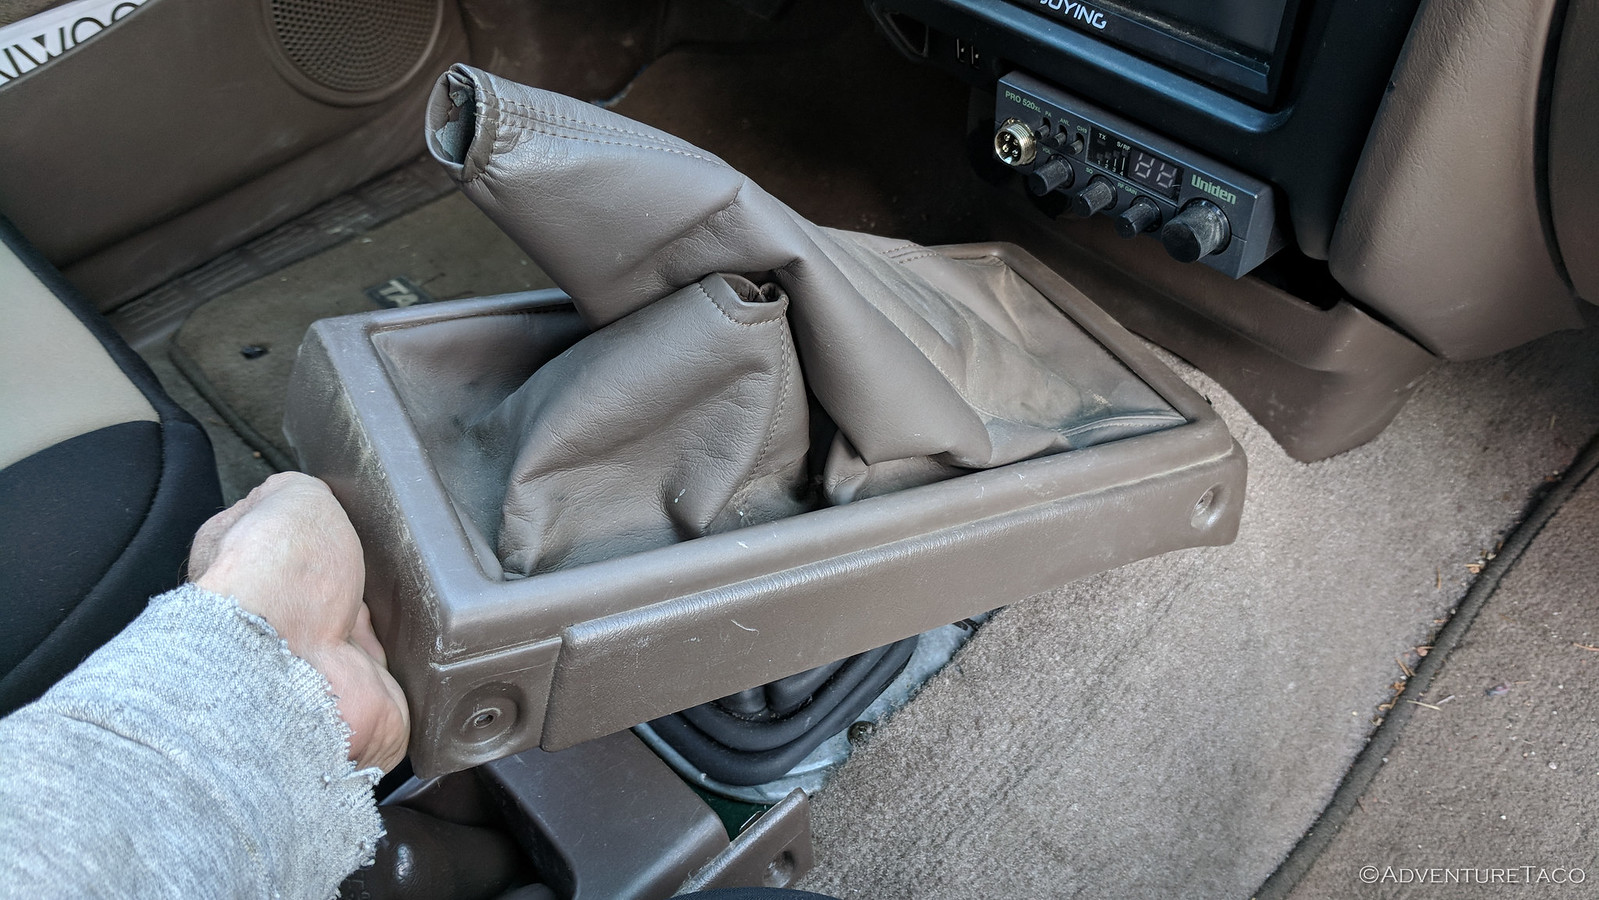
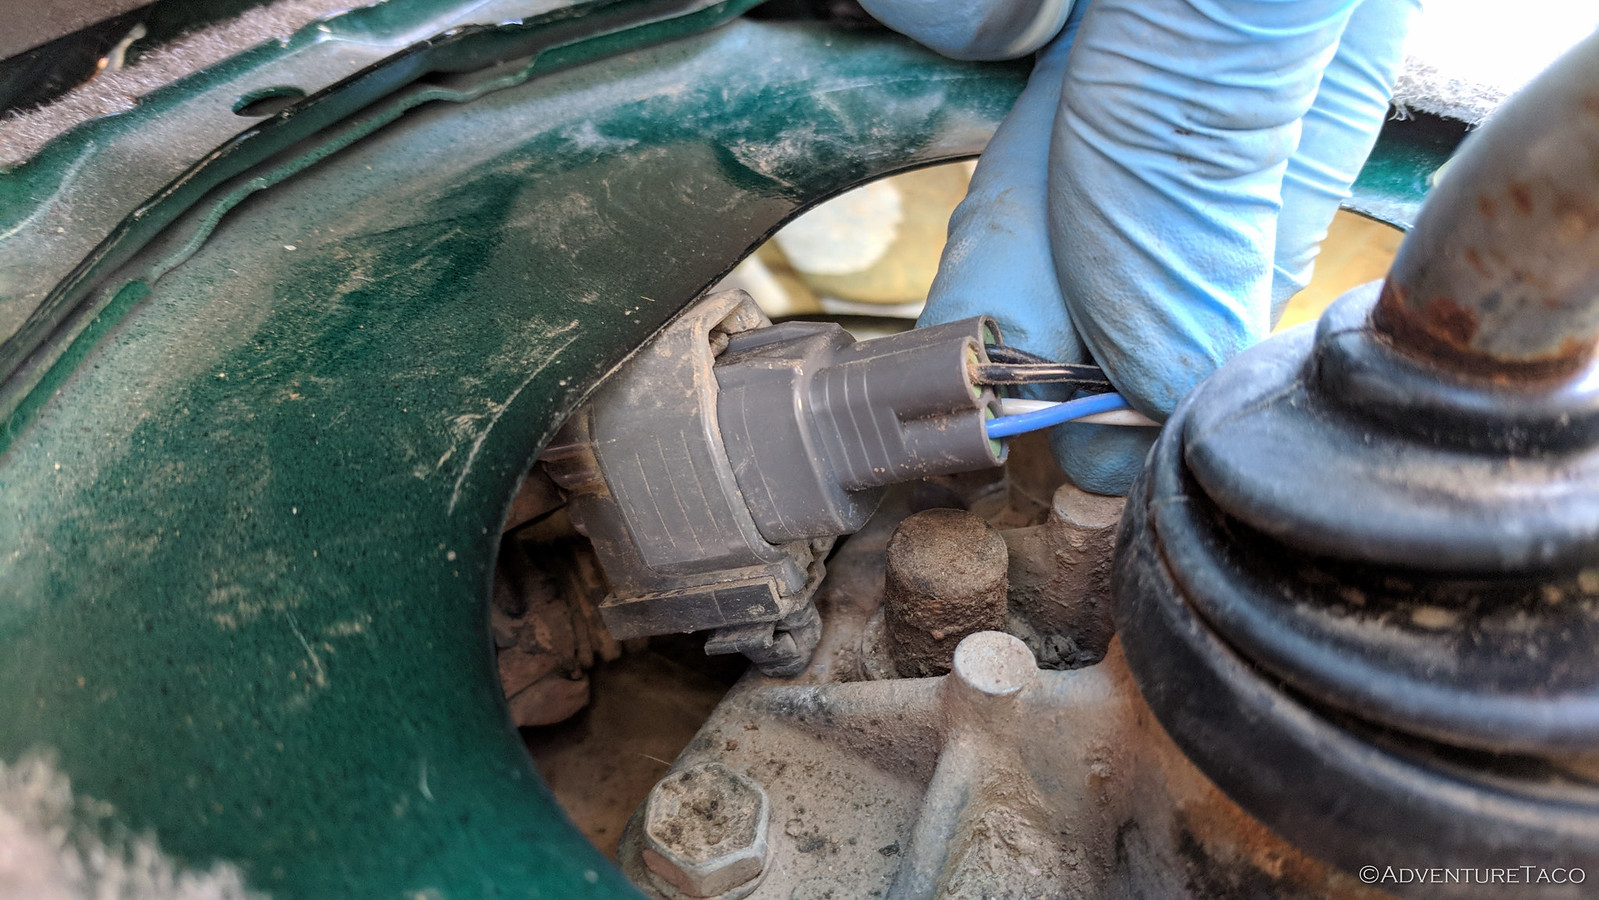
Next, I needed to find the connector. On manual transmission v6 Tacoma's, the connector is located on top of the transmission, and is only (barely) accessible from inside the cab. Start by removing the shifter knobs (they just unscrew), boot covers (four screws), and boots (four screws). The only tricky bit here is removing the boot covers - be careful when prying out the boot covers so you don't break the plastic tabs on the rearward part of the center console.
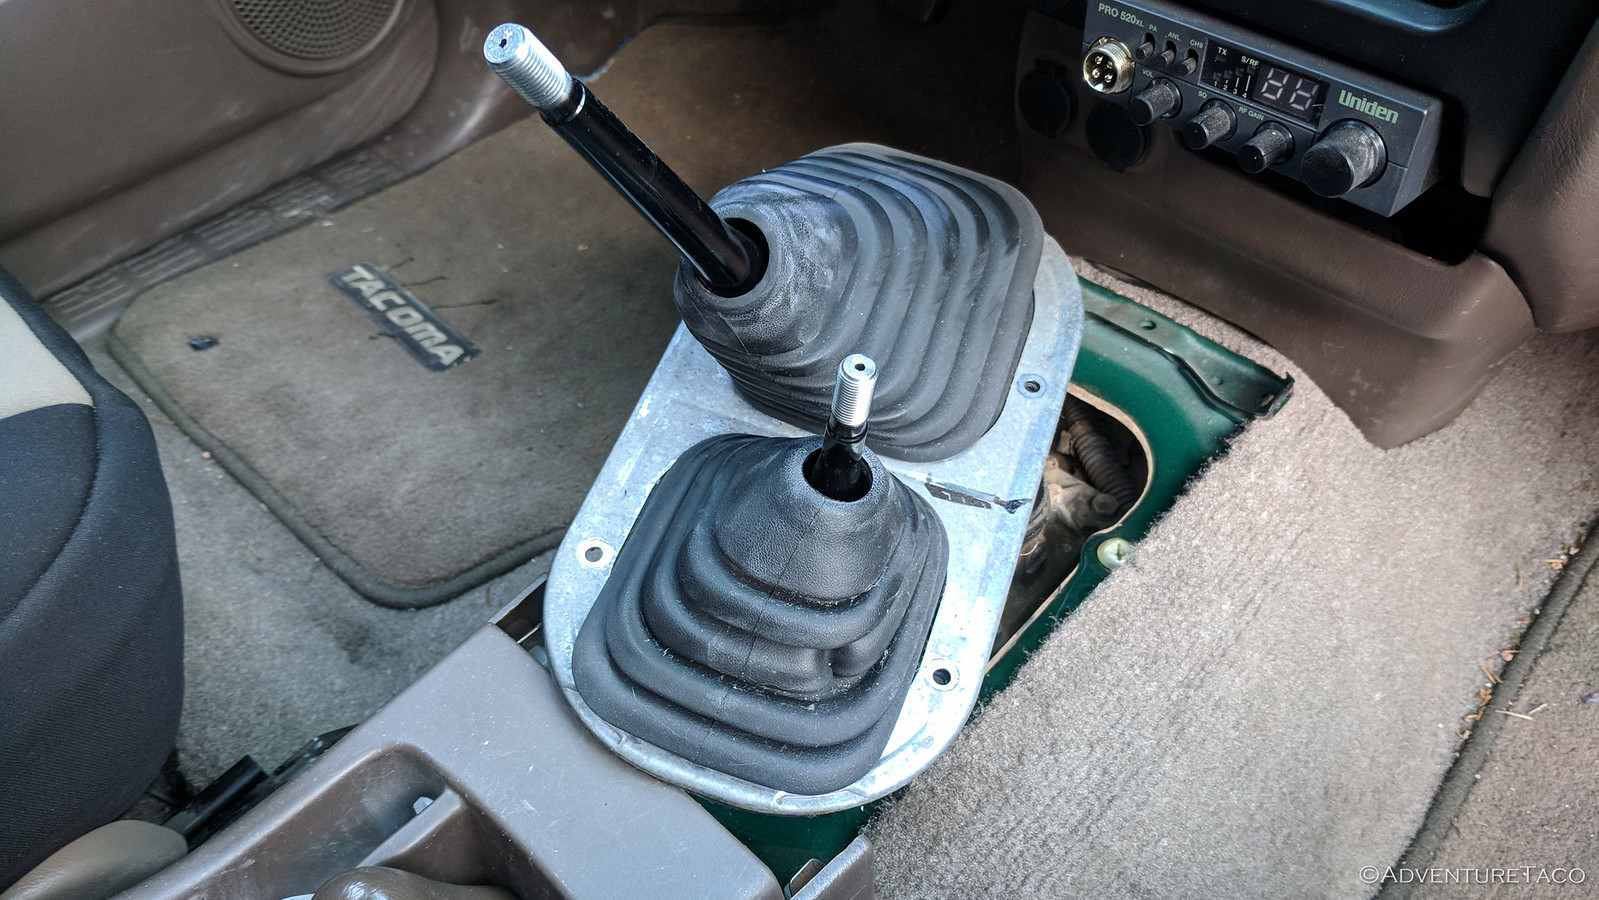
At this point, you'll be able to see the top of the transmission and transfer case. Mine was covered with mud from Montana and Wyoming as well, so I took a few minutes to clean it off, just 'cause.
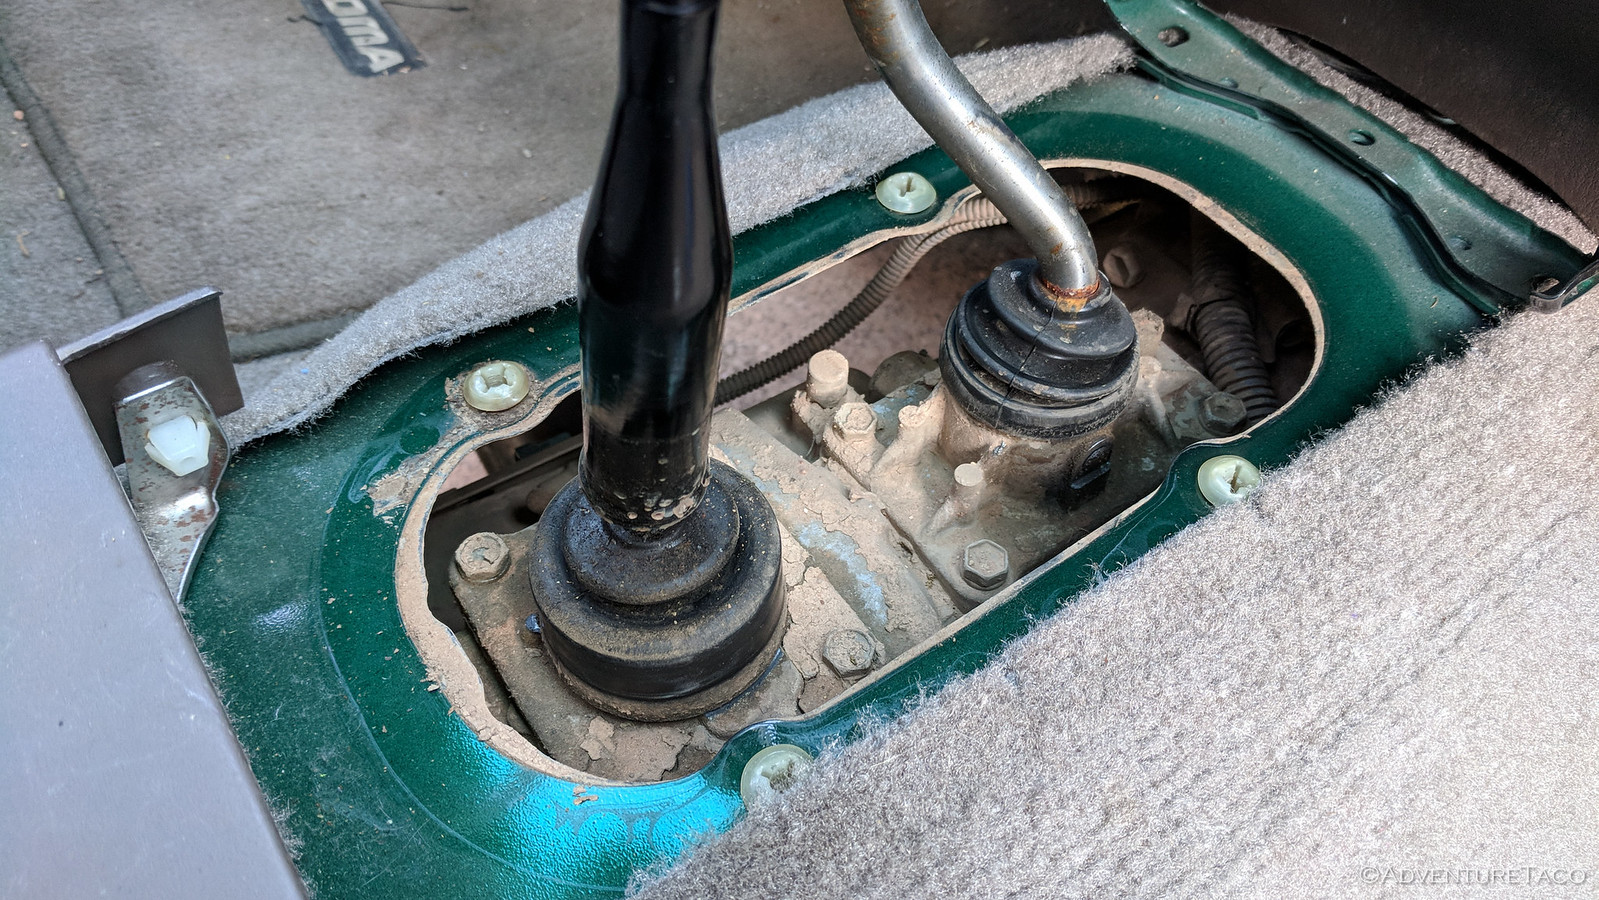
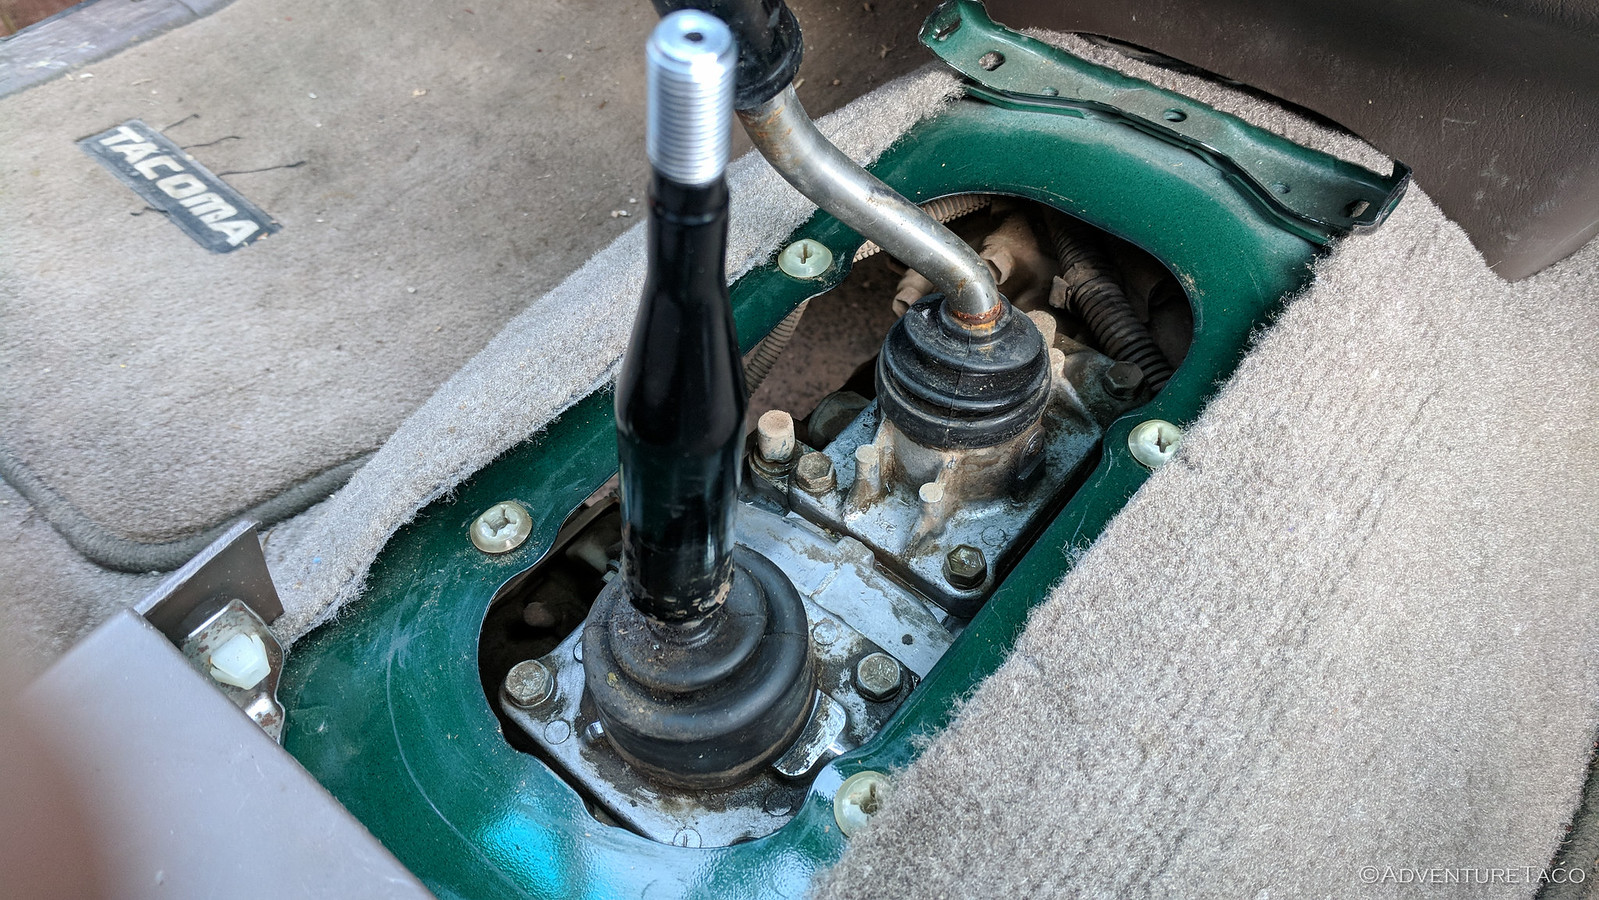
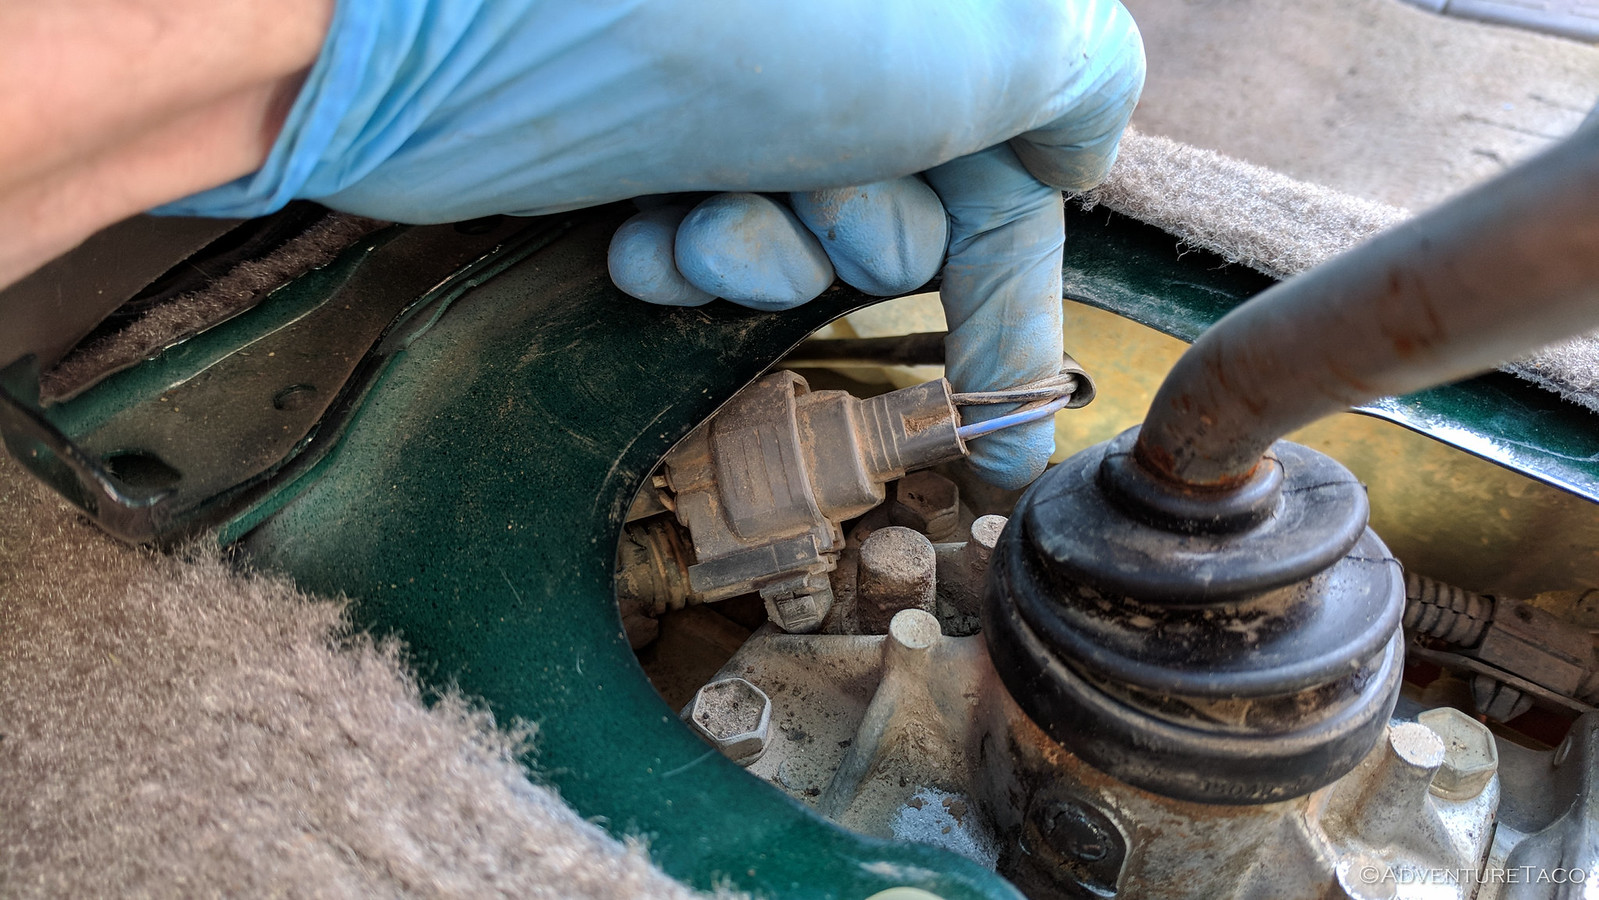
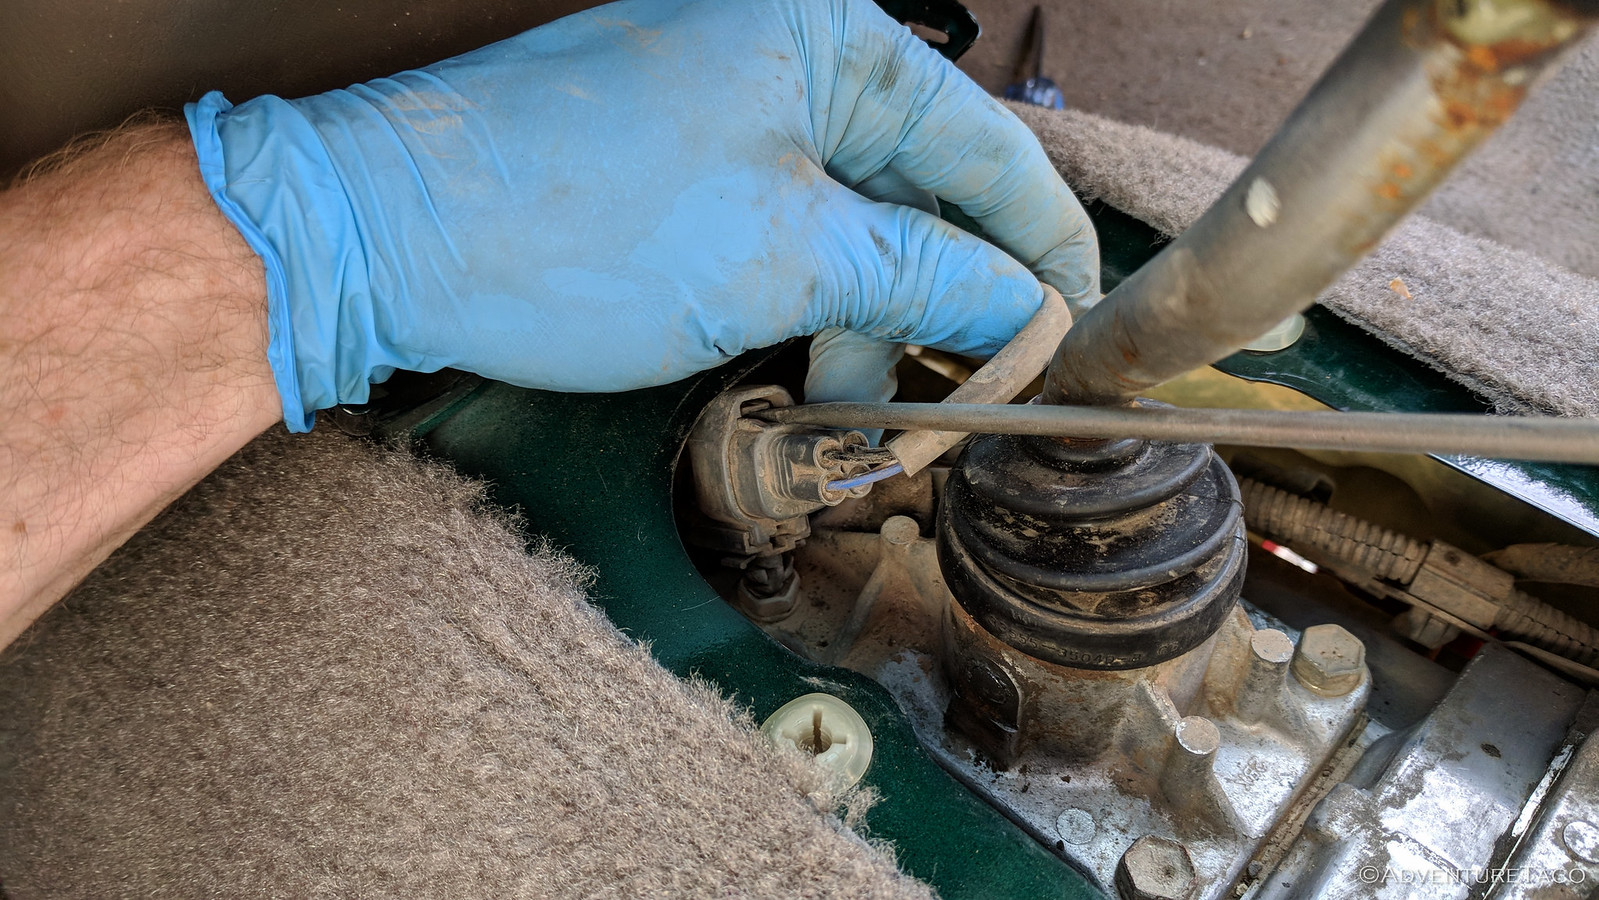
Now, if you look forward on the transmission, you'll see the connector your after. It's clipped about 4-inches forward, just out of finger reach. Use a screwdriver to pry out the clip so you can access the connector. Go slowly and use a flashlight - the clip is installed vertically, so you pry "down from the top" and "up from the bottom" in order to release it.
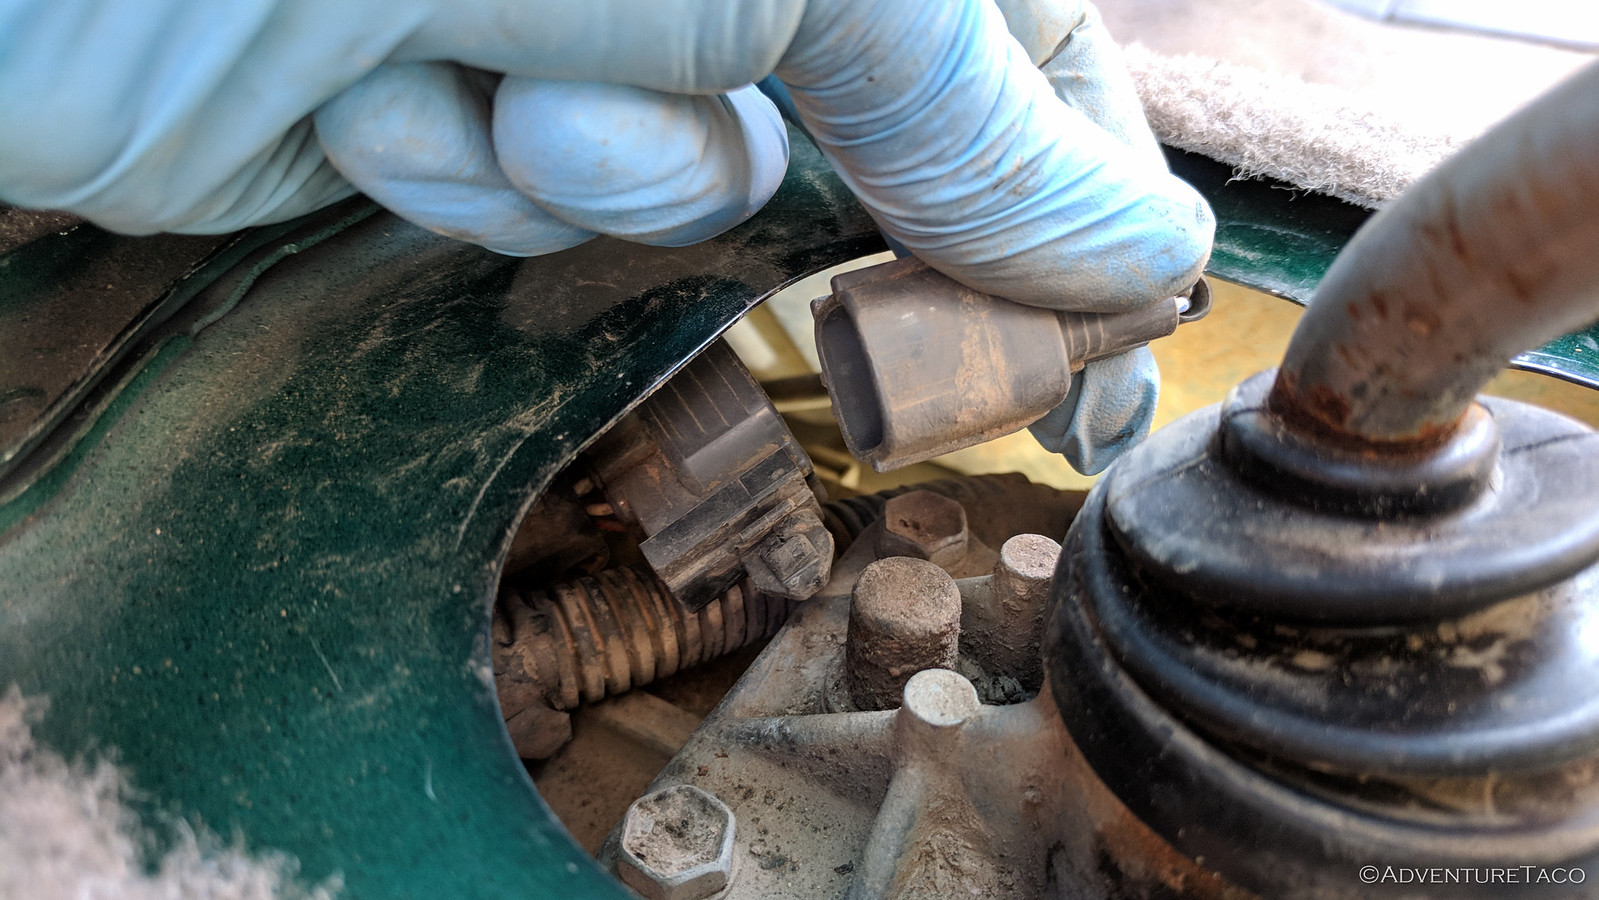
Once you've released the clip, you can pull out the connector and disconnect it. I found a screwdriver to be useful in this process as well, as I could pry "up" the catch more easily than trying to compress the plastic on the other side of the connector.
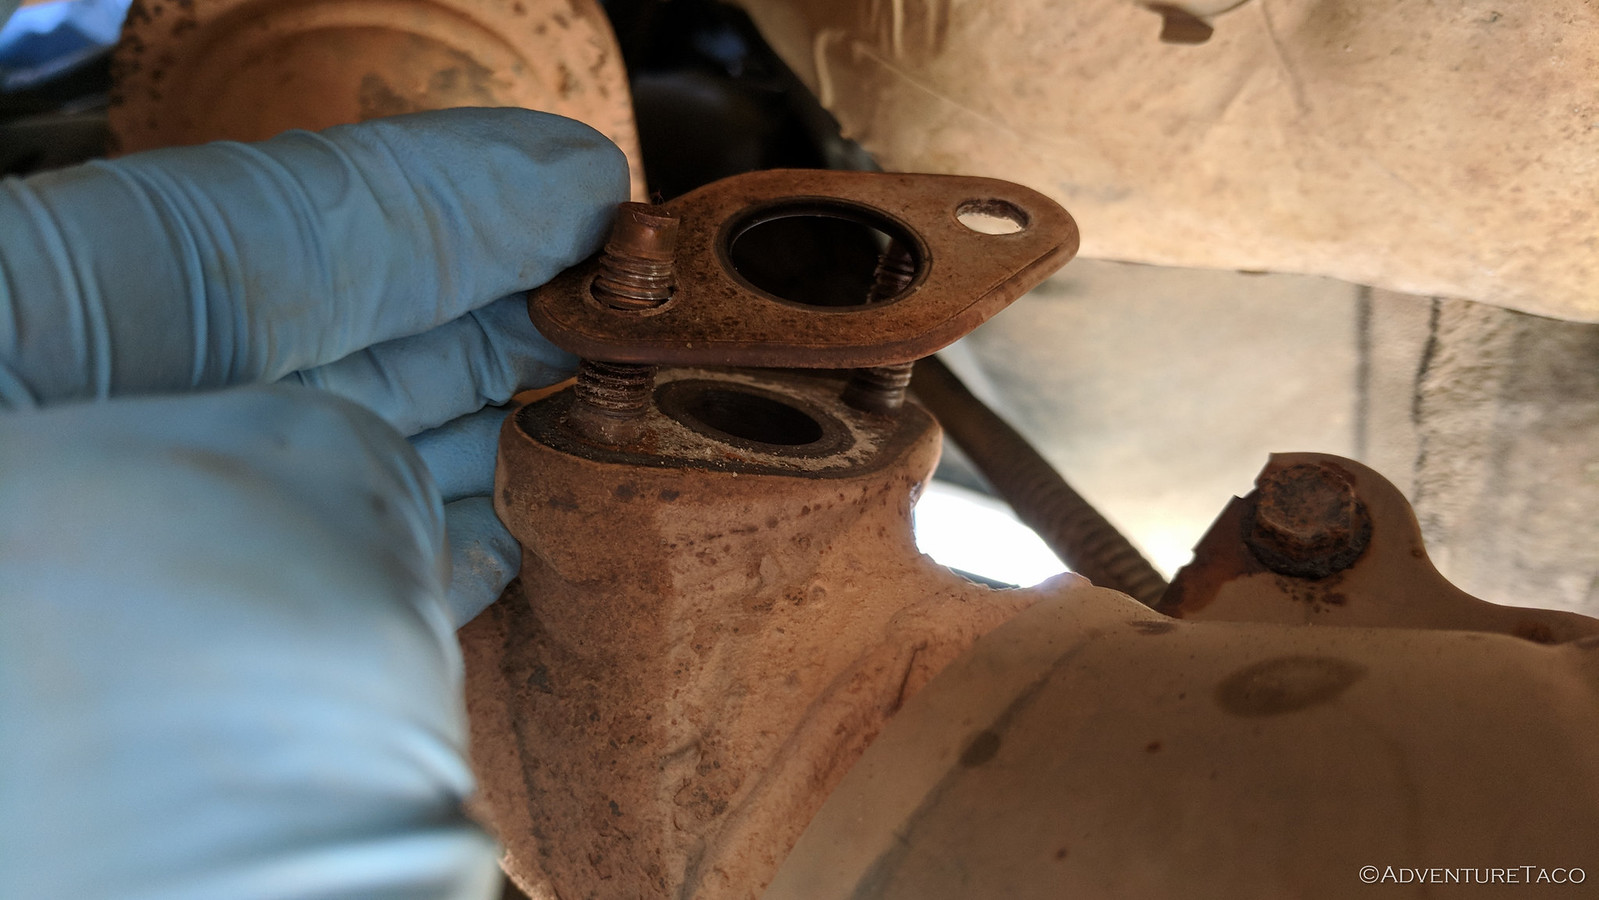
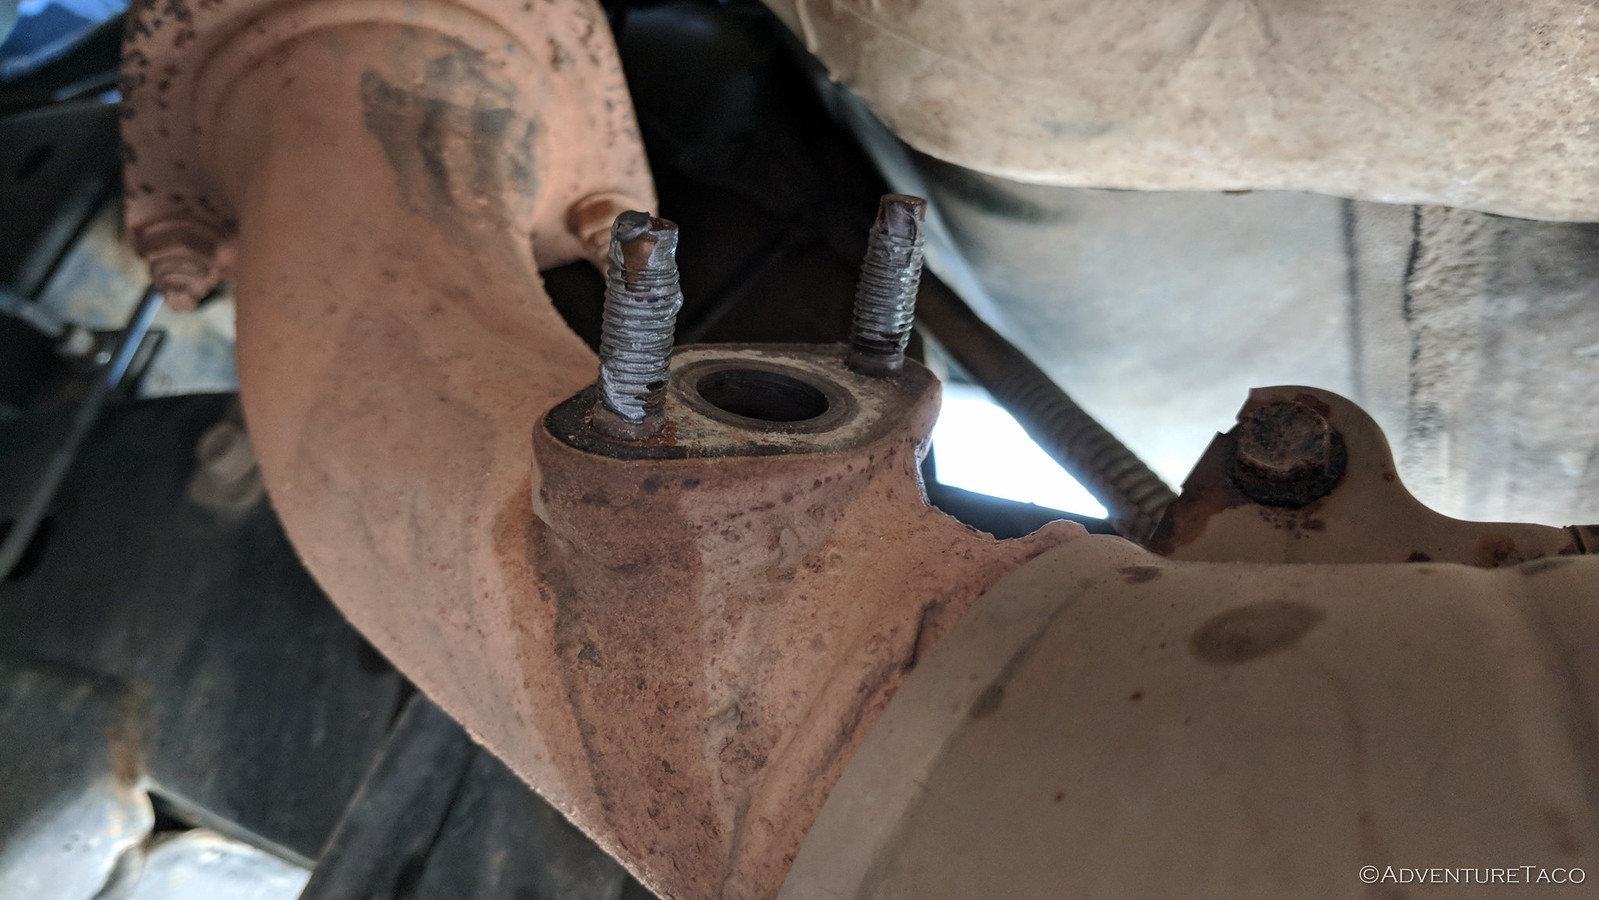
It's now time to remove the sensor itself. Back under the truck, I used a 12mm socket and a bit of dexterity (use whatever adapters you need) to remove the two nuts holding on the AF sensor. Once you do, carefully remove it and the gasket below it, noting the orientation of the gasket, which is important.
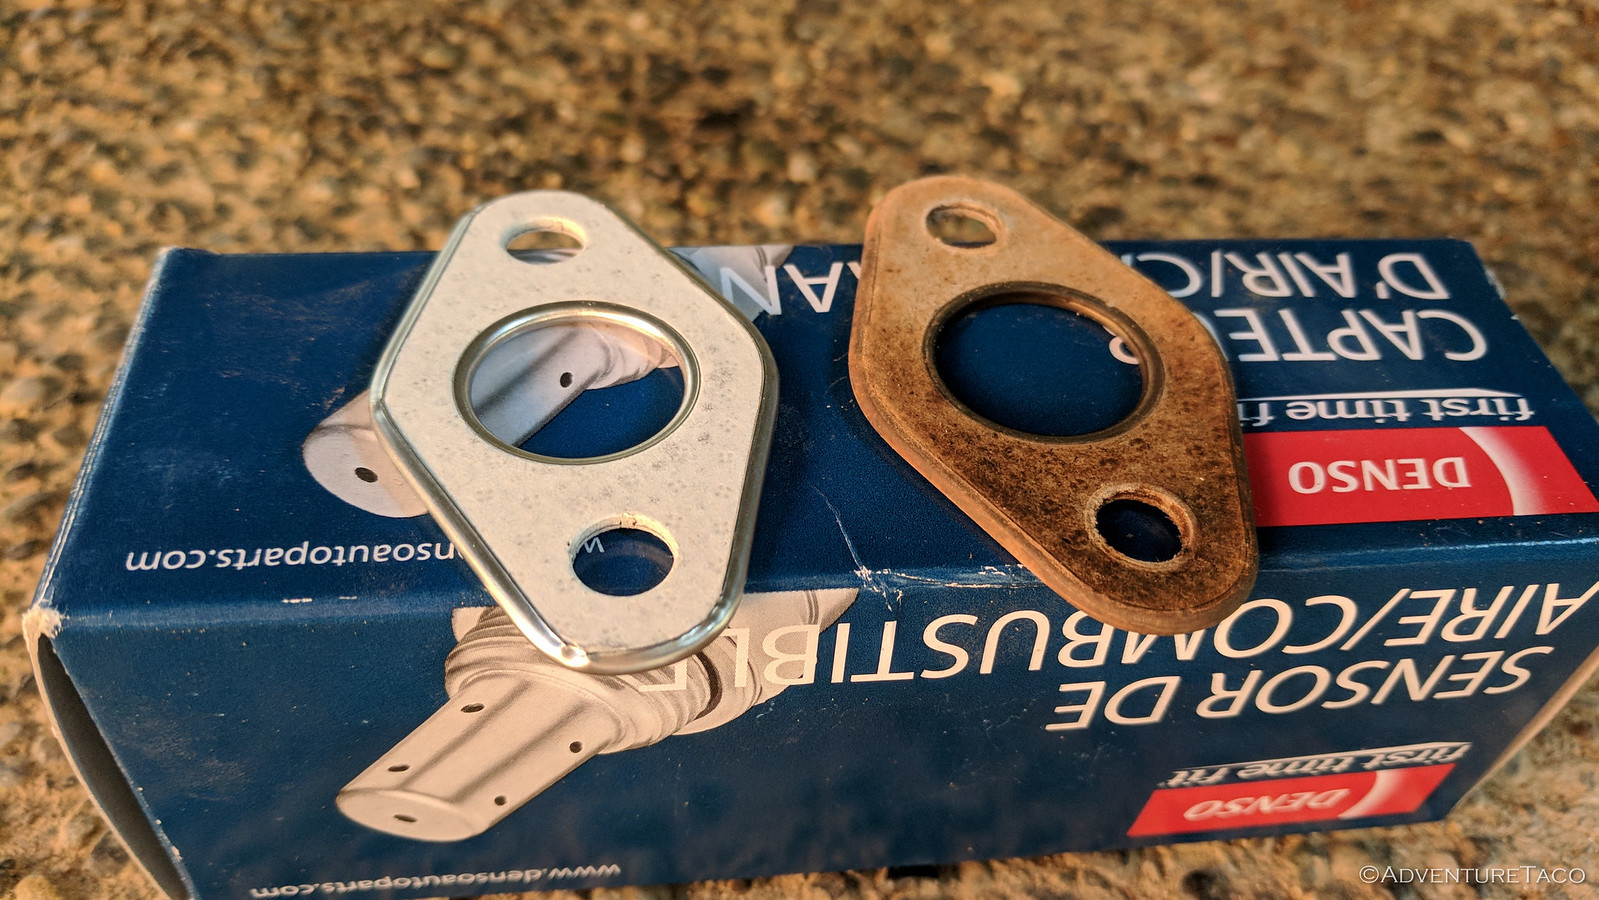
Next you can compare your old and new sensors to ensure that they are identical. My old one looked like it was in reasonably good shape, though I wouldn't know until the new one was installed and tested.
Connecting the new sensor is straight forward. I wrapped the sensor itself in the plastic bag it came in (so it wouldn't touch anything) and set about connecting the electrics first. This is just a matter of plugging the connectors together, and I opted to hold off on securing the connector to the top of the transmission until I was sure the new sensor was working.
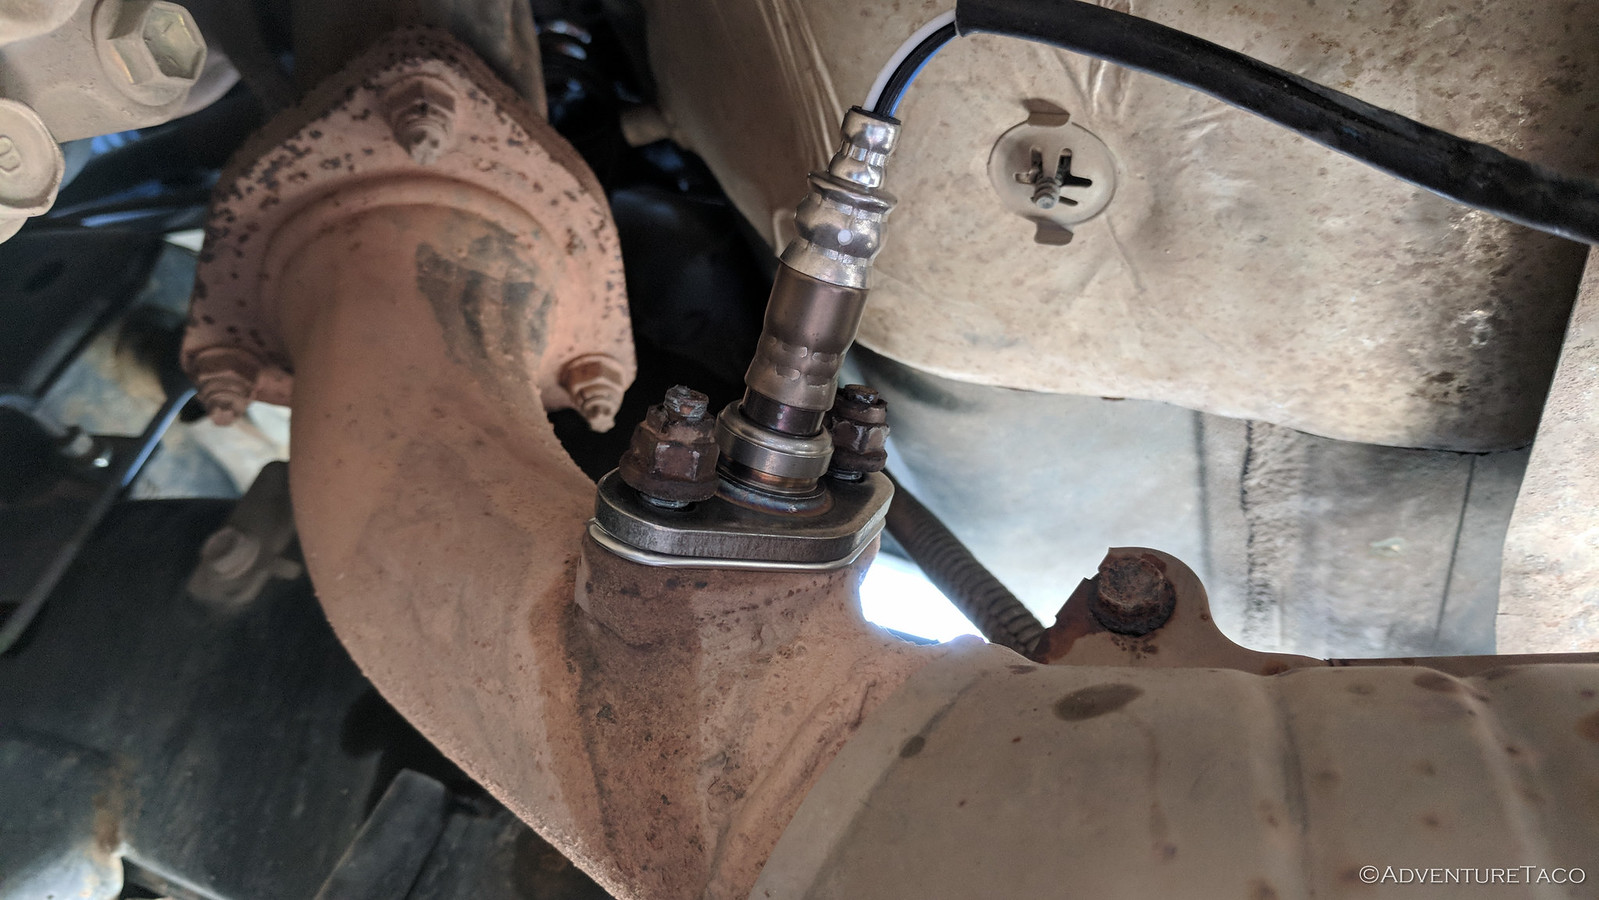
Next, under the truck, I spread some anti-seize on the bolt studs for the AF sensor, and installed the gasket and sensor itself, first tightening the nuts by hand, and finishing them to 14 ft-lbs as speced ("tight" in my case, since it's pretty tough to get a torque wrench up in there).
Then it was into the cab so I could test everything. Everything was working as expected, so I re-clipped the connector to the transmission and buttoned up the shifter boots and knobs.
At that point, I took stock of my fuel trim situation. It was slightly better still, though Bank 2 was still showing higher trims than I'd expect.
So - here's the current situation. I believe that I'm below thresholds that will trigger a P0171 CEL at this point, but I still plan a couple follow-ups to determine whether I need to do work to the Bank 2 injectors:
- Chat with Toyota Service to see what they think of the LTFT numbers I'm seeing, as well as the difference in trims between Bank 1 and Bank 2.
- Convince some good folks who have first gen Tacoma's to take a look at their fuel trims, to see what ranges they are seeing, and to see if they have differences between the two banks.
- - -
Thanks for reading! And thanks to Monte (@Blackdawg), Zane (@Speedytech7), Mike (@Digiratus) and Dan (@drr) who answered a bunch of my questions as I went through the process, and helped me better understand a bunch of this.
- - -
Update: 2018-05-15
The LTFT numbers I was seeing for Bank 2 are bogus and should be ignored. Our (first gen) Tacoma's do not differentiate between Bank 1 and Bank 2 for LTFT, they send only one number to the ECU. The scanner is just picking up "random data" in the memory stream coming out of the OBDII port for Bank 2 fuel trims.
 - Still Happy")


Thanks, man. Great write up. -2001 4x4 manual owner.
Sure thing, hope it helps if you're chasing the same! Trucks are pretty similar, as mine is a '00 4x4 MT. ?
After replacing the TPS and cleaning the MAF i'm still getting the P171. i only get this when i pull a load... not much in my book but half a ton of gravel tips it when i pull a grade. Any suggestions?
When pulling a load, you're putting more stress on the vacuum system, so I'd do a careful check of all vacuum lines. If you can't find a leak, then perhaps a smoke test is in order, though that may also be difficult to diagnose if the problem doesn't reproduce when the system isn't under strain.
The one other thing to be aware of is that P0171 essentially means that the computer thinks the "air in" (MAF) and "air out" (forward O2 sensor) doesn't match, after taking into account combustion, etc. So, it could also be the forward O2 sensor.
Hope that helps, would love to hear what the problem is when you narrow it down!
What fixed your problem? I have the same thing going on. Replaced MAF, front 02 sensor, spark plugs, and wires. Engine runs fine but randomly throws P0171. My LTFT is at 35. I've smoked the whole intake system and replaced all hoses that were leaking. Even intake hose with MAF sensor in it. Sometimes it takes 4 or 5 drives before it shows up. Fuel pressure is good with a new fuel filter. Thanks
Hey Nate, as I noted in the story, the MAF and front O2 - really, an AFR (sir-to-fuel ratio) - sensor did the trick for me. You can see in my numbers that the MAF had the greatest impact on fuel trims, but the front O2 sensor definitely helped as well. I'd take a look at the airflow rate from the MAF (as noted above). Also, did you replace the MAF and O2 sensor with OEM/Denso from a reputable source? Aftermarket and knock-off (counterfeit) versions of these components are known to perform poorly.