Post by BigFishAllDay, circa 2011. Captured here for posterity, given the wealth of info the post contains. For my Tundra Brake Upgrade, see New-to-me Tires and a Tundra Brake Upgrade.
I’m in the process of doing the 231mm Tundra Brake Upgrade and I realized while I was searching for information on the upgrade, there was very little info available as to the differences in specs between the stock hardware and the 231mm Tundra calipers/rotor. A lot of this information would have been handy for me in deciding whether or not to do this upgrade, and whether or not to go w/the 199’s VS. the 231’s.
There is some info out there, don’t get me wrong. That being said, the current info on the web leaves a lot to be desired. So I decided to post everything I've learned about 231mm Tundra Brakes... maybe it will help someone along the way.
First, the benefits of the 13WL (231mm) caliper over the 13WE (199mm) caliper are as follows:
The mechanical difference boils down to the updated caliper being much larger to hold a larger pad....The early style pad (in the 13WE caliper) will be less than 5” (4-11/16” or 199.5 mm) in width; the (pads in the) later update (13WL caliper) is more than 5” (5-5/16” or 231 mm). Both of the calipers have the same dimensions on the mounting bosses......The update (to 13WL calipers) will replace the (13WE) calipers with a larger set that will provide additional swept area and fluid capacity for heavy-duty use.
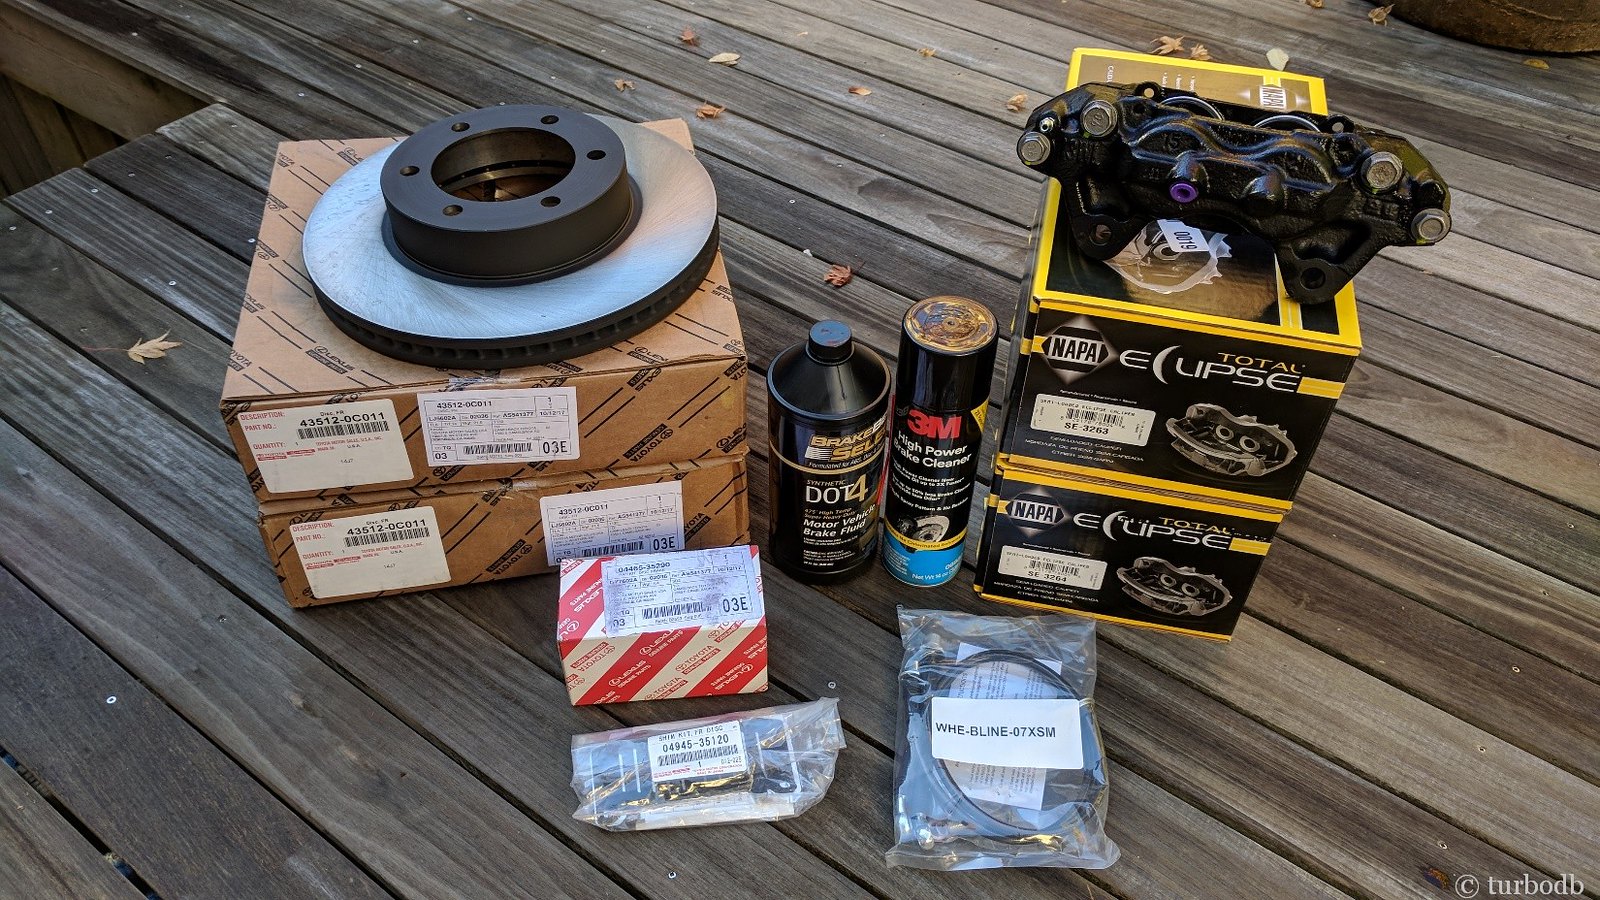
Here’s all you need to do the upgrade…
When ordering parts, tell them it’s for a 2005 Toyota Tundra 4x4 V-8. You could get this stuff from NAPA, or AutoZone, which is a little cheaper... a Toyota Dealer, which would be more expensive, or your auto parts store of preference. You might also consider junkyards if you have a good one nearby.
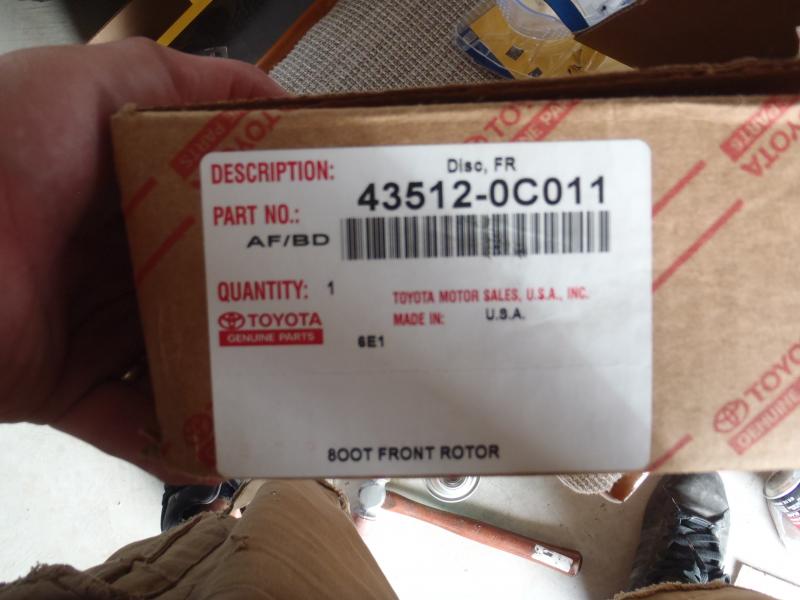
- 2 Toyota Tundra OEM rotors (L/R: 43512-0C011) Note: amazon is sometimes out of these, and the Bosch QuietCast line is another good (and cheaper) option (L/R: 50011223)
- 2 Remanufactured Tundra 13WL calipers from Napa (L: CAL SE3263) (R: CAL SE3264)
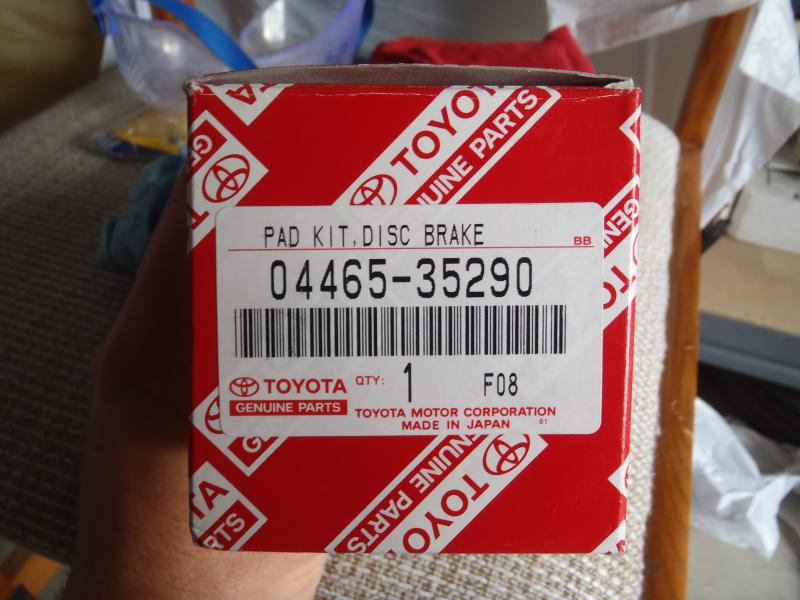
- 1 set of Toyota Tundra OEM brake pads (L/R: 04465-35290)
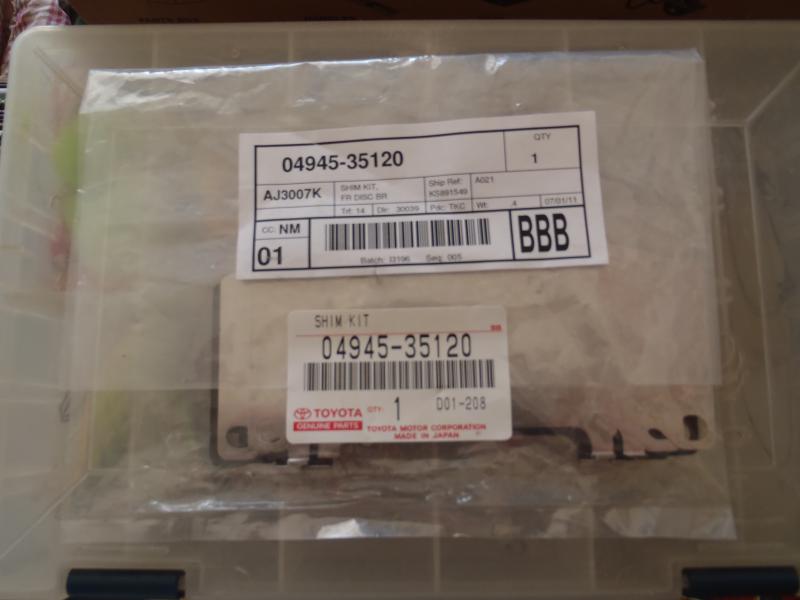
- 1 set of Toyota Tundra OEM brake pad shims (L/R: 04945-35120, or 04945-0c030)
- Brake lines
- Tacoma: 1 kit: Tacoma-to-Tundra Hard Brake Line Upgrade Kit
- 4Runner: 1 set: 4Runner Stainless Steel Brake Lines for Tundra Upgrade
- Some DOT4 brake fluid, and brake cleaner
[Update 2019-08-19] - I've stopped using the Wheelers Stainless Steel front brake lines, in favor of Tundra-style hard brake lines. This isn't due to the Wheelers lines, but rather to manufacturing differences in Tundra brake calipers found at the standard parts stores. To see what happened to one of my calipers, see Rig Review: Idaho July 2019 - What worked and what didn't? and for the solution, Making It Right: Tacoma-to-Tundra Brake Upgrade, where I ultimately switched to a Tacoma-to-Tundra Hard Brake Line Upgrade Kit.
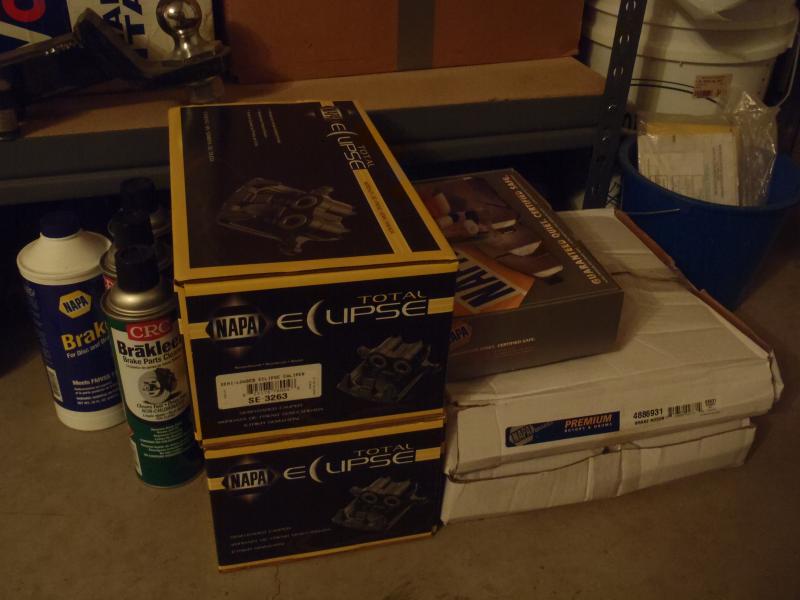
I initially went the NAPA stuff because it was readily available, the calipers are warrantied (versus getting them from a junkyard, you take your chances), and others have had good luck w/the NAPA setup. My only concern was that the NAPA rotors seem to be poorly cast and may have some balance issues. OEM Replacement Brembos are available on Amazon for about $64 and you can move up to a PowerSlot for about $120. Also, NAPA lists two different grades of Rotors.. there's the one I got, and a Premium which costs $90. That's the same as OEM, so why not go with an OEM rotor?
Upon further consideration, I have returned the NAPA Brake Rotors & Brake Pads due to quality/performance concerns. The NAPA Rotors went back because they have a lot of casting irregularities. The NAPA pads are not only MORE EXPENSIVE than OEM pads, but the pad surface has a chamfered edge that reduces the surface area of the pad that actually contacts the rotor by over 25%. This will result in a noticeable decrease in braking performance. I also learned that the NAPA Ultra Premium pads are manufactured by Akebono (not a bad thing, just FYI).
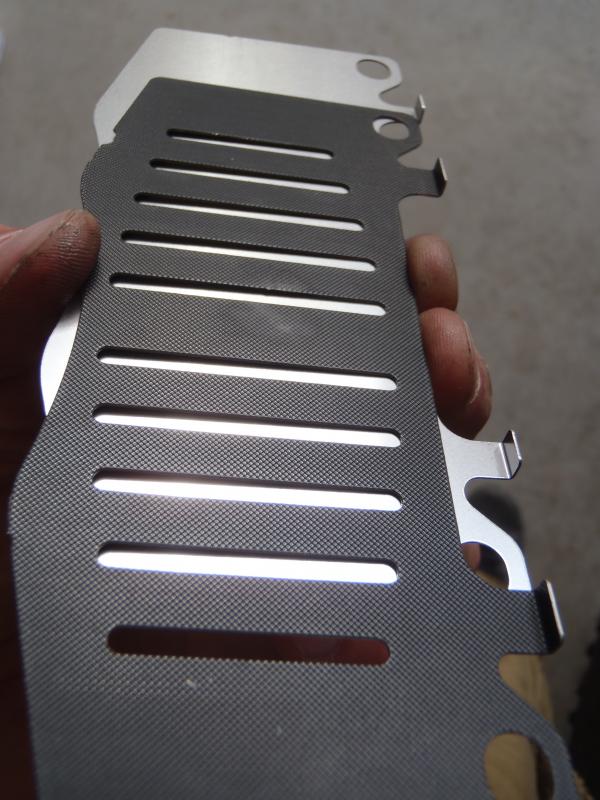
Here's a photo of the Toyota Pads & Shims alongside the NAPA pads. Notice on the NAPA pads, there is a shim pre-installed. The Toyota shim kit comes w/8 shims, two per pad. Also note the chamfered edge on the NAPA pads, and the significantly reduced contact area on the pad.
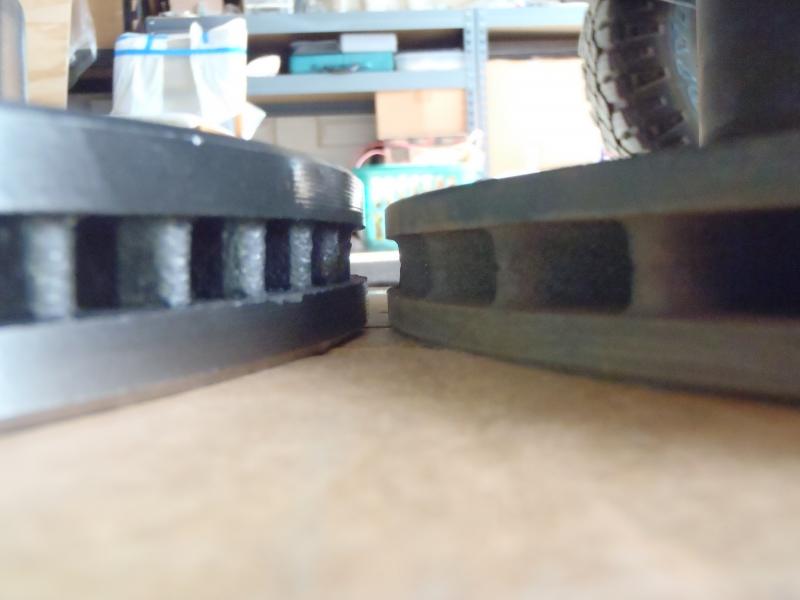
This is a shot of an OEM Tundra Rotor (on the left) versus a NAPA Tundra Rotor (on the right).
And this is why I returned the NAPA rotors... Look at how clean the casting is on the OEM rotor on the left, versus the sloppy casting, rough, uneven cooling fins, and uneven edges on the NAPA rotor.
I started out with this pile of parts...
Then I returned the NAPA Rotors and Brake Pads and ended up with these...
Good Tip RE Brake Pad options, thanks Socco:
There is another option for 231mm pads available in the US: Toyota P/N 04465-AZ001-TM This "Ceramic Brake Pad Kit" includes pads AND shims and retails for $56. This is much less than you'll pay to buy the pads/shims separately. This kit contains different pads/shims than the ones pictured below. HOWEVER, NOTE from BFAD: Be advised that the pads that come in this Kit are CHAMFERED just like the NAPA pads pictured earlier in this post. These chamfered pads will not provide the same pad surface contact with the rotor as the pads shown below. The decrease in pad surface area contacting the rotor will reduce braking performance. If you want the higher grade pads/shims, you will need to purchase the pads and shims separately and make sure you purchase the brake pads shown below, Toyota Part # 04465-35290.
Cost Breakdown (as of 2011)
Toyota OEM Rotors @ 89.77 ea........................ $179.54
Toyota OEM Brake Pads...................................$60.94
Toyota OEM Shim Kit for Front Brakes.................$41.37
Napa Reman'd 13WL Calipers @ 92.99 ea.............$185.98
32 oz Bottle of Valvoline Syn. Dot 4 Fluid.............$7.99
Brake Cleaner @ $3.99 ea.................................$11.97
Total.............................................................$487.79
Tax...............................................................$34.14
Grand Total.....................................................$521.93
I did not include the Core Charges @ $55.00 ea. because they get refunded when you take your old calipers back. They will accept your 4Runner calipers in return as cores. Don't make a point of telling them that they are not the same as the ones you bought, and things will work out fine.
BTW, my cost was SIGNIFICANTLY higher than what most people pay because I used OEM stuff. I hate doing things twice so I dropped the extra coin to have the highest quality components the first time around. When buying new parts, you can get this done for $320-$420 depending on how much you shop around and look for deals. If you go to a Junkyard, you could probably do it for even less.
Tools
- 17mm socket for Caliper Mounting Bolts
- 10mm Line Wrench for removing Brake Line
- 12mm socket for removing Brake Line Bracket
- 8mm open end wrench for the bleeder valve
- Torque wrenches… The torque spec for the Caliper Mounting Bolts is 90 ft/lbs per the FSM, and the brake line is 11 ft/lbs per the FSM. You’ll need both a big and small torque wrench to hit these torque values exactly. (Note: The FSM is providing torque specs for the OEM 4Runner hardware, but since that is re-used during the upgrade they should be the same.)
- 2 feet of Clear Tubing for bleeding the system
- Things that are nice to have in addition to the list above: Breaker Bar, Vice Grips for pinching the brake line, Plastic Caps for capping the brake line (vacuum caps work great), 3" and 6" extensions, a rubber mallet/hammer, Sandpaper for cleaning up the hub, a Dremel Tool w/a cutting wheel for trimming the Dust Shield, needle nose pliers for installing pad springs, 10mm Crows Foot for torquing brake line to caliper, extension cord…. And eye protection is nice too.
FSM links:
If you have an FSM, the following sections could be useful:
- Bleeding Brakes: [ Repair Manual \ Brakes \ Brake Fluid \ blee.pdf ]
- Replacing Pads: [ Repair Manual \ Brakes \ Front Brake Pad repl.pdf ] Remember, this is the procedure for replacing STOCK brake pads, but it helps to give you an idea of what you might want to lubricate.
- Removing & Installing STOCK caliper: [ Repair Manual \ Brakes \ Front Brake Caliper \ comp.pdf ] Use this to reference Torque Values.
On to the SPECS!!! Let’s start with the Side by Side Comparison
Remember this entire thread is based on the specs of a STOCK S13WM Brake Caliper & Rotor VS. a 13WL 231mm Tundra Brake Caliper & Rotor.
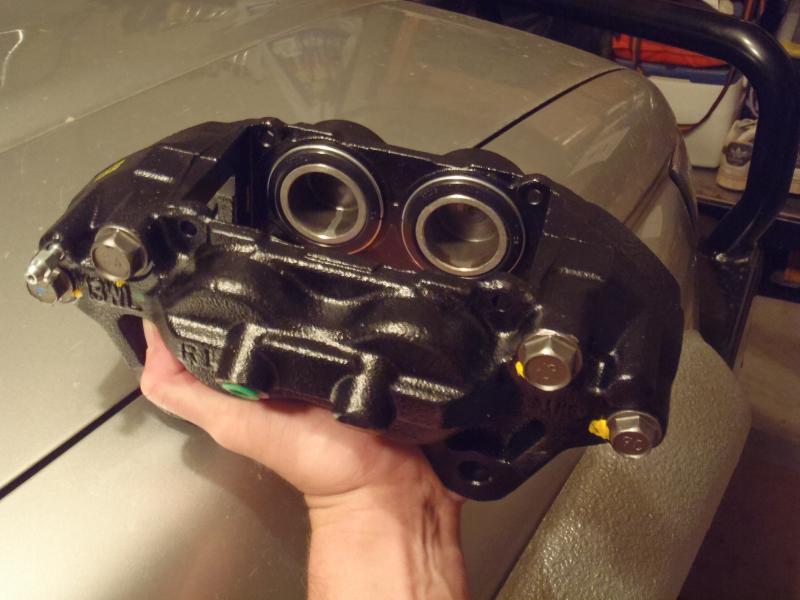
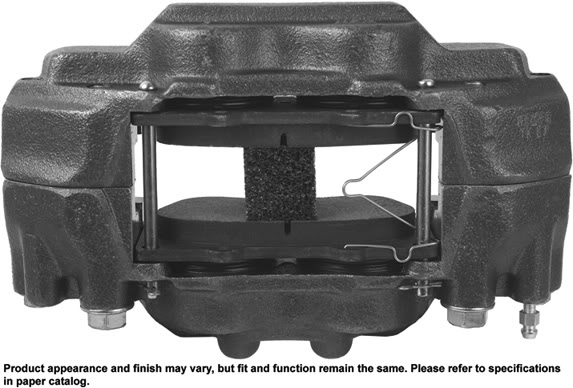
The new hardware. It appears much beefier and much bigger when you first pick it up.
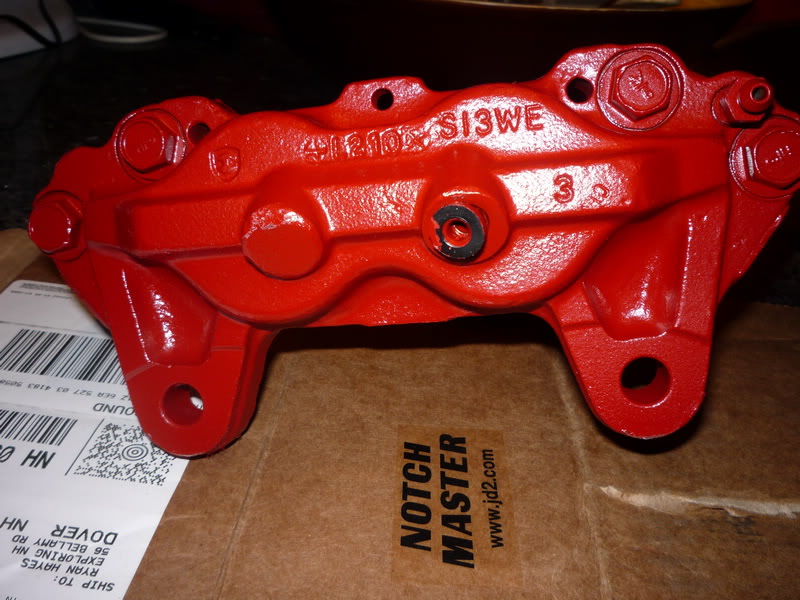
And some side by side comparisons, just for reference… The stock calipers are stamped as a S13WM casting.
A shot of the Tundra rotor on the left, versus the Stock rotor on the right....
Specs on the Rotors…
The braking surface of the Tundra rotor is much thicker than the stock rotor, but other than that they are identical in size and shape.
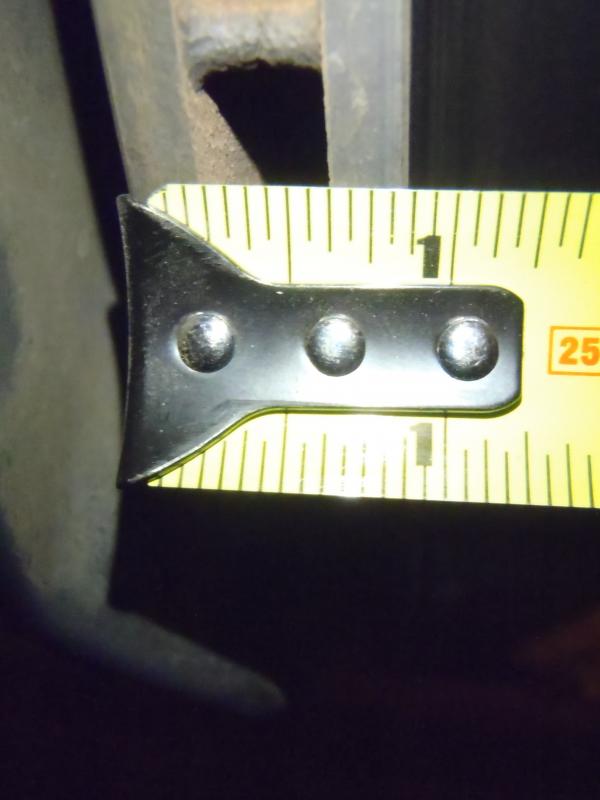
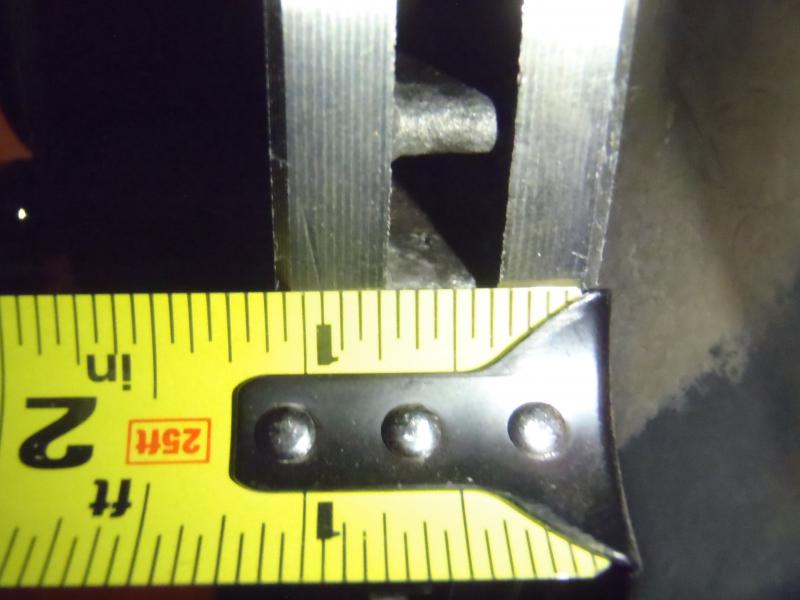
Stock Rotors are about 7/8” thick
Tundra Rotors are 1 3/32” thick... The overall diameter, bolt pattern, hub bore diameter, and bell section diameter are all the same...
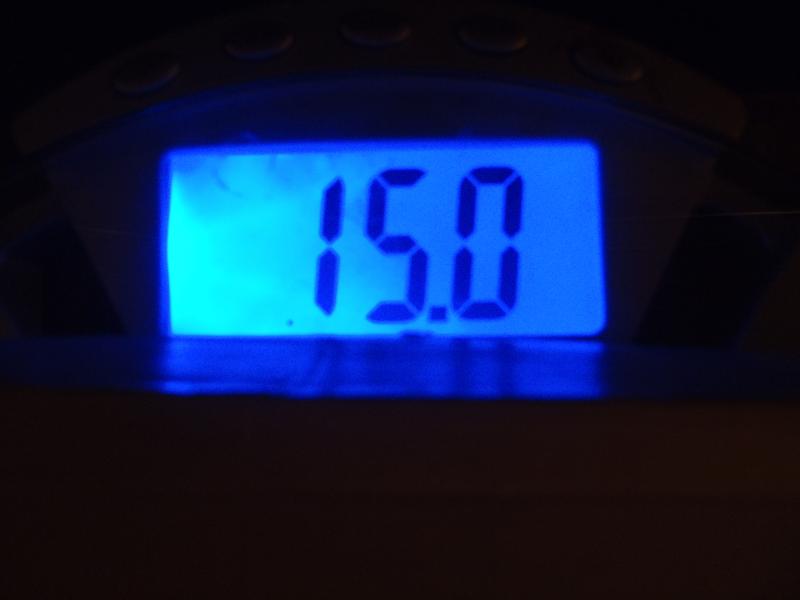
Stock rotors WEIGHT is 15 lbs even (my Rotors were nearly new, so this is reflective of a new stock rotor)
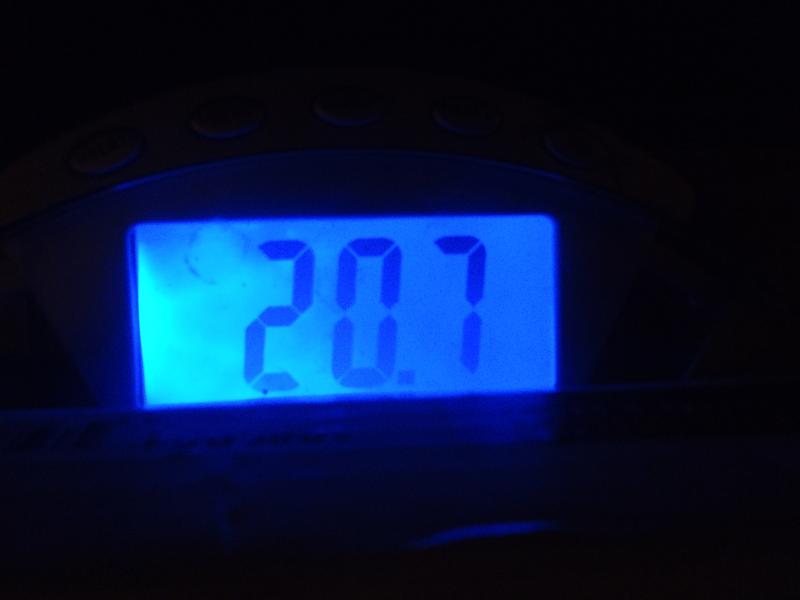
Tundra Rotors WEIGHT is 20.7 lbs… extra thickness makes a big difference and gives you a 5lb increase in the size of the primary heat sink in the braking system. The increase in rotor mass is probably the biggest benefit of this upgrade. (Remember that this is an extra 5.7 lbs of UN-SPRUNG WEIGHT, which means it will change the dynamics of how your vehicle handles and how the suspension reacts to the road. This is probably not much of a concern on a 4Runner, but a big deal on a sports car.)
Some write-ups state that when installed, the increased thickness of the Tundra Rotor reduces the amount of wheel stud available for the lug nuts to thread onto by a corresponding amount. This is NOT TRUE. The rotor that goes w/the 231mm Tundra Calipers does NOT reduce the useable length of the wheel studs.
Stock… Note the amount of stud showing...
And w/the Tundra Rotors installed…. Same amount of stud available...
So, how is it that the Tundra Rotor is thicker, but does not extend the wheel mounting surface outboard? The answer is that Toyota moved the outboard friction surface of the rotor toward the wheel mounting surface, resulting in a shallower bell section of the rotor.
Stock distance between outboard friction surface and wheel mounting surface, 1 7/8”
Distance between outboard friction surface and wheel mounting surface on Tundra Rotor... 1 5/8”. The 1/4” that the outboard friction surface moves toward the outside edge corresponds to the 7/32” (or approx 1/4”) increase in the thickness of the rotor. So that’s where they put the extra mass.
Specs on the Calipers
I took a bunch of measurements on the Calipers as well so that I could make a thorough comparison between the two. It turns out they are very similar in size, except in terms of overall length.
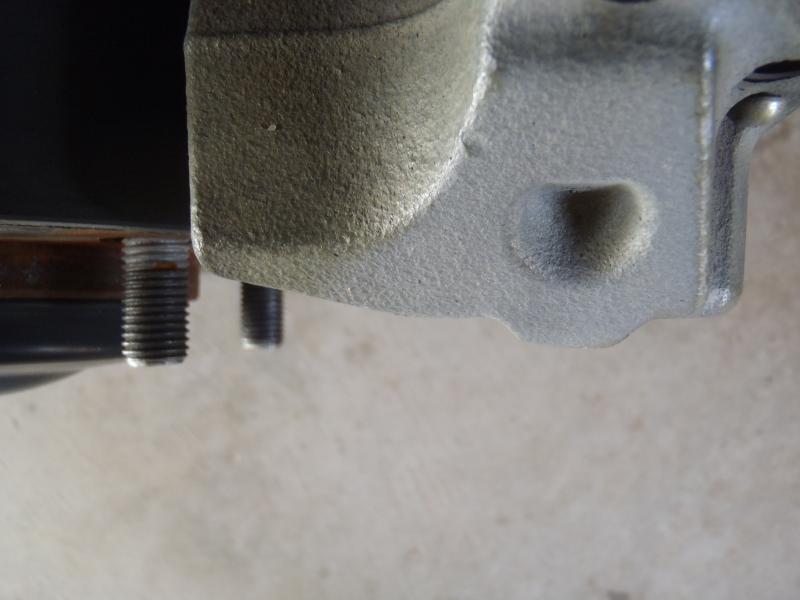
First, I wanted to know how much farther the Tundra caliper protrudes outward versus the stock caliper. For a reference point, I used the wheel studs and a carpenters square to see how far the outermost surface of the caliper sticks out compared to the wheel studs. Notice that both calipers are nearly identical in terms of where they sit in relation to the wheel studs.
Stock Caliper...
Tundra Caliper...
I thought that there would be a big difference here due to how many issues people have with wheel clearance. It looks to me like the problem isn't the outermost surface of the 231mm caliper, but rather the surfaces/ridges between there and the wheel mounting surface. That section of the Tundra caliper is shaped differently, see pics below...
Stock...
Tundra...
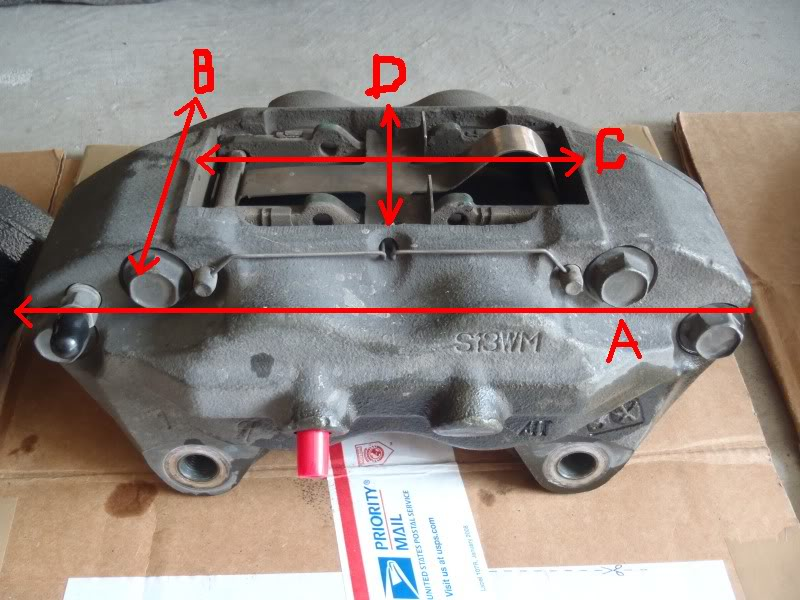
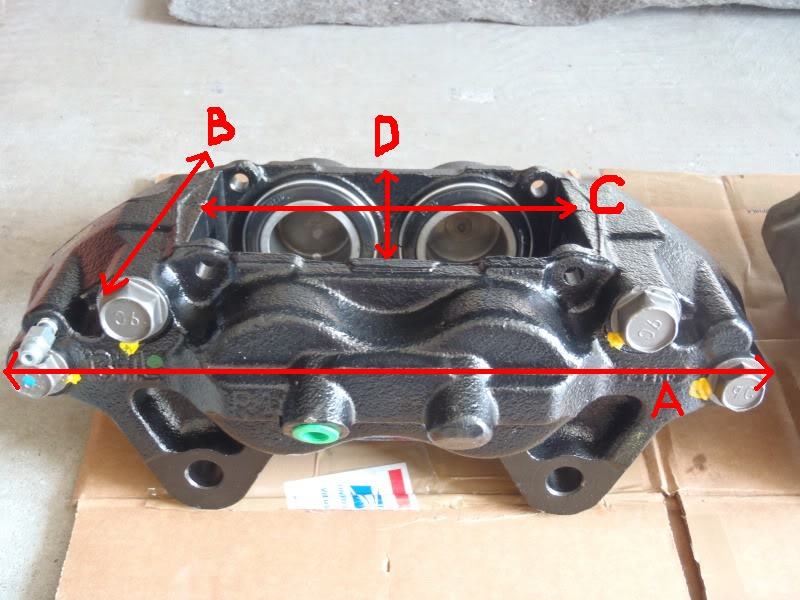
Stock Caliper (S13WM)
A = 8 1/2" Long
B = 6 1/8" Wide
C = 4 3/4" long
D = 2 7/8" wide
Tundra Caliper (13WL)
A = 10 1/8" Long
B = 6 1/8" Wide**
C = 5 5/16" long
D = 3 5/32" wide
** Measurement B does not include the small nubs in the inside of the caliper where the brake line threads into the caliper.
Aside from the overall length of the 231mm caliper, it is very close in size (Measurements "A" & "B") and positioning on the vehicle to the stock caliper. I had read that the Brake Pads for the 231mm caliper were also much bigger than stock, and the measurements of the Brake Pad Cavity do support that.
With regard to the brake pad cavity, the difference between the two in measurement "C" was about 9/32" or a little more than 1/4". Once again, this corresponds to the 7/32” (or approx 1/4”) increase in the thickness of the rotor. I would assume the extra 2/32" is to allow for slightly thicker brake pads.. however that would only be 1/32nd on each pad. That might give you some extra life, but probably won't have any impact on performance.
Since the increase in the width of the brake pad cavity is mainly due to the additional thickness of the rotor, I also took a look at the length of the brake pad cavity.
The brake pad cavity on the Tundra 231mm caliper is 9/16" longer than the cavity on the stock caliper. This definitely allows for a larger brake pad surface area.
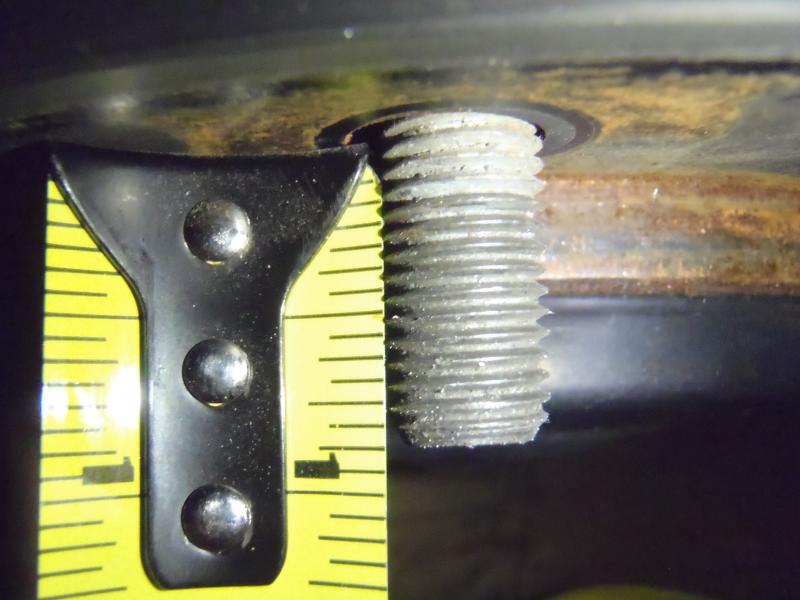
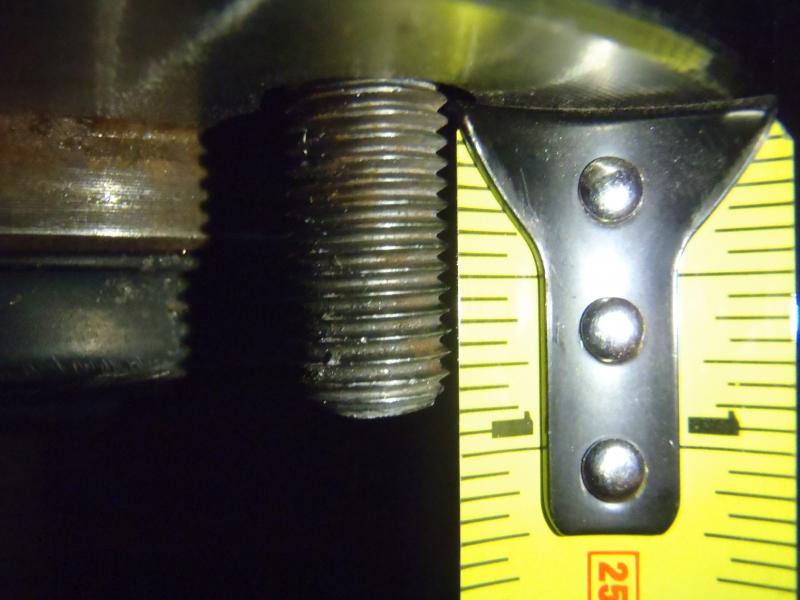
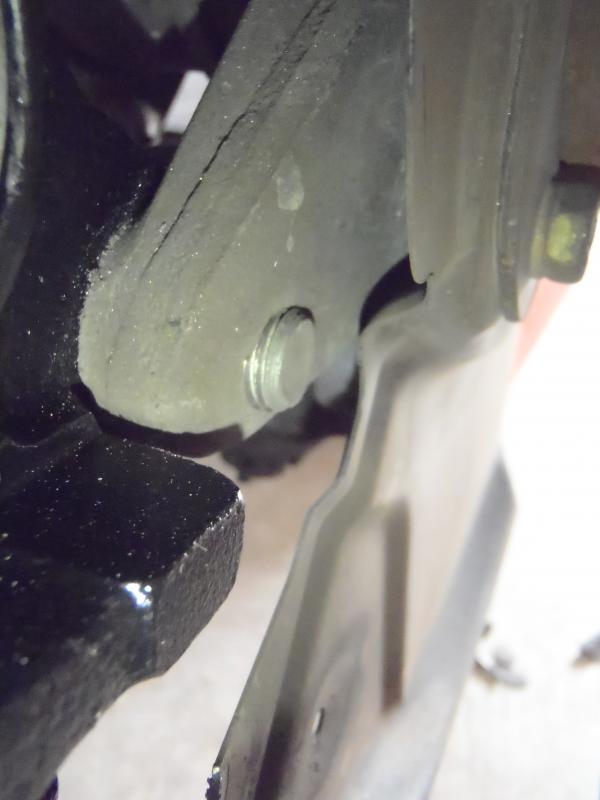
I wanted to check on another 231mm caliper specification that nobody ever really mentions. The two 17MM bolts that hold the caliper on are CRITICAL BOLTS and I wanted to make sure that they still got sufficient thread engagement with the 231mm calipers. I mounted the caliper without the rotor or the pads so that I could take a look at how far these bolts thread into the mounting holes.
Top bolt... That's got plenty of grab!
Bottom bolt, Looking GOOD!
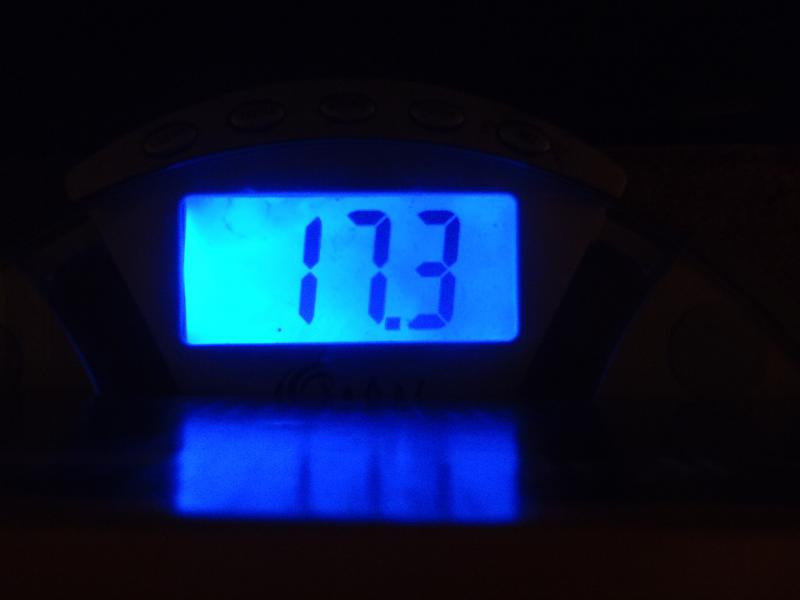
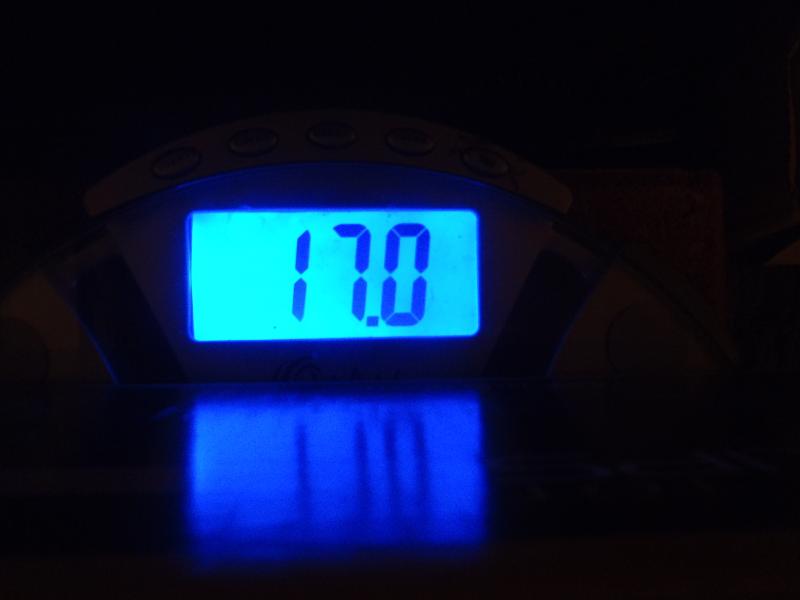
Finally, I wanted to know how much unsprung weight I was adding by moving up to the larger 231mm calipers. I put them both on the scale WITH brake pads and associated hardware to check the difference in the weight of the calipers.
Stock Caliper
Tundra 231mm Caliper
I was surprised to see that the 231mm Tundra calipers actually weigh a little bit less than the stock calipers. In terms of weight you gain 5.7lbs on the rotor and you lose 0.3lbs on the caliper for a net increase in unsprung weight of about 5.4lbs per side.
Finally, while we're talking about calipers, I thought I should include some valuable information contributed by NelsonMD.
When I was purchasing calipers, I was offered an alternative to the 13WL.. it was much more expensive and the casting was 13WG. I wondered what the differences might be, and NelsonMD was kind enough to find out.
I have found that shops don't distinguish between 13WL and 13WG, no one really seems to know the difference, and lots of people have gotten them mixed up. It is all about the brake line angle.
13WL, Ignore the fact that he used a banjo fitting, not an inline.
13WG, Note the angle of the nubs on the caliper where the brake line threads into the caliper.
And finally, a picture of the S13WE for reference (199mm)
Bottom line is, 13WL is needed for hard line fitting, but if you replace the hard line with flex line, you could use either.
Installation
Installation is pretty straightforward. The 231mm calipers bolt into the exact same spot as the stock calipers, and as mentioned before, the hub diameter on the Tundra Rotors is exactly the same as the stock rotors, so the rotors fit snugly right on the 4Runner hub.
There are a few things that have to be done, and a few tips that might save you a headache or two.
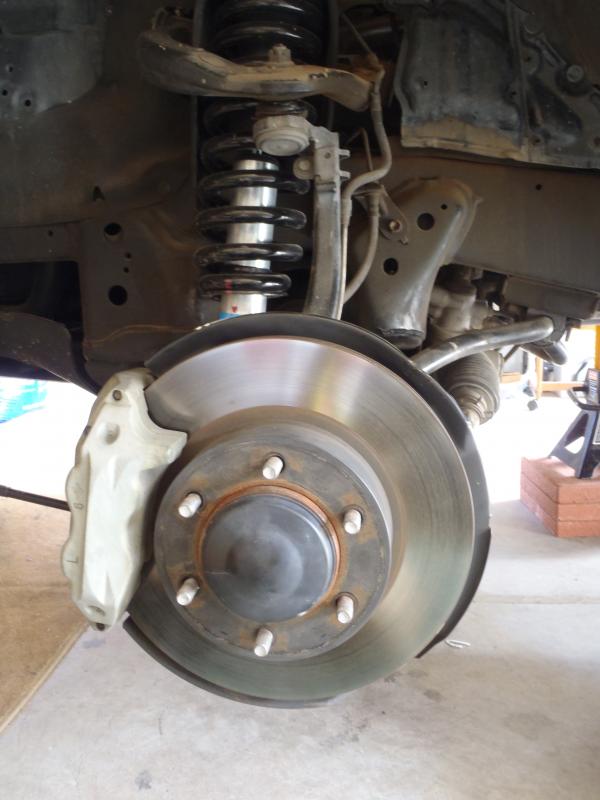
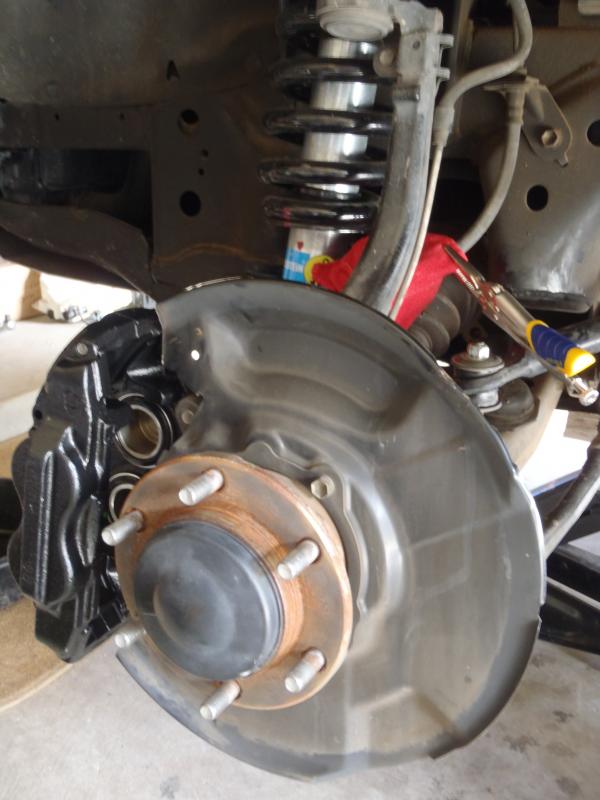
First, remove your wheel. Set it aside and keep a couple of the lugnuts handy. You'll be using them shortly. This is what you should be seeing once you've got the wheel off. All Stock.
Next, I took a small precaution that makes bleeding the brakes after installation much easier. It also eliminates any chance of air bubbles working their way back up to your Master Cylinder / ABS Unit.
If you don't have a pair of Vice Grip pliers, go buy some. For $20 you can get two pairs at Lowe's. For this process, you'll want a smaller set because they don't weigh quite as much.
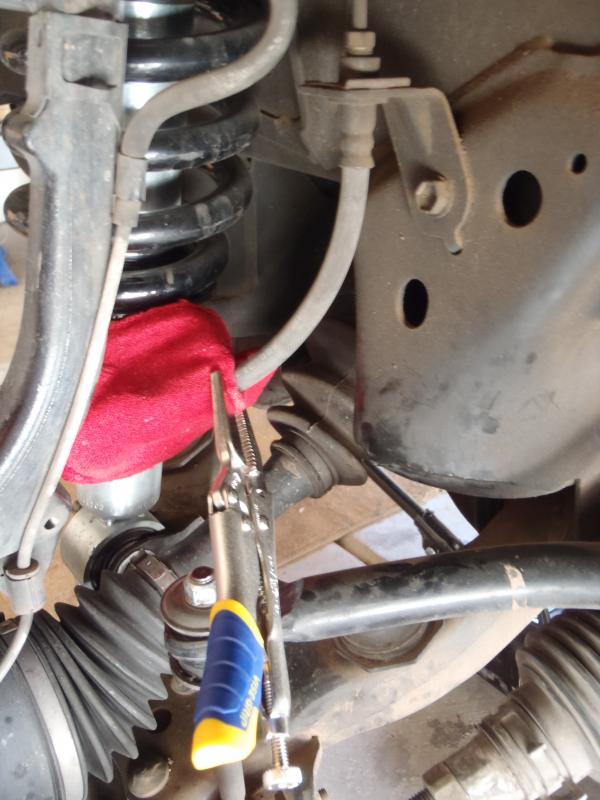
Take a shop cloth and fold it over several times so that you've got at least 1/4 inch of thickness. Place the cloth over the brake line, then adjust the closure on the Vice Grips to where they close just tight enough to pinch the brake line shut THROUGH the cloth. You MUST put the cloth on the line before you put the pliers on it or you will damage the brake line.
Next, using your 12mm Socket, 6" extension, and a Ratchet, Remove the bracket for the the brake line & ABS sensor from the spindle. This will give you some extra play in the brake line so you can move it back away from the caliper. You can see the bracket I'm talking about in the picture above. It is directly left of the jointed section of the pliers on the upright section of the spindle.
Next take your 10mm Line Wrench and remove the brake line from the stock caliper.
If you have successfully clamped the brake line shut with the Vice Grips it will create a vacuum effect in the lower section of the line and you should have minimal fluid leaking out of the line. I lost 2 drops. Assuming you have purchased some Vacuum Caps, you should place one of them over the end of the Brake Line to further reduce fluid loss and prevent contamination of the line.
At this point, you're ready to remove the stock caliper. Take your 17mm Socket and put it on your Breaker Bar. (This is where the breaker bar comes in handy... if you don't have one you'll just have to Hulk out on it.) Remove the two large bolts securing the caliper to the hub assembly.
Make sure you support the caliper before you remove the last bolt, because it WILL drop if you don't. Remember it weights 17lbs and if it lands on a finger or a toe it might hurt a little bit. 
Next, take the caliper and set it aside. You are now able to remove the stock Brake Rotor. First, get a good hold on the rotor because it too is heavy and can smash things if you drop it. Then give it a little tug. It should pull right off the hub.
Sometimes rust has other plans and the Brake Rotor will bond (read RUST) itself to the wheel hub. This is where the Rubber Mallet/Hammer comes in handy. I guess you could use a block of wood too. Just give it a few gentle hits around the outside edge and it should free it up.
Next, you get to trim the dust shield. In order to see what needs cutting, just take the 13WL caliper and hold it as steadily as you can in front of the dust shield, doing your best to align the mounting holes w/the holes on the wheel hub assembly. Once you've got them lined up, it will be clear what has to be cut. Take a Sharpie and make your marks....
I knew I had to be between these two lines on the top....
And right around here on the bottom....
The easiest way to cut the dust shield is with a Dremel Tool. Simply install a cutting wheel and cut along the line. It takes seconds. Alternatively, you could use metal shears, but would bend up the dust sheild and leave a generally messy cut. You could also use an Angle Grinder with a cutoff wheel if you have one lying around. It's sheet metal, so where there's a will theres a way, it just depends on how clean you want it to look.
I took the Dremel route... Bzzzzzzzzzzzzzzz.....
Bzzzzzzzzzzzzzzzzzzz.... All done.
As you can see I then test fit the caliper and it lined up perfectly.
So here's how you should be sitting as of now... All trimmed up and ready to test fit everything.
Next is to test fit the Tundra Rotors and make sure you don't have any unforseen clearance issues. Most people say that they fit right on, but mine did not. I put the rotor in place, then tightened it down with two lugnuts (Remember I said to keep those handy?), then gave it a couple spins. I was getting some metal on metal contact at certain points in the rotation so I gave it a few more spins and checked for shiny metal. It turns out the rotor was hitting the dust shield here...
Out came the Dremel Tool again and I put on a small grinding attachment. I used the Sharpie to draw a 1mm line down the edge of the dust shield, then used the Dremel to grind off just that little bit. I tried the Tundra rotor again and it fit perfectly.
One other thing you might want to do at this point is take some Sandpaper and sand all the old rust off the mounting surface of the wheel hub. Be sure to spray it off with brake cleaner when you're done. You don't want any humps, grit, or rust on this surface because it will cause the rotor not to sit flush on the hub. This will result in nasty vibration when you apply the brakes.
Remember to hit the areas that you have trimmed on the Dust Shield with a little paint to protect against rust. I used some Flat Black Rustoleum I had leftover from another project.
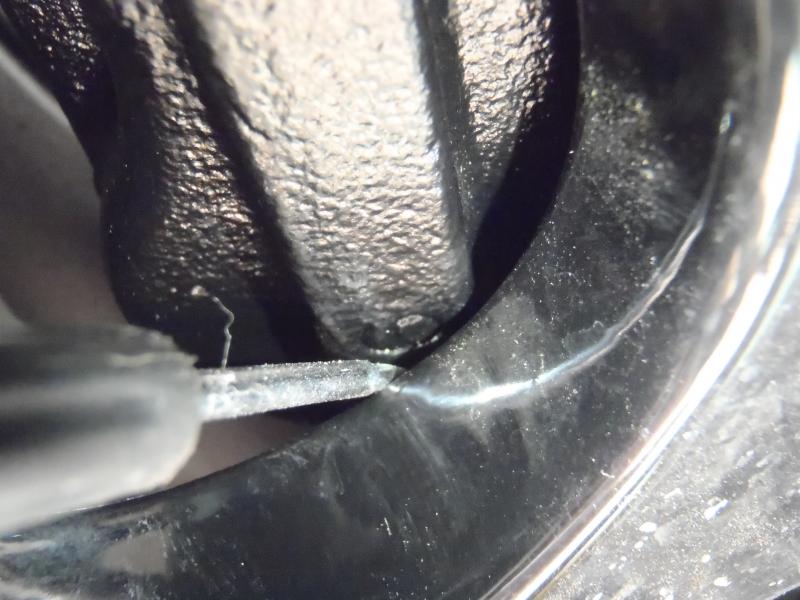
NOW THE 2 MILLION DOLLAR QUESTION AND THE MOMENT OF TRUTH.... Are the 231mm Tundra Calipers going to clear my wheels??? I installed the Tundra Rotor & Caliper and the Wheel so I could check it out.
DAMN THAT's CLOSE, but they do clear!  (Just for reference, that is one of those small eyeglass screwdrivers...that shaft is about 1/8" in diameter)
Finally, once you've made sure everything clears, it's time to re-connect the brake line, torque the caliper mounting bolts, and bleed the brakes.
First, get your large torque wrench and set it to 90 ft/lbs. Tighten and torque the TWO caliper mounting bolts.
Next, remove the factory plug from your new 231mm caliper, and using your 10mm Line Wrench, install the stock brake line into the caliper. Once it's snug, use your small torque wrench and a crows foot wrench to torque it to 11 ft/lbs.
Next, using your 12mm Socket, 6" extension, and a Ratchet, re-install the bracket for the the brake line & ABS sensor onto the spindle. I couldn't find a torque value for this bolt, so I just went "tight enough".
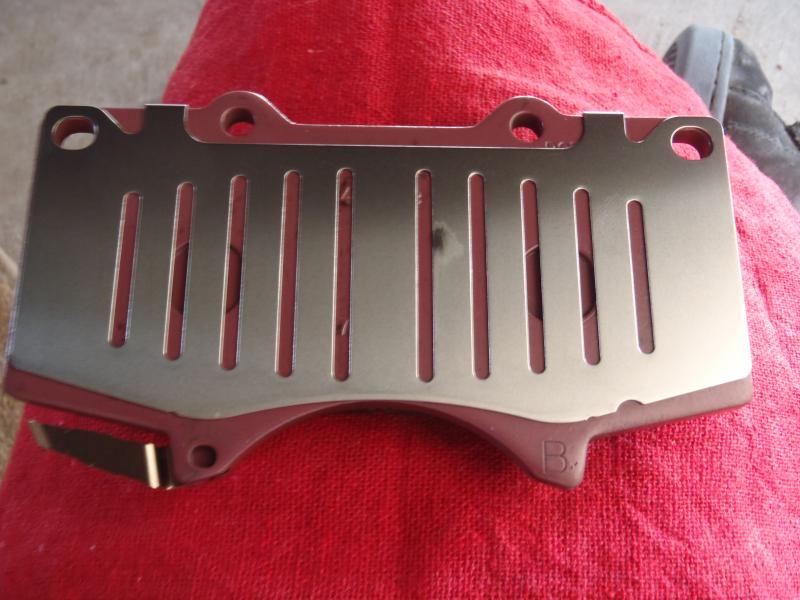
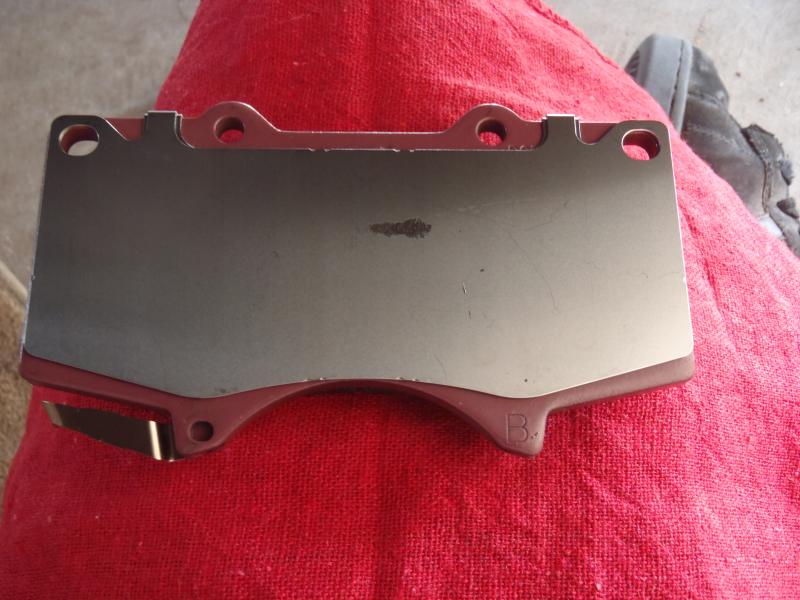
If you happen to get Toyota Pads/Shims....This is how they go together, and remember to apply a little grease between the layers and on top of the solid shim. (grease comes w/the Shim Kit). If you got NAPA, Autozone, etc, pads then your shims should come pre-installed.
Finned Shim to Pad...
Solid Shim over that...
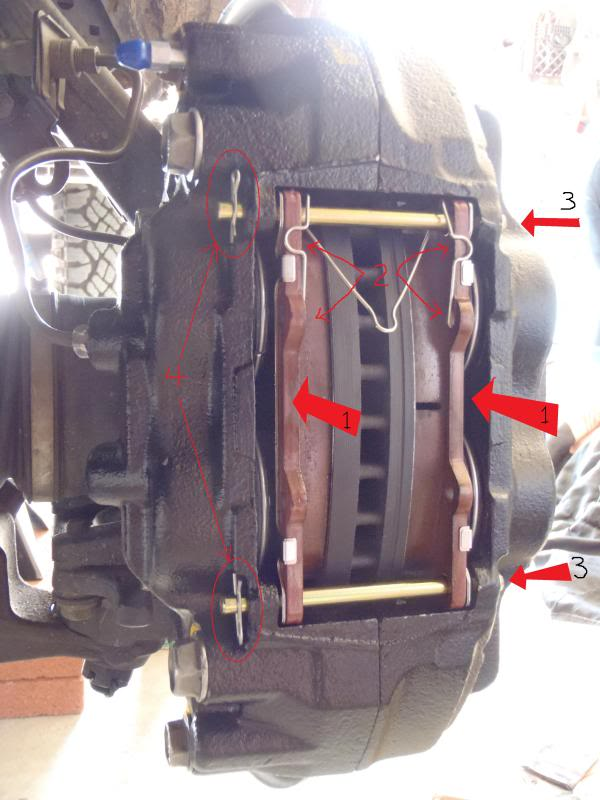
Next, refer to the picture and steps listed below...
Step 1: Slide the pads into the caliper on either side of the rotor. The pads have holes for the retaining pins, and you'll easily see which way they go in. You will have two pads that have a wear indicator on them. It looks like a metal fin protruding from the pad at one corner. I placed the pads with the wear indicators on the OUTBOARD side of the rotor so I could visually check the wear indicators through the spokes of the wheels without pulling things apart.
Step 2: Insert the "W" spring between the pads as shown in the picture. Make sure the ends of the spring are fully seated within the holes on the pads.
Step 3: Lubricate the retaining pins with caliper lube where they contact the pads and caliper, and insert them through the OUTBOARD side of the caliper, through both pads, then through the INBOARD side of of the caliper. Make sure the top retaining pin goes through the "W" spring as shown in the picture.
Step 4: Insert the small retaining pins through the holes in the ends of the brake pad retaining pins... see the circled areas in the picture.
Now it's time to bleed the brakes. I'm not going to go into detail on it, you could google it and read all about it. I have a few tips though.
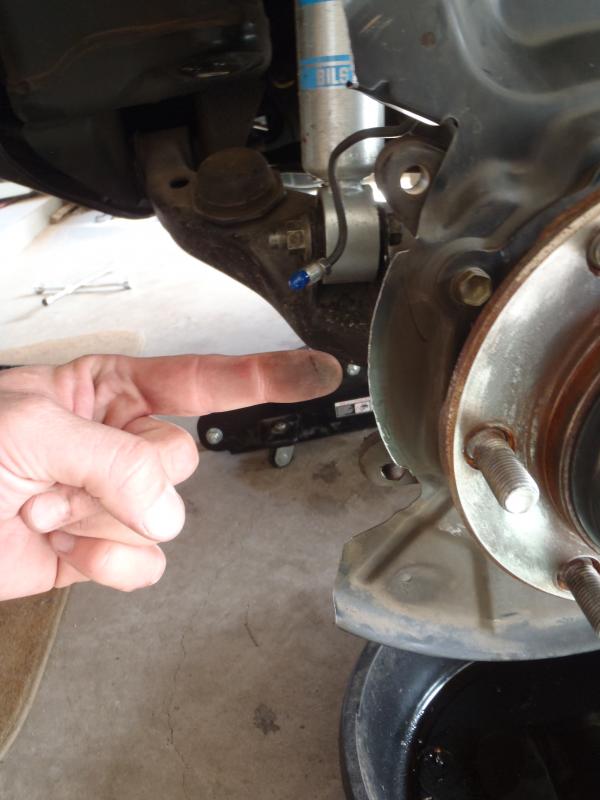
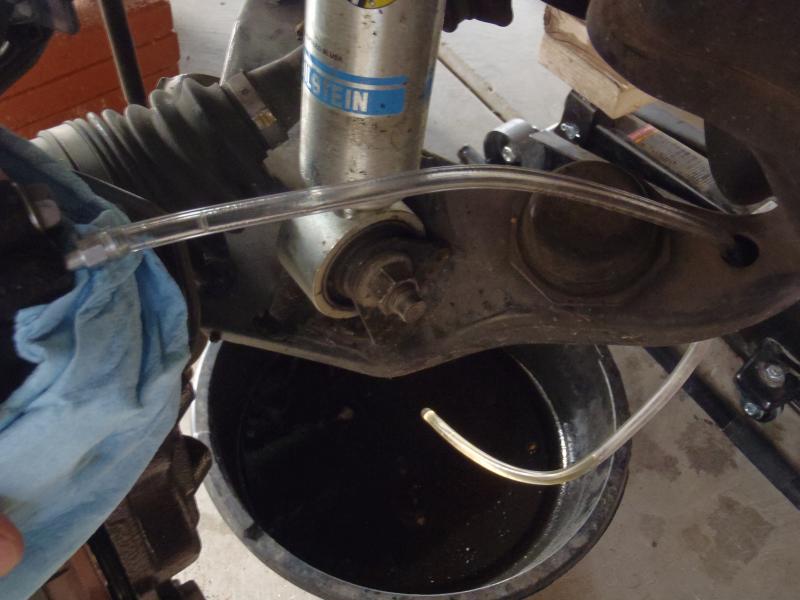
1. Hook up about 2 feet of clear tubing as shown in the picture below.... I threaded it through the lower control arm to hold it in place.
2. Get a couple of paper back books, then get into the drivers seat and depress the brake pedal as far as you can before opening any bleeder valves. This is your pedals NORMAL range of travel. Put a few of the books behind the pedal so that it cannot GO PAST the normal range of travel. This will prevent you from doing damage to internal seals in your master cylinder.
3. Draw old brake fluid out of your master cylinder if you desire, or dont. Either way, make sure you top it off to the max.
4. Just before you are ready to start bleeding the brakes, remove the vice grips from the brake line so the fluid can travel down the line and out of the new calipers.
5. Get a helper and bleed the brakes until you see nice, clear, BUBBLE FREE fluid coming out.
THE STOCK SPARE WILL NOT CLEAR THE 13WL CALIPERS!!!! I test fit the spare and there was so much interference the wheel wouldn't even turn. If you plan on doing this upgrade keep in mind you will either need to purchase a different wheel to use as a spare, run a wheel spacer full time or carry one to install w/your spare, or you will have to change TWO tires if you ever get a flat on the front axle, putting the spare on the rear axle and the wheel from the rear axle on the front.
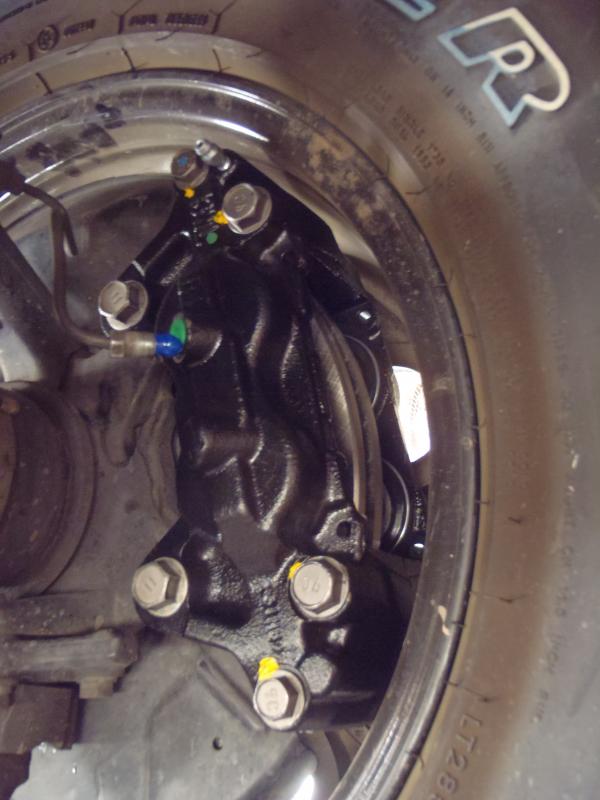
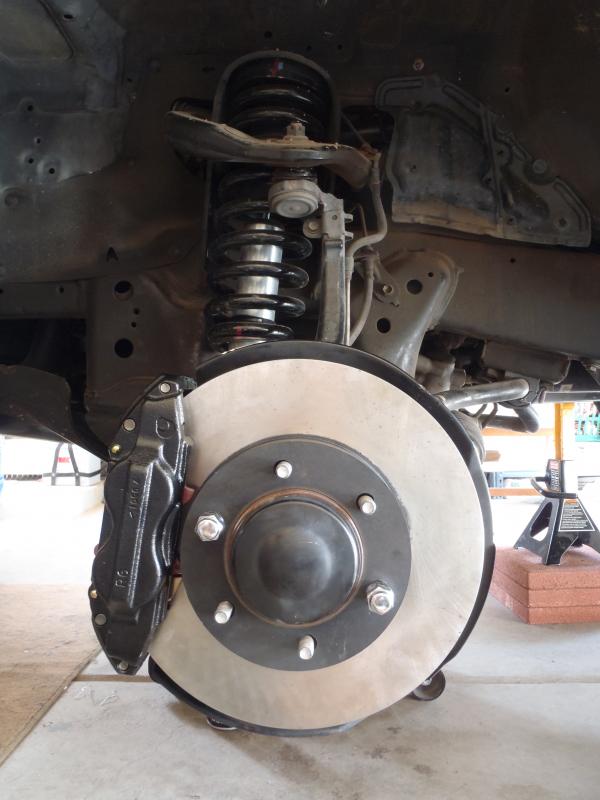
And.... the finished product... Sure is purty...













EXCELLENT write up!!! Seriously great work!
Where did you get the tundra caliber from
Andy - you can get the Tundra 13WL calipers at a local auto parts store - you're just looking for 2005 Tundra 13WL calipers. I gotten mine at Napa and O'Reilly.
The "problem" is that not all 13WL calipers these days work with banjo bolts, so if you want to be sure that you're going to have working calipers, you need to convert to a hard-line connection into the caliper (just as the Tundra uses). For that, you want to use a Tacoma-to-Tundra Hard Brake Line Upgrade Kit and then you'll be able to use any of the parts store calipers, and you'll get better braking to boot!
what is the length of the flex lines in your upgrade kit?
Hi Tom, in general, they are long enough to reach from the frame to the hard line at the spindle. Do you need a special length or have a special situation where you need a different length than normal?
might I ask the minimum sized wheels to perform this swap, as I know the won't work with stockers...
Many thanks!
Very detailed write up!
Hi Casey, You'll need at least 16" wheels for this upgrade. You can see a list of wheels that are confirmed to work (or not), and details for them, here:
Which Wheels/Rims Fit the Tundra Brake Upgrade (13WL 231mm rotors) on a Tacoma? (or 3rd gen 4Runner)
Also - I don't know if you have a Tacoma or 4Runner, but...
I have 18”x9” wheels but the brake caliper are only 1/16th of an inch away from my spokes. Is it ok to grind on the 13wl caliper?
It probably depends on where and how much you have to grind it - there are definitely people who have ground parts of them before, so ultimately you'd have to make the call if that's the route you want to go.
What wheels are you running where the caliper is close to the spokes? A 9" wheel where the spokes are that close seems like it must have a lot of backspacing. And, if that's the case, it may be the perfect situation for a 1/4" spacer, to push the spokes out and away from the caliper.
I see kits for this upgrade from power stop and lce, but they say for 4wd. Will there be an issue trying to put these on a 2wd Prerunner ?
Hi Kevin, As long as you have a 6-lug Prerunner, the kits from Callahan or PowerStop, along with a Tacoma-to-Tundra Hard Brake Line Upgrade Kit should work just fine, though I personally think that the parts linked in the post will give you something a bit better in the end than the Callahan and Powerstop options.
I would not recommend going with the LCE kit, as the calipers and rotors are 13WEs, which means that they are smaller and so offer less braking ability. If you're going to do a brake upgrade, you want to get the most out of it that you can.
Cheers!
I’m running the ion alloy 171’s. I’d came across a forum where some grinded on the same part that I’d need to grind. It has a port just under the 1/2 ridge that is close to the wheel so I can’t grind that part for sure. Yeah looks like my best option will be to space the wheels out an 1/8th or a 1/4. I don’t guess putting an 1/8th inch washer between the spindle and the caliper would a good idea to give me a lil bit more room?
Gotcha. Thanks for the details - I'm going to add that wheel to the Which Wheels/Rims Fit the Tundra Brake Upgrade (13WL 231mm rotors) on a Tacoma? (or 3rd gen 4Runner) page with a note about close tolerances. 👍
As far as washers/spacers - personally, I'd go with some 1/8" spacers (if you can find them) or 1/4" if you can't get the 1/8". Of course, I've heard of folks using washers on the wheel studs instead of spacers and having everything work just fine for years...but that's never really recommended (as you know).
Lj: I just bought Ion 171 wheels (16x8) and found that they interfere with the stock caliper on my 2010 tacoma. I was browsing this forum thinking that doing a Tundra rotor+caliper swap would move the caliper farther radially from the hub. On what truck did you get your Ion 171's to fit before the brake swap?
Thx,
Dean
95.5 Tacoma. I used 1/8” aluminum spacers non hub centric for minimal gap and offset.
super. thanks!
I wasn’t asking about washers on the lugs but rather washers between the spindle and the caliper, which would push the caliper towards the center of the truck. Seems to me like it would work.
A washer between the spindle and caliper definitely won't work. Don't forget that the caliper is centered on the rotor, so if you put washers between the mounting point for the caliper, but don't also adjust the rotor, you're not going to be centered anymore, and will (at best) not have good braking. More likely though, you won't even be able to fit the caliper (with brake pads) over the rotor.
So yeah, definitely no washer between the caliper and spindle!
Firstly, thank you for the time and energy to put together such a wonderful write up; I know the amount of effort that takes.
Do you know if these calipers would be a direct fit for a 1998 - 2003 (1st Gen) Toyota/ Lexus Harrier? I know they have many parts interchangeable with the 4Runners.
Looking to upgrade the brakes on a turbo Harrier project I am doing, and if these fit they should be a massive improvement. I know the rotors are different, as the Harrier is 5 x 114.3.
Any guidance/ suggestions would be deeply appreciated.
Glad you found the site, and I'm glad you found it useful. I don't know about fitment of these components on an early model Harrier. I think the route I'd go might be to pick up a single caliper and rotor at a local parts store and just see if they bolt on (though, you'll have to find a rotor that will fit the larger calipers, since the Tundra rotors are 6-lug, or be ready to re-drill the rotors for your situation if the caliper bolts on).
I AM DOING THE TUNDRA 231 MM BRAKE UP GRADE TO MY 2002 4 RUNNER 4X4 LIMITED I HOPE I AM DOING THE CORRECT THING HOPE IT NOT TO MUCH BRAKES CAUSING A ABS CONCERN USING ALL TOYOTA NEW PARTS BUT WHERE SHOULD I GET THE STEEL Braided brake Hoses from LC ENGINEERING TRD STOP TECH?
Hi Michael, I'd recommend getting 4Runner Stainless Steel Brake Lines for Tundra Upgrade, since the lines will make a big difference in pedal feel. The LCE ones are too expensive. Cheers!
Hi,
I'm about to order your upgrade kit. Can't decide on the color.
I have a few question about the calipers. I want to go with Toyota OEM everything.
While searching around I noticed some advertising calipers with a coating and some un-coated/unfinished. I didn't see this distinction on OEM calipers from toyotapartsdeal.com, which is the only OEM calipers I've found so far online. Is it better to get them with a coating or does it not matter?
Also, when looking up the parts for the 2005 Toyota Tundra 4x4 V-8, what trim setting do you choose for the search?
47730-0C020 and 47730-0C021 Are these the right OEM part # for the right and left calipers?
I saw some new calipers on ebay, non OEM. what is your take on new vs re-manufactured?
Would the OEM's be new?
Thanks for the info.
Hey Dwight, as far as coatings on calipers go, it doesn't matter from a functional perspective, but uncoated calipers will develop surface rust. So, if you care about that visually, then you'll want to find coated calipers. I am running one coated, and one uncoated caliper (just because I had to replace one on the trail, and uncoated was what was available). Both work equally well, and I don't mind the surface rust.
For getting calipers from an '05 Tundra, you can choose any 4x4 trim - they all use the 13WL caliper.
All 13WL calipers you get these days are rebuilt, even the ones you get from Toyota (and sorry, but I don't know the part numbers b/c the Toyota ones are so expensive as to be silly to get). Based on your questions, my recommendation would be to get this Callahan kit on amazon - that will get you the right calipers (13WL), and with a coating, so you don't need to worry about surface rust. The price on them (at least as of when I wrote this reply) is quite good as well.
You could grab a kit with some red brake lines to go with it! ?
Cheers!
Another quick question.
(Step 2: Insert the "W" spring between the pads as shown in the picture. Make sure the ends of the spring are fully seated within the holes on the pads.)
Is there only 1 "W" spring per caliper and it is placed on the top pin?
What is this spring for?
Thanks.
There is only one spring per caliper, and the spring pushes the pads away from the rotor when you aren't pressing on the brake pedal. That keeps them from heating up the rotor, wearing down, etc.
Also - this is a great post, but I'd recommend this other one, which is a little easier to consume. It's a step-by-step guide (with pics) on the upgrade, as well as links to all the parts needed (at varying price points):
Step by Step Tundra Brake Upgrade on a Tacoma (or 4Runner)
Hey I want to do the tundra upgrade on my 2002 4runner, I have 16” vision 353 turbine on it, does anyone knows if they will fit the 231mm brakes??? Thanks
Hi Yeguero, Might be better to ask over on this page: Which Wheels/Rims Fit the Tundra Brake Upgrade (13WL 231mm rotors) on a Tacoma? (or 3rd gen 4Runner).
Also, it's unlikely anyone will have an answer for you there (though Vision 375s are listed), but there is a template at the bottom of the page that you can print out, then cut out, and place in your wheel to see if the 13WL calipers will fit. If you do get them to fit (or not) and send me some photos, I'll refund $5 of the brake lines (if you purchase them from me) and credit you on the site. ?
Got it. So the 199mm should work right??? If so which are the part numbers?? I’m confused not sure if it’s the wg or the we
I can't say for sure if the 13WE (199) calipers will work either - they do work with some 16" that the 13WL don't fit, but they also don't fit some 16" wheels. The best bet is to print out the template, as that will tell you for sure if the calipers will fit.
I will do the template, still if I wanted to go with the we, what am I looking for??? All the Toyota Tundra brakes for a 2005 tundra seem to be wl or wg
All the Tundra brakes for 2005 were 13WLs. The 13WEs were phased out in an earlier model year because they had less stopping power. If you want to purchase a set of 13WEs, you can get them here:
Looking at these calipers for a upgrade on a different vehicle.
Can you measure the mounting bolt spacing?
Look like Toyota used came molds as the Mitsubishsi 3000GT VR4.
Rather not have to buy a set to just measure the it.
Thanks/
Excellent! Ive almost gathered all the material here. If you have AAA then Napa gives a 20% discount. So the Adaptive calipers I got for $75 each! Went with the Bosch Quiet cast option and OEM pads and shims. Will need to get a metal cutting tool for my dremel tool. Ive smoked 3 sets of tacoma rotors in 150k miles and hoping this fixes that. I carry heavy loads and heavy utility trailers with my 2.7L and have even used the 4 wheel Lo to slow me down on large down hills. I try not to do that however.