December 17, 2018.
I'm generally pretty good at building things with my hands, but in relocating the rear shocks on my first gen Toyota Tacoma, I'd royally screwed up. If you haven't read about that, I'd recommend checking out the previous post in this series - Rear Shock Relocation - Fabrication and Failure, where after I'd permanently welded a bunch of stuff to my truck, I'd discovered that I couldn't go over bumps taller than about 2-inches. Not good for adventuring out on dirt roads.
But, failure is a great learning tool, and I'd spent some time figuring out why what I'd done hadn't worked, and what the right way was to accomplish my goals... so it was time to give it another shot.
Note: If you just want to understand the right way to do this and don't care about the story, the post you want to read is this one:
How-To: Toyota Tacoma Rear Shock Relocation - Determining Leaf Spring Cycle and Mount Positioning
Of course, having welded on the original shock mounts I'd purchased from RuffStuff.com, the only way they were coming off was by cutting and grinding, so my first step was to order a couple new sets of mounts. I got the same ones I'd purchased previously - RuffStuff SBRKT-175 (now SBRKT-3) (upper) and R1988-8 (lower) shock mounts.
New parts acquired, it was time to figure out how to get the bed off the truck again - always a tedious process for me since I don't have a good place to store it, and since it requires a few strapping folks to lift free of the frame. Luckily, my 4Runner buddy Joe - who'd run the WABDR with us earlier in the summer - wanted some help installing a new roof rack and said I was welcome to use his "trellis hoist" to pull the bed off at the same time if I wanted.
Of course, I wanted.
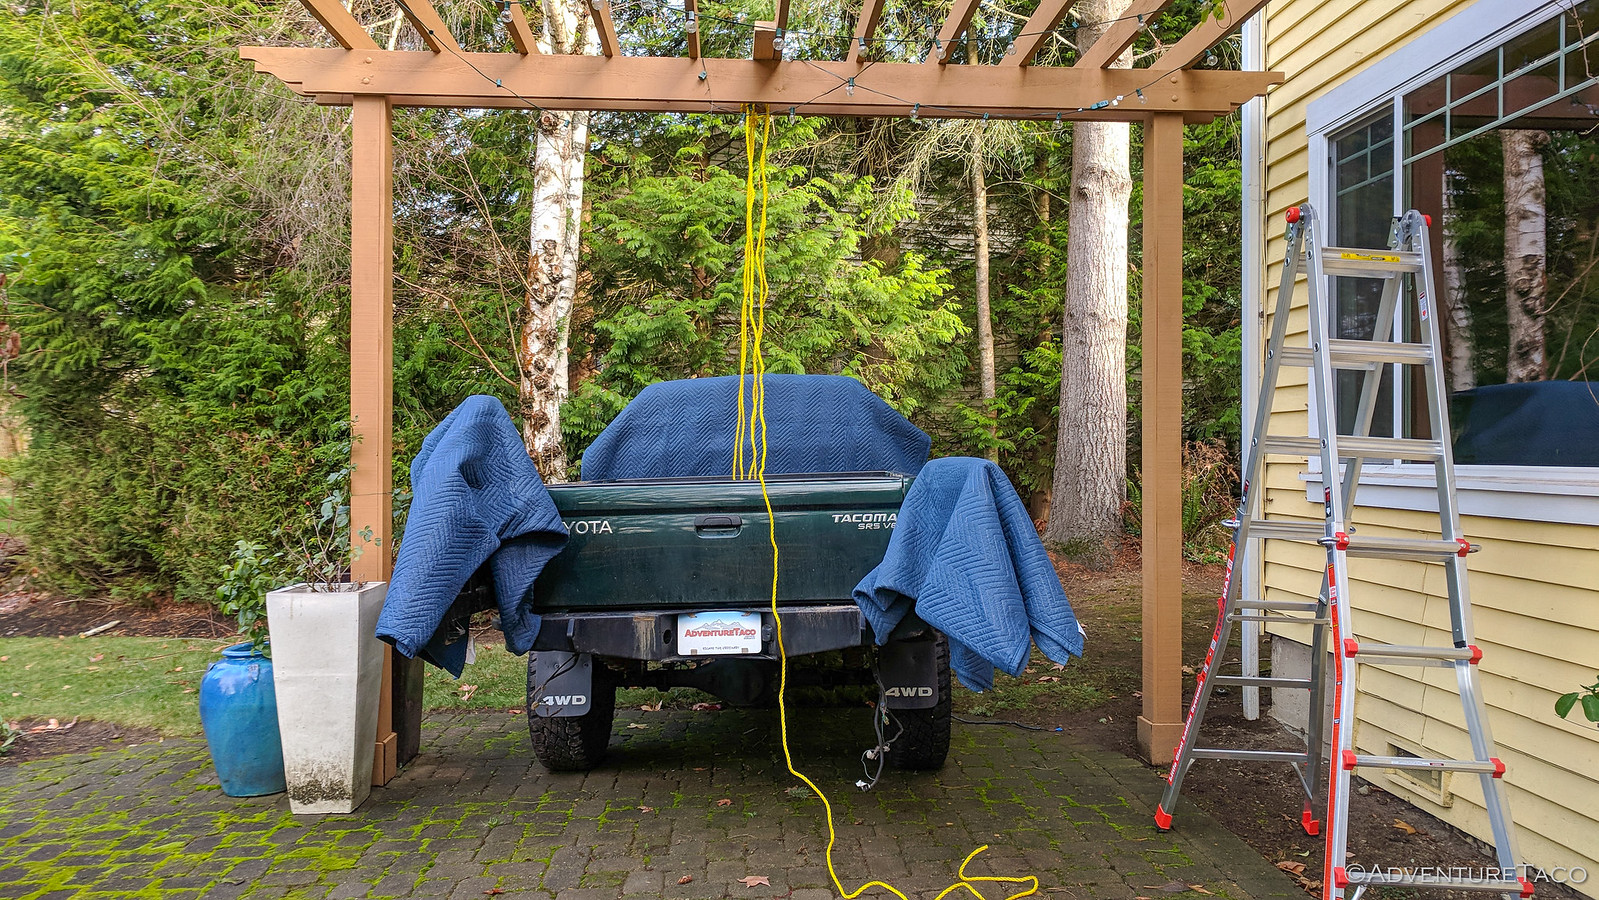
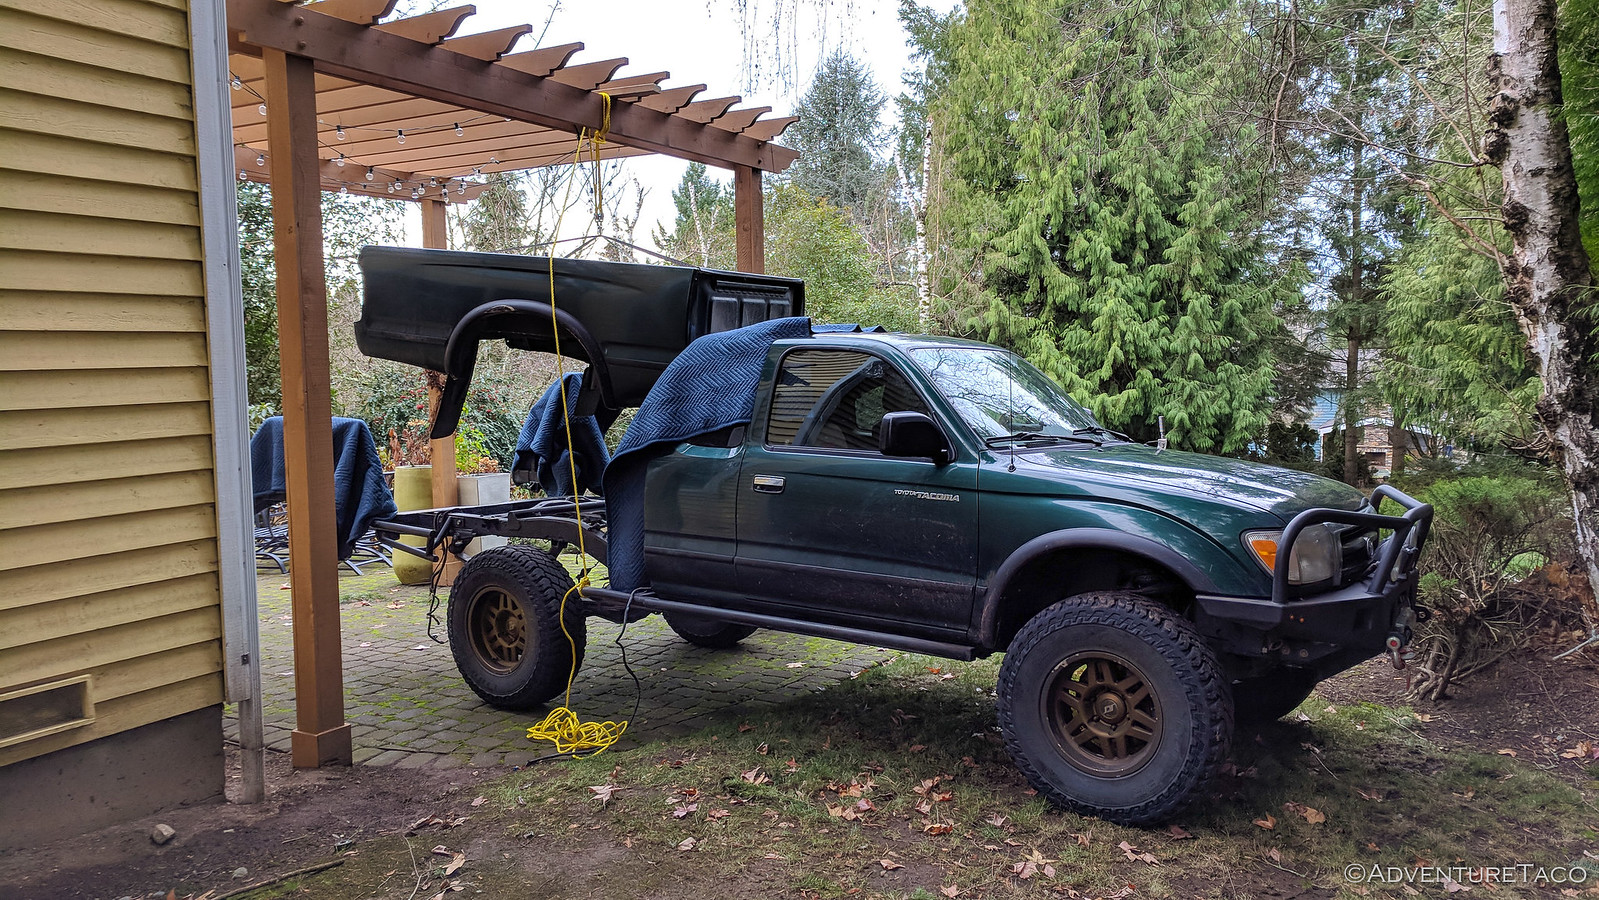
So I headed over and maneuvered the truck under the trellis in his backyard. Joe uses this hoist to lift his RTT on/off his 4Runner so we hoped it had enough oomph for the Tacoma bed - I protected the cab and rear bumper with some moving blankets just in case it started to swing around.

As we started lifting the bed, it was clear that the rear half was much heavier than the front. Removing the tailgate balanced it out almost perfectly and with the help of some pulleys and guidance up and over the fuel filler neck, the bed was soon suspended several feet above the frame.
With rain in the forecast, it'd make a nice roof, assuming the rope held through work.

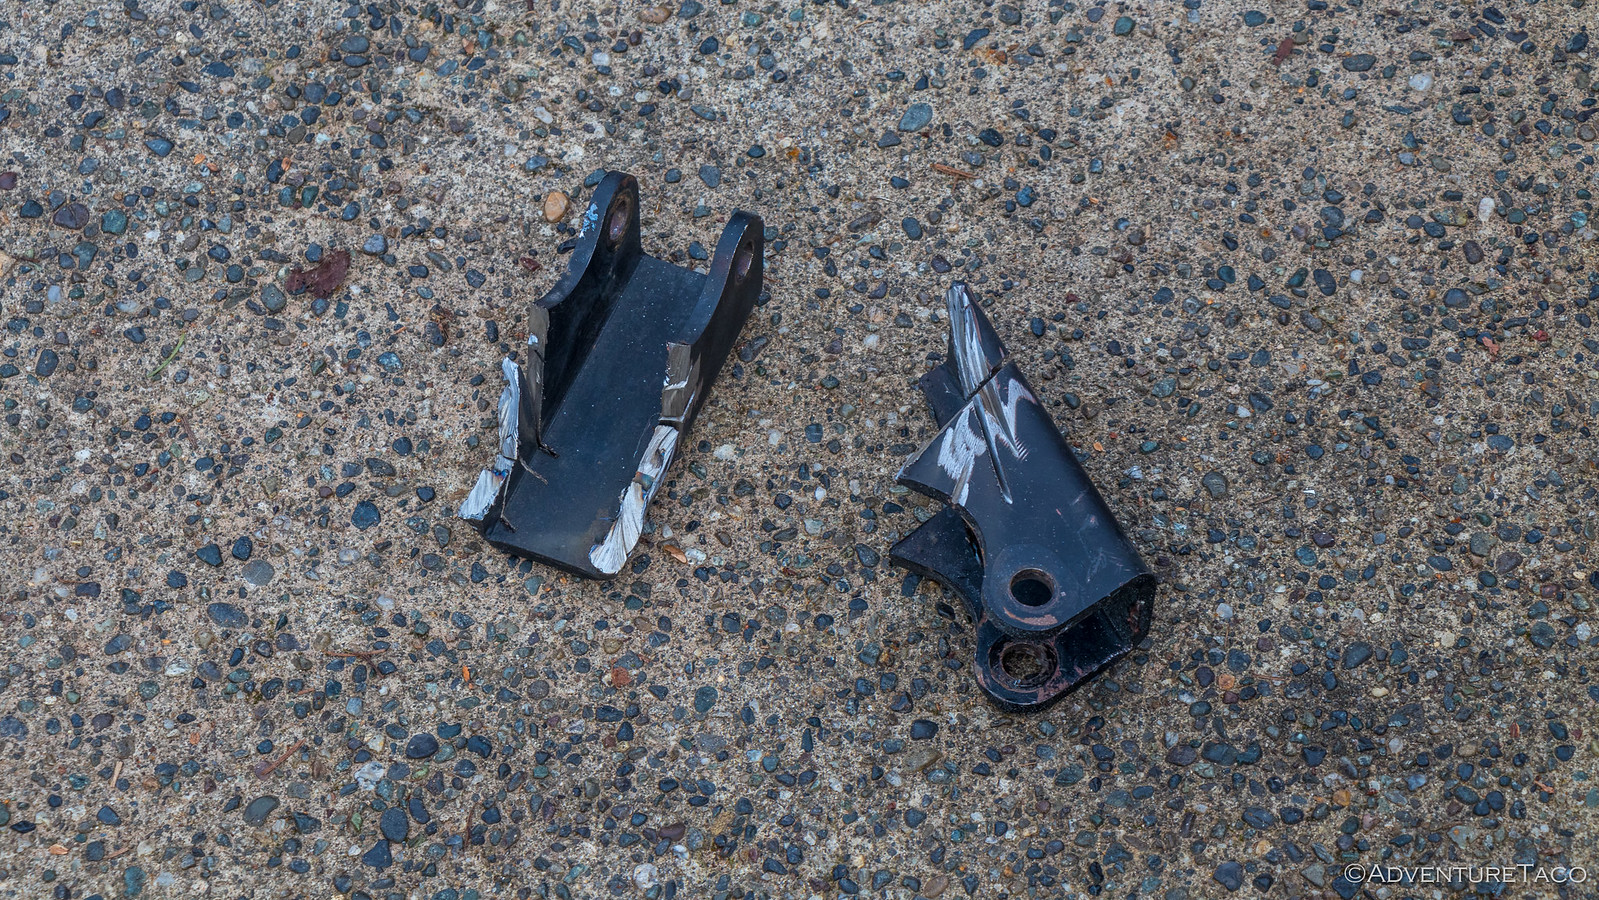
The first order of business was cutting off and grinding down the first attempt at the top mounts - the mounts quite clearly angled too far down.
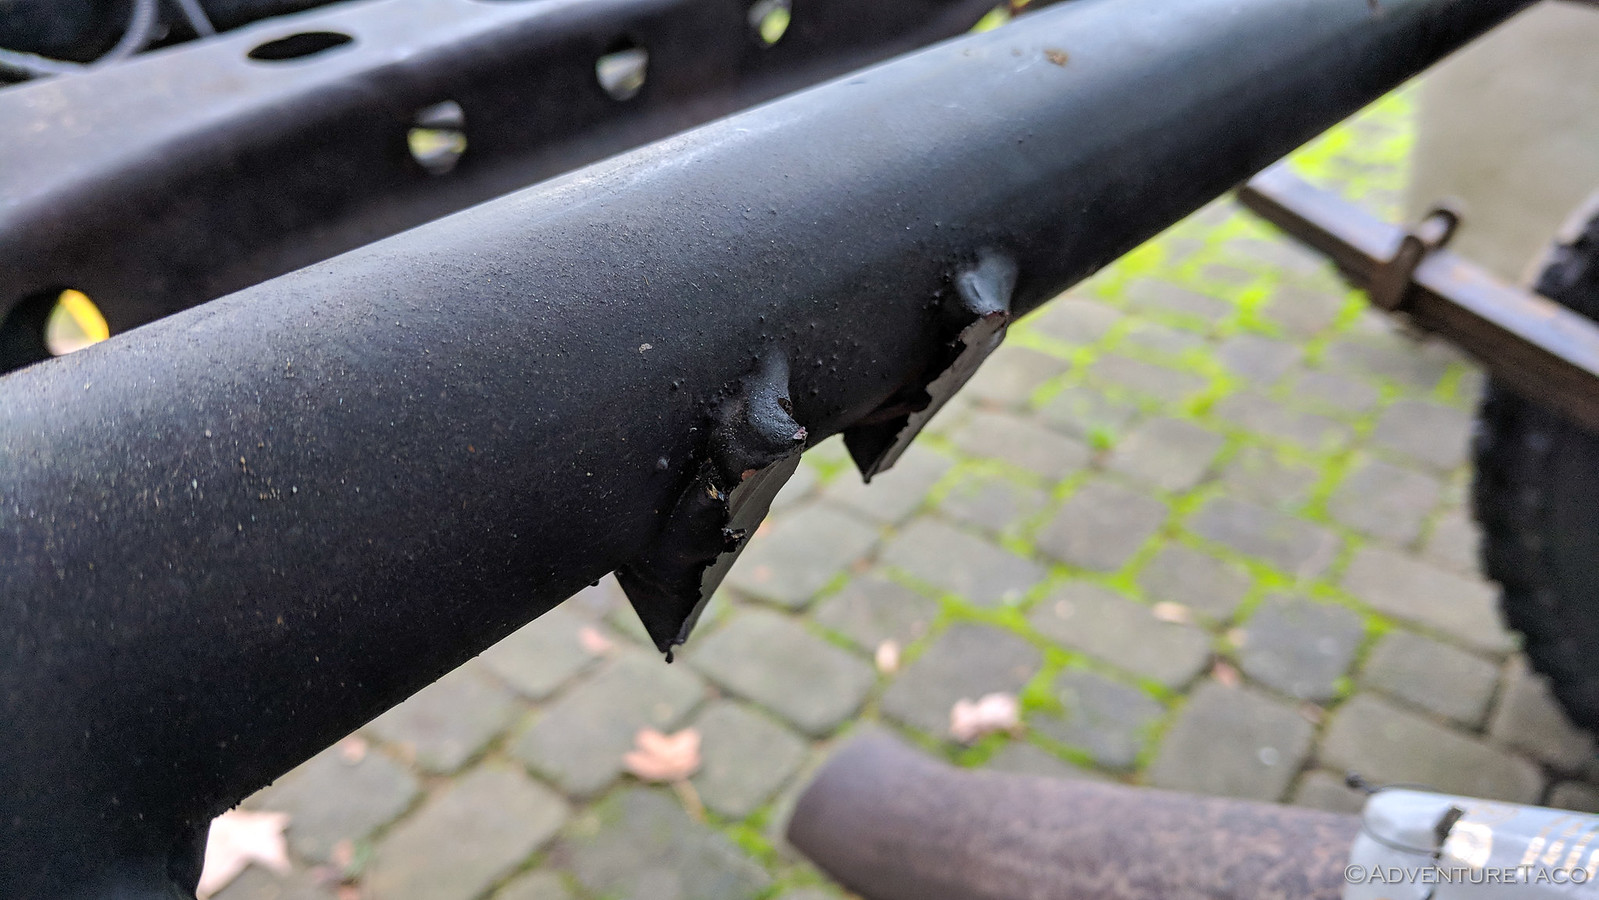
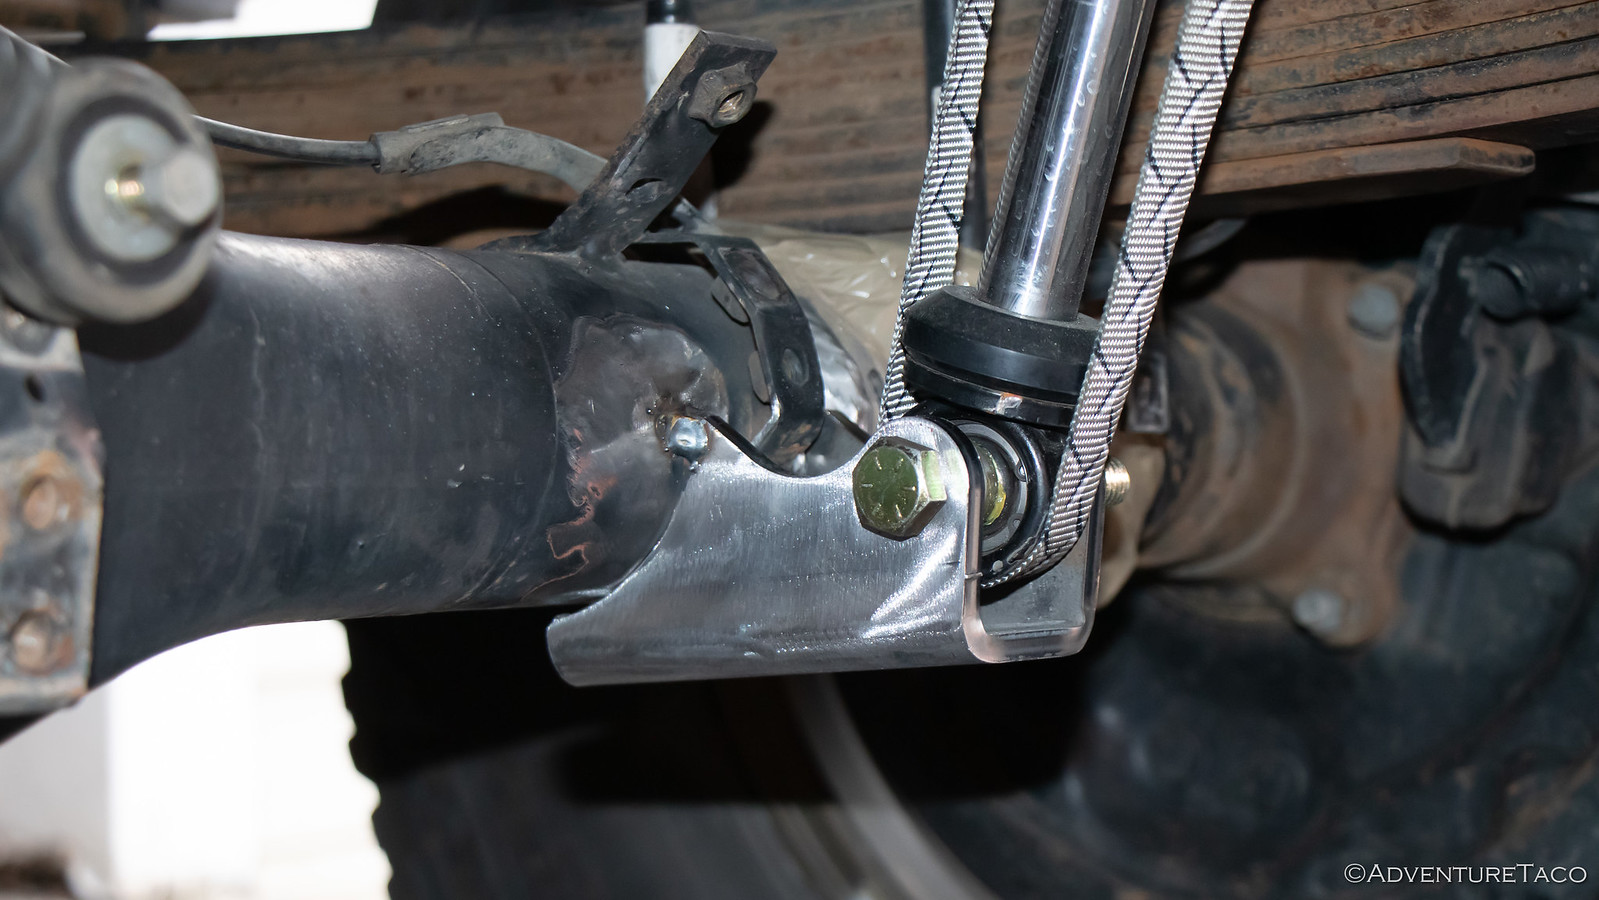
Then, I positioned and welded on the new mounts. Unlike the previous attempt, there was no measuring this time - I took @Squeaky Penguin's advice and mounted them as high as possible. In fact, I mounted them high enough that I had to grind just a little bit of the back of the mount off so it'd clear the bed. Every 1/8" counts!
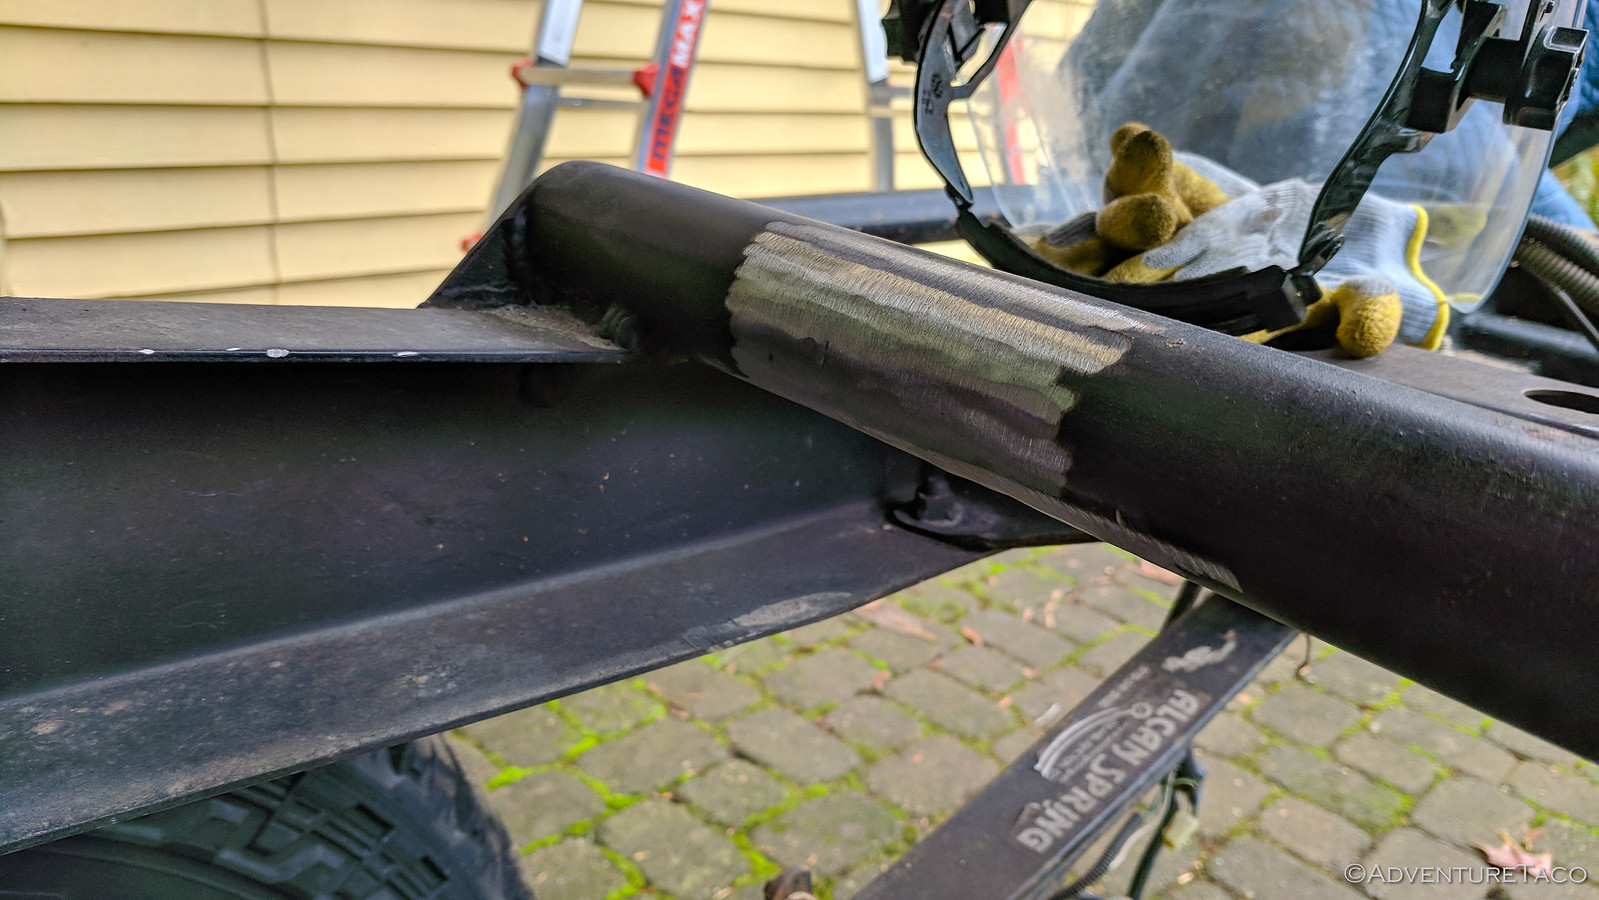
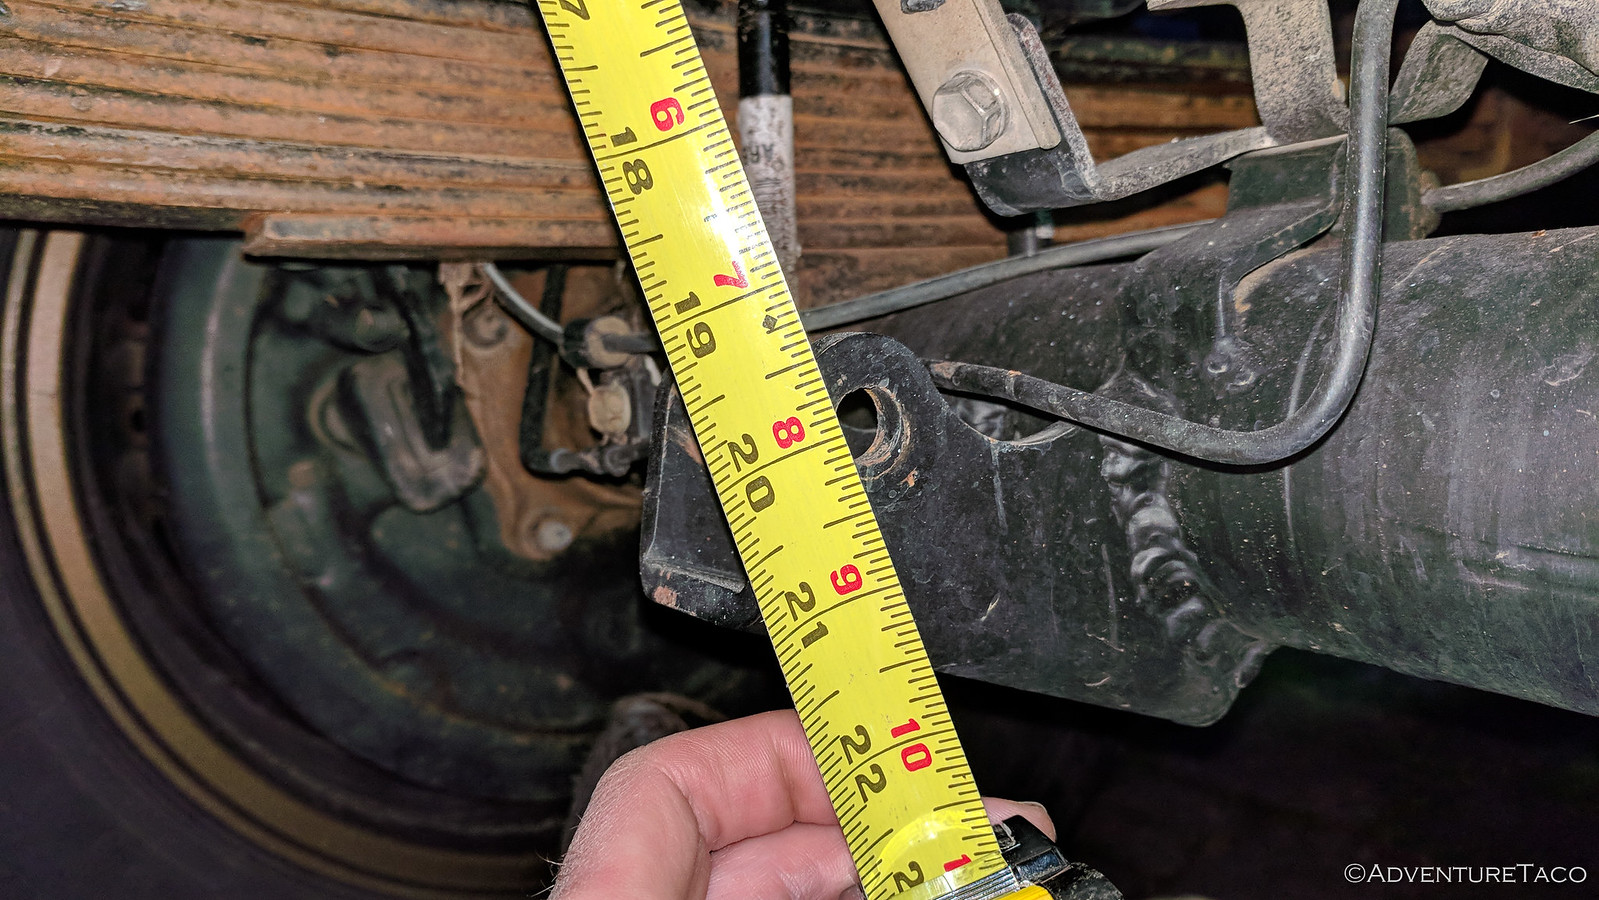
A quick measure at this point showed that I'd gained just over 2 inches of up-travel, previously the distance between mounts around 17 ¾".
This was "close" to being good enough, but alas, once the mounts were re-painted and shocks were installed, the amount of exposed shaft (at rest) was exactly equal to the distance between the top of the bump stop and the frame - meaning the shock would bottom out before the bump stop could compress and absorb any impact. From talking to @Plastics Guy, I knew that the bumps would compress somewhere on the order of .4 - .7 inches depending on the impact, so I needed to either move the bumps up an inch or expose an additional inch of shock shaft to really feel comfortable.
Since I already knew what the leaf springs would look like when "on the bumps" from our recent Mojave Road trip, I knew that raising the bump stops would be the wrong call - I'd be limiting my travel more than I needed to.
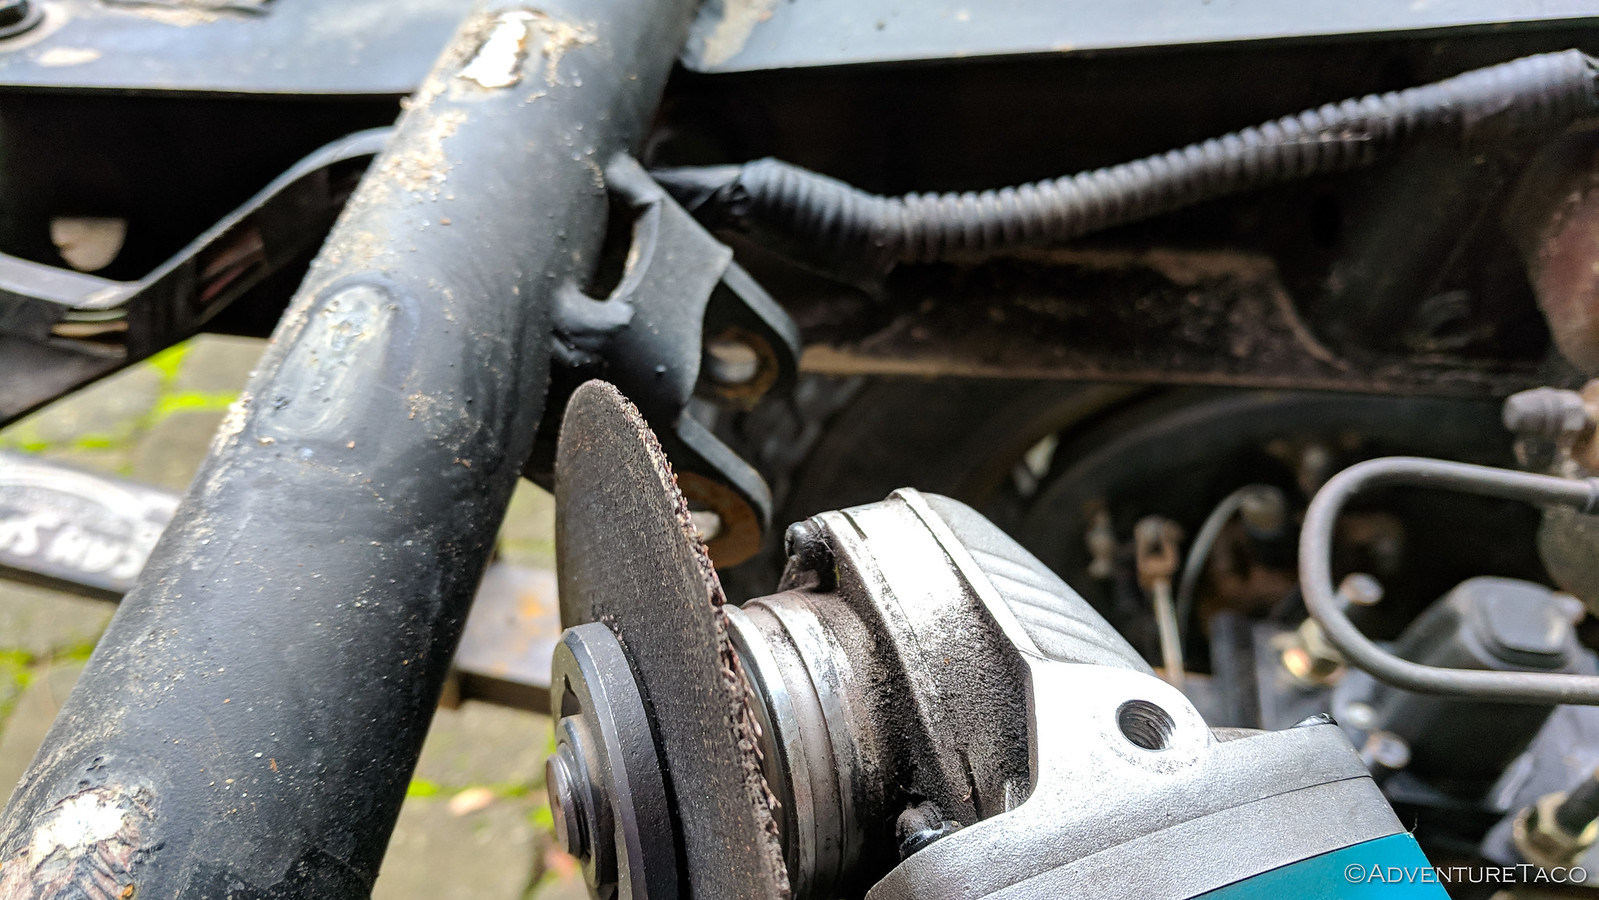
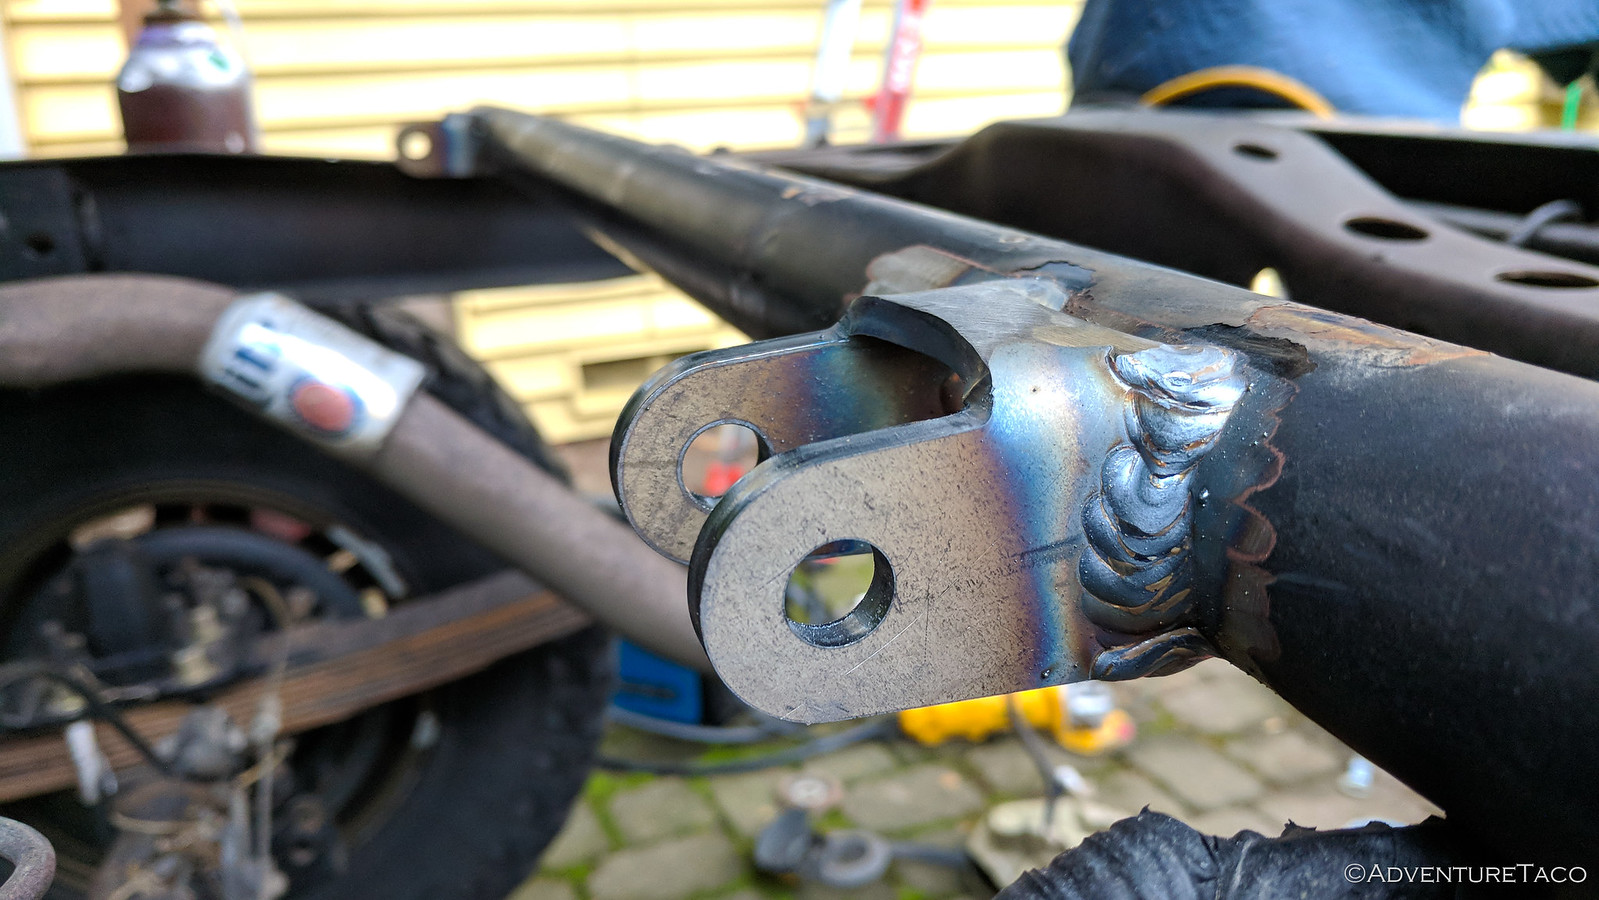
That of course meant that the bottom mounts had to come off as well, and new ones installed, with the mount rotated down slightly - giving me an additional inch of shaft travel before the shocks would bottom out. This process was both easier and harder than the top mounts. On the one hand, I had plenty of room to work without removing the bed. On the other, there were hard brake lines all around the lower mounts and there was no way I could get a grinder in there without some serious risk.
The first step then was removing the hard lines - a bit of a pain in that I'd have to bleed everything when I was done.
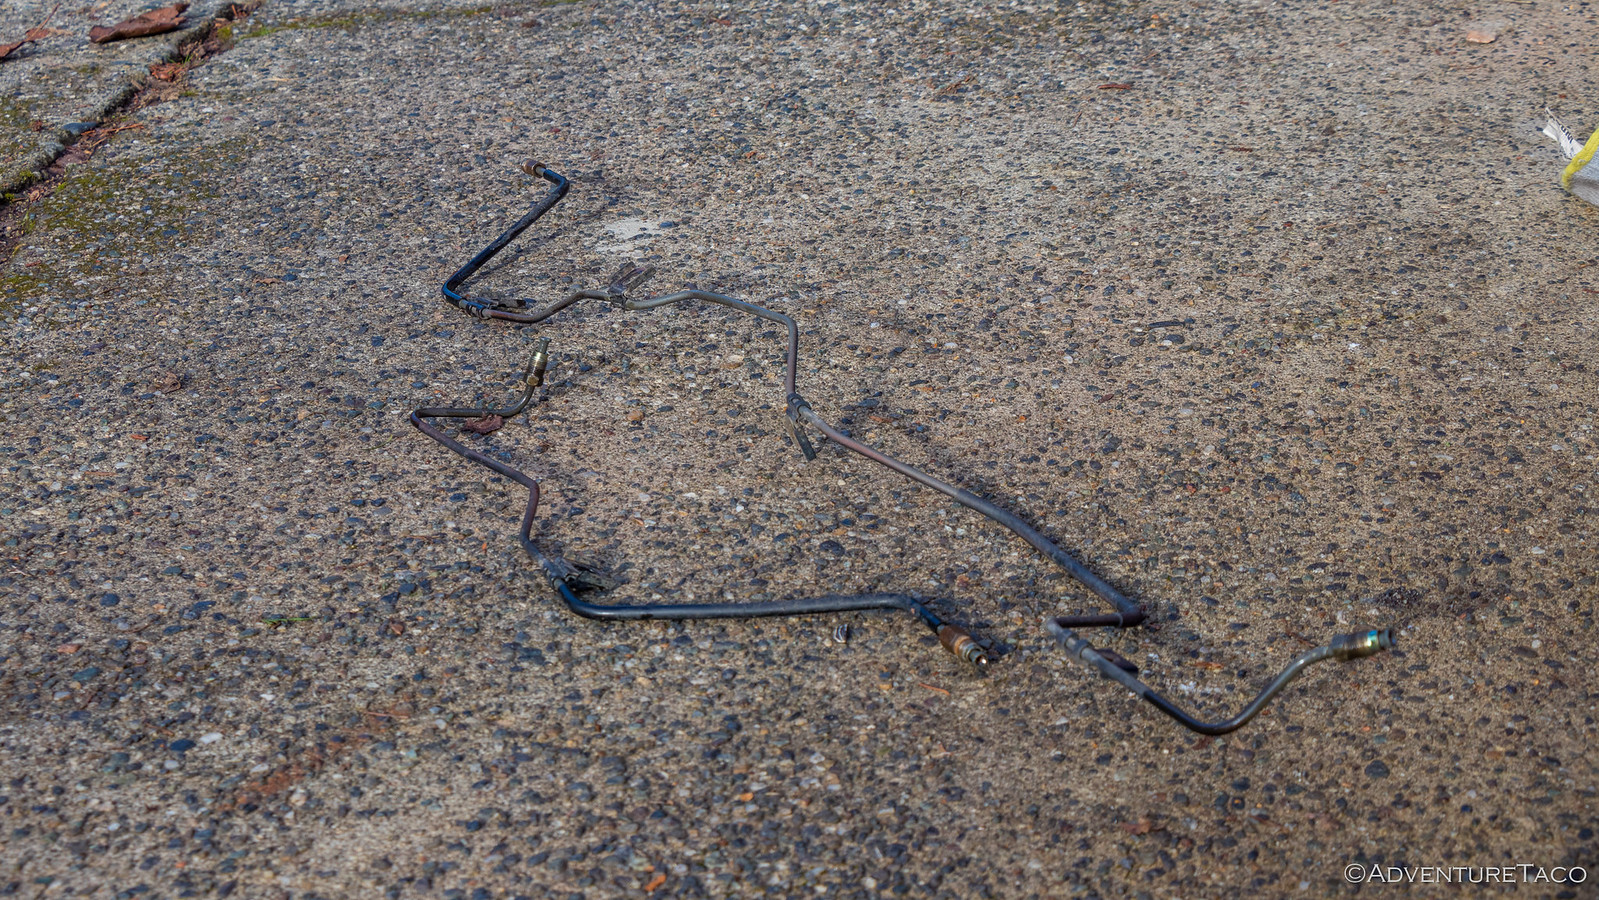
Then, I was able to cut and grind off the lower mounts, just as I had with the tops. I was careful here to make sure I'd taken measurements of the position so that I'd be sure to correct correctly when I welded the new ones on!

Axles naked of shock mounts once again, I positioned the new mounts and tacked them on. I wanted to make sure that I could install the shock and ensure that it'd cycle correctly before buttoning everything up this time!
Things looked good, so I finished welding, cleaning up, and painting everything for the second time. Hopefully the last time. That's what they say, right? Second time's a charm.  hahahahaha
Finally, it was time to install the shocks and load everything up to double check that things looked good - and they did!
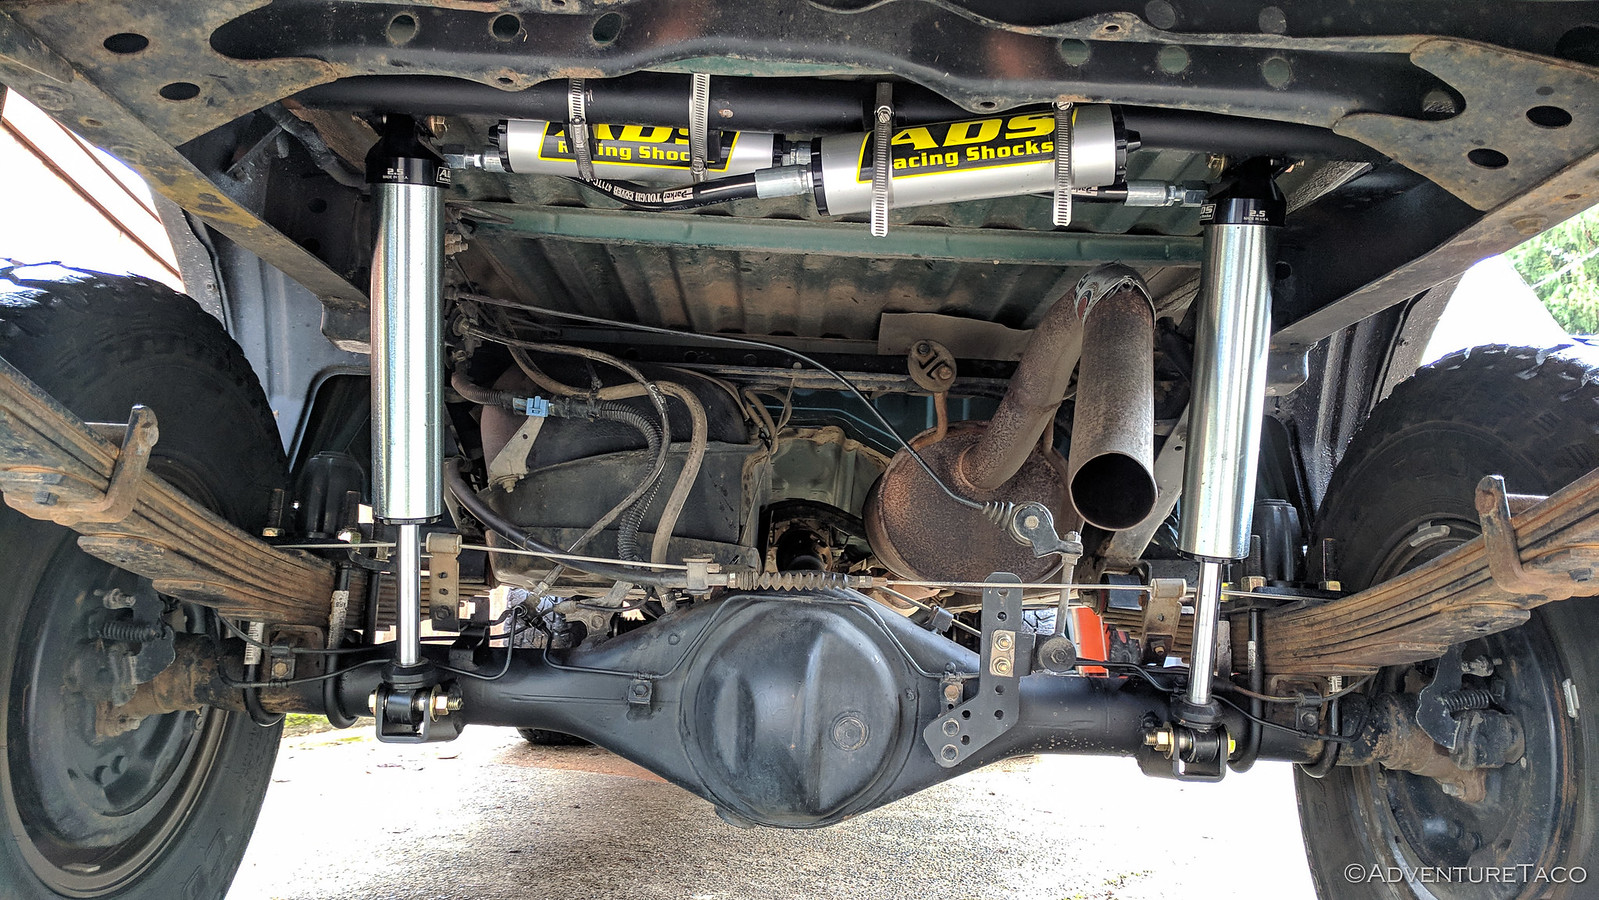
It had been quite the project - or was it two? - upgrading my shocks, bump stops, and relocating everything at the same time. But it was a great experience - one that taught me so much more than having done it right the first time, not really understanding why (or thinking I understood why but having that understanding be incorrect).
Thumbs up all around. 


I applaud you for taking on this project. From the way you write it appears you don't have a lot of mechanical experience, yet you don't let it stop you from taking on projects anyway. That is how you learn. I have a lot more respect for someone who works on their own vehicle than somebody who hires all of the work done for them. Good job!
Thanks Randy! It turns out I have quite a bit of mechanical experience, just not working on my own vehicle. I love doing things with my hands, so learning how to fabricate on the truck has been a great experience! I also think it’s a great way to get to know your vehicle, and have a better sense of how it works when it is working correctly, so you can better address any issues that come up when it is not working correctly!
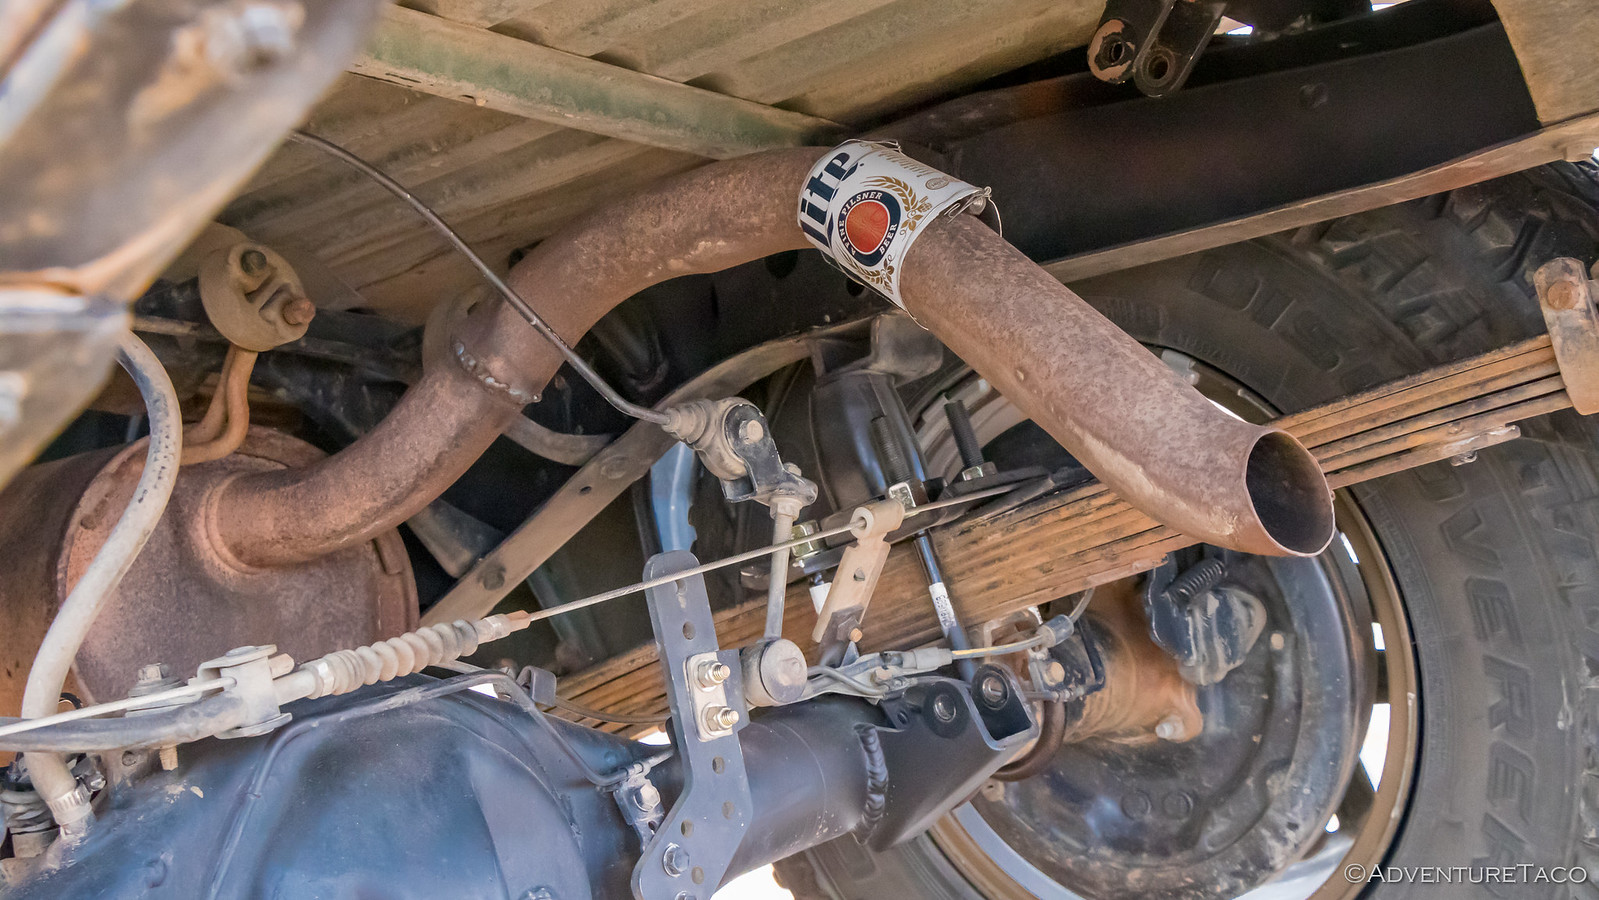
Did you end up re-routing the exhaust outlet after you relocated the shock? If not, any issues with the exhaust routed like that like noise, heat, corrosion, etc? And I assume the beer can is a makeshift heat shield since the shock is there?
Hey Mark, I've never re-routed the exhaust from where you see it here. It's actually been great; not noisy at all (I like quiet vehicles, much to the chagrin of some of my buddies) and no issue with heat, corrosion, etc. The beer can was a makeshift heat shield due to the shock location, but I don't think it made any difference at all - there's enough airflow there that all the heat is quickly whisked away. I do still have the beer can though, because I have fond memories of doing this work with my buddy and putting it on there. It rattles like crazy (which I can only hear when I'm out of the truck taking photos or whatever) and that always makes me smile, hahaha! ?