Thousands of miles.
How far have I travelled on washboard roads at full tire pressure? Definitely thousands of miles. Probably not ten thousand, but enough that I wish I’d have known how much better life is when you can air down and air back up without too much hassle.
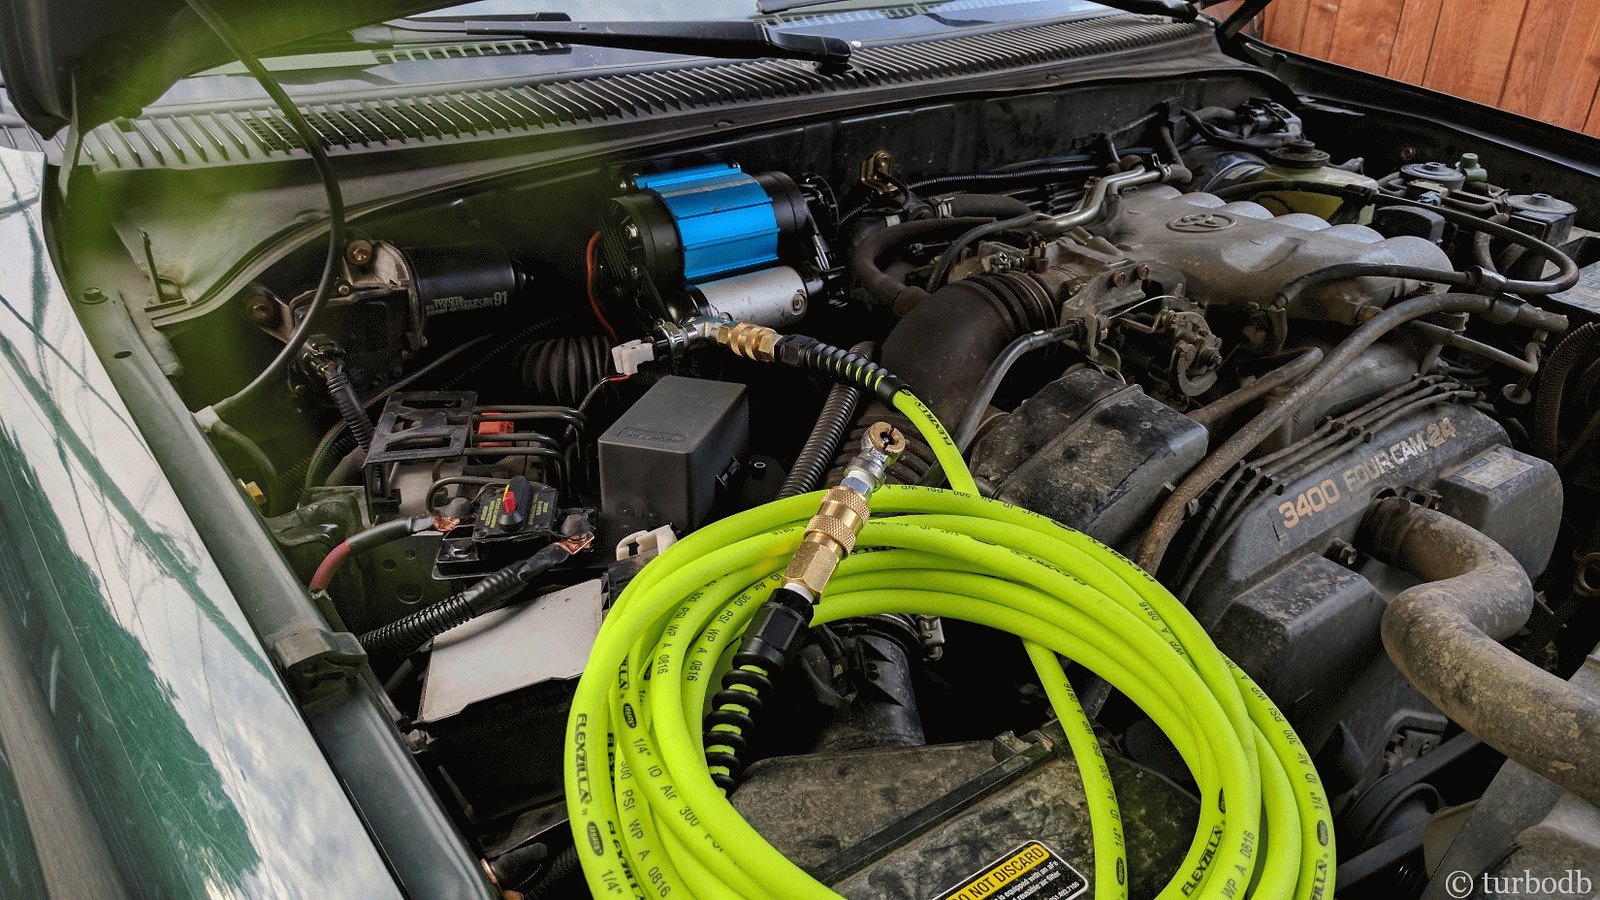
Luckily, while I’m still cheap, I’ve smartened up over the years, and I know that some things are worth a little extra. And comfort is one of those things. So, it’s time to install an ARB CKMA12 air compressor.
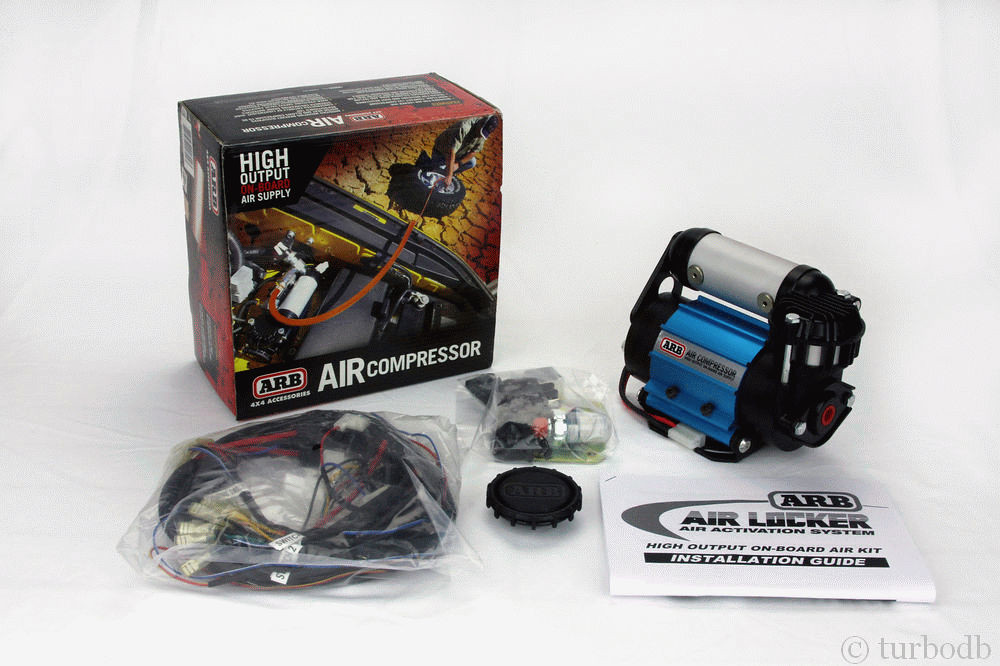
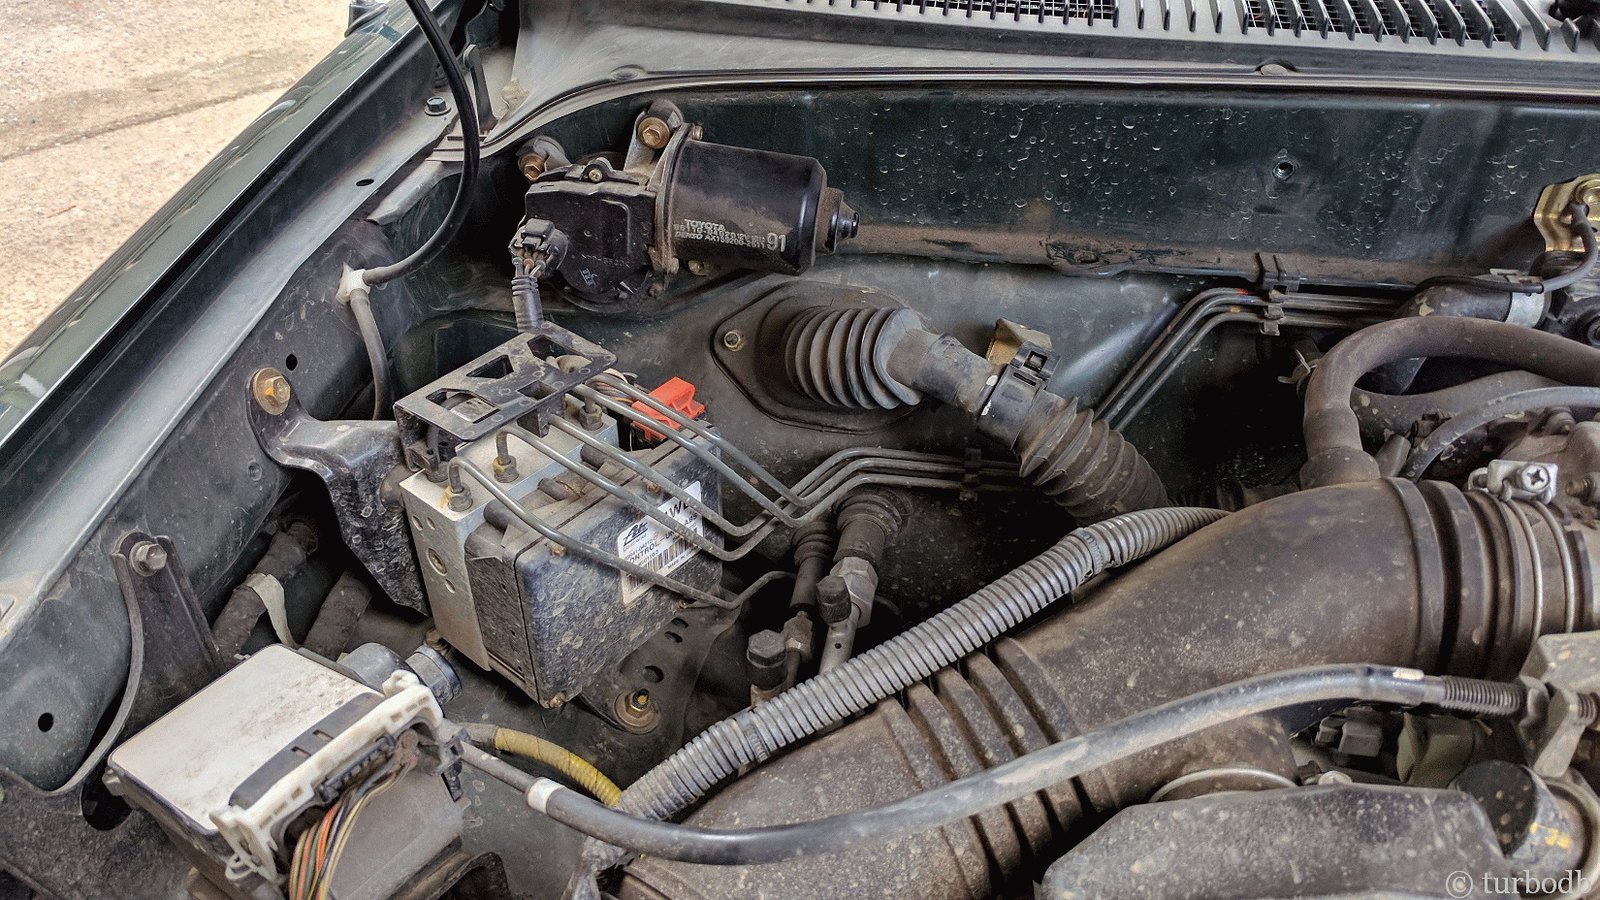
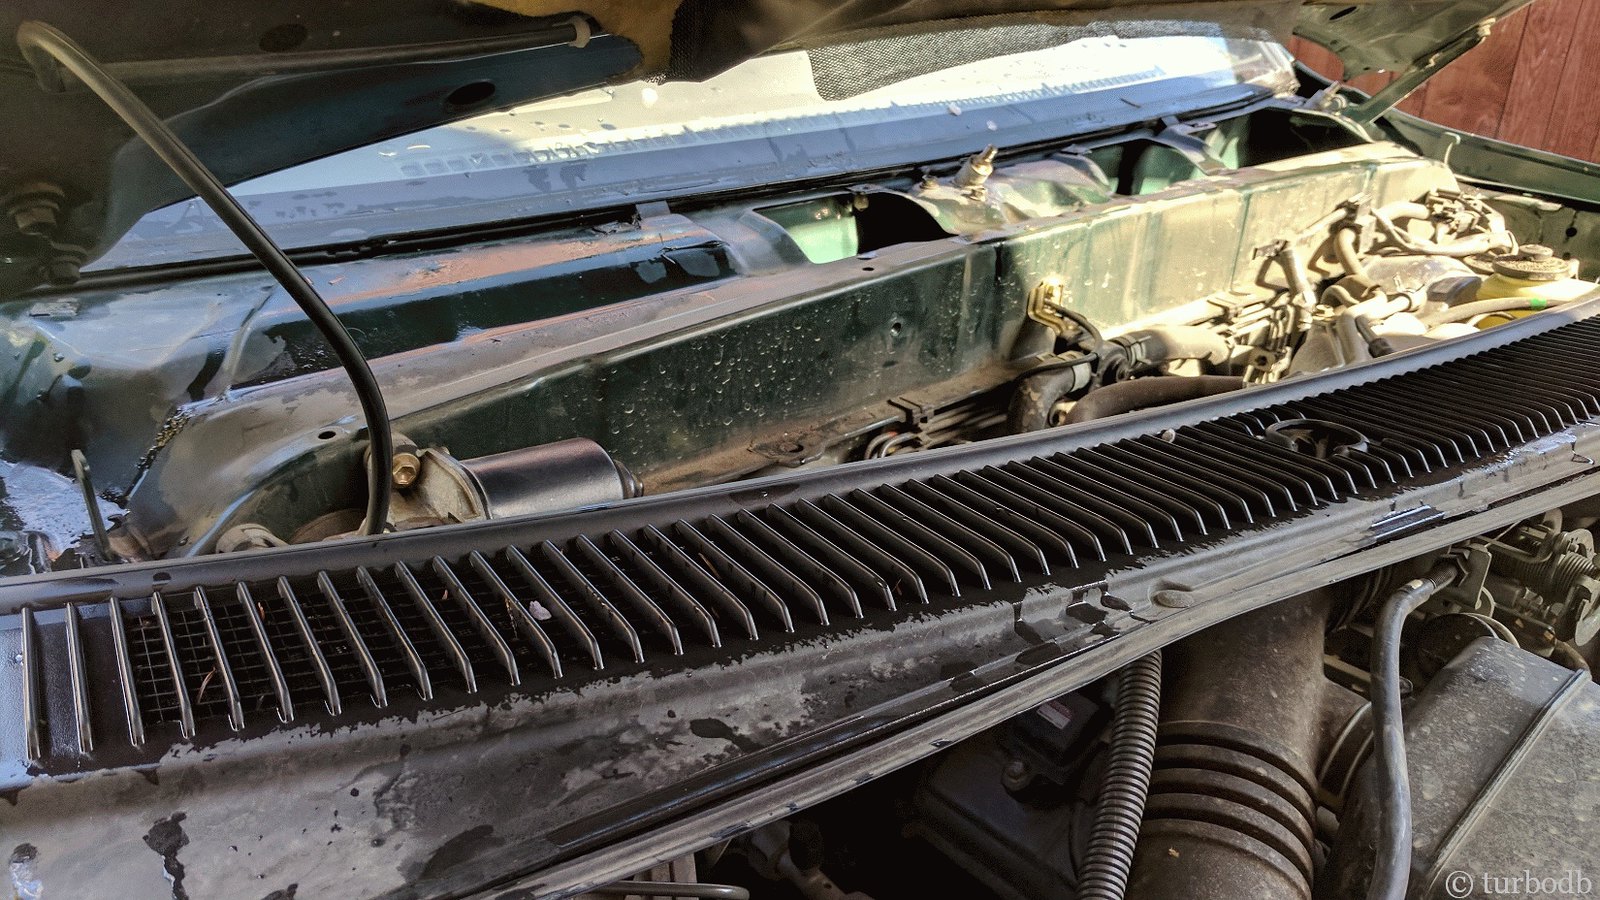
I’ve opted for the single compressor here rather than the twin (CKMTA12), because I’ve got really limited space under the hood. In fact, as it turns out, a 2000 4WD Tacoma with ABS and cruise control apparently has the least amount of space of any Tacoma, ever. The driver side engine compartment is completely full, with the battery, fuse box, charcoal canister, and power steering, and the passenger side is pretty full with the air filter, power steering, and ABS controller.
Not to be dissuaded, I spotted that blank space on the firewall - it looked close, but, I was willing to give it a shot.
So I did some searching around on the internet, and I finally discovered that the good guys over at Expedition Overland happened to find that same spot on their 2001 Tacoma, and in a short video cameo, I was able to see the compressor mounted. Was victory mine?
Hoping so, I emailed them to see if they had any more footage or documented the installation. Jeff got back to me in a couple days and while they didn’t have anything he could share from a picture perspective, he did confirm that it fit, and gave me a valuable hint about removing the plastic cowl in front of the windshield (where the wipers are) to access the back of the firewall in that location. At this point I could tell, victory was going to be mine!
Or so I thought.
I didn’t discover until the end, but it turns out that the one last thing that makes a 2000 Tacoma’s engine compartment different than 2001-2004 is that the hood swoops down slightly in the middle rather than swooping up. Probably makes about a 1½ inch difference right where the compressor was going to mount.
Victory would still be mine, but only with a little bashing. More on that later.
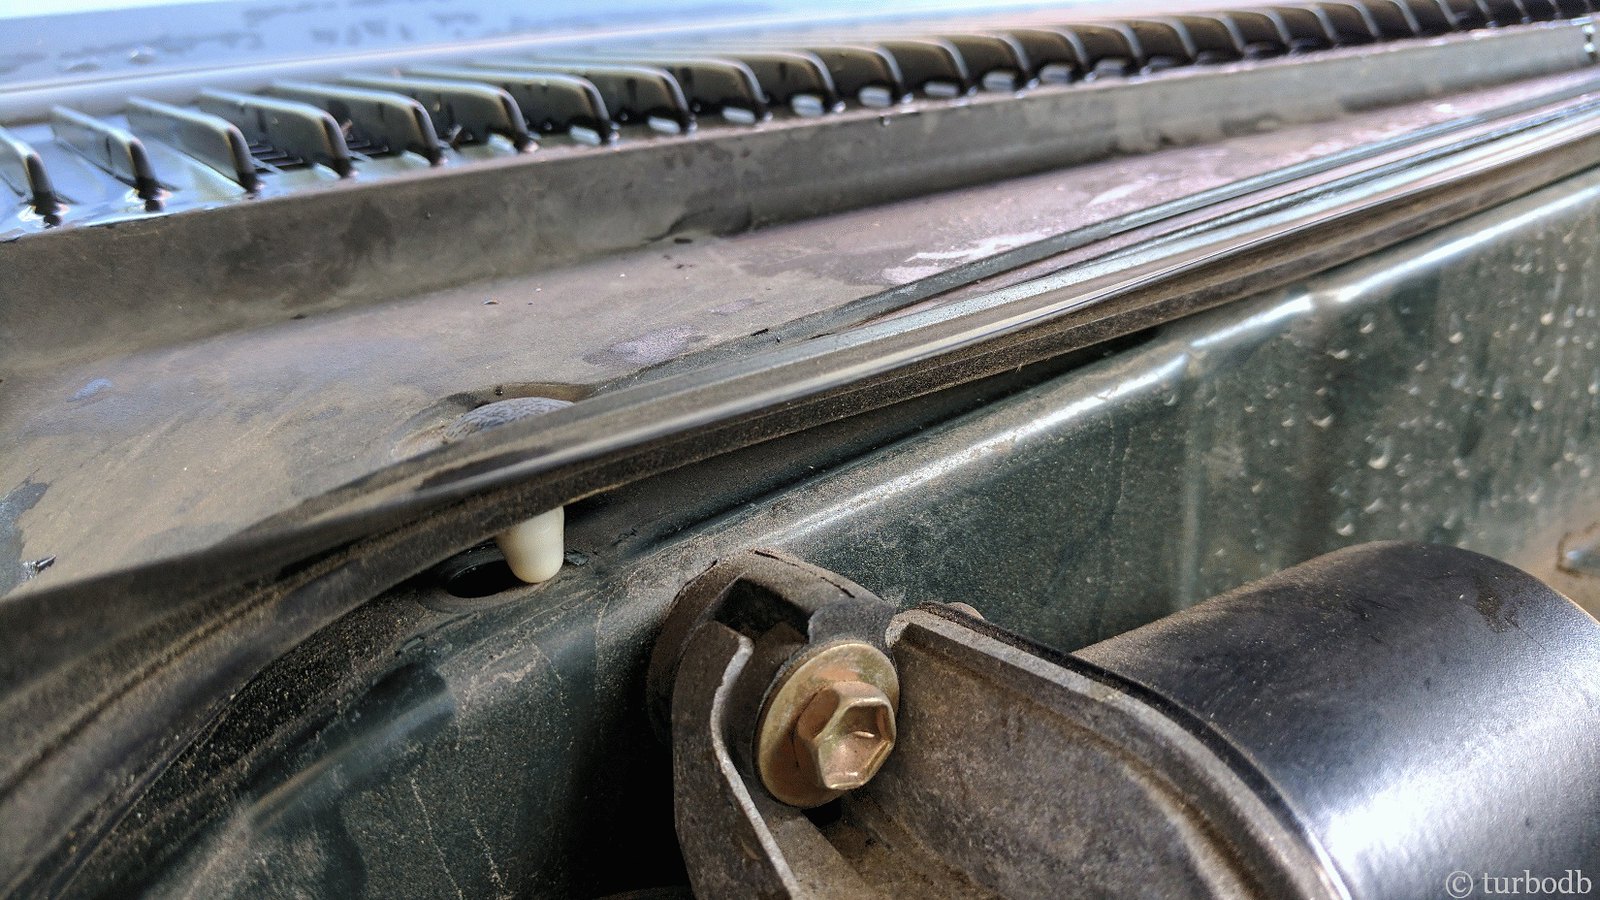
First, I removed the windshield wipers, then a few screws, and finally some plastic clips that held the cowl in place.
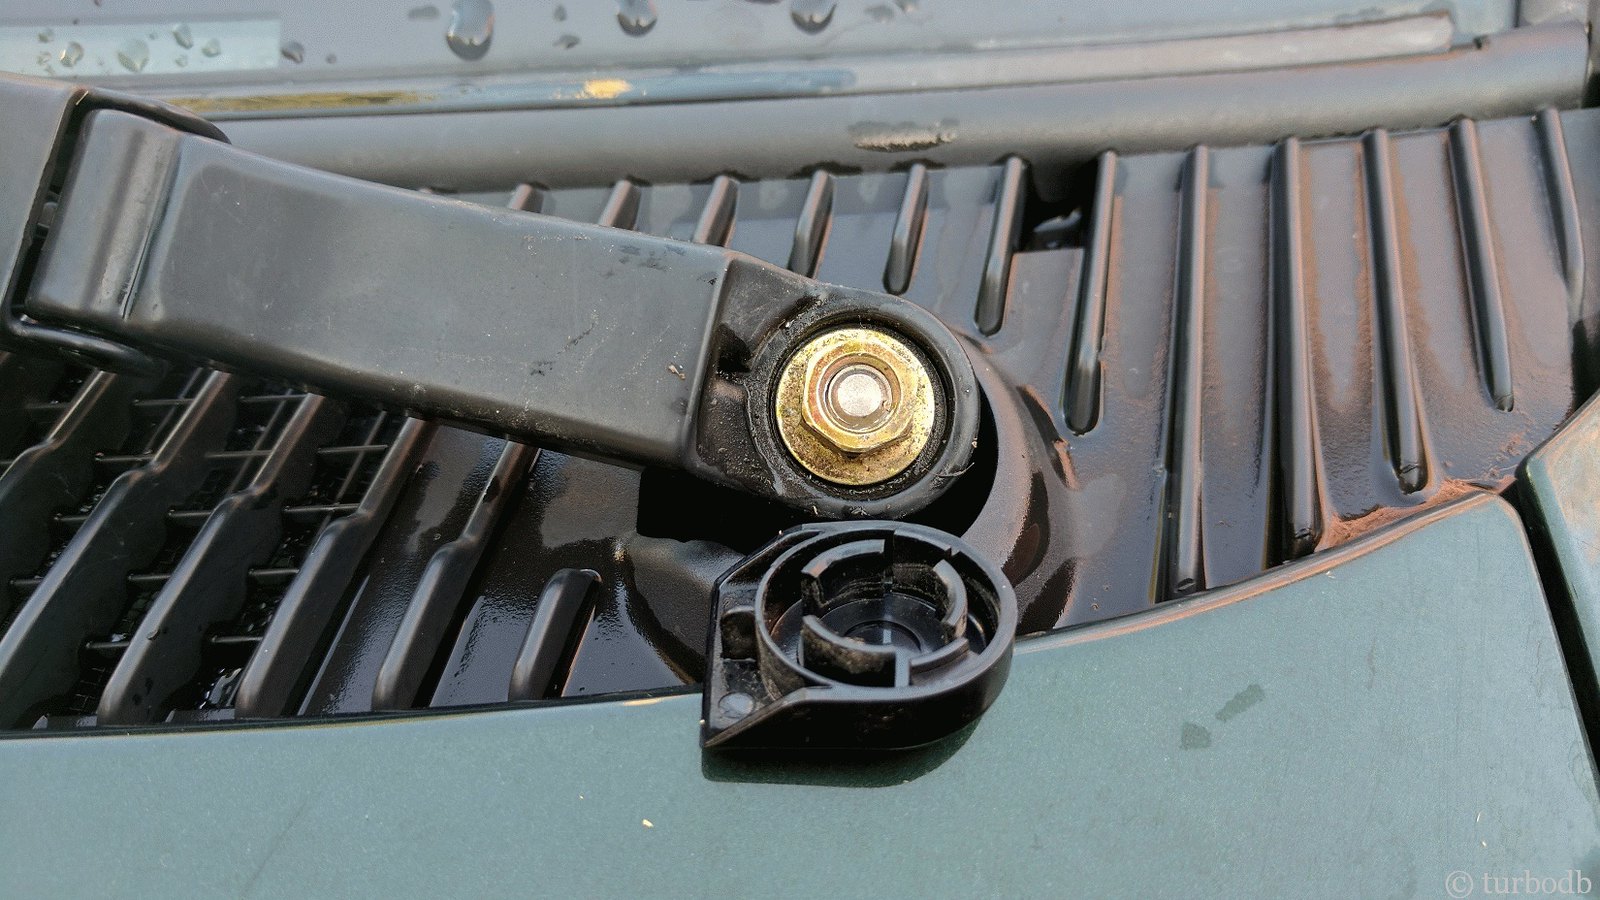
It’s always nice when you can remove plastic clips without breaking them.
Fifteen minutes in, and I was sure, I’d be done by lunch!
But of course, this is when the fun part started. It was clear to me that there was just no way that the compressor was going to fit on the firewall above the little metal shelf. When placed there, two problems arose: First, it was about ¾” too tall; second was the fact that the mounting bracket wouldn’t sit flat against the firewall when the compressor was installed -- the motor on the compressor would hit the shelf.
So I did what anyone in my position (aka “stuck,” since I’d already paid good money and had nowhere else to mount the compressor) would do - I improvised. First, I cut off as much of the bottom of the ARB compressor bracket as I felt like I could, while leaving myself enough room for the two bottom bolts to hold it on to the firewall. And second, I seam welded up and painted a couple pieces of ¼” bar stock to use as a spacer behind the mounting platin - hopefully pushing it far enough away from the firewall to clear the shelf.
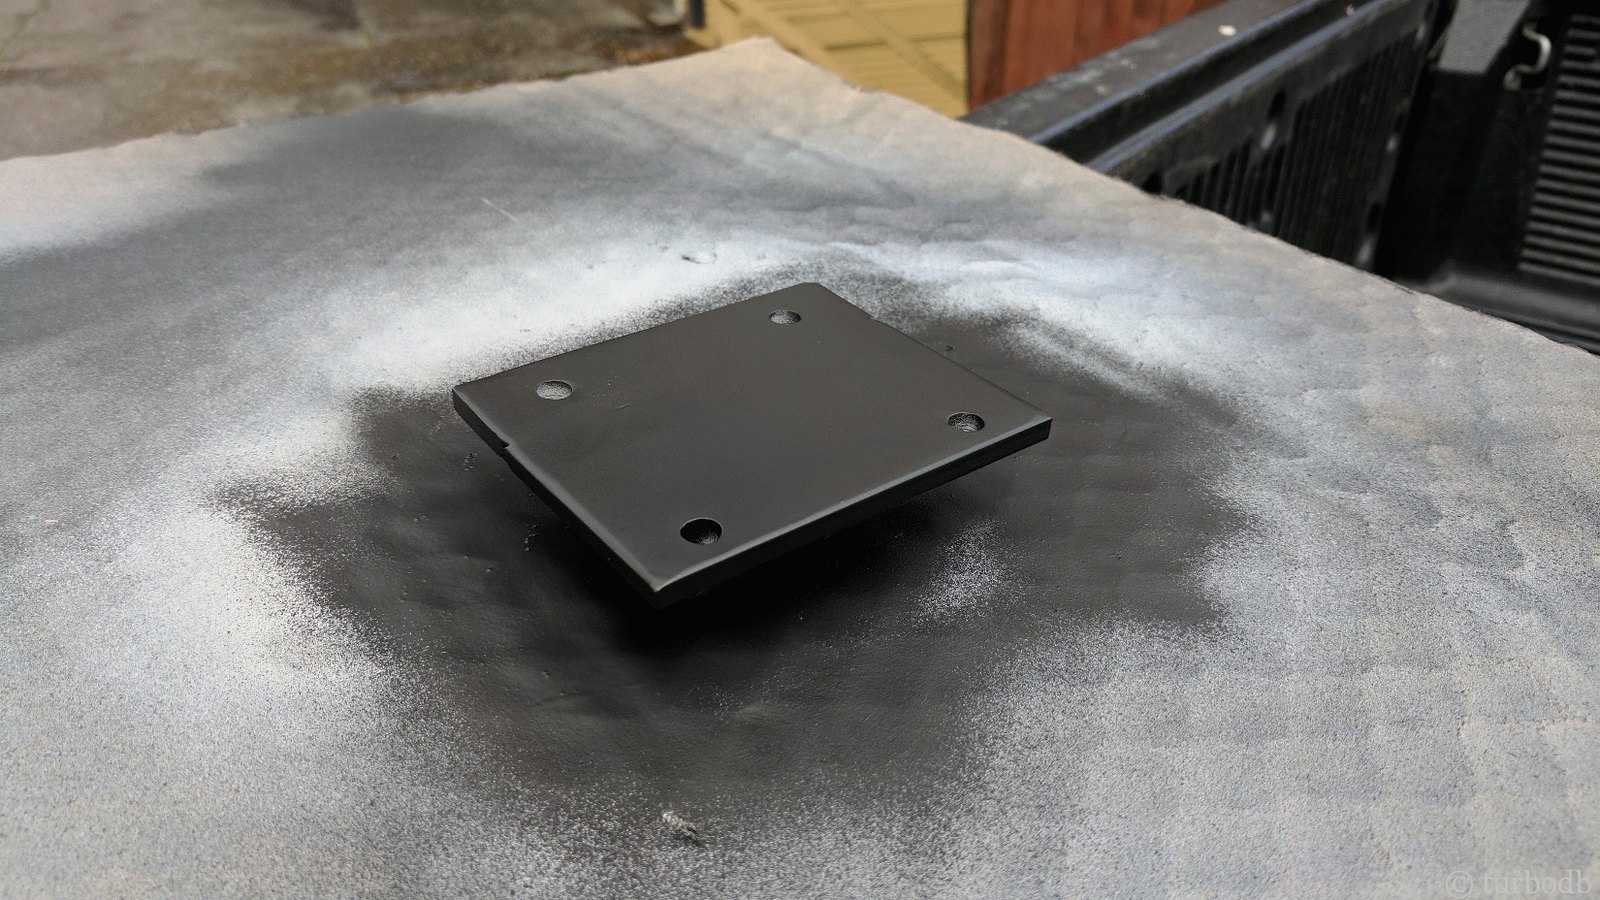
A bit of paint on the spacer, and four holes in the right place, and some EPDM rubber on the back for vibration isolation and sealing, and it was ready to mount up. Oh, and I used it to mark and drill the holes in the firewall.
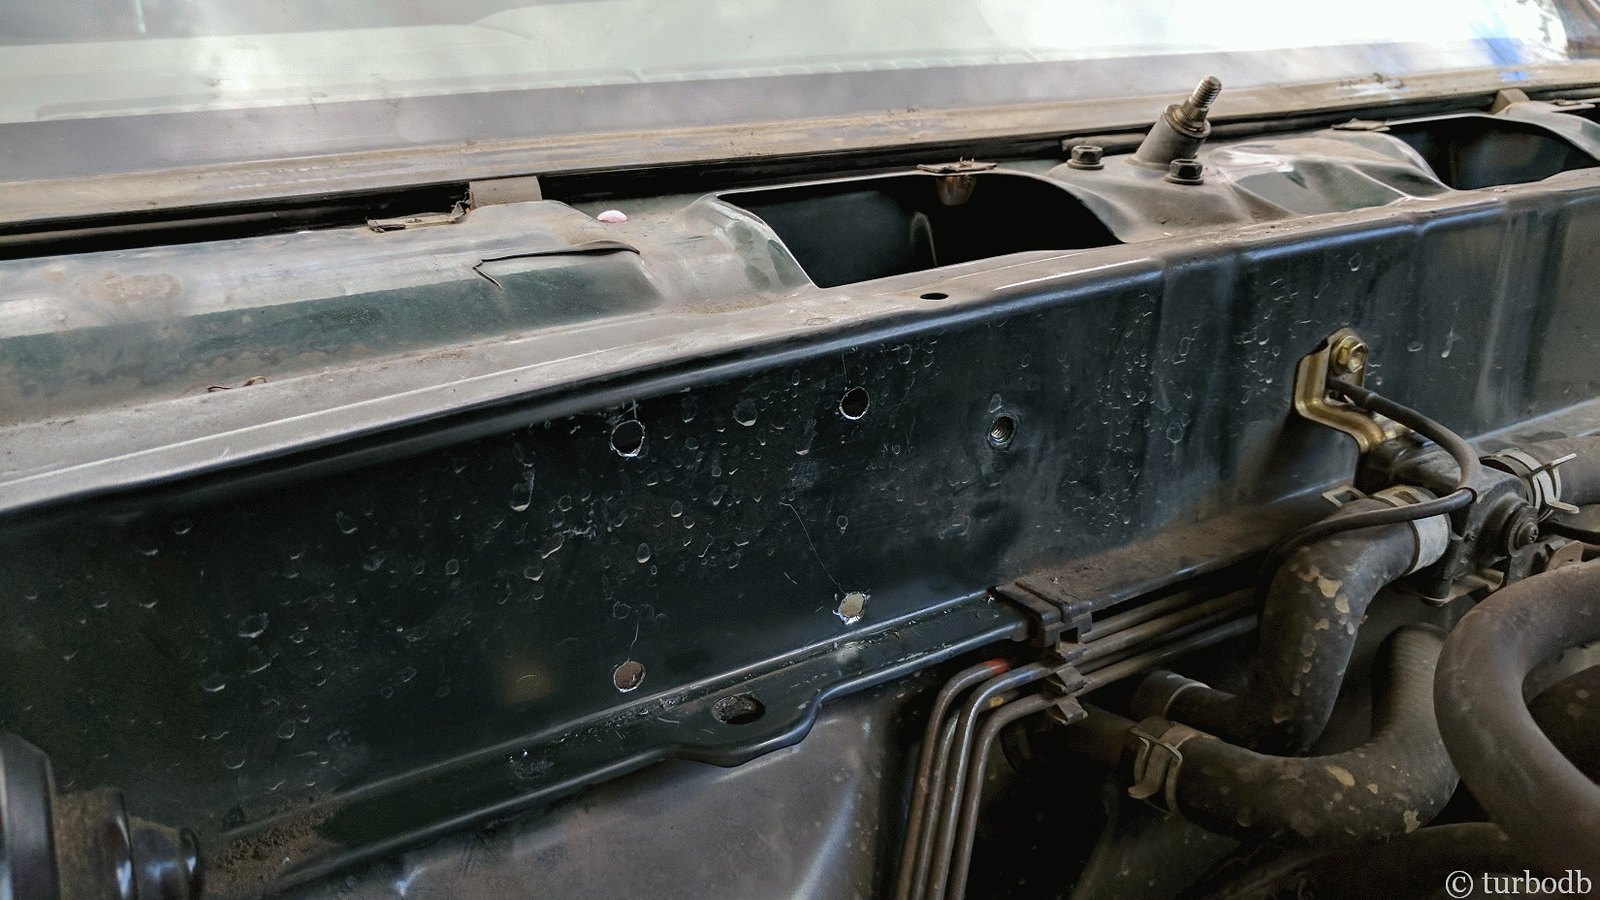
There is little I’ve done to the truck more nerve racking than drilling holes in the firewall. And technically, this isn’t even really called the firewall, since it doesn’t go directly to the cabin.
After getting the holes drilled, it was time to mount everything up. Mounting consisted of some stainless steel hardware I’d purchased separately for its corrosion resistance. The sandwich then was:
- ¼” stainless hex bolt
- ¼” stainless lock washer
- ARB mounting bracket
- ¼” stainless washer
- ¼” custom steel plate (painted)
- EPDM rubber, 1/8” thick compressed
- Firewall
- 1 ¼” fender washer
- ¼” stainless washer
- ¼” stainless nut
The idea of course is to ensure that the lock washer holds everything in place, and that the washers on the back of the firewall are large enough to support the weight of the compressor as it gets bumped around on the trail.
Bracket installation took about 90 minutes, since access to the holes was nearly impossible (probably would have been easier with a second set of smaller hands, and the hood removed) and the stainless hex bolts I was using were just long enough (1 inch) to get started in the nuts with the whole sandwich.
With the bracket mounted, I was sure that I was totally screwed. The more I looked at it, the more convinced I was that there was no way the compressor was going to fit under the hood. Hard-headed as always, I kept going.
Turns out the hood wasn’t the thing I should have been concerned about (first). The shelf in the firewall was still a bit too wide and the bottom of the compressor was hitting it when I tried to mount it to the bracket. Sure that I was doing the right thing, I pulled out my hammer and knocked it down a bit, and out of the way. Disaster avoided.
I then spent another 60 minutes screwing in the four bolts that hold the compressor to the mount (everything’s such a tight fit that getting an Allen wrench in there is nearly impossible.
And then, it was mounted. Luckily, I think I only stripped one head when it was all said and done, and just as I completed tightening it.
At least we know it’s never coming out.
Oh, and now I’m really committed to making it work.
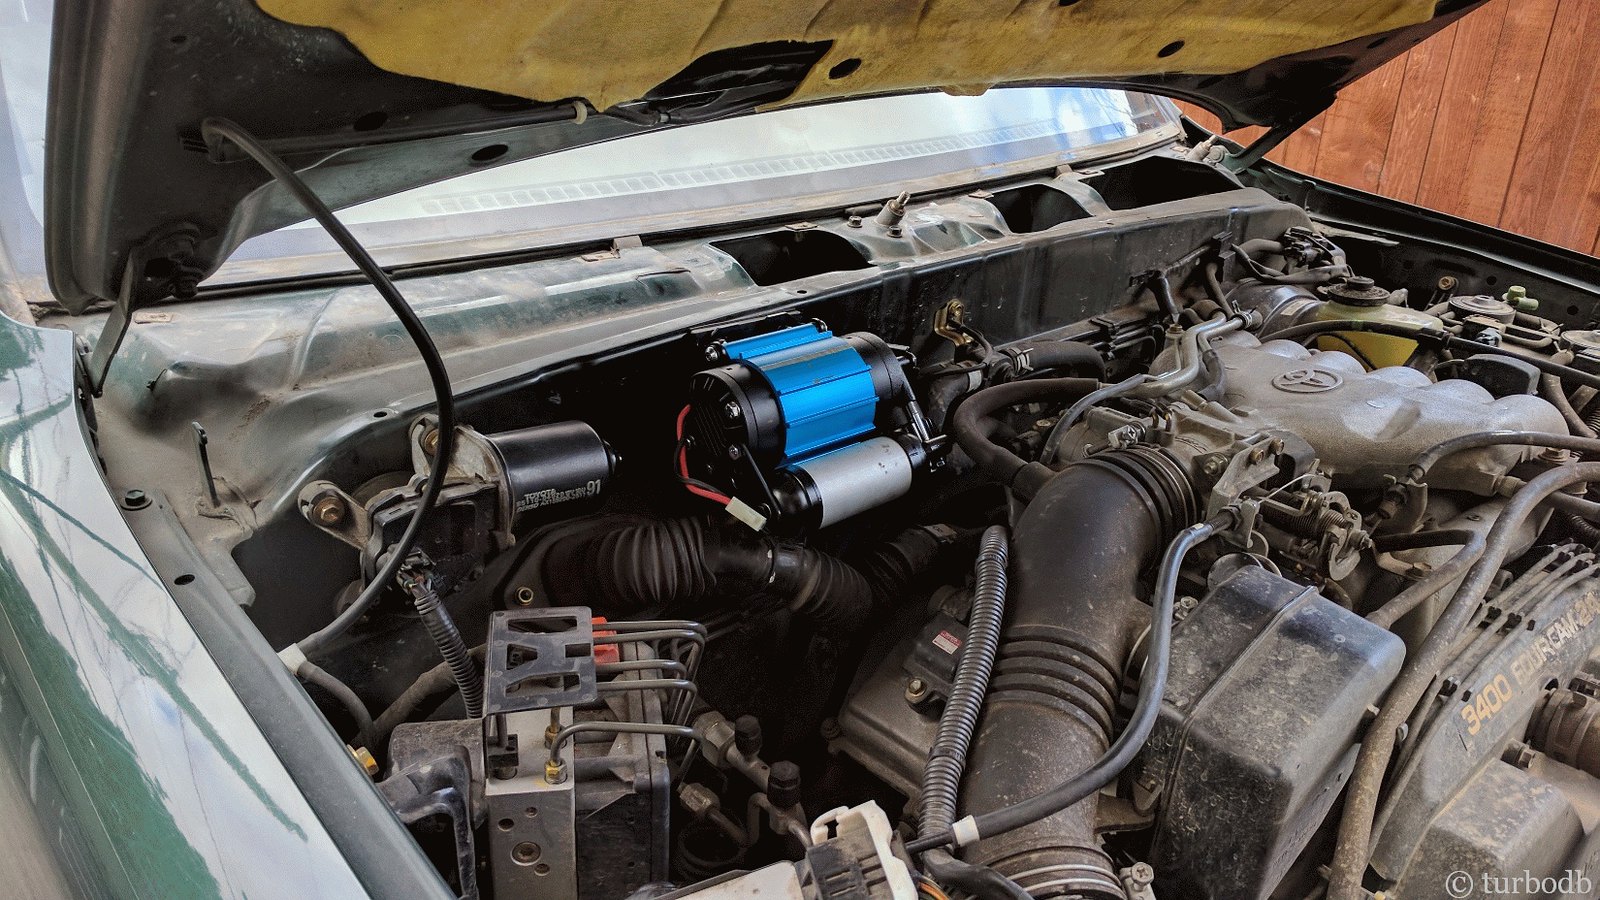
The moment of truth. I gathered up my various tools and shut the hood. It was no good. I could tell that even with my cutting of the bracket, it was hitting on the top of the compressor. Actually, it was hitting on one of the anodized blue aluminum fins.
So out came the grinder, and off went the fin. Easy peasy. Who needed that fin anyway?
I closed the hood again. Better, but still touching. No more fins to grind off, I needed another ¼” or so to feel like there was enough of an “air gap” to accommodate hood vibration, etc. Luckily for me, the part of the hood hitting the compressor was a reinforcing bar, so I was able to once again use my precision hammer to bash it in just the right place and generate the necessary clearance. And with that, just like a 2001-2004 Tacoma, you can fit an ARB CKMA12 in a 2000 Tacoma. Sort of.
And now, it was time for wiring. Having just installed my Bussmann RTMR, I was looking forward to using one of the relays to power this puppy. So I broke out the wiring harness that came with the ARB and pillaged the necessary bits from it - some 10 gauge wire here, connectors there - essentially removing the bits that would be replaced by the Bussmann. I also gathered up a few other new bits of electronics that I’d need to get everything connected up
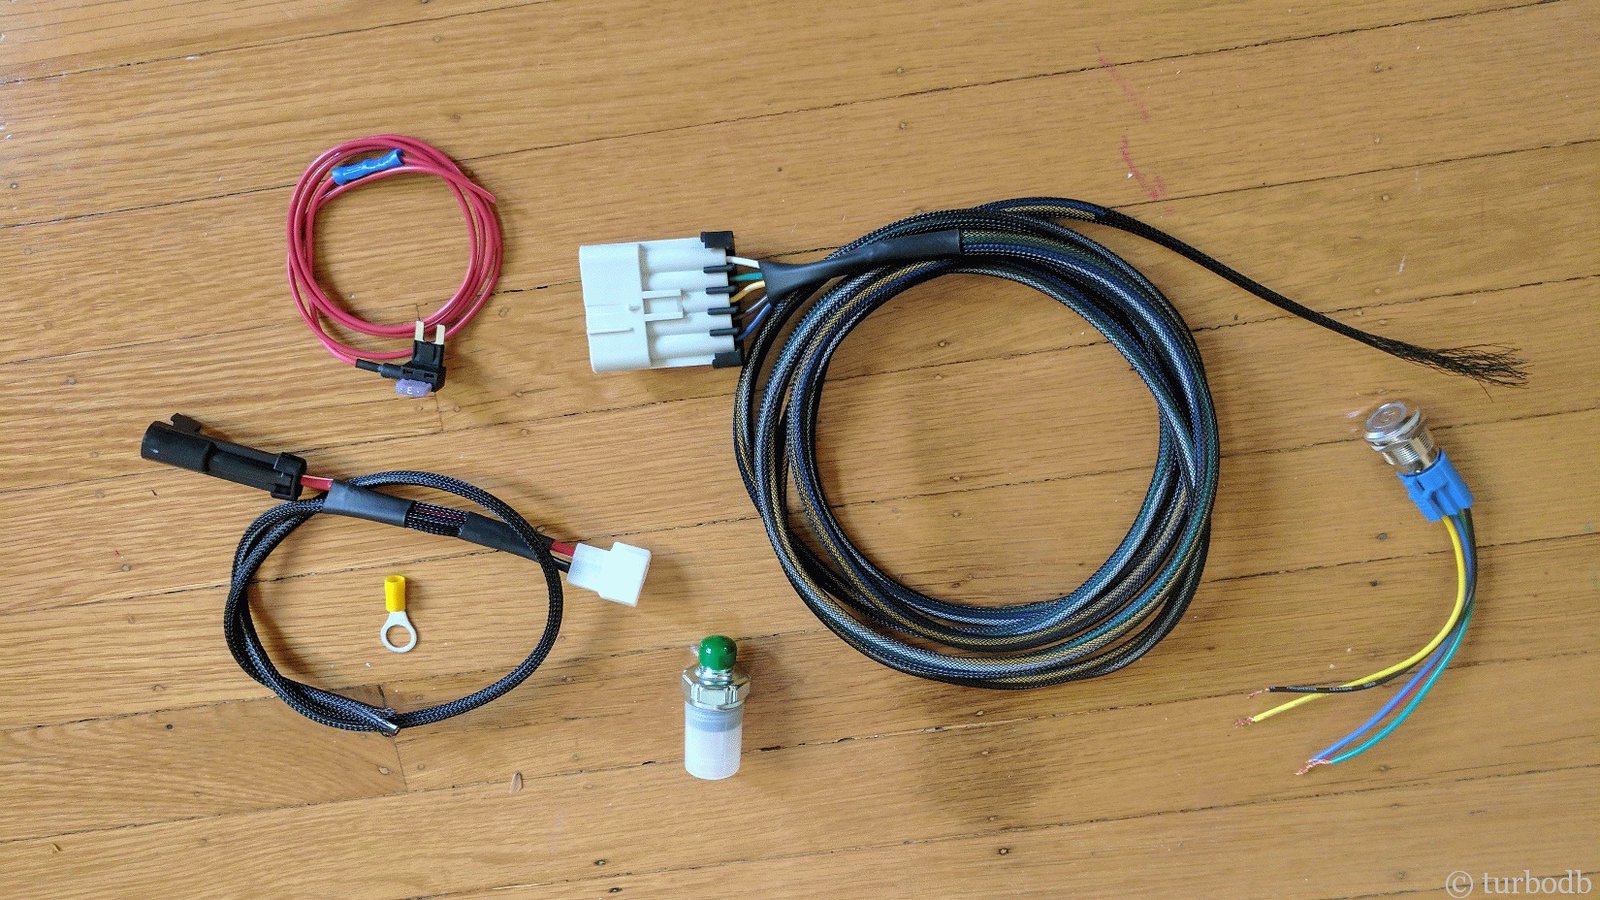
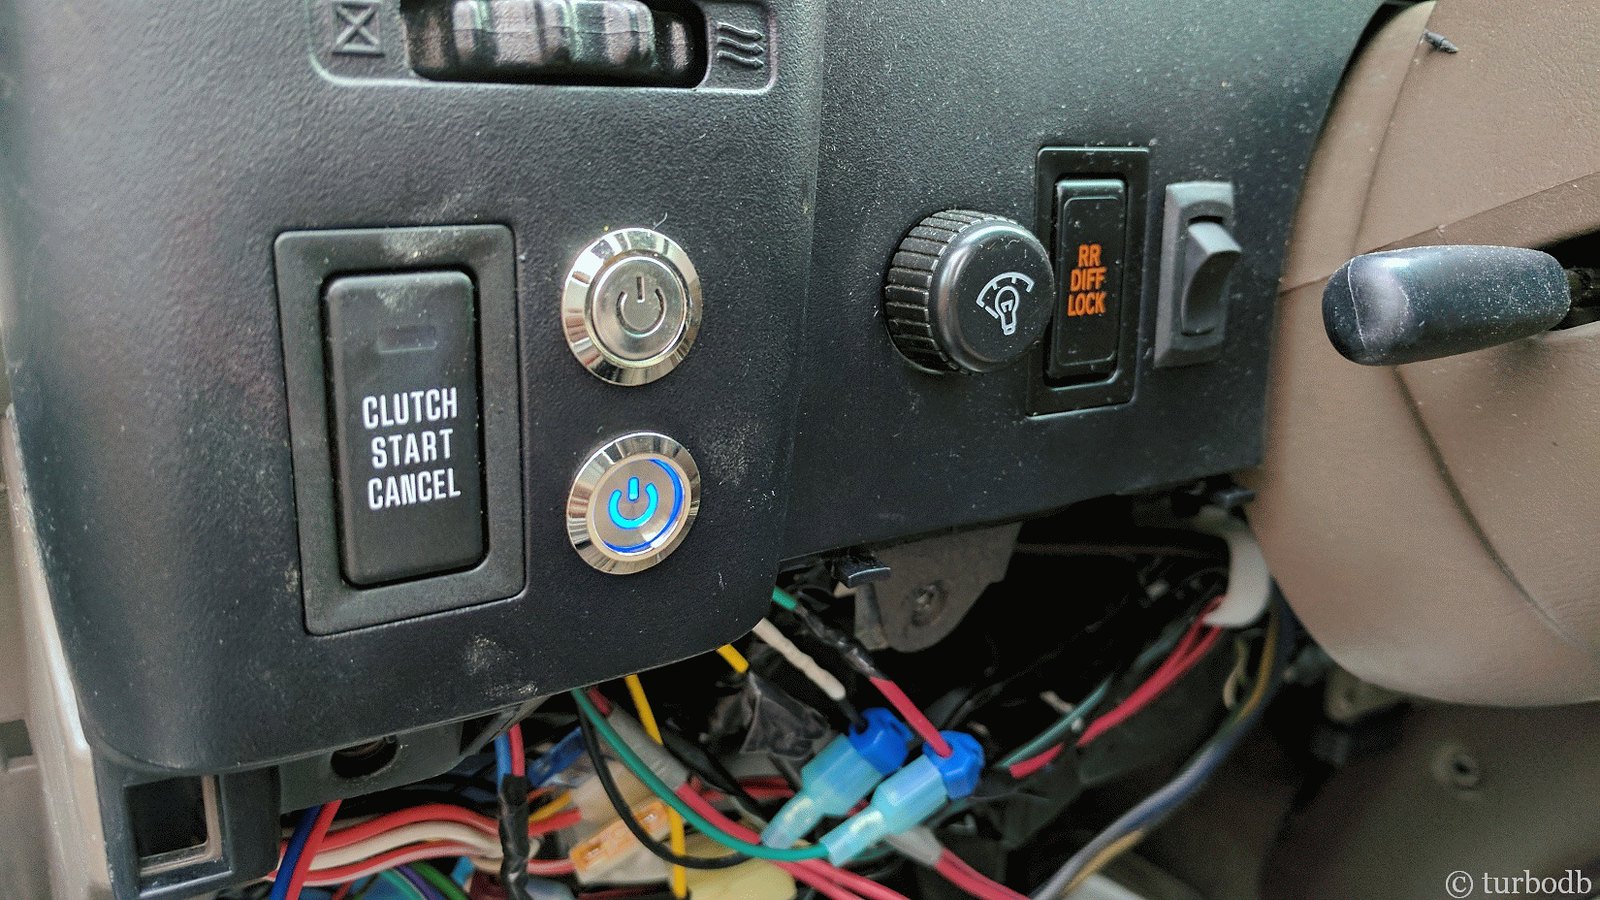
Those got split-loomed into the engine bay, and run through the firewall to the cab, where I installed my own push-button switch (that matches my other switches). A bit of soldering, reconnection of the battery, and I a test was in order.
The switch switched. The compressor compressed. I could see the finish line.
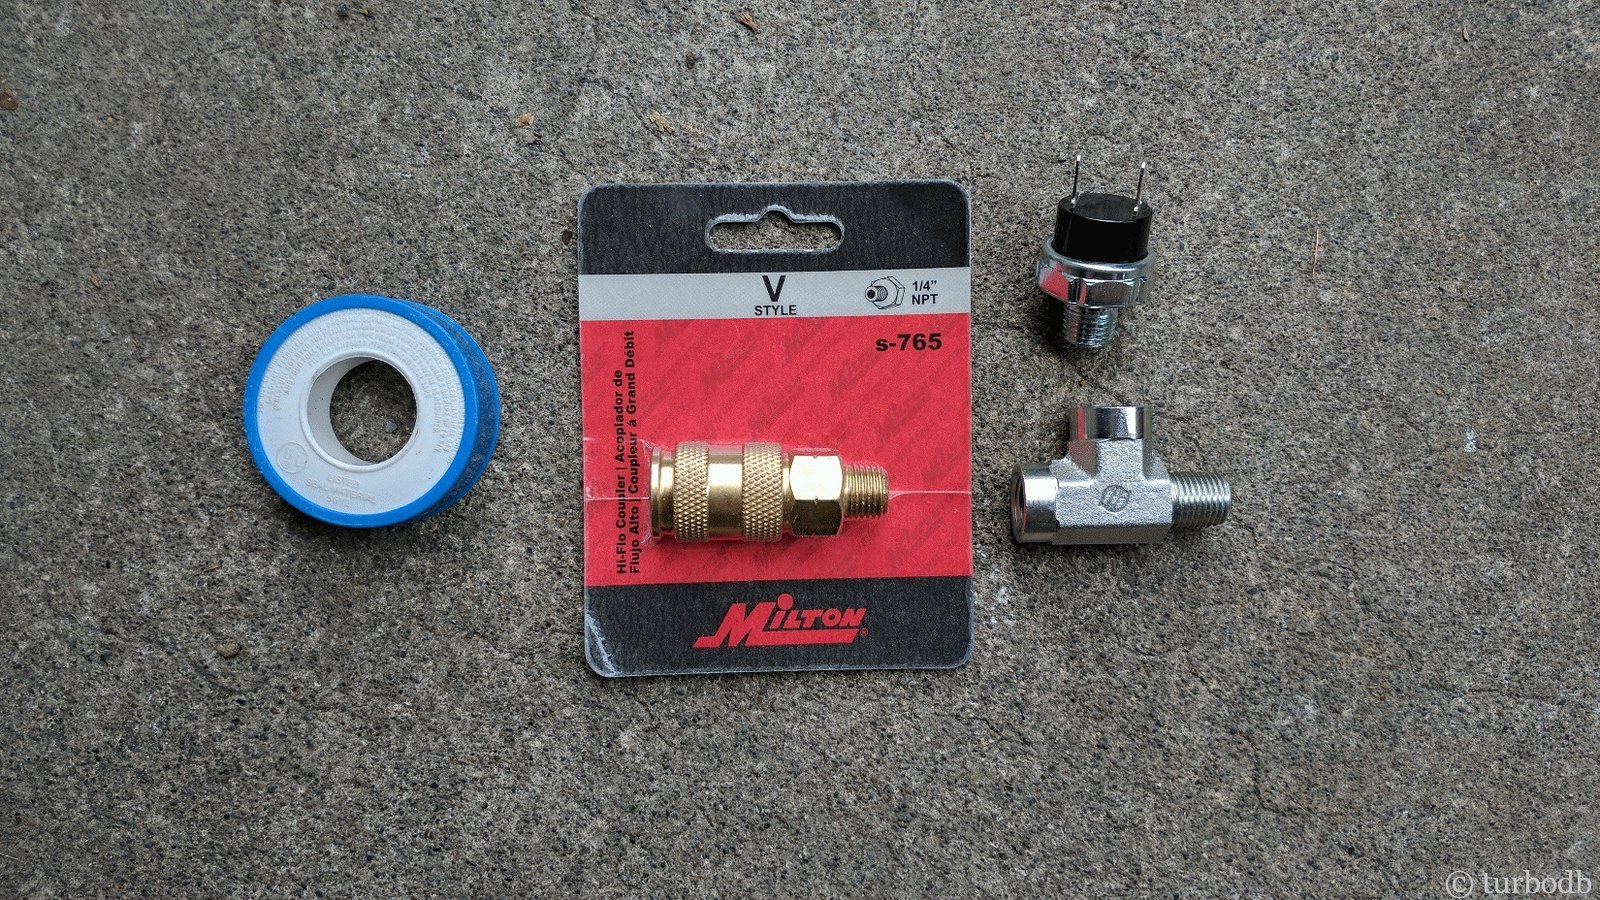
The last step was to attach the various fittings and hoses that would move the air from the compressor to the tires. With the single compressor version of the ARB, I made sure to get all V-style (to ensure as much airflow as possible):
- Started with a Brennan Industries 5602-04-04-04-FG steel tee, for the ARB pressure switch and coupler
- Milton S-765 1/4" MNPT V Style High Flow Coupler
- Flexzilla Pro Air Hose, 1/4 in. x 25 ft. (HFZP1425YW2)
- Milton S-216 1/4" NPT V Style Coupler and Plug Kit and Milton S-761 1/4" FNPT V Style High Flow Plug for the ends of the Flexzilla
Some Teflon tape and everything went together well.
And now, I can look forward to airing down when we leave the pavement.