
TL;DR - I am not happy with the lifespan I got out of the X-Axis joints on my SPC upper control arms (UCAs), so I'm going back to the original polyurethane bushing-based SPC UCAs.


I first installed SPC UCAs in 2018, 165,000 miles ago. Looking back, I'm not sure it was entirely necessary - I was able to get a perfectly good alignment with the stock UCAs - but it seemed like the right time, as I was significantly upgrading my front suspension after realizing how much I was actually using the Tacoma to explore the western United States.
Those SPC UCAs worked great until almost exactly two years ago. By then, 120,000 miles later, the SpecRide polyurethane bushings had worn out and were ready to be replaced. Since installing the first set, I'd gotten wind of a new joint - named X-Axis by SPC, but essentially spherical bearings - that replaced the SpecRide bushings on newer models of the UCAs. After a few conversations with SPC - where they informed me that the X-Axis joints were "lifetime joints" - I decided to take advantage of their upgrade program and traded out my original UCAs for a brand-new set that contained the new joints.
Unlike the first upgrade, the new SPC UCAs were anything but. Immediately, horror stories from other customers who'd installed the X-Axis based UCAs started rolling in. At first, I thought it was just a few outliers, but it soon became clear that the X-Axis joints were causing a lot more problems than the original SpecRide bushings. I was not happy with SPC. Still, they promised to stand behind the new joints, and I've been keeping an eye on them ever since.
It was about six months ago - at the end of February 2024, and 18 months after installing the new UCAs - when I started to notice a little bit of play in the X-Axis joints. I fired up my email and sent a message off to SPC:
Sent: Tuesday, February 27, 2024 7:06 PM
Subject: SPC UCAs with X-Axis showing some playHi ███████,
Hope you’re doing well. We traded emails a couple of years ago regarding some SPC UCAs with X-Axis joints that you did a “trade-up” with me on, from my original SPC UCAs with bushings. I’m starting to see some play in the X-Axis joints (a small clunk when I tug on the installed UCAs) and so it seems to me like the X-Axis joints are wearing out.
I’d like to trade them in to you guys under warranty - can you let me know the process? Would you like me to send a video of the behavior I’m seeing?
Thanks,
Dan
I got a reply back within a few days, and SPC asked me to send a video of the clunking that I was seeing, so I fired up my phone and sent along a poorly-executed moving photo of the situation, and awaited their response.

Sent: Wednesday, March 6, 2024 06:32
The bushing should not have any play at all. I could get them change with a core charge of $250.00. We are in a process of changing the bushing and ball joints in the next 4 months if you want to wait till then or we could do it now.
SPC Customer Service lead
Regional Sales Associate
After a few more back-and-forths to determine if I wanted to wait for the new bushings and ball joints, I decided that I would hold off on the replacement until I brought the Tacoma home from Las Vegas for the summer, and when summer finally did roll around, it was no problem getting a new set of arms from SPC, though the core charge had somehow ballooned from $250 to $525.
I'm Not Installing Those New SPC Upper Control Arms
I'd wanted to get the latest and greatest from SPC, because I had no plans to install them. Rather, I'd be selling them to someone else and wanted to ensure that they had something brand new and with better joints than I had.
My plan - after my dramatically different longevity experiences between the SpecRide-based and X-Axis-based UCAs - was to go back to SpecRide versions of the SPC product. As such, I'd picked up a used set from a fellow TacomaWorld member, along with five sets - enough to outlast the Tacoma - of SpecRide bushings.
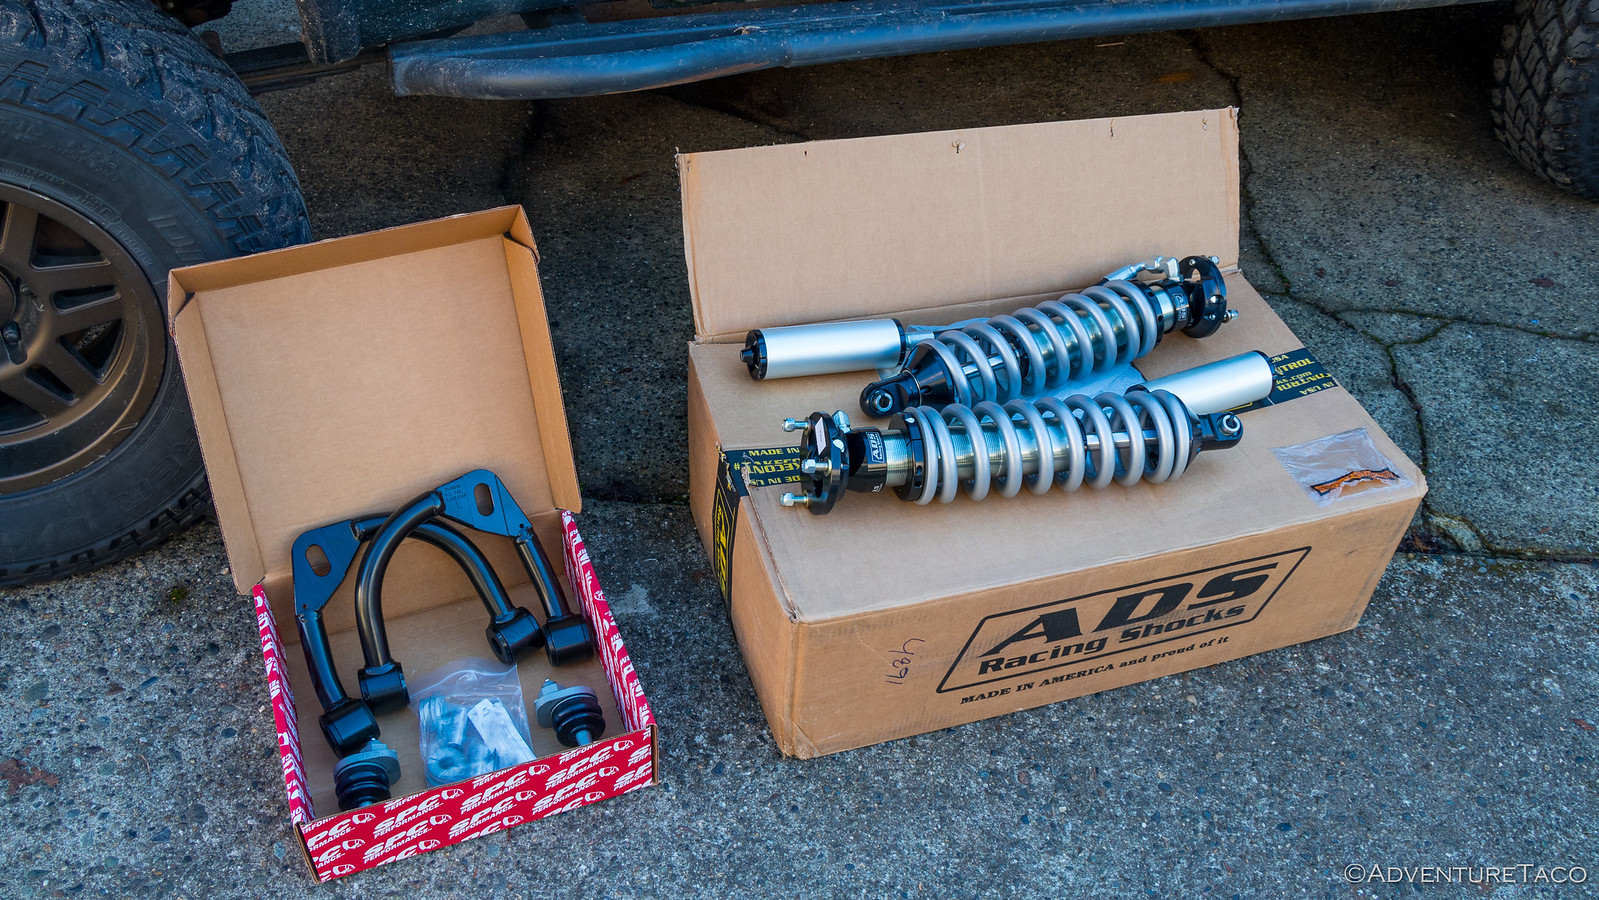
And so, with three sets of SPC UCAs in hand, I set about replacement.

I won't bore you with all the details of the arm replacement - anyone interested in that can check out my first installation, replacement with X-Axis UCAs, or even a step-by-step guide. Instead, here are a comparison of three generations of SPC UCAs and upper ball joints (UBJs) for comparison.


Wondering about the difference between the original and newer X-Axis joints, I wasn't able to get much information from SPC. All I was told was, "We changed the size of the bushing to fit better around the moonball." While this isn't very detailed, to me it sounds similar to the tightness rating that bearing manufacturers like FKS use when assembling spherical bearings. There, FKS has developed an "F1" tightness rating that is significantly tighter than normal bearings and provides a much longer lifespan as it keeps dirt and debris out of the bearing.

Replacing the SpecRide Bushings
With the comparison of the three UCA and UBJ variants complete, I set about prepping the oldest set - the tubular arms with polyurethane SpecRide bushings for use. This entailed removal of the old bushings and replacement with a set of brand-new SPC (25466) bushings.

Only a shop press (sometimes Harbor Freight is cheaper) is necessary for this operation, and I found that the instructions provided by SPC were significantly more complicated than they needed to be. To replace the SpecRide bushings, simply follow these steps:
Press out the old bushings
The old bushings press out of the SPC arms from the inside toward the outside. This means that a long press fixture is required, but luckily the Toyota OEM UCA hardware can be utilized.

- Thread the OEM UCA nut "backwards" onto the OEM UCA bolt as far as it will go.
- Place a large fender washer - with a ~1.5" outer diameter, just small enough to fit in the bushing sleeve - onto the inner side of the supported arm.
- Place the UCA on the press, supported by one of the tubular arms and so that the bushing can be pressed out of the joint.
- Slowly press the bushing out of the sleeve, being careful to watch for any flex of the UCA bolt, or interference/rubbing of the washer on the sleeve.
Repeat steps 1-4 for the remainder of the bushings.
Press in the new bushings
The new SpecRide bushings are pressed into the sleeves from the outside surface of each sleeve. Pressing in the new bushings is also a straight-forward operation and can be done with the assistance of the large washers that are supplied in the new SpecRide bushing kit.

- Place the UCA on the press, supporting one of the sleeves so that the bushing can be pressed into the joint.
- Place the bushing on top of the sleeve, with the small shoulder down toward the sleeve.
- Place two of the large washers supplied with the bushing kit on top of the new bushing
- Slowly press the bushing into the sleeve.
- When the bushing bottoms out on the supporting surface, remove the UCA from the press and use a hammer or mallet to pound the bushing the final 3/16" into the sleeve.
Repeat steps 1-5 for the remainder of the bushings.
Putting Everything Back Together
With the new bushings installed, it was time to reinstall the tubular UCAs, adjust the alignment as best I could at home, and take the truck in for an alignment.

After getting the arms installed, the next order of business was getting the alignment close enough so that I wouldn't need to worry about tearing up the tires, or that the alignment shop - Firestone in my case, since I have a lifetime alignment agreement there - wouldn't be able to get the job finished efficiently.
For this, Brett @Squeaky Penguin recommended that I do the following:
- Max out the alignment cams. This means moving the cams so that the bolt is as far inward as possible on the front cams, and as far outward as possible on the rear cams. This maxes the caster.
- Adjust the positioning of the UBJ using the large nut on the top of the SPC control arms to get camber as close to 90° (vertical) as possible.
- Measure the toe, and if necessary, use the Outer Tie Rods (OTREs) to adjust.
Maxing out the alignment cams was easy. A 19mm and 21mm wrench were all I needed for this step, which entailed first loosening the bolt, then rotating the cam - from the nut side of the cam - and then retightening the blot.


Top: front alignment cams set "in." Bottom left and right: rear alignment cams set "out."
To adjust the position of the UBJ, I made a short piece of wood and attached my digital angle gauge. This allowed me to loosen - and then slowly move - the nut on the top of the UBJ until I got the angle of the wheel surface to a perfect 90°.

To measure the toe, you can purchase some toe alignment plates, or you can make your own with a couple straight (being perfectly straight is important here) pieces of plywood. Since I was in a rush, I cut a piece of 3/4" plywood to be 45" long and 2.5" wide. To these, I attached to a couple of 8" tall feet, placing one against the outside edge of each of the front tires. Then, with the steering wheel centered, simply measure the distance from the outside edge of each board to the outside edge of the other. Ideally, they will be identical, and if they are not, you can adjust toe by loosening the jam nuts and adjusting the OTREs.

And with that, I was off to Firestone for my final alignment.

In this Series

")
")


Maybe the moral of the story is that just because something is newer and looks better doesn't mean that it is better. I've experienced a few redesigned parts that did not hold up as well of the older parts. BUT, I just replaced a T-fitting (bathroom plumbing) original that was crap and a bad design and was very prone to leaking with a new redesigned fitting (same company) that is perfect (so far), was much easier to install and addressed the leak problem by changing from flat fiber washers to cone rubber washers. I'm guessing the company (like in your situation) had a lot of complaints about the original parts leaking.
I hear you on both counts! I've found that a lot of times (but not always) when things get cheaper, they often lose quality. This - of course - is a tradeoff that companies are willing to make because we consumers have proven over the years that we value low cost, and of course, low production cost also means higher revenues for the companies.
But, with these SPC arms, the product got more expensive and conceptually at least, the X-Axis joint is a superior design. I think that in a few more iterations, it probably will be pretty great, but for now, it's not worth it to be the guinea pig!
For your plumbing fitting - that's fantastic! It reminds me of the "transition" from copper to PEX. I was a little hesitant at first, but after remodeling my first house with PEX, I was sold! That stuff is fantastic, has no joints from a central manifold to each individual fixture, and is so easy to pull/install compared to soldering copper.
So, us hands-on folks just have to put up with some bad developments as we also take advantage of the good ones. I suppose it's no different than the output of my work... I mean, I felt like I was always making mistakes, but I'm sure I got things right every now and then. 😉
I could go off into the weeds about 1st gen vs 3rd gen, having one of the latter and traveling across the Sheldon National Antelope Refuge a week ago with one of each. Let's just say that I like mine but I deeply appreciate a lot of the things that hadn't been "improved" yet by Toyota on said 1st gen.
If I understand correctly, the SpecRide bushings are polyurethane encapsulated in a steel sleeve and the X-axis joints are a typical SRE with (perhaps) a PTFE coating? If that's the case, give me the former. On my early Bronco's shocks, arguably different but yet the same, I got tired of constantly replacing the clunking SRE's that would last a season but theoretically offered better location, with urethane bushings.
I'm about to sink a bunch of money into my 3rd gen's suspension (it needs it, topic for another discussion). Pretty sure I'll keep the stock UCA'a if possible.
Thanks for the detailed report!
There are most definitely improvements that have been made over the years - ball joints, some of the suspension bits, and of course, quite a few creature comforts. But yes, as often seems to be the case, there are tradeoffs - so much is now computer controlled vs. manual, parts that were once metal are now composite. If only we could get the best of all worlds... the true, unicorn Tacoma. (I suppose that in the truck world, the unicorn is the Tacoma... no matter the generation, hahahaha!
Anyway, I digress. The SpecRide bushings are just some "special formula" polyurethane, and they don't even have metal sleeves - unless you count the arms themselves - so they are easy to maintain and replace which is how a bushing (or any wear component) should be.
The X-Axis joints are really just SPC's fancy name for a sleeved (and semi-sealed) spherical bearing like you might see in the rod end of a coilover. The problem is that because they are a custom SPC part, they are very expensive. If you could just swap in an FKS spherical bearing, they'd be much more reasonable.
I'm sort of at a loss on what control arm to go with now. I don't really need to adjustment option but went with SPC because the specride tubular arms work so well on one of my other vehicles. I just don't have a way to easily acquire the older SPC arm style now.
I don't think a uniball style like Total Chaos is an option in my dusty envrionment. Maybe JBA. I hate the red color but they've held up for the people I know running them.
It's not a great solution, but the specride bushings fit in the new SPC arms, once you press out the X-Axis bushings. So, you could purchase the new SPCs, wear out the X-Axis over ~30K miles, and then replace them with specride...
Not "awesome," but an option! 👍
I purchased mine as Mevotech rebranded units through RockAuto. Since Mevotech left that arrangement Rockauto offered me a refund. SPC offered me their arm swap program thing but that will be potentially $300+
So my arms with the first revision of the x-axis bushings will accept the specride? If so I'll dip into my supply of specride bushings for my other truck and be on my way.
Yep, that's my understanding. I've never actually done it, but I had a buddy who measured and let me know that the ID of the arms was the same across models. Makes sense, since SPC wouldn't want to redesign the arms just to put in a different bushing/joint.
I’ll give it a shot and report back.
Pressed the spec ride bushings into the forged arms this afternoon. Seems there is a bit of slack but members on the 2nd gen Tacoma forum on Tacoma World have mentioned this will go away when sandwiched together and torqued to spec on the truck. We'll see about that. Multiple 2nd gen owners in that thread mentioned success with this method. Of course my truck is a 1st gen with slightly different arms.
Awesome! Good luck, keep me posted! 👍
Late getting back to you here... bear with me on this explanation.
I was bolting the truck back up together today and I can't find a way to take up the extra slack with these specride bushings from the thinner forged arms. The second gen Tacoma guys have some interesting thoughts in this thread https://www.tacomaworld.com/threads/spc-type-b-uca-bushing-replacement-polybushing.803354/. One guy installed 3D printed spacers to take up that extra slack and prevent the issue. That's outside of my wheelhouse.
There's also a guy testing out custom bushings for the x-axis forged arms. My dilemma is I don't want to buy new arms and I don't want to spend $200-$300 on new x-axis bushings. These second gen Tacoma arms use slightly different bushings, so these custom bushings will not be of any use to 1st gen owners. I'm not interested in any new and improved x-axis bushing since I'm convinced they're using customers as unofficial and unpaid field testers.
Basically these x-axis arms are paper weights, and I should probably take my RockAuto warranty store credit on them. I'll eventually need enough Denso OEM equivalent stuff to use the credit up.
Hey Andrew, thanks for the heads up. I can't quite see it in your photo, but are you saying that the washers that come with the specride bushings don't "fill the gap" as they do on the forged arms that originally came with specride bushings? That the the space between the legs is different on UCAs that come with the x-axis preinstalled?
Here's a photo with slightly better lighting. This is unrelated to the washers. The specride bushings perfectly fit into the tubular welded arms, but when installed in forged arms xaxis arms the bushings are too long. This allow for the arm to move side to side, sliding along on the longer bushings.
The second gen guys were adding 3D printer spacers to fill this gap and prevent that lateral sideways movement.
Wow, I had no idea that the sleeve there at the shock tower was narrower on the X-Axis version of the UCAs than it was on the specride bushing version. That's a little insane given that the first version of those cast UCAs had specride bushings in them; that means they changed the casting at some point when they transitioned to X-Axis.
Thanks for the heads up, and I'll be sure to update my post with this information!
This is my current plan. I just bought brand new SPC arms with the "fancy " bushings. If they wear out sooner than I think they should, I'll replace them with the older style.
I really appreciate all the work youve put into this page, lots of really good information!
I'm currently working on a pretty heavy refresh and have the og spc uca with poly bushings but one of the balls is worn, have you had any issues with the sealed ball joint?
Also how come you didn't zerk the uca like you did the lca? I pulled the uca because they were squeaking non stop and was planing on doing zerks but the "vent hole" has me hesitant.
Hey Walden, thanks for the kind words and glad you've found the site useful! I continue to learn (and get tons of help doing so), so it's nice to help out where I can!
I've never run the sealed ball joint, but as luck would have it, I swapped out my zerked SPC UBJs yesterday for some of the sealed joints. Up until that point, I hadn't had any of the SPC uppers wear out, but I discovered that mine were on my last trip to Utah. At any rate, the sealed joints have a "lifetime warranty," but I expect that's similar to the same "lifetime" warranty of the UCAs, so more like 3 years / 30K miles, so I'll be checking them pretty regularly before I hit those marks, in order to swap them out if necessary.
For the UCA zerks - really, the only reason I didn't do it was because I didn't think about it. Now you've got me wanting to get in there and add a zerk, hahaha! It'd be even easier - and probably more effective - on the uppers because they aren't captured as tightly as the lowers (in that there's the single long bolt that they pivot on, rather than a bolt per corner for each alignment cam). For the lowers, you definitely need to loosen each alignment cam in order to add grease to the bushing.
I should also note - I've not had much squeaking of my uppers, but then, I put a lot of that SPC-supplied grease in there, so it could still be going strong.