

If you ended up here just looking for a Cabin Air Filter for early model Tacoma, 4Runner, Tundra, or Sequoia trucks and don't want to read the story of its development, you can pick one up here:
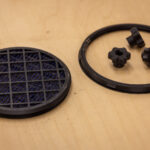
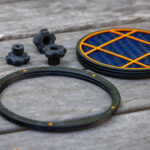
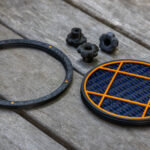
I've been working on a thing.
When I first got the Tacoma that I still drive today - brand new, off the lot at the very end of 1999 - I didn't even know what a cabin air filter was. And, for the first 16 years of ownership, I never gave it a second thought. I drove around on pavement, mostly in the Pacific Northwest where it's usually damp if not outright raining. I was breathing the clean air that pervades coastal communities.
And then I started going on adventures. New to the whole 4wd thing, I was usually somewhere in the middle of the pack. Doing my best to keep up, but not wanting to fall behind and get lost. And boy, it was dusty there in the middle. Way too dusty to have the windows down, and I quickly learned that I needed to slide the climate control to the recirculate position if I wanted to stand any chance of arriving at camp without muddy boogers.

It wasn't long before I heard others in my group talking about cabin air filters and the lack thereof for our 1st gen Tacomas. Various solutions had been attempted, but none seemed to work all that well - from either an airflow or filtering perspective.
And so, life progressed. For a decade.

Really, I just learned to minimize - as much as possible - and live with the dust. Regular vacuuming of the cab, and a Windex-with-vinegar wipe-down every trip or two, have been enough to get by. And better than most, I'm sure.
But I've always suspected that life could be better. And now it is.
For the last several months I've been designing a cabin air filter for early model Toyota pickups and SUVs. By pickups and SUVs, I mean:
- 1st gen Tacoma ('96-04)
- 3rd gen 4Runner ('96-02)
- 1st gen Tundra ('00-06)
- 1st gen Sequoia ('00-06)
These all share a common design for the climate control system, using a blower mounted below-and-behind the glove box to pull air through the A/C Evap Core and push it out to the vents through the rest of the system.

The impeller (fan, for those of us who skipped Small Engines 101) in this centralized blower seemed like the right place to start overthinking things, and I considered a design that would put a filter on the intake or output side of the blower. Each had their problems:
- On the intake side - a 4.75" circle - there'd be approximately 11 sq-in once I fabricated a circular frame to hold the filter.
- On the output side, the opening was bigger - allowing for 12 sq-in of surface filter area - but pushing air through a filter, rather than pulling, is much less efficient due to the uneven turbulence created when air hits the filter surface.
A First Attempt Ends in Failure
I knew the solution would be a filter on the intake side, but I needed a way to increase the surface area. Doing so would allow me to both reduce air resistance and lengthen filter life. And, the best way to do this seemed to be a cylinder that sat inside the impeller. After a bit of CAD work and several prototypes, I had something that I thought might just work.

This design would give more than 25 sq-in of filter surface area, nearly 50% more than a simple disc filter. Plus, it would pull dirty air - be it from outside the cabin, or dirty air from inside the cabin - through the filter for a more efficient flow.
I was a genius. Or so I thought.
With my frame created, it was on to sourcing filter material - I wanted to go with a pleated material in order to double the surface area and increase airflow even more as compared to a woven-mat-style filter - which turned out to be quite the search. Eventually, however, I was able to get my hands on some MERV8-rated pleated filters that keep dirt and dust particles, lint and hair, pollen, mold spores and mildew, and dust mites locked safely away from my lungs.

Sure that I'd figured the whole thing out, I installed the new filter assembly into a junkyard blower housing that I'd picked up for fitment testing and hooked up my 12v bench power supply to the blower motor.
It's hard to describe the immediate disappointment on multiple fronts. Even though I'd gone to the trouble to design a system that pulled air through the filter, the airflow was reduced by nearly 50%! It was bad, but even if I somehow convinced myself that reduced airflow was a tradeoff worth making for clean air, I had a bigger problem. Most terribly, there was an unbearable whistle from the blower. After some experimentation, I determined this to be a result of the proximity of the filter to the fins of the fan. I'd made that space as small as possible so that the filter could be as large as possible, and the movement of air between those surfaces was like blowing through a whistle. Shrinking the filter size would solve that problem, but would result in the filter having approximately the same surface area as a disc filter.
It was back to the drawing board.
Take Two
Taking a step back, I contemplated what my real design goals were. Sure, I wanted clean air at the end of the day, but as I thought about it more, I realized that there were other aspects that were nearly as important:
- Clean air - because this is what Toyota forgot.
- Good airflow - because on a hot day, you want a bunch of nice cool air coming out of the vents.
- Easy access to filter changes - a filter with a smaller surface area might require more frequent changes, but if those were easy to do, that would be fine.
The trick, of course, is getting all three to be true at the same time, but I didn't know how hard that would be just yet.
Back to a disc-based design, I decided to try to maximize airflow first. This was reasonably straightforward; I reduced the structure of the filter frame as much as I could, leaving as much area as possible for the filter.
Next, I started to think about installation and filter changes.
Snapping a filter into place on one of these early Toyota trucks is not an operation that one wants to do frequently. It requires some rather extreme contortions to apply the appropriate pressure inside the housing, and it was easy to break the filter frame, or the grid that supported the filter - if not both - when trying to get it in or out.
To make that easier, I came up with the idea of an outer ring that would snap into place, and an inner filter cartridge that would thread in and out of that frame. This would allow the outer ring to be very snug - with no risk of coming loose - and allow very easy installation/removal of the filter cartridge. I was, again, momentarily, a genius.

The first time I tried to install one of these filters in my truck, I quickly realized that my genius had been focused in the wrong place. Or, really, that I'd had tunnel vision - I'd only focused on the filter part of the equation. In fact, the most painful part of installing a filter is removing and reinstalling the blower motor. This is because it is secured by three T25 Torx screws that are hard to access and require fumbling with a driver while also trying to support the blower motor so it wouldn't fall on my face while I was peering up under the dash, trying to locate the next screw.
I'd used up most of my genius tokens, so I noodled on this problem for a good long while. Finally - and I don't remember how - I had an idea: thumbscrews! With a bit of design, I came up with a solution that could reuse the existing screws - so I didn't have to worry about sourcing new ones that would fit (let me tell you, I tried, and these are some weird-ass Japanese screws that are hard to find in the United States) - and would result in an entirely toolless experience.

Once again energized, I loaded up a filter into the cartridge, installed it into the housing on my bench, secured the blower motor with some thumbscrews and powered it on.
I was once again disappointed, but it wasn't the same total disappointment I'd had the first time around. The biggest problem - the whistle - was gone! However, airflow was still an issue. A major issue.

I was bummed, but I'd done all I could do - I had as much surface area as possible, and the filter changes would be reasonably easy - so I installed one to give it a longer-term test.
And I also reached out to the rest of the 1st gen community on TacomaWorld to share what I had, and to ask for victims - excuse me, helpful souls - to get their impression on the installation and performance.
Everyone was very respectful, but the feedback was reasonably consistent: the install was good, but with such low airflow, there wasn't much appetite for long-term installation.
Third Time's a Charm
One of the most amazing things about TacomaWorld is the people who frequent the forum. In a day where social media has created a sloppy shithole of hate that many people spend much of their life immersed in, the folks on TW are generally super positive and want to be helpful in finding solutions.
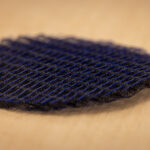
And that's where @t0p_d0g came in. He suggested that the problem was my filter. Rather than using a traditional nonwoven mat, he suggested using an electrostatic filter material. He was pretty convincing:
These materials are specifically engineered to trap microscopic allergens using a passive static charge rather than a dense physical weave.
Best of all, because it’s fully washable and reusable, it would make your kit an incredibly high-value, easy-to-sell product for the community. It gives buyers the exact allergen and heavy trail dust protection they want, but keeps the airflow wide open and completely safe for vintage electronics.t0p_d0g
It didn't take long for the two of us to find a source for the stuff, and for me to get a sample on the way.
As soon as it arrived, I eagerly cut out a disc and headed back into the workshop to test it. As soon as I fired up the bench blower, I knew this could be a winner. I immediately grabbed my airspeed meter - called an anemometer - and headed out to the Tacoma.
One thing was for sure - installation was a breeze with the thumbscrews!
And then, as I tested each fan speed on the climate control system, I started to get excited. The numbers were looking great. Really great.
I was, once again. A capital-G genius. Except - and I cannot stress this enough - it was a group effort by the TacomaWorld community! A place where everyone knows that the best ideas come from the 1st gen forum.

And so, after many months of testing, there's now a cabin air filter on the market for 1st gen Tacomas. I've already got blower housings on the way so I can build versions that fit 3rd gen 4Runners, 1st gen Tundras, and 1st gen Sequoias.
So: no more boogers made of Utah. Nostrils that have suffered for decades will finally be able to rest easy, and TacomaWorld can add 'saved a man's sinuses' to an already very strange resume.

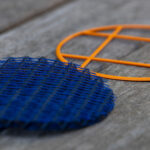
Thanks for reading, hope you enjoyed. If you'd like to pick up your own AdventureTaco Cabin Air Filter Kit, they're available to order!
You Know You Want One


Discussion
No comments yet.