If you're here looking for how to install Tundra 13WL or 13WE brakes on a 1st gen Tacoma, you can read how I did it on this particular day, but the more useful page for you will probably be this guide:
Step by Step Tundra Brake Upgrade on a Tacoma (or 4Runner)
The guide shows step-by-step (with pics) how to do the upgrade, and has links to all the parts needed (at varying price points).
When you find yourself on a trip with other Tacoma owners, there's a tendency for everyone to come away from the trip wanting something. And in my case, with a relatively "young" build, that's extra easy.
For me, I've always known that I want bigger tires. But I've hesitated to do so because well, tires are expensive and bigger ones are hard on the gas mileage. Well, after The De-Tour, it was clear that I'd just have to suck it up and go for it - I mean, the Truck did great on the trip, but the front skid took a whooping.
Which isn't bad - I mean, I paid good money for that thing. Glad it's doing its job.
Anyway - one night on the trip, I mentioned bigger tires, and I could see Monte and Mike's faces light up. Because bigger tires meant only one thing to them: an opportunity for me to get bigger wheels! I mean, because I would need bigger wheels if I was going to do (obviously) the Tundra brake upgrade.
And it was all the better (for them) because it was my wallet getting lighter! Hahaha!
Well, I decided on and ordered wheels first, because I was sure of what I wanted - SCS Stealth6's. But then I had to figure out what tires to mount up. I thought I wanted 255/85R16 BFG KM2's, but I wasn't sure. So, when I got a lead from @drr on a great second-hand set that he had on some steel spares, it didn't take me long to decide to give them a try - if I like them, I can get some new ones. And if I don't, it will be a cheap experiment.
So, home they came!
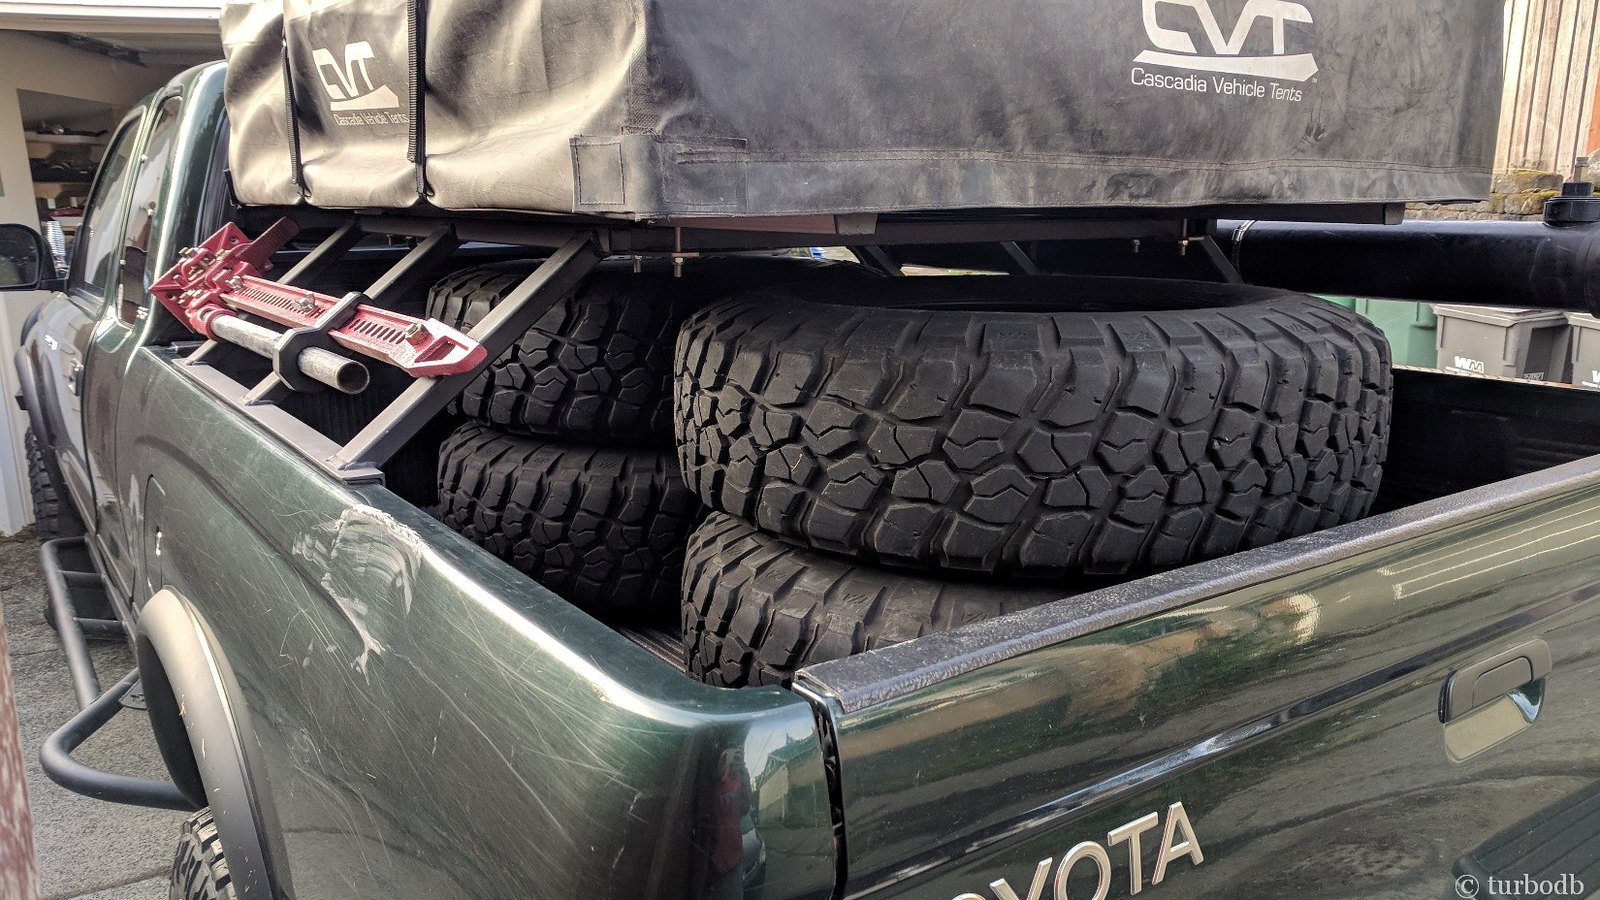
They mounted up pretty easily - turns out that there were two different backspacings on the steel wheels (maybe 1st gen / 2nd gen? Or Tacoma / 4Runner?). At any rate, I put the smaller backspacing on the front, and the larger on the back, knowing that I'd be installing the bigger brakes in the front, and I hoped they'd clear.
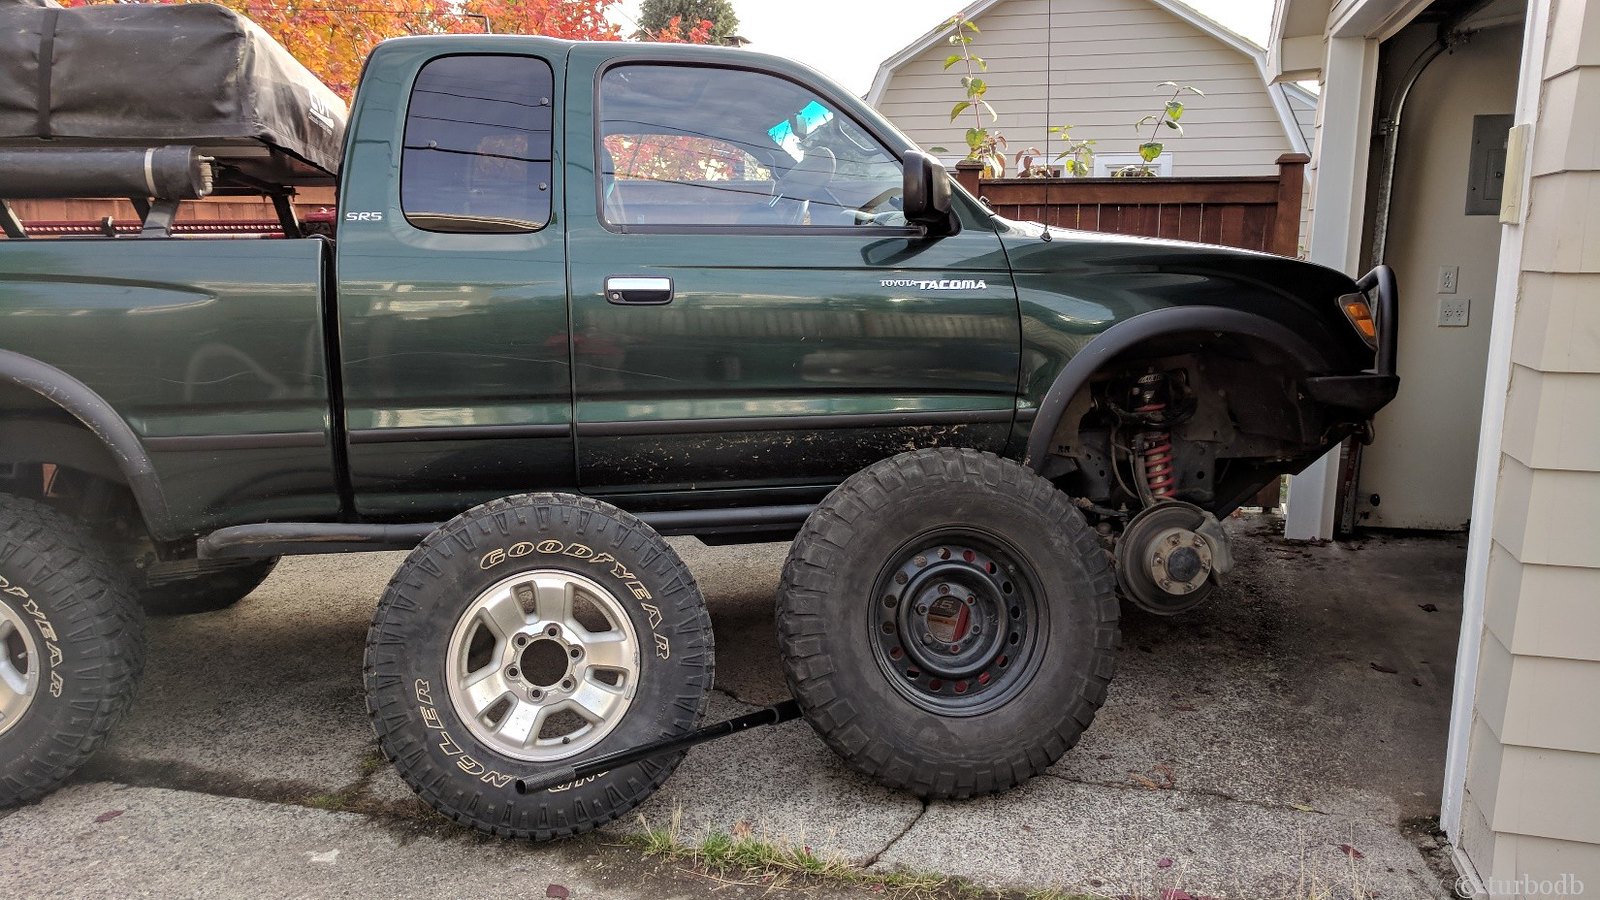
They were definitely bigger!
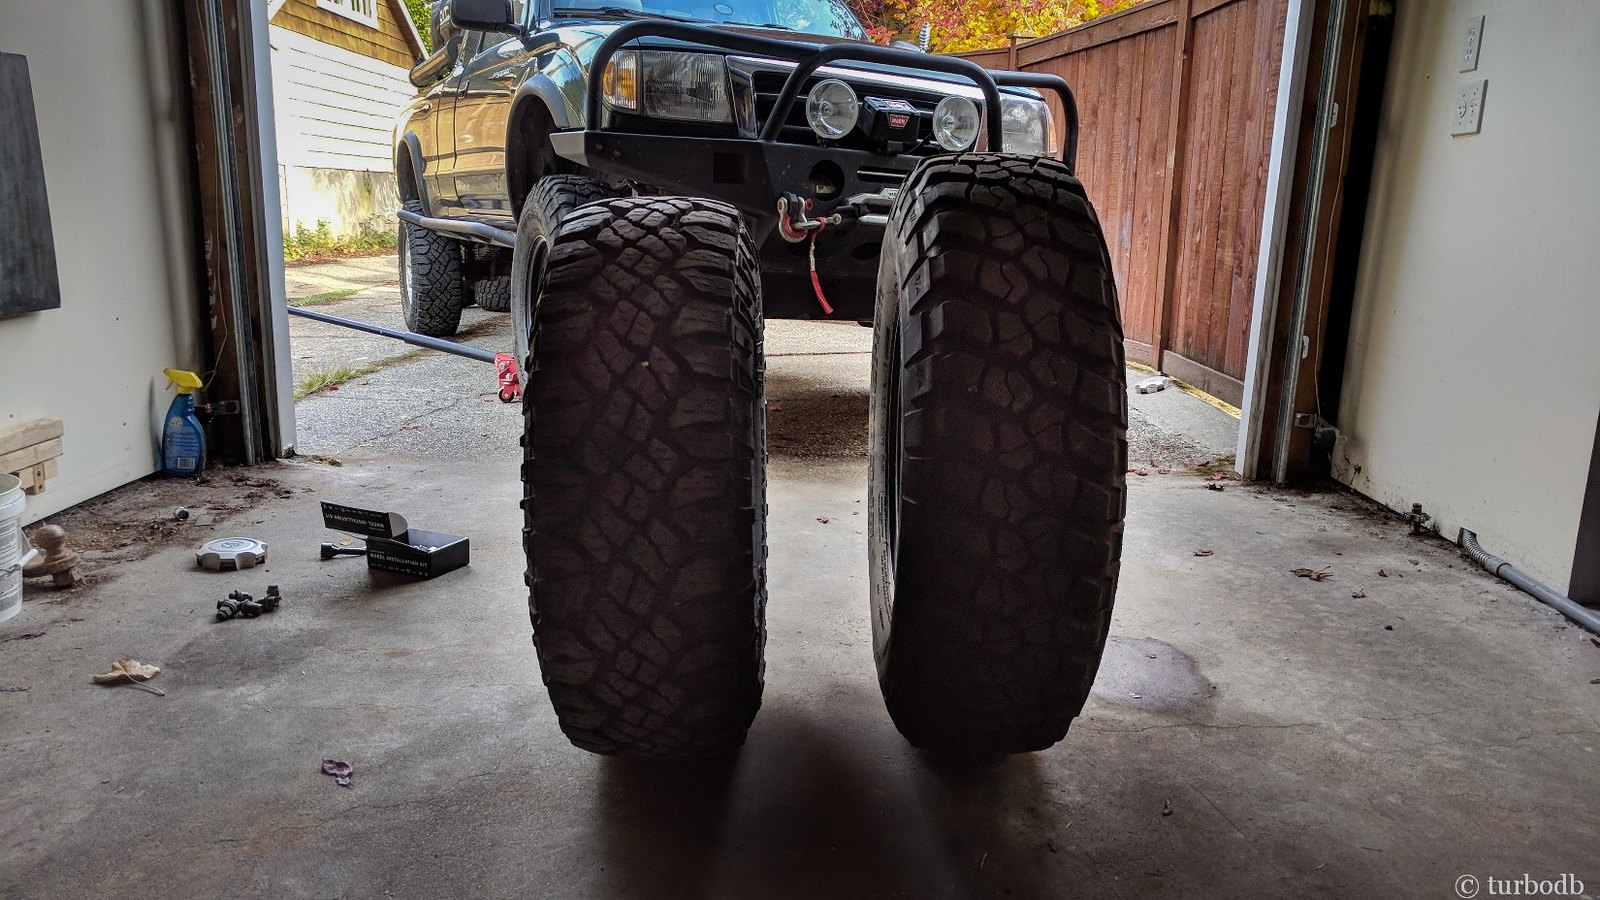
And installed, they look pretty nice - definitely lift the truck up a bit! The rears sit a little far back in the wheel wells for me, but I'll deal with that "later," - it won't be a problem in the city, and only might be a problem on the trail.
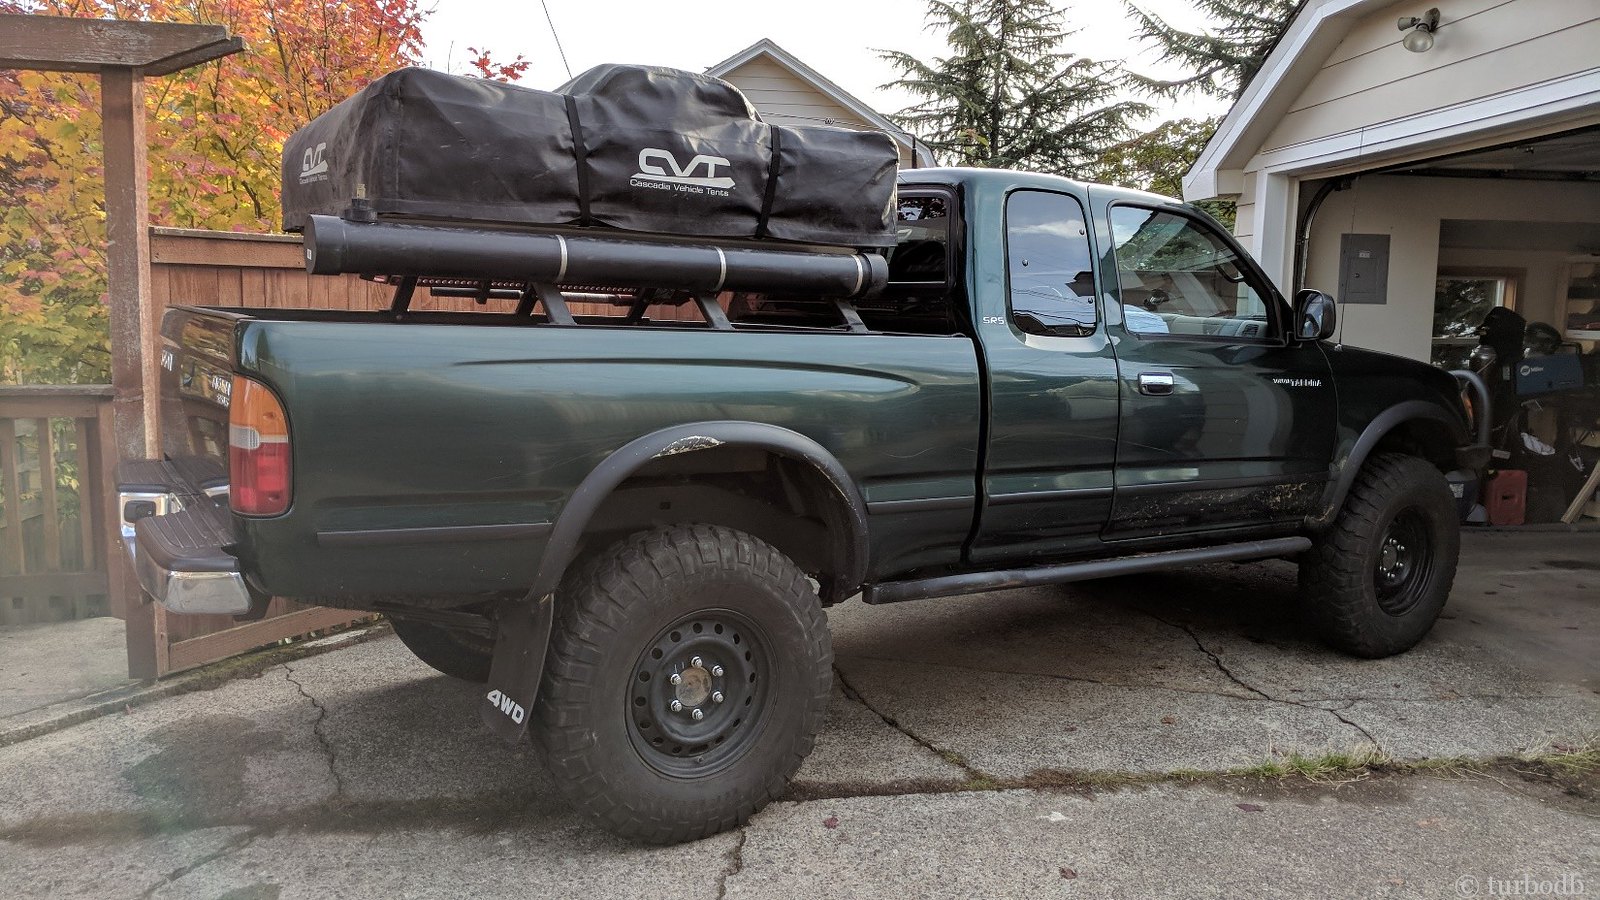
With the new-to-me tires installed, I was ready to get to the brakes. My wear indicators started squealing on the last trip, so I knew it was time - especially with bigger tires, I didn't want to do a lot of driving on the current set of pads!
I'd already gotten everything ordered up, having debated between two possible routes:
- Go with a "kit" that came with all the components I'd need. Either Callahan or PowerStop.
- Buy individual components to get the best quality.
Ultimately, I went route #2. I think this is the less common route, but after finding a great comparison of OEM vs. non-OEM here, I figured that I didn't want to mess around with brake quality, and I could cover the extra expense - after-all, it's not like there's anything else expensive I want to get for the truck, right?! 🙂
(Note: I think that for route #1 the PowerStop brakes are probably the better bet even though they are a bit more expensive, since others have had problems with the Callahan's.)
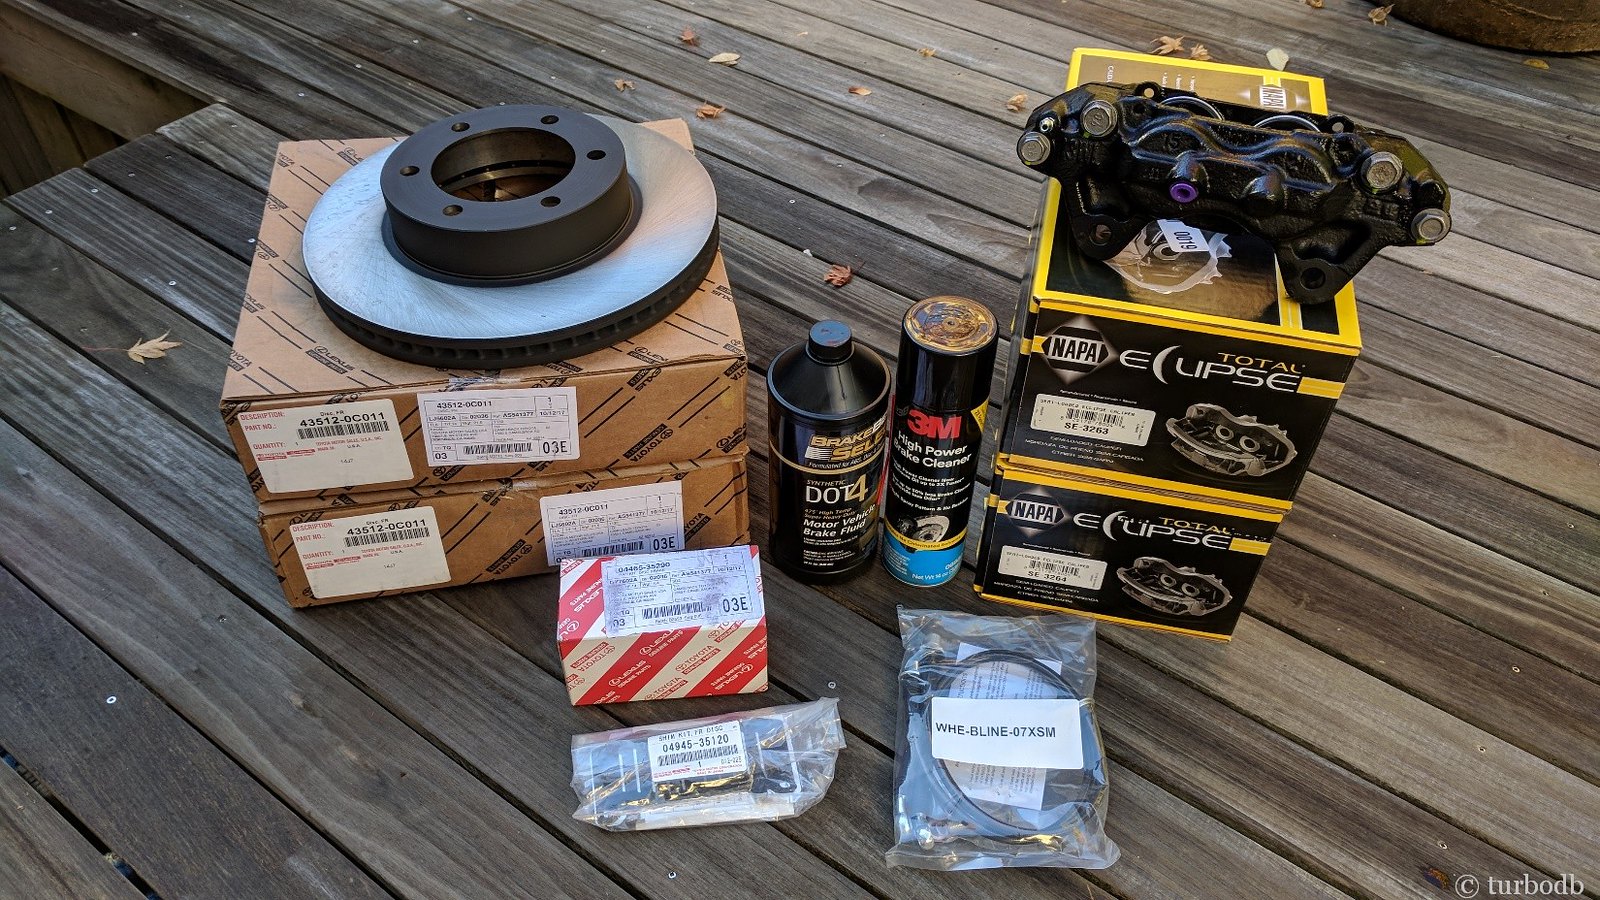
Having decided on route #2, I'd ordered:
- 2 Toyota Tundra OEM rotors (L/R: 43512-0C011) Note: amazon is sometimes out of these, and the Bosch QuietCast line is another good (and cheaper) option (L/R: 50011223)
- 2 Remanufactured Tundra 13WL calipers. Any of the following will work just fine and are all generally remanuafactured by Cardone:
- Callahan: L+R set, red powder coat
- Napa Eclipse: (L: CAL SE3263) (R: CAL SE3264) or Adaptive One (L: ADC 1766XA) (R: ADC 1766XB)
- or 13WL calipers from another parts store. Note: if they carry multiple lines, I recommend getting a line that has a lifetime warranty in case you ever need to replace a caliper.
- 1 set of Toyota Tundra OEM brake pads (L/R: 04465-35290)
- 1 set of Toyota Tundra OEM brake pad shims (L/R: 04945-35120)
- 1 AdventureTaco Tacoma-to-Tundra Hard Brake Line Upgrade Kit
- Some DOT4 brake fluid, and brake cleaner
Note: alternatively, if you want to buy a kit that contains rotors, calipers, and pads, you can purchase one from either Callahan or Power Stop. The components won't be quite as high quality as the OEM components listed above, but many people go this route to save a bit of money. If you do go this route, you still need the Tacoma-to-Tundra Hard Brake Line Upgrade Kit (or for a 4Runner, the 4Runner Front Stainless Steel Brake Lines), some DOT4 brake fluid, and brake cleaner.
[Update 2019-08-19] - I've stopped using the Wheelers Stainless Steel front brake lines that I installed below, in favor of Tundra-style hard brake lines. This isn't due to the Wheelers lines, but rather to manufacturing differences in Tundra brake calipers found at the parts stores. To see what happened to one of my calipers, see Rig Review: Idaho July 2019 - What worked and what didn't? and for the solution, Making It Right: Tacoma-to-Tundra Brake Upgrade, where I ultimately switched to a Tacoma-to-Tundra Hard Brake Line Upgrade Kit.
Then, my only question was: would this stuff fit with those steel wheels I was currently sporting? I hoped so, but in the quality write-up I mentioned, there was this caveat:
THE STOCK SPARE WILL NOT CLEAR THE 13WL CALIPERS!!!! I test fit the spare and there was so much interference the wheel wouldn't even turn. If you plan on doing this upgrade keep in mind you will either need to purchase a different wheel to use as a spare, run a wheel spacer full time or carry one to install w/your spare, or you will have to change TWO tires if you ever get a flat on the front axle, putting the spare on the rear axle and the wheel from the rear axle on the front.BigFishAllDay
I asked, and there were of course differing opinions, so in the end, I just gave it a shot by removing the Tacoma caliper and temporarily bolting on a Tundra one. It worked!
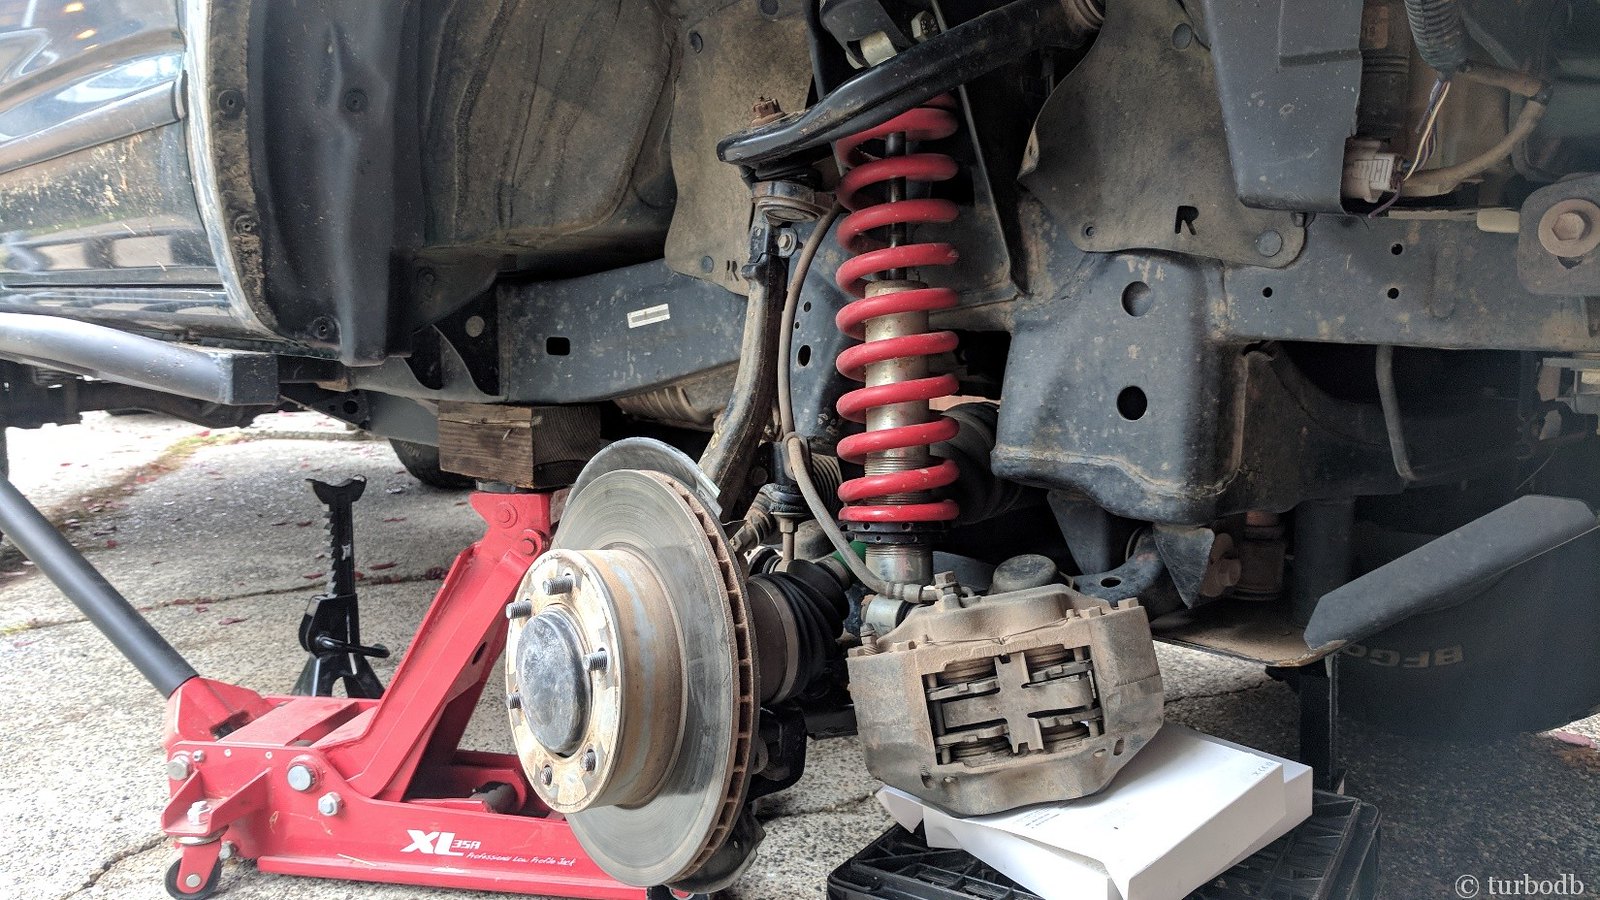
I just set aside the Tacoma caliper, while I tried out the Tundra one (pad-less).
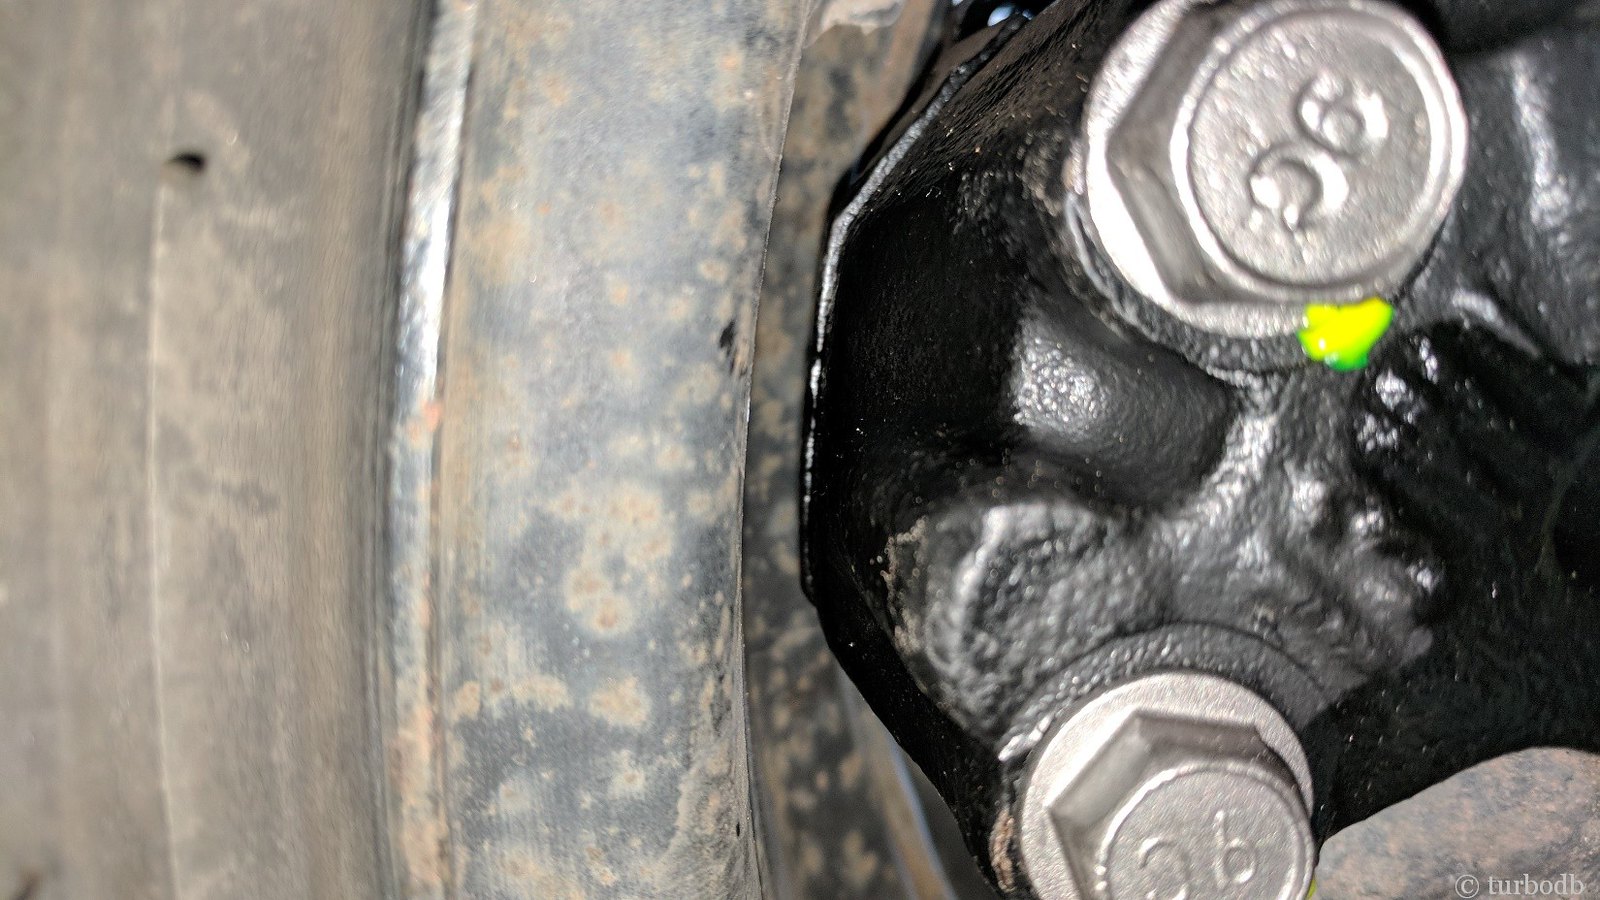
That was a huge relief, so I got started with the install. It was actually quite straight forward - though it took me a while since I was being extra careful, not wanting to mess anything up.
Having already taken off the Tacoma caliper, the next step was to remove the center anchor for the flexible line, and then disconnect the flexible brake line from the hard line. I broke the nut free with a 10mm flare nut wrench and then removed the clip so I could pull out the flexible line + caliper, and then the Tacoma rotor.
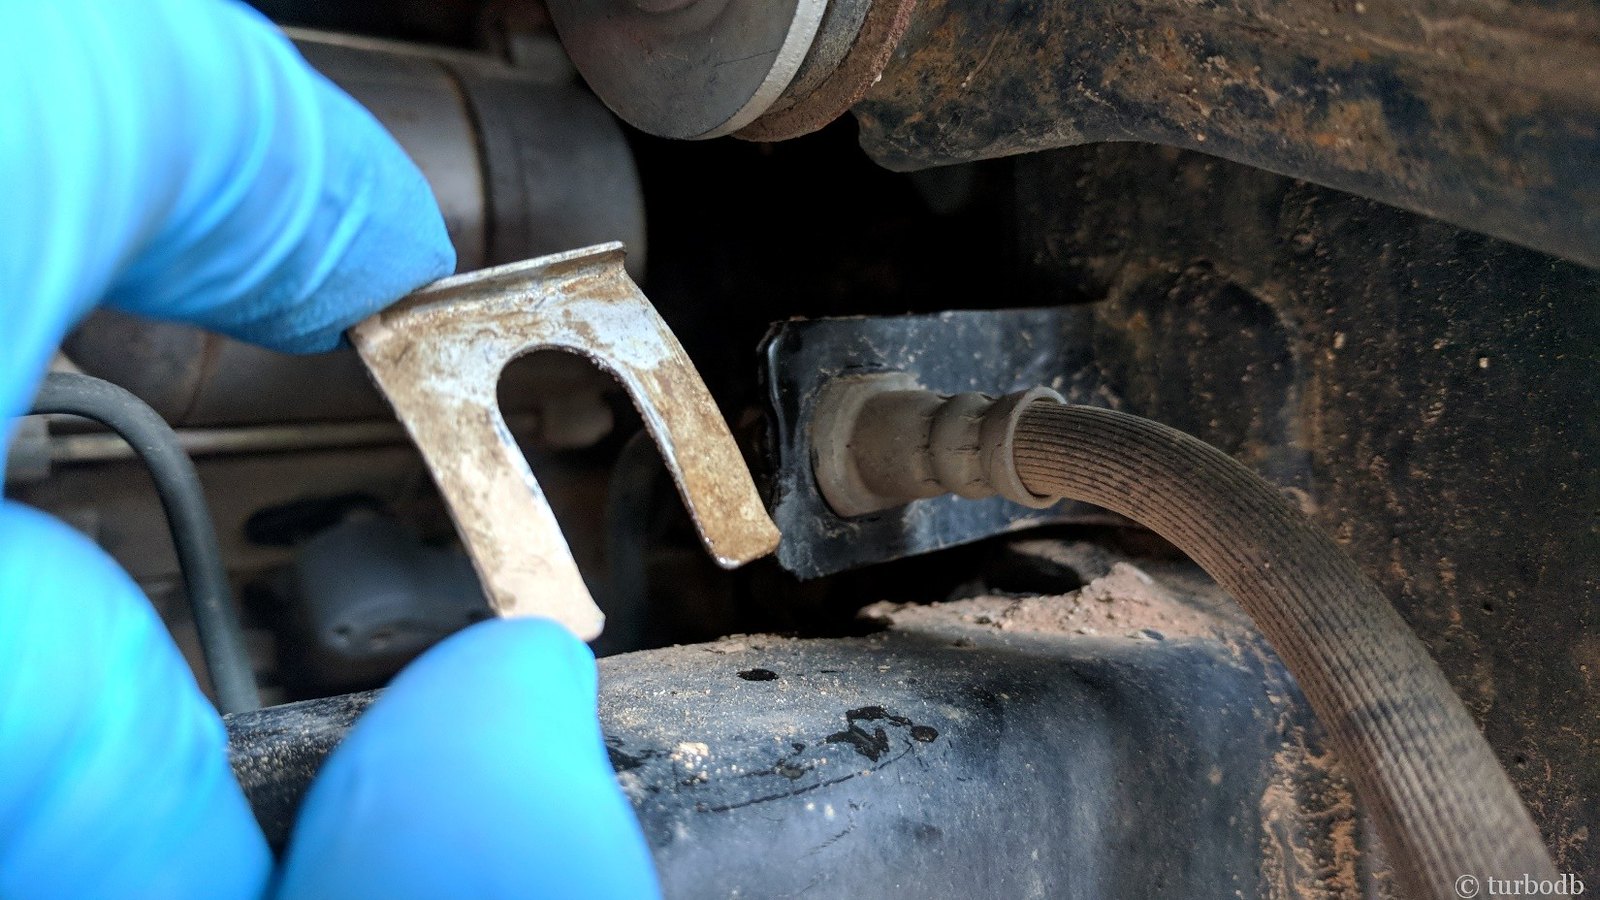
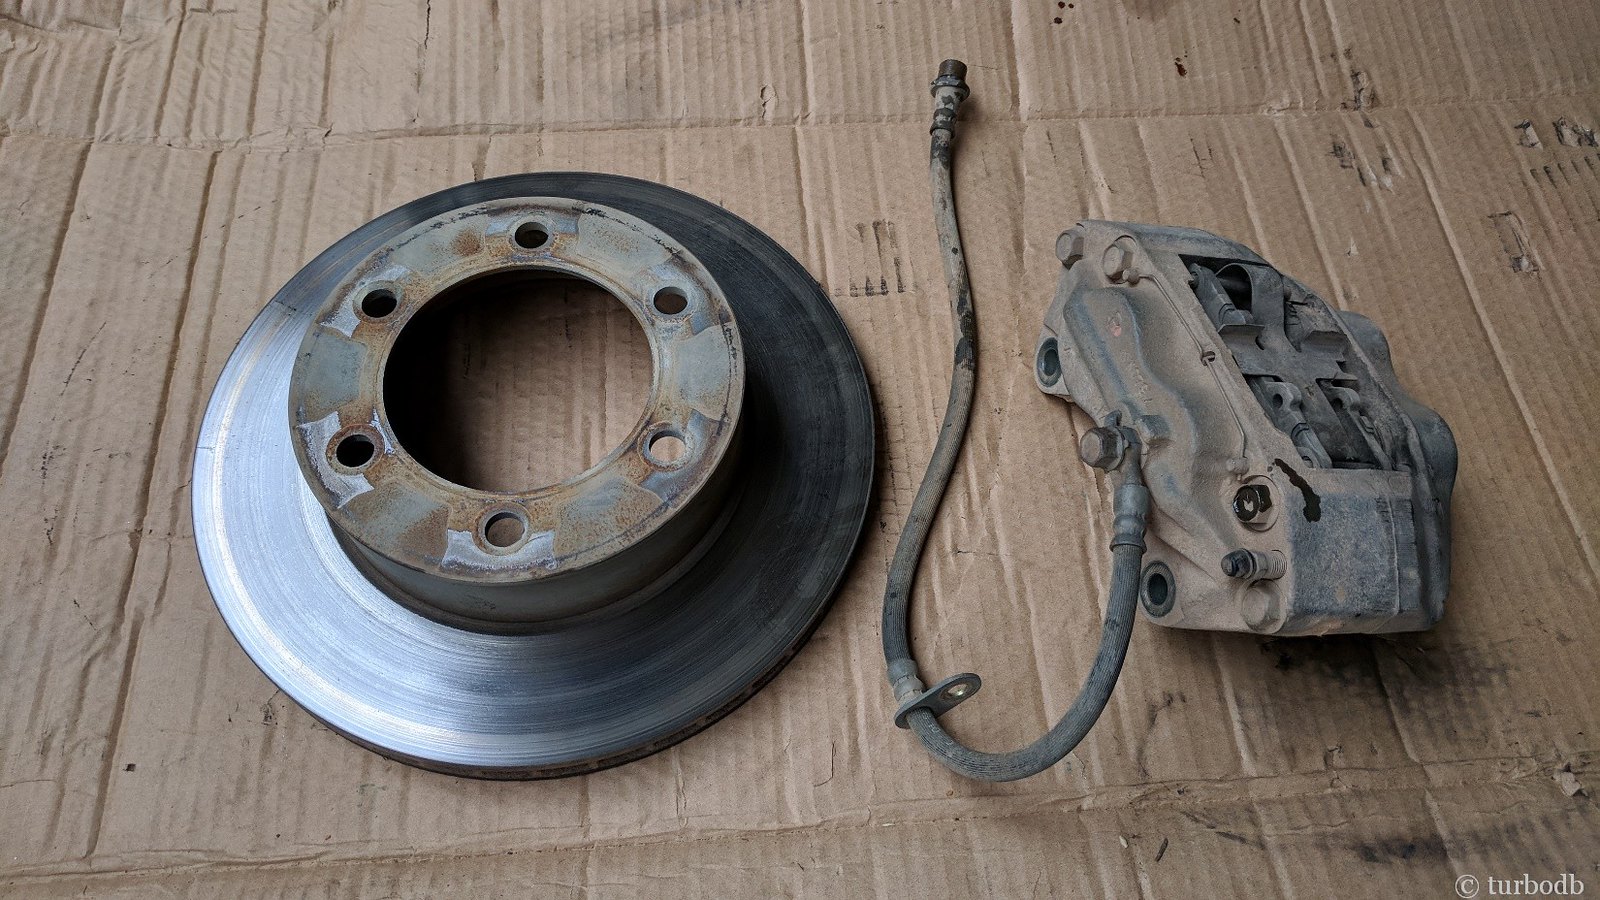
If I'd not done the Tundra upgrade, it was definitely time for new pads anyway...
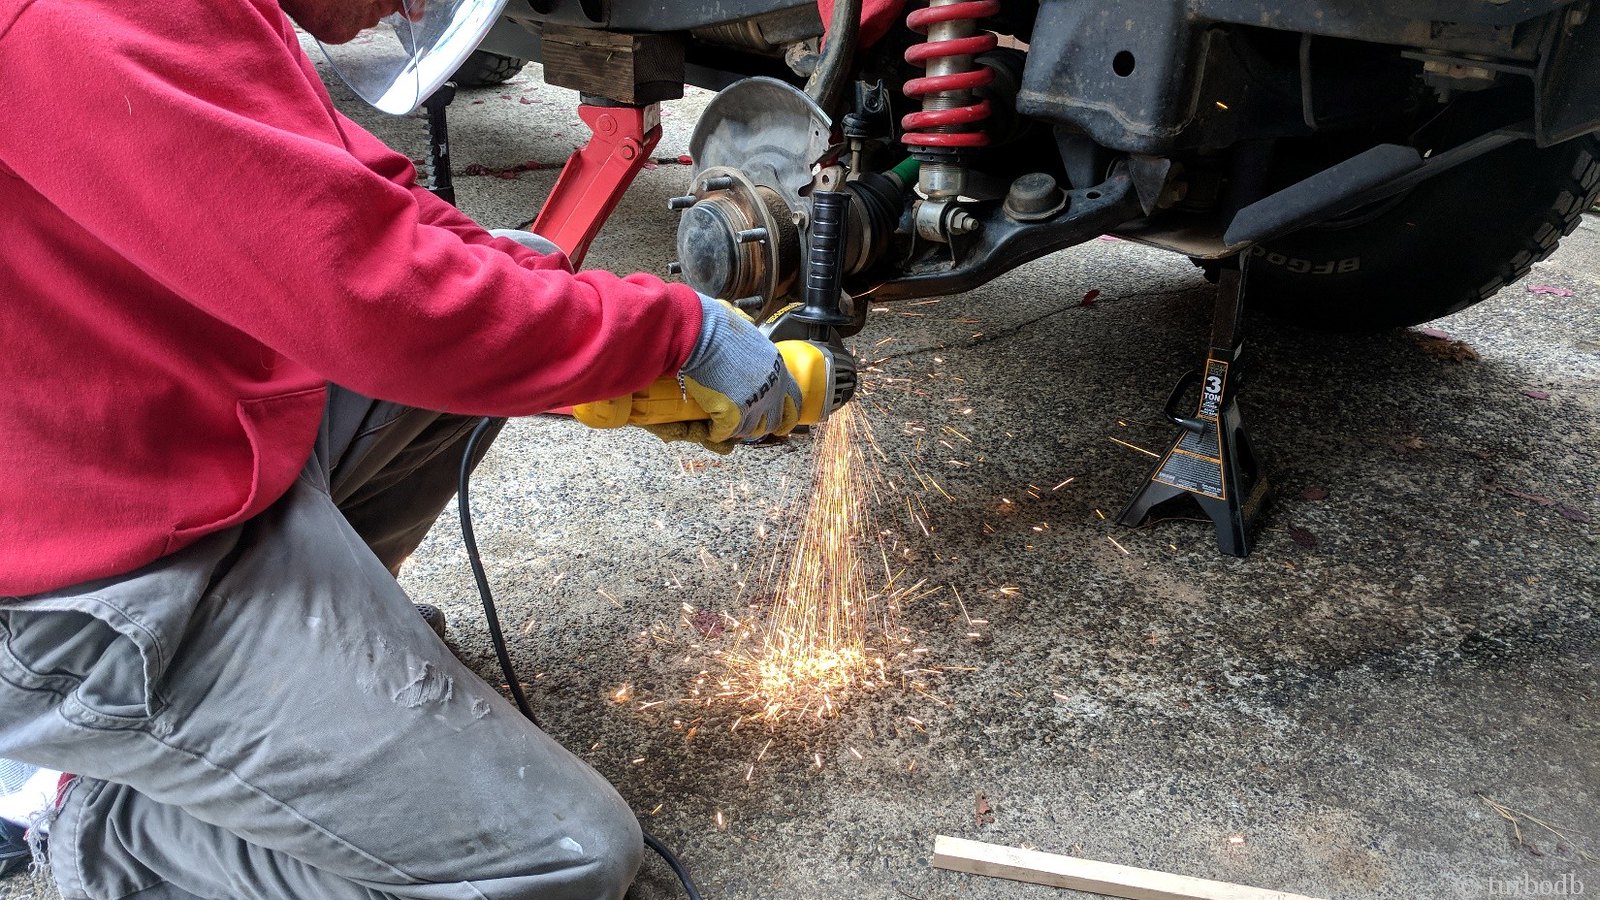
With all the Tacoma bits removed, it was time to trim the dust shield to fit the Tundra caliper. I didn't need to trim much, but after trimming the little bit I did, I used a file to remove all the burs, round off all the sharp edges and get it "user-friendly" again. And then I hit it with a couple coats of Rustoleum enamel, to prevent future rust.
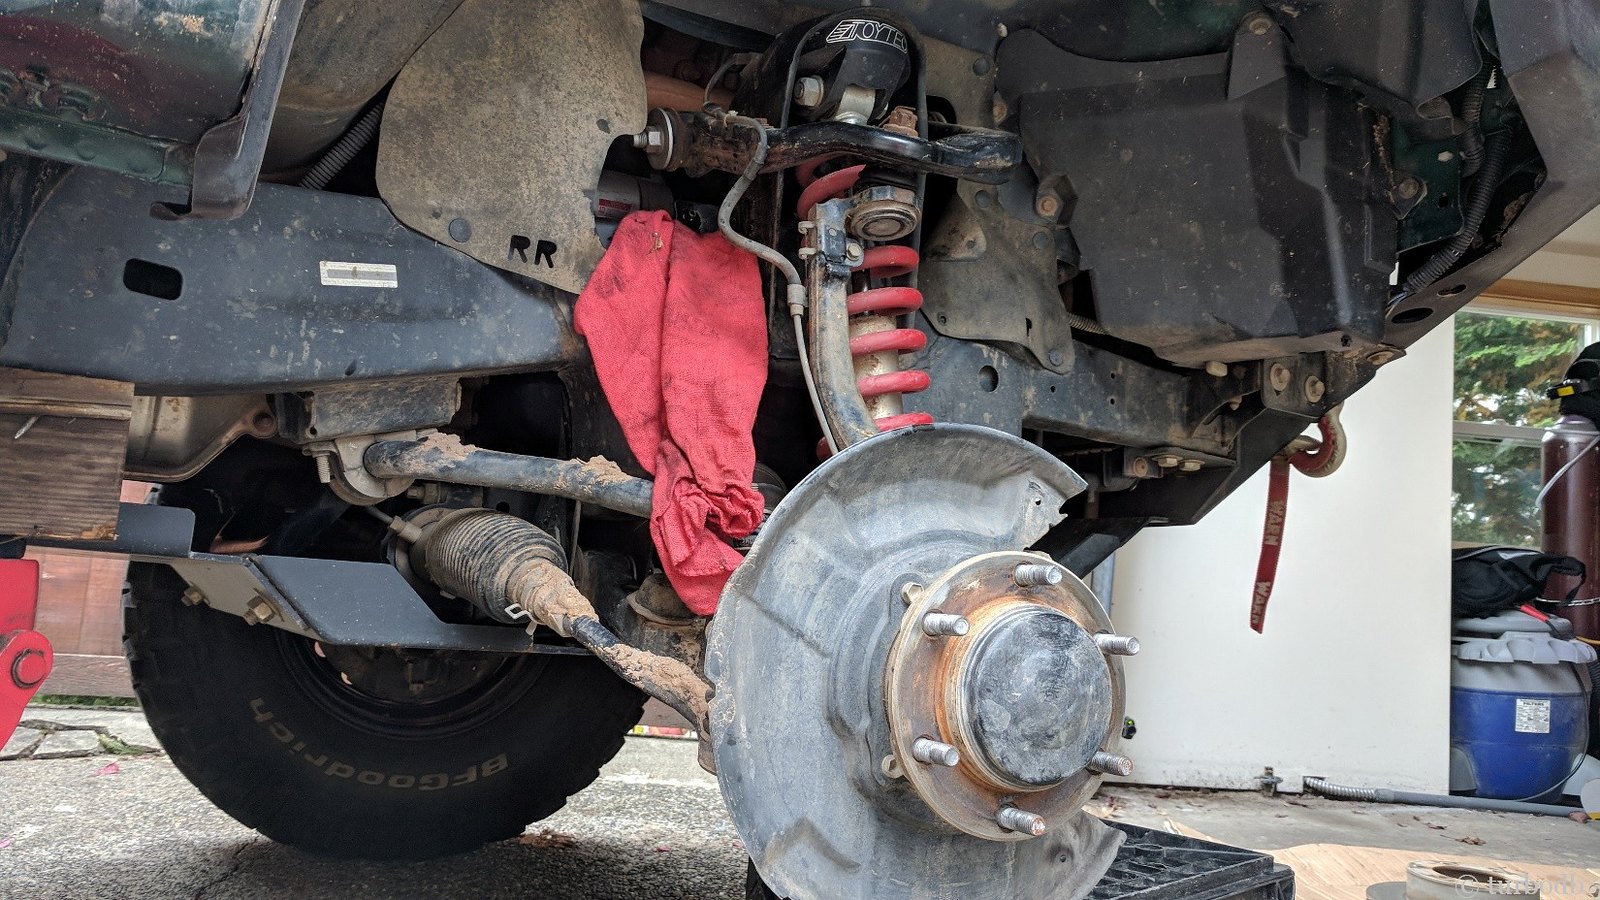
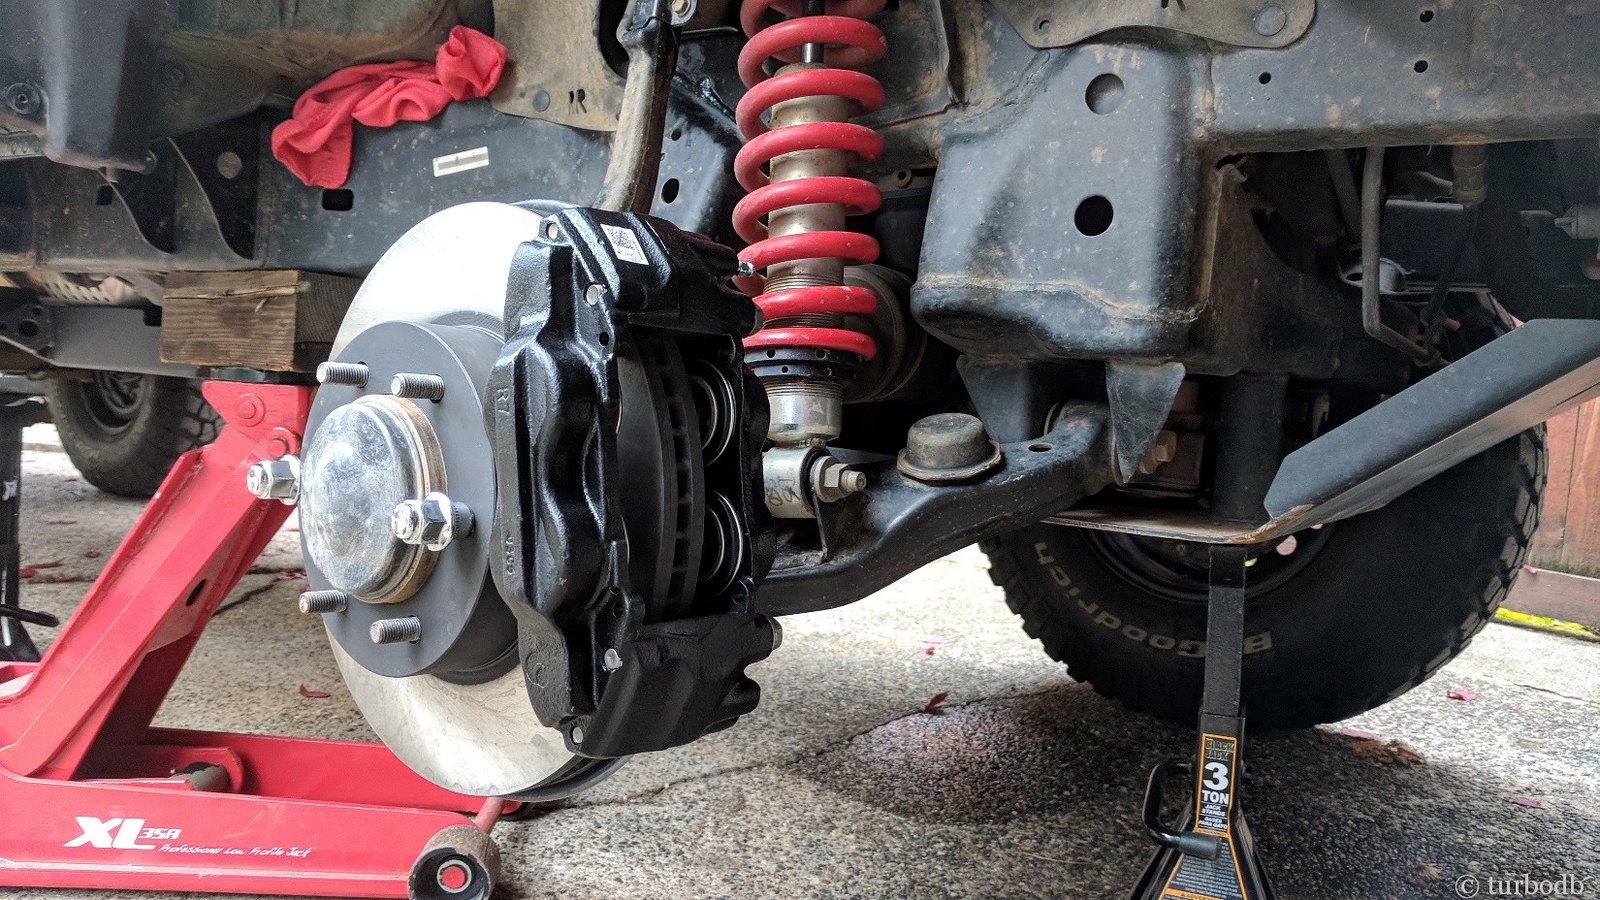
Fitting the Tundra parts came next. First on was the rotor - it just slips on, but a couple of lug nuts can help to snug it up over the hub and hold it in place. Then while rotating it, I could see if there were any places on the dust shield that rub on the rotor itself. For me there were, but I was able to easily bend those parts of the dust shield "toward the engine a little bit" in order to clear everything. And then, I just bolted on the caliper - careful to get the specified 92 ft-lbs on the torque wrench.
Starting to come together!
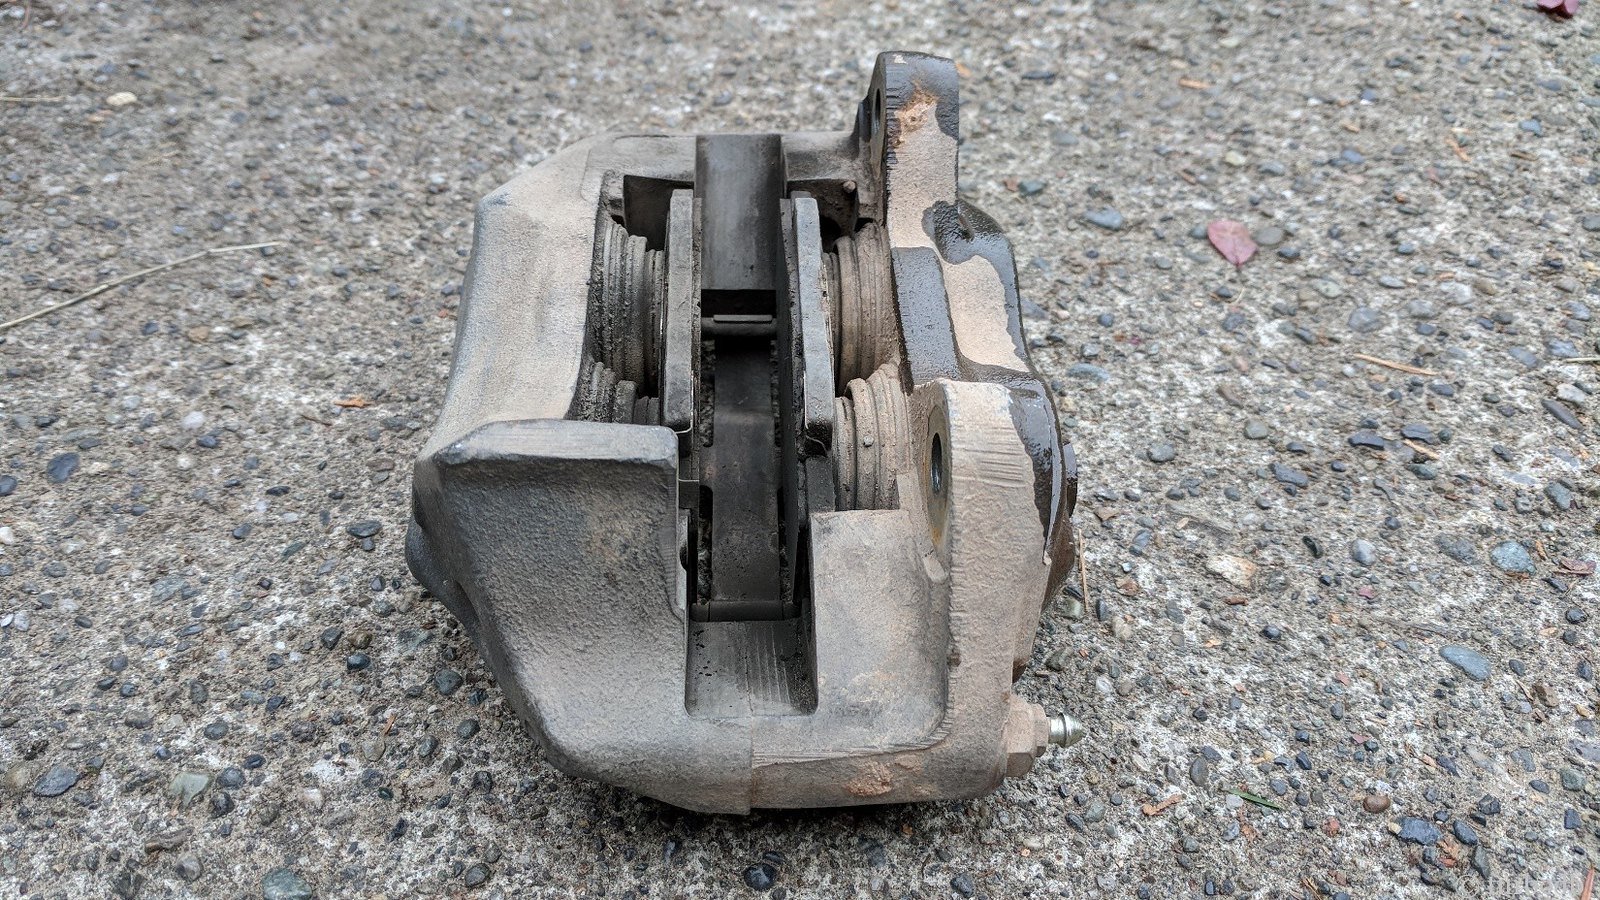
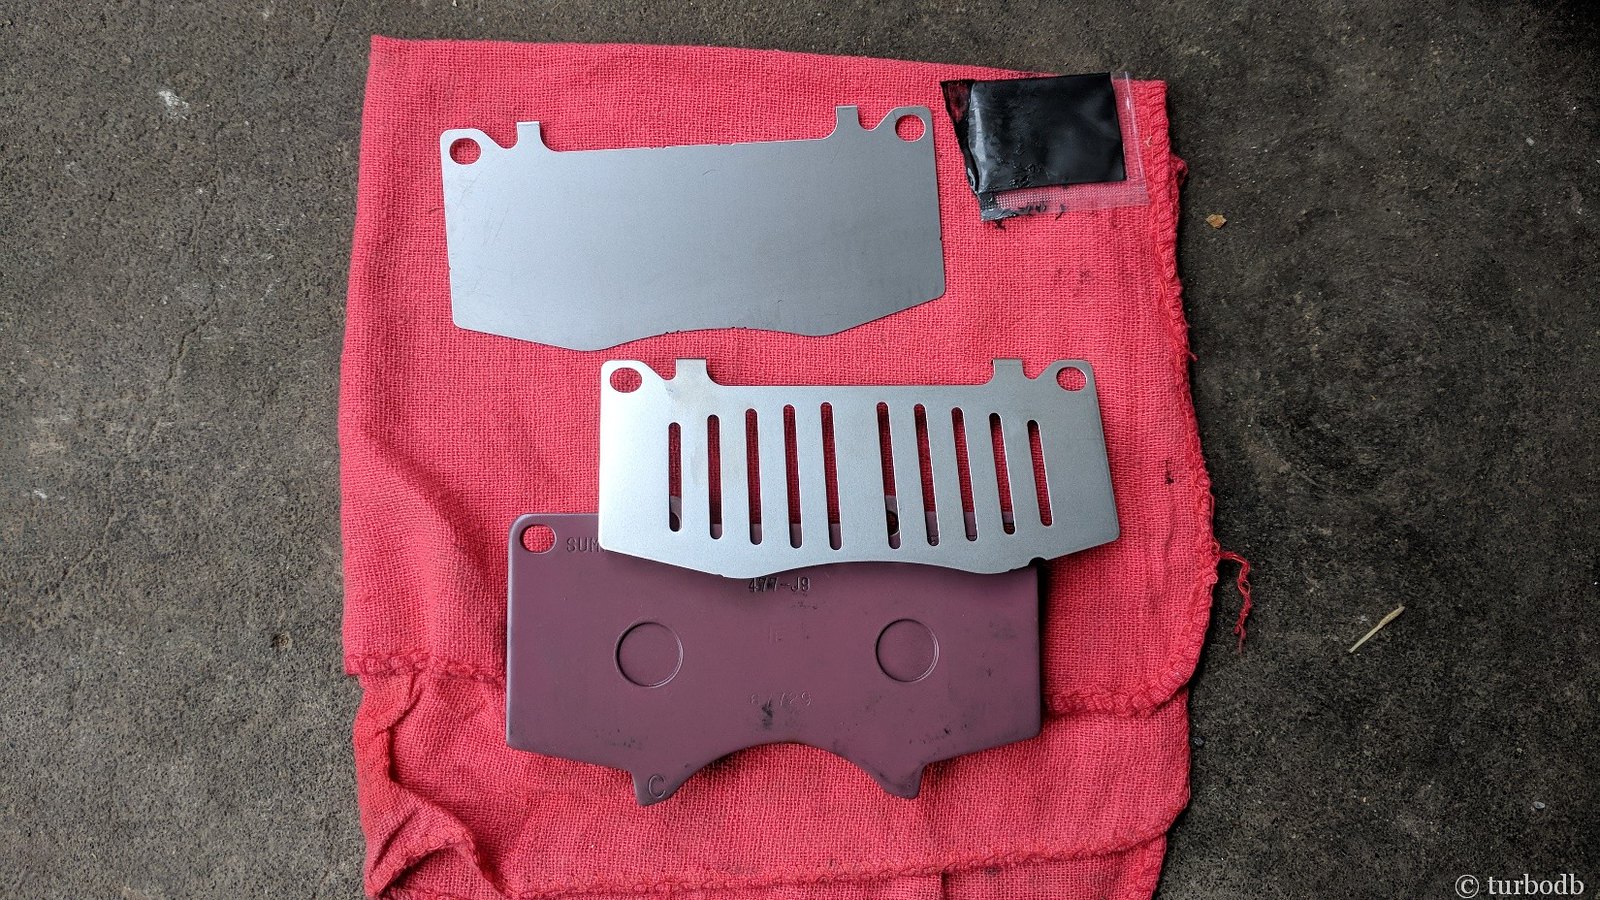
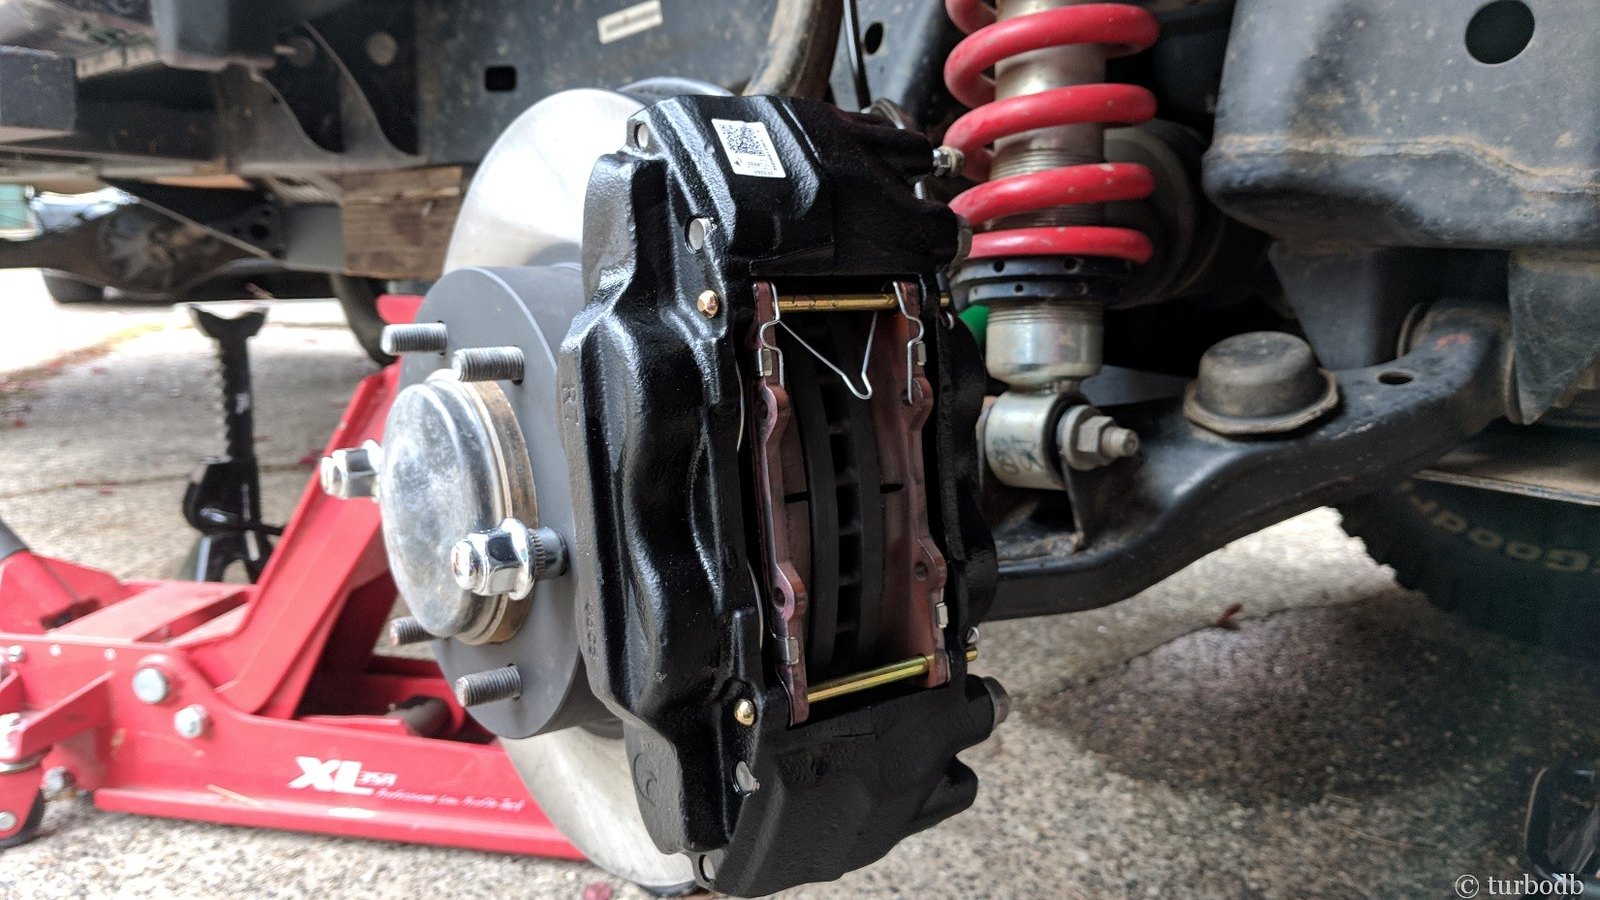
The pads required greasing and assembly (with the spacers), but that goes quickly - essentially, you put grease on all surfaces of the spacers, being careful to not get any on the friction area of the pads - and then you just slide them into the calipers, fastening them with a spring and pins (that are supplied with the calipers).
The spring was a bit tricky for me the first time, but I realized that if I installed it at the same time as the top pin, that the pin would help to hold it in place.
[Update 2019-08-19] - I've stopped using the Wheelers Stainless Steel front brake lines that I installed below, in favor of Tundra-style hard brake lines. This isn't due to the Wheelers lines, but rather to manufacturing differences in Tundra brake calipers found at the parts stores. To see what happened to one of my calipers, see Rig Review: Idaho July 2019 - What worked and what didn't? and for the solution, Making It Right: Tacoma-to-Tundra Brake Upgrade, where I ultimately switched to a Tacoma-to-Tundra Hard Brake Line Upgrade Kit.
Then, the only thing left was to install the Wheeler's front brake lines. The Wheeler's lines are needed because the banjo-bolt is slightly shorter than the OEM Tacoma banjo; otherwise, the lines are just stainless-steel versions of the OEM lines. They also come with crush washers and whatnot that you need to install them.
This is a pretty straight-forward process - essentially, the reverse of taking out the OEM lines and went really smoothly for me on the passenger side.
But of course, nothing can be totally easy, and no matter how hard I tried, I couldn't slide the center anchor to the necessary location on the brake line for the driver side. And that meant that I didn't have enough line to reach the hard lines coming out of the engine compartment.
I played with it for probably 30 minutes before calling @Wheeler's Off-Road Inc. I talked to Steve and he mentioned that I should try greasing the brake line and then pulling with all my might - which I did.
Now, I'm not the strongest guy in the world (thank goodness), but I'm not really a slouch either (thank goodness). Even lubed-up and pulling hard, I couldn't get the grommet to move. In fact, instead the rubber coating on the exterior of the brake line itself started to deform - building a little "wall" that the grommet would never clear.
Well, that's no good.
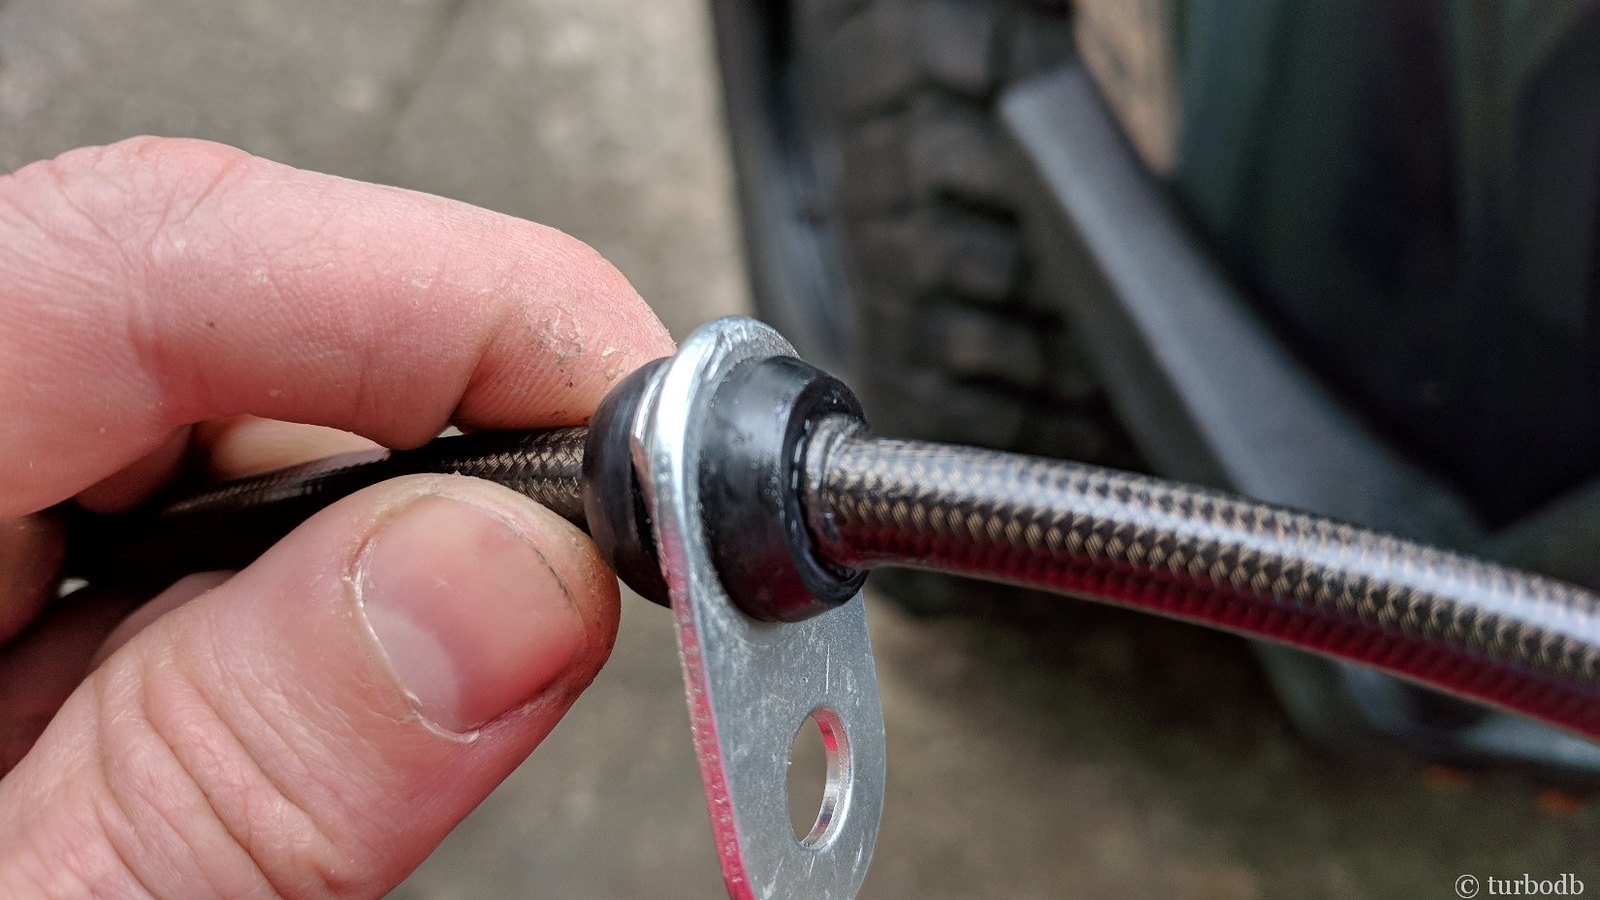
Steve was great - he was happy to send out a replacement. Hopefully he'll be able to get it out overnight; or at least two-day so I get it Friday (c'mon Steve!) - then, it'll be onto the truck and I'll bleed the lines one last time, on my way to beefier brakes.
[Edit: Steve got the lines out with 1-day shipping, which USPS of course interpreted to be "by Saturday." Thanks Steve!]
Because as I keep reminding myself - if you're going to get bigger tires, you might as well consider bigger wheels to fit some bigger brakes. 🙂
Oh, and of course, this is one of those great mods - you know, the one's you can't even tell you did, but that you know when you look at your truck - there are some Tundra brakes in there!

Just a final follow-up here as I was taking care of re-forming (rather than cutting) and re-installing the fender liners today as part of the pinch weld mod and so had the wheels off.
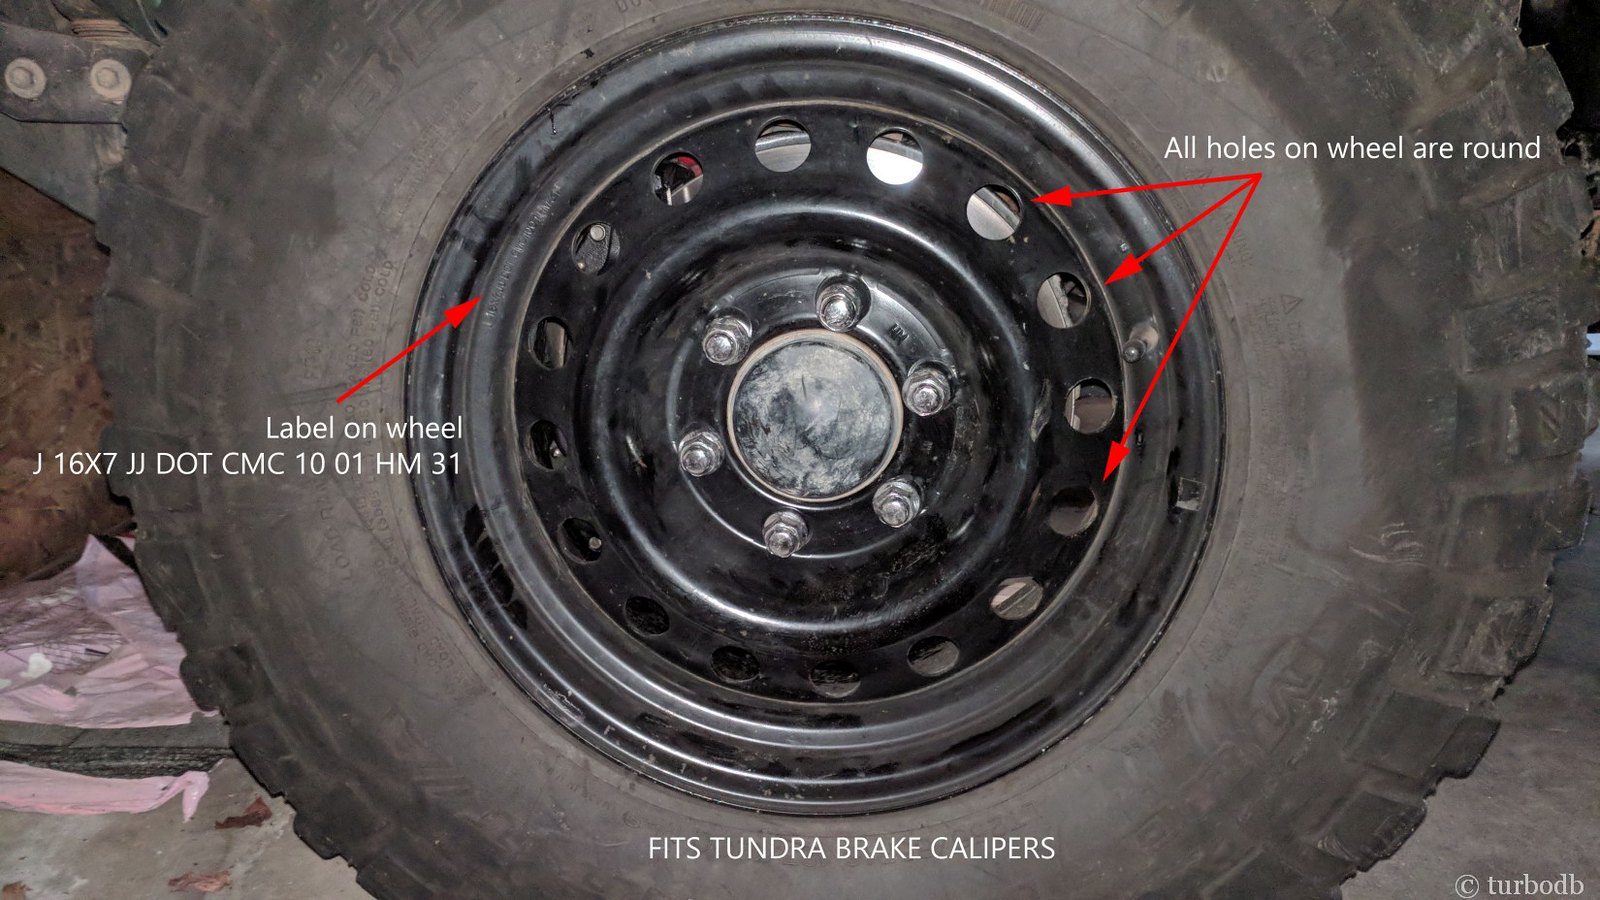
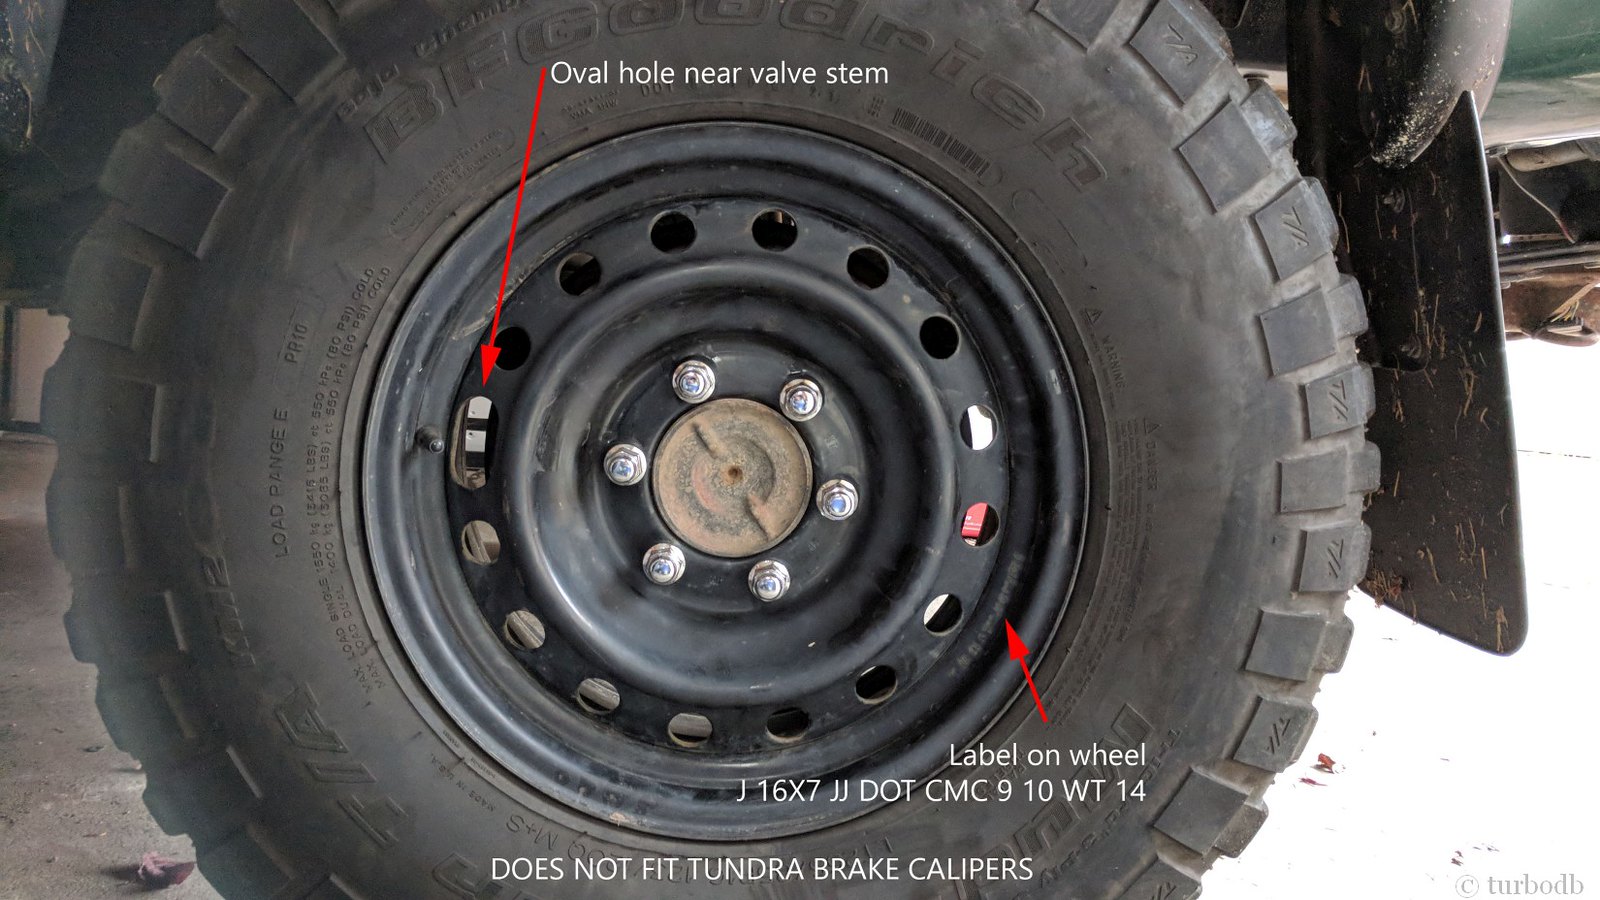
I have two different types of 16" steel spares - one type fits over the Tundra 13WL calipers, the other doesn't:
Fits (1st gen Tacoma ('01-04 only) / 1st gen Tundra (all years) spare):
- label stamped in wheel: J 16X7 JJ DOT CMC 10 01 HM 31
- backspacing: 4 3/4" strong (so 4 3/4+)
- identifiable (for me) via all holes being round (P/N: 42601-0C010)
Doesn't fit (2nd gen Tacoma spare - backspacing pushes the wheel too far in, interfering with the brakes and front suspension):
- label stamped in wheel: J 16X7 JJ DOT CMC 9 10 WT 14
- backspacing: 5 3/8"
- identifiable (for me) via one oval hole near the valve stem
.
[Update October 2020]
Lots and lots of people wonder if a certain wheel will fit with the Tundra 13WL calipers. Until now, finding that info has been hard. However, this page now catalogs (with photos) wheels that are known to fit:
Which Wheels/Rims Fit the Tundra Brake Upgrade (13WL 231mm rotors) on a Tacoma? (or 3rd gen 4Runner)
Looking back at this, would you source your own parts again or just get the kit? What would the price difference even be?
Hi Jerry, I'd still source my own parts - mostly because no kit has all the parts I "want." OEM is best for the pads, but for the calipers you shouldn't pay the premium. Get them from your local parts store (ideally) or amazon, which will give a lifetime warranty in case you ever need to replace them.
And don't forget the upgraded lines, they make a big difference with the larger calipers.
Going this route also happens to be cheaper (usually in the $400-450 range) than a kit, but it's the part choice that would make the decision for me. 👍
Would you happen to know if the 2nd gen tacoma steelies (Oval hole) would clear the TBU on a 3rd gen 4runner with a 1.25 spacer?
I made a mistake of getting the wrong set thinking they were from the 1st gen Tundra and only realized my mistake after getting them powdercoated and mounted with new tires 🙁
I have a set of spidertrax 1.25 in spacers that I plan on installing but am I wrong in thinking that the spacers would allow for the necessary backspacing after installing them?
Hey Justin, I don't know if the 2nd gen Tacoma steelies will fit with 1.25" spacers (I do have them on the list as not fitting with no spacer). Since you have them already, it should be pretty easy to figure out if they will fit. All you need to do is:
I'd love to learn if the spacer solves the problem so I can update the list! And, if you can provide a photo (either way), I'd be happy to provide a small discount on a brake line kit. 👍
Hey,
So I did some test fitting over the weekend and I was able to confirm the 13WL Napa Eclipse brake calipers do clear the 2nd gen Tacoma spare steelies with the spidertrax 1.25 spacers. I attached a google drive link of the videos I took. I didn’t have a grinder to cut the heat shield but I forced the caliper bolt to line up to the tundra calipers and they don’t rub the wheel at all. Unfortunately I don’t have a printer to use your template and had already purchased the 13WL since the Napa store is down the street from me.
(Edit by Dan: I've uploaded Justin's video to YouTube for easier viewing)
Awesome, thanks for the follow up! I've uploaded one of the videos to YouTube so that folks can see the clearance right here. 👍