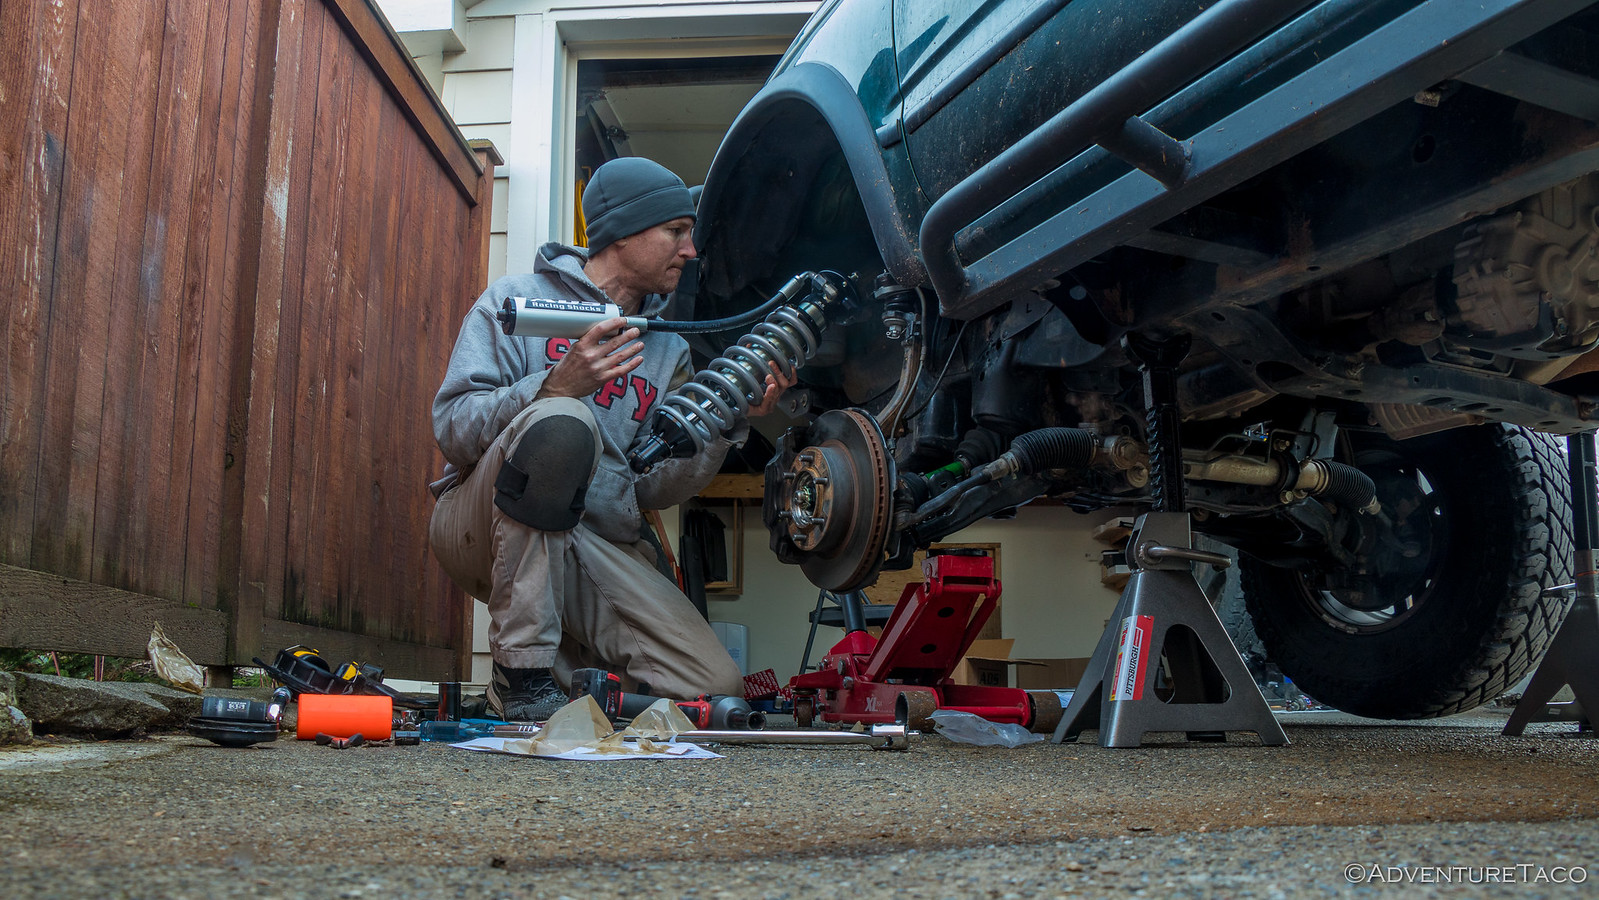
January 15, 2019.
What can I say? It's the end of an era, sort of. Really, it's the end of a transition period for the Tacoma - a time when it was transitioning from daily driver and home renovation hauler to a more dedicated exploration vehicle. It was nearly three years ago that this transition started, one of my first modifications being a new Toytec BOSS lift in order to support the Relentless armor I was soon to install.

Over the last three years, that @Toytec Lifts setup has done everything I could have asked of it. No, that's not right - it's done more than I could have asked. When I installed the setup, I didn't know all that much about off-roading with Tacoma's and I thought that the BOSS coilovers would be my last and only upgrade of the suspension - after all, the OEM stuff had lasted me 16 years...this aftermarket stuff was bound to last longer than that.
I knew at the time that I wasn't getting the best - I wasn't ready to shell out for King, Icon, or Fox. But I also felt like I was getting something pretty good for a reasonable price. And I still feel that way - BOSSes are a great set of coilovers for someone who's getting into off-road adventures but isn't sure exactly how much they'll do. A tester / introductory set of suspension as it were!
Of course in my case, the last three years has been dramatically different for the truck. Gone are the days of simple trips around town and the occasional forest service road or weekend out exploring. Now, a "normal" trip involves 1000 miles of pavement just to reach dirt, and then a week or two of bouncing around, before driving another 1000 miles of pavement home.
And there are a lot of those trips.
So it's time to upgrade the suspension. The Toytec stuff is worn out (understandably) and it's not rebuildable (by design) and frankly it's no longer a good fit for my use of the truck. It's time to step up to the best - or at least, the best class (since everyone will argue that their favorite brand is the real best ;)).
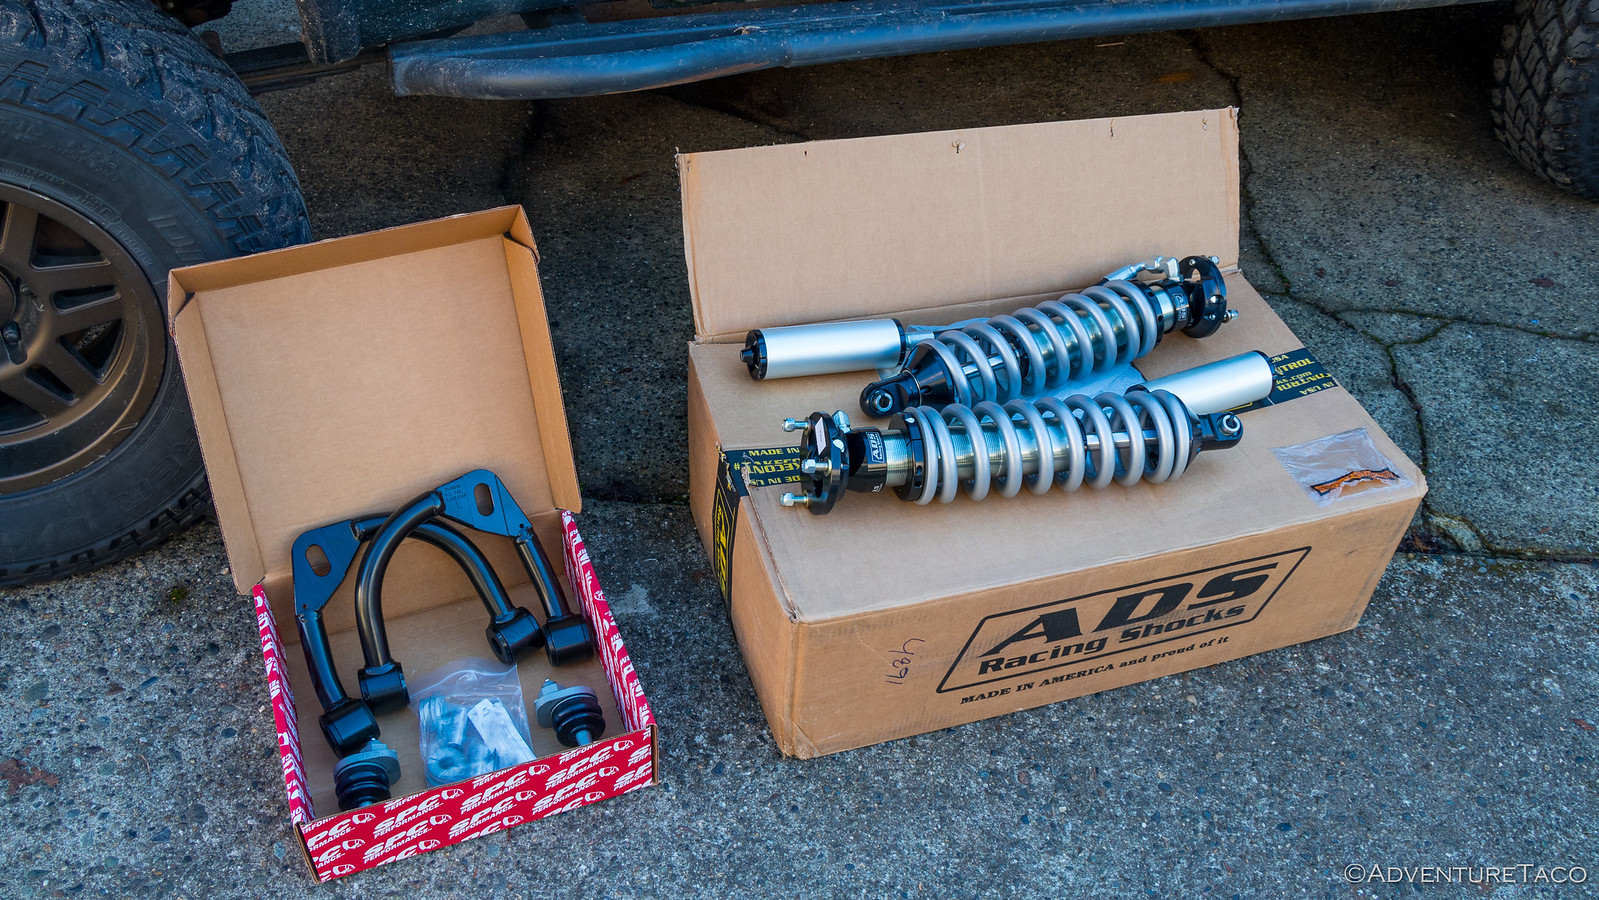
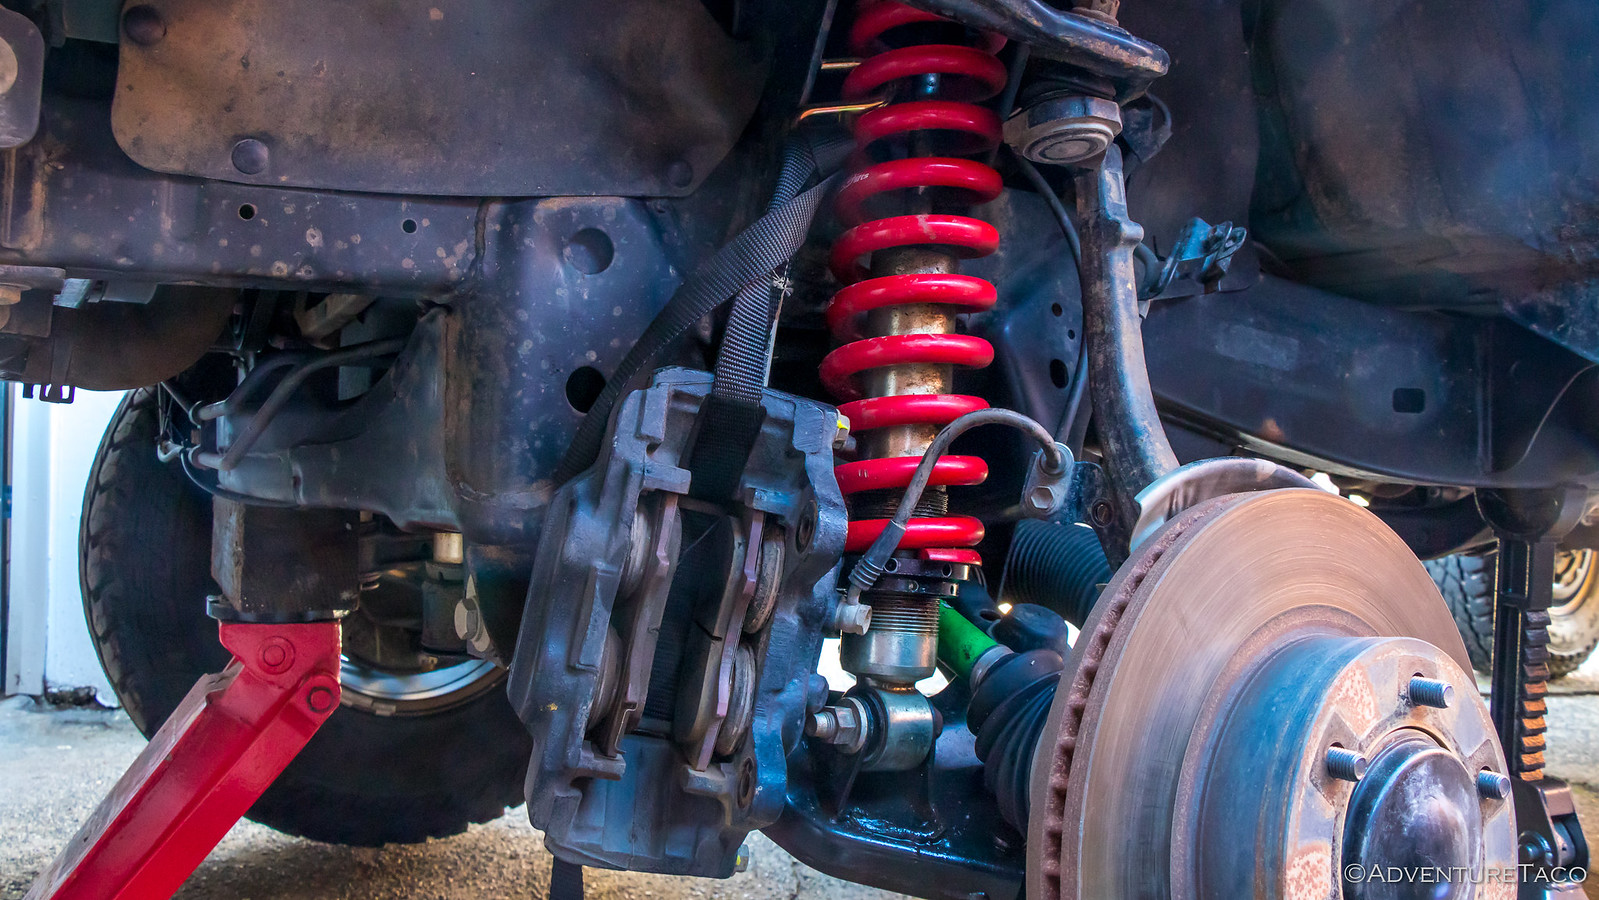
I started with the rear - choosing 10" stroke ADS 2.5" shocks - just because of how my calendar worked out. With those installed and the bugs worked out, it was time to get going on the front. As with the rear, I'd considered all the major players - King, Icon, Fox, etc. before settling on 2.5" ADS coilovers with remote resi's. I'd heard good things about them and I liked the idea of having a consistent setup on all four corners.
But that wasn't all. I figured that while I was mucking around, I should also finally take the plunge on new upper control arms (UCA's). This would hopefully give me more downtravel (droop), and - since I decided to go with SPC 25460 arms - the ability to adjust tire position in the wheel well, hopefully moving it forward just a bit so it didn't rub so much when turning.
And with that, I had all my parts and it was time to get started.
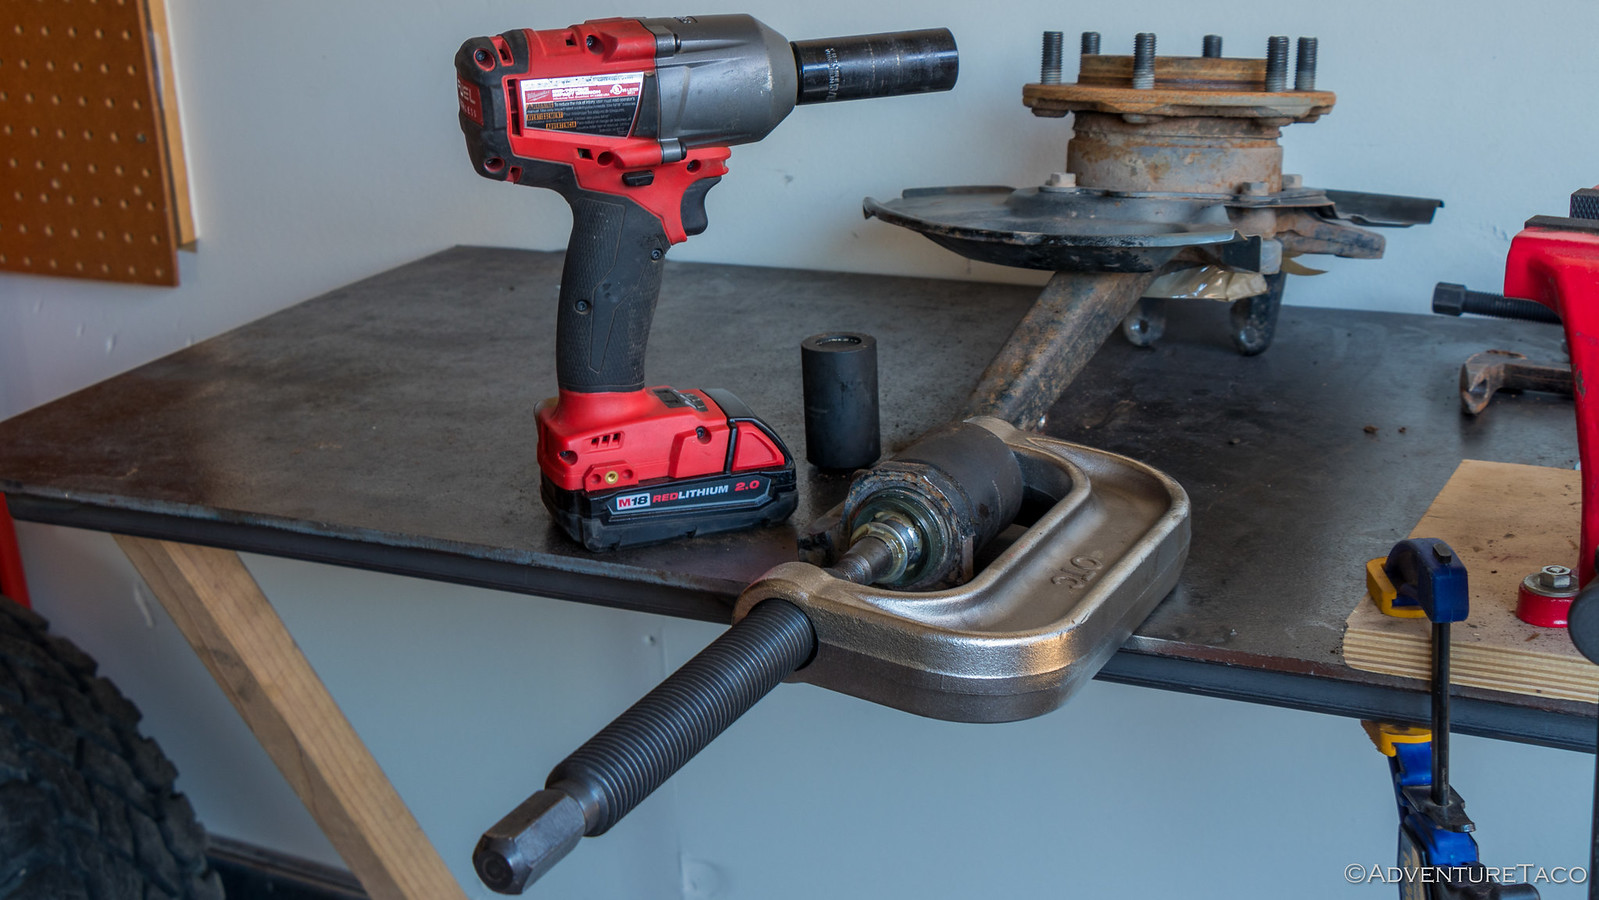
Almost. I also had to gather up a few of the special tools I'd need to make the job easier - specifically to make separation of the upper ball joint from the UCA and upper ball joint from the spindle easier.
- OTC 6295 Front End Service Kit - contains tie rod puller 7503, used to separate the UCA from the ball joint.
- OTC 7249 Ball Joint (and U-Joint) Service Kit - essentially a huge c-clamp used to press the ball joint out of the spindle.
- OTC 38354 Receiving cup for Toyota - needed to capture the ball joint as it's pressed out of the spindle.
My plan of attack was relatively simple - replace the Upper Control Arm first, then swap out the Toytec suspension for the new ADS variant. I had only one real question: should I remove the spindle (extra work) to press out the upper ball joint, or leave it installed (more precarious).
In the end, I decided that with two sides of the truck to do, I'd try it both ways. Experiment for science! 
So, with that, I jacked up the front of the truck and got it on jack stands before removing the wheels.
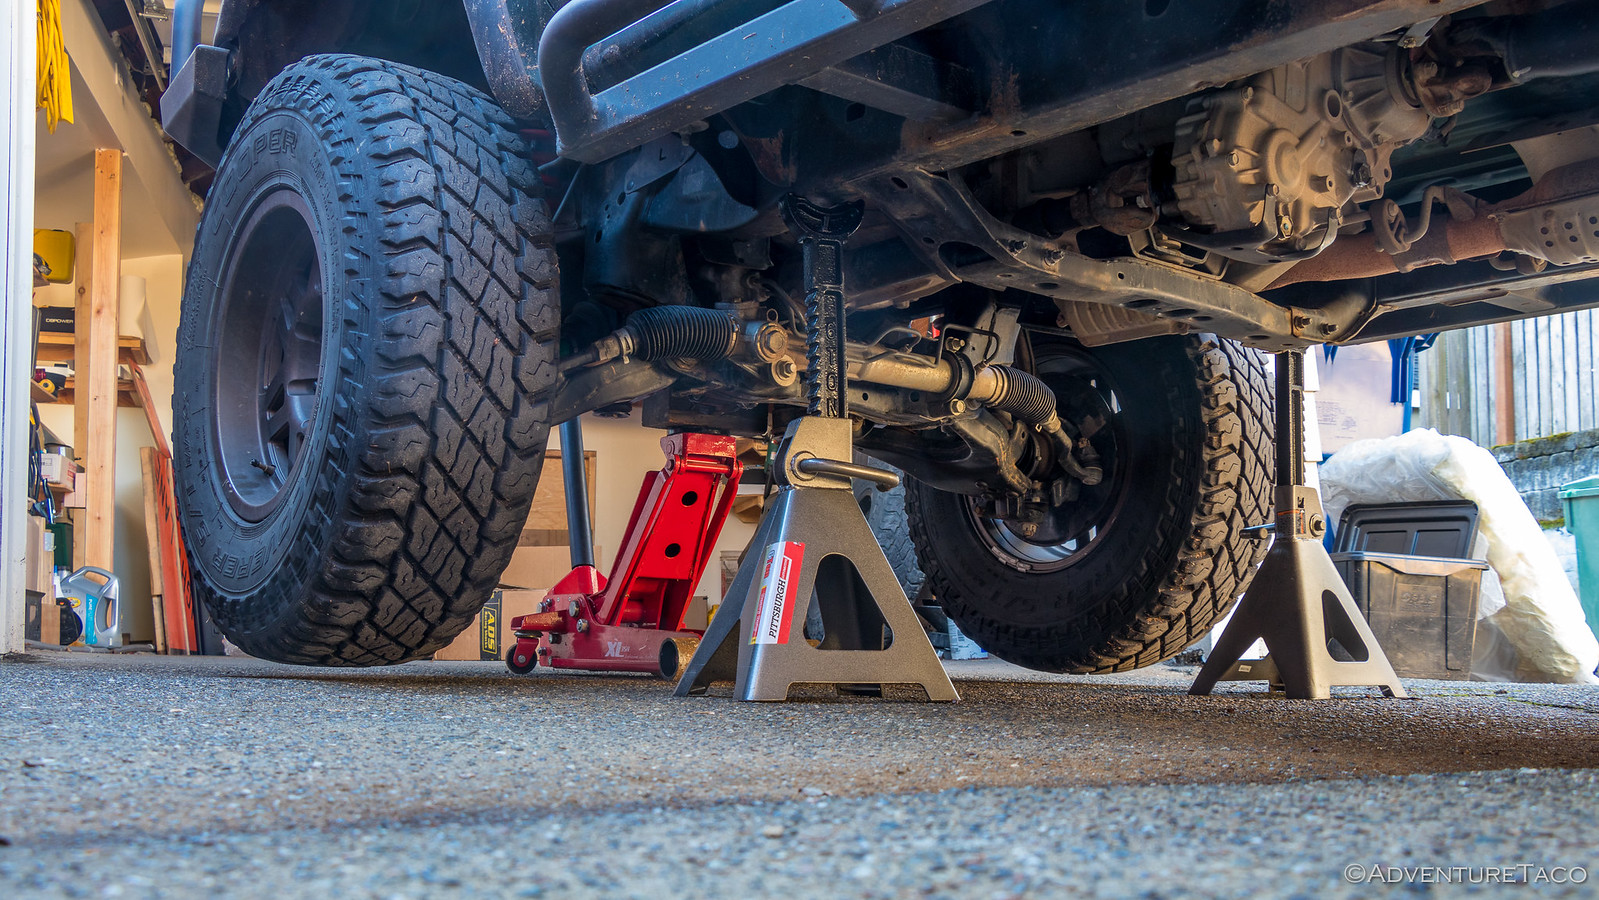
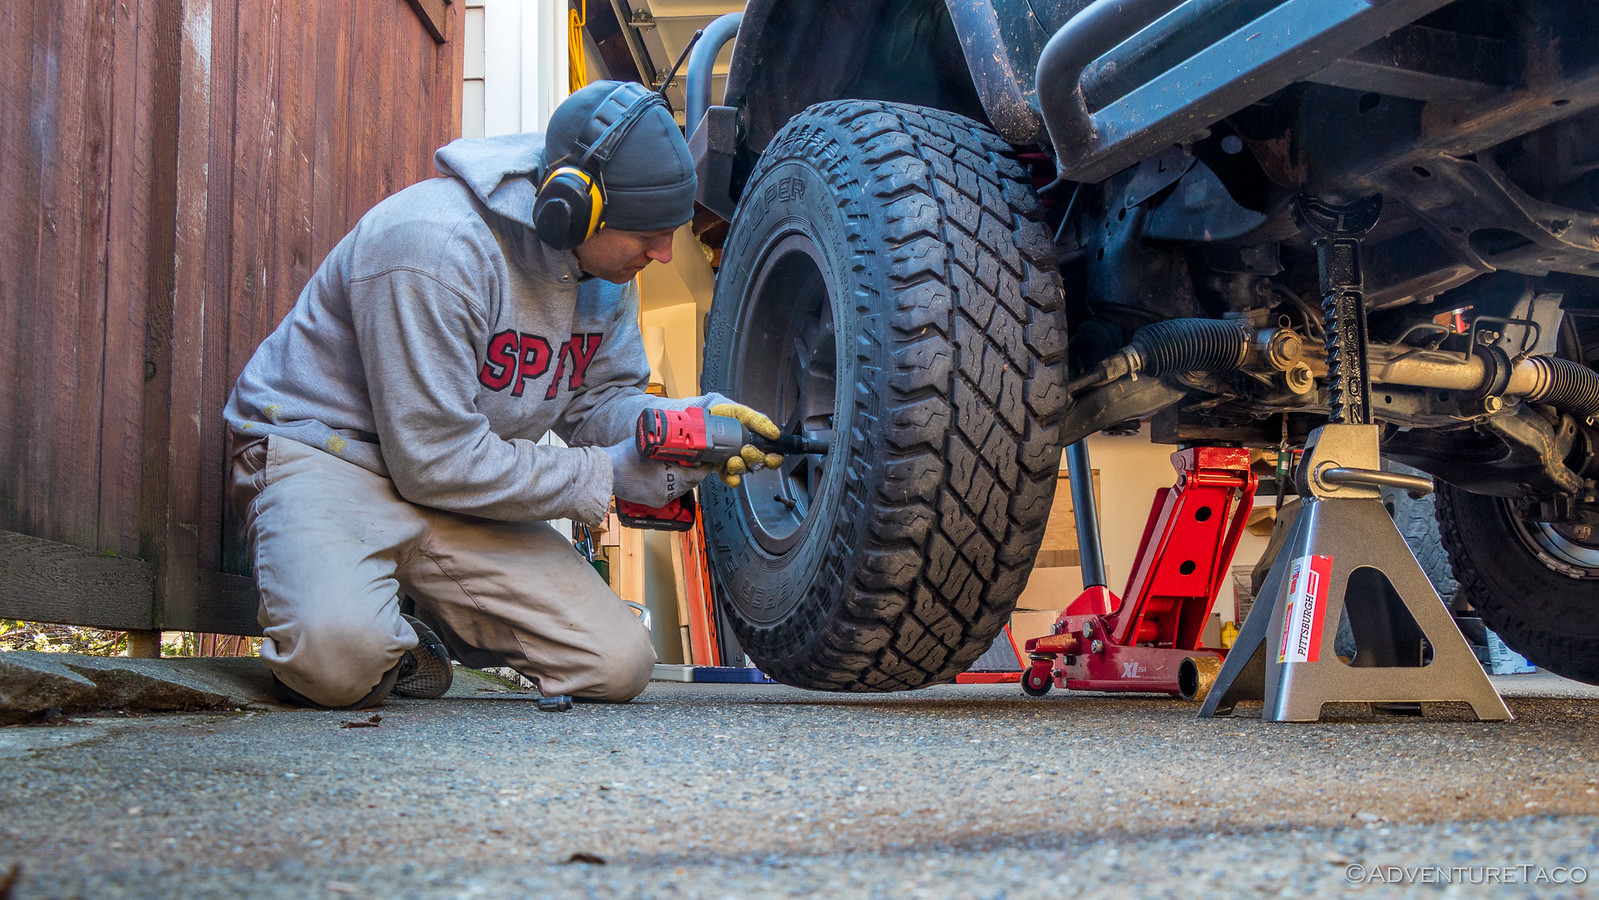
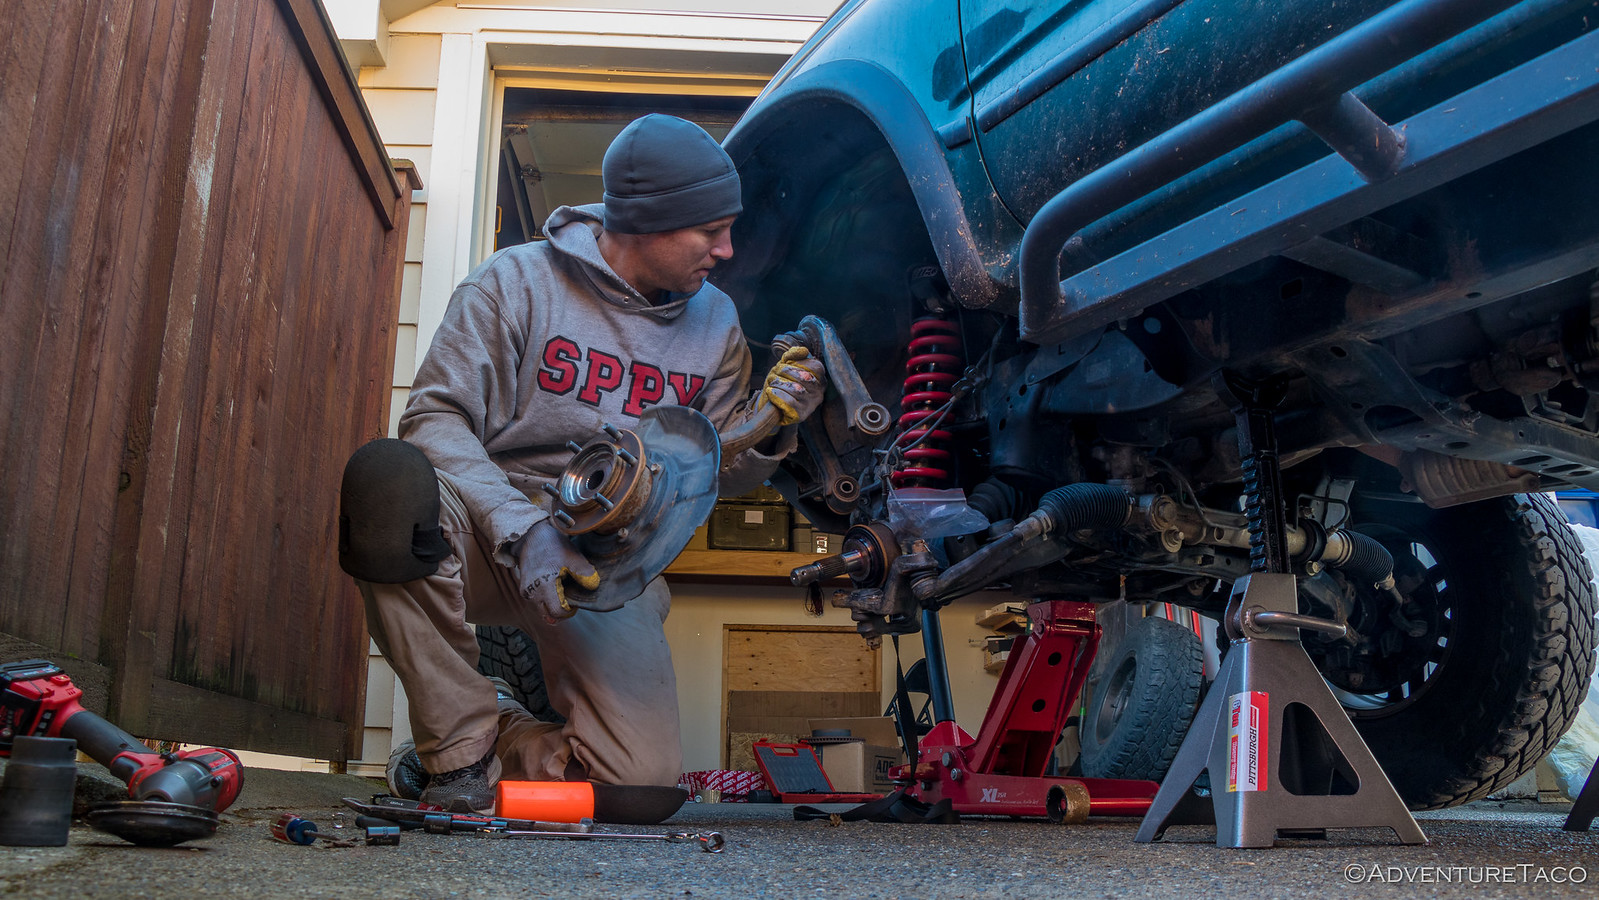
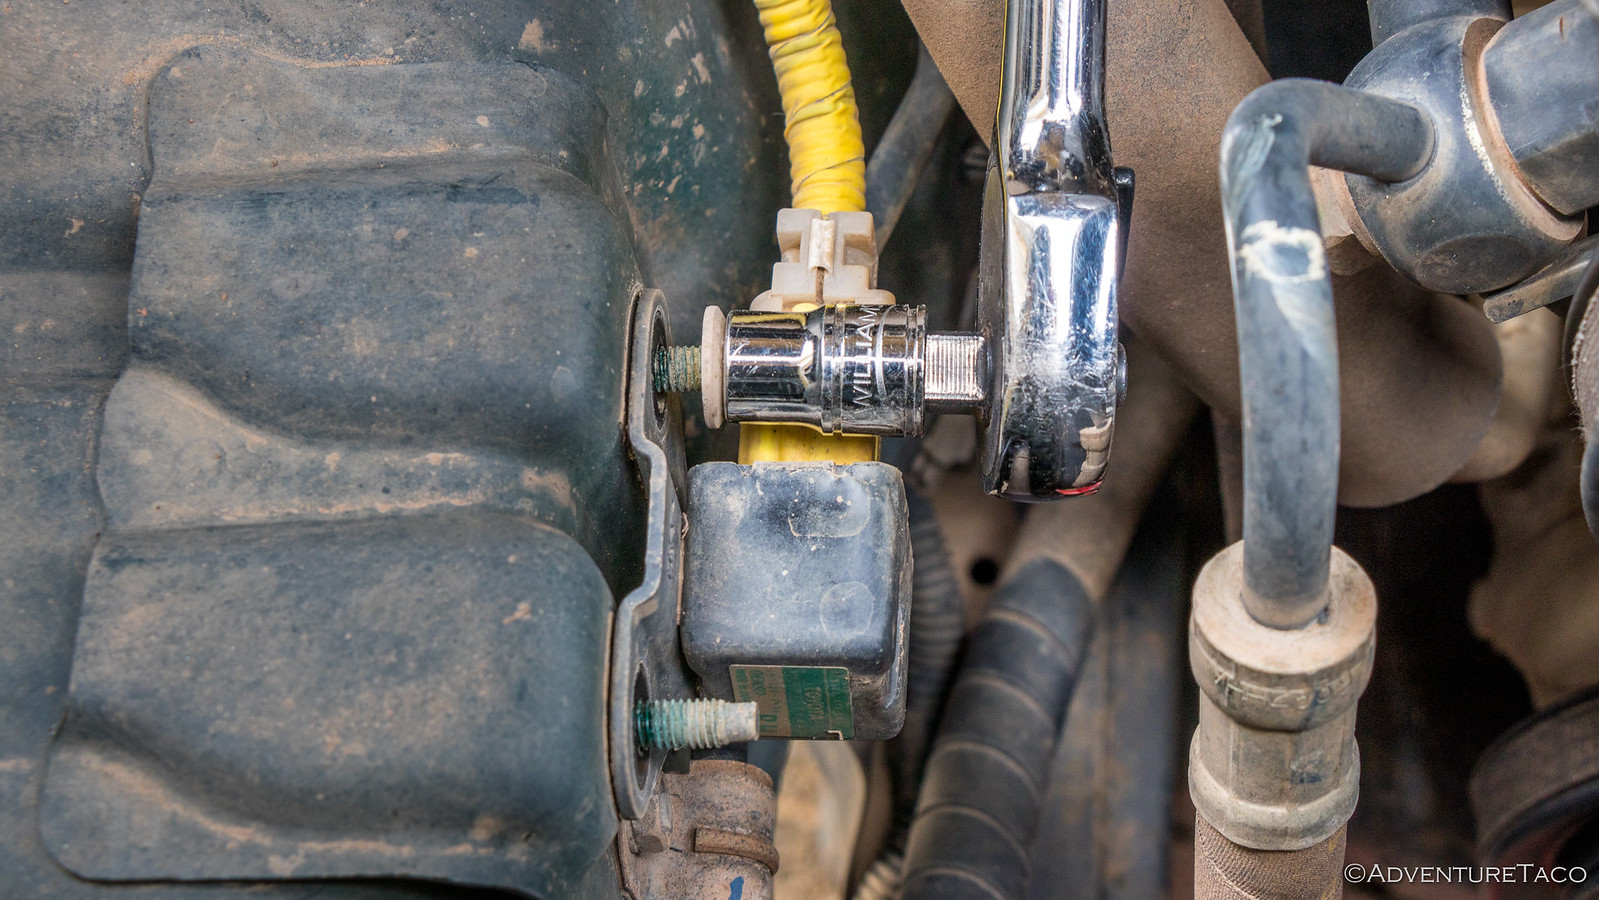
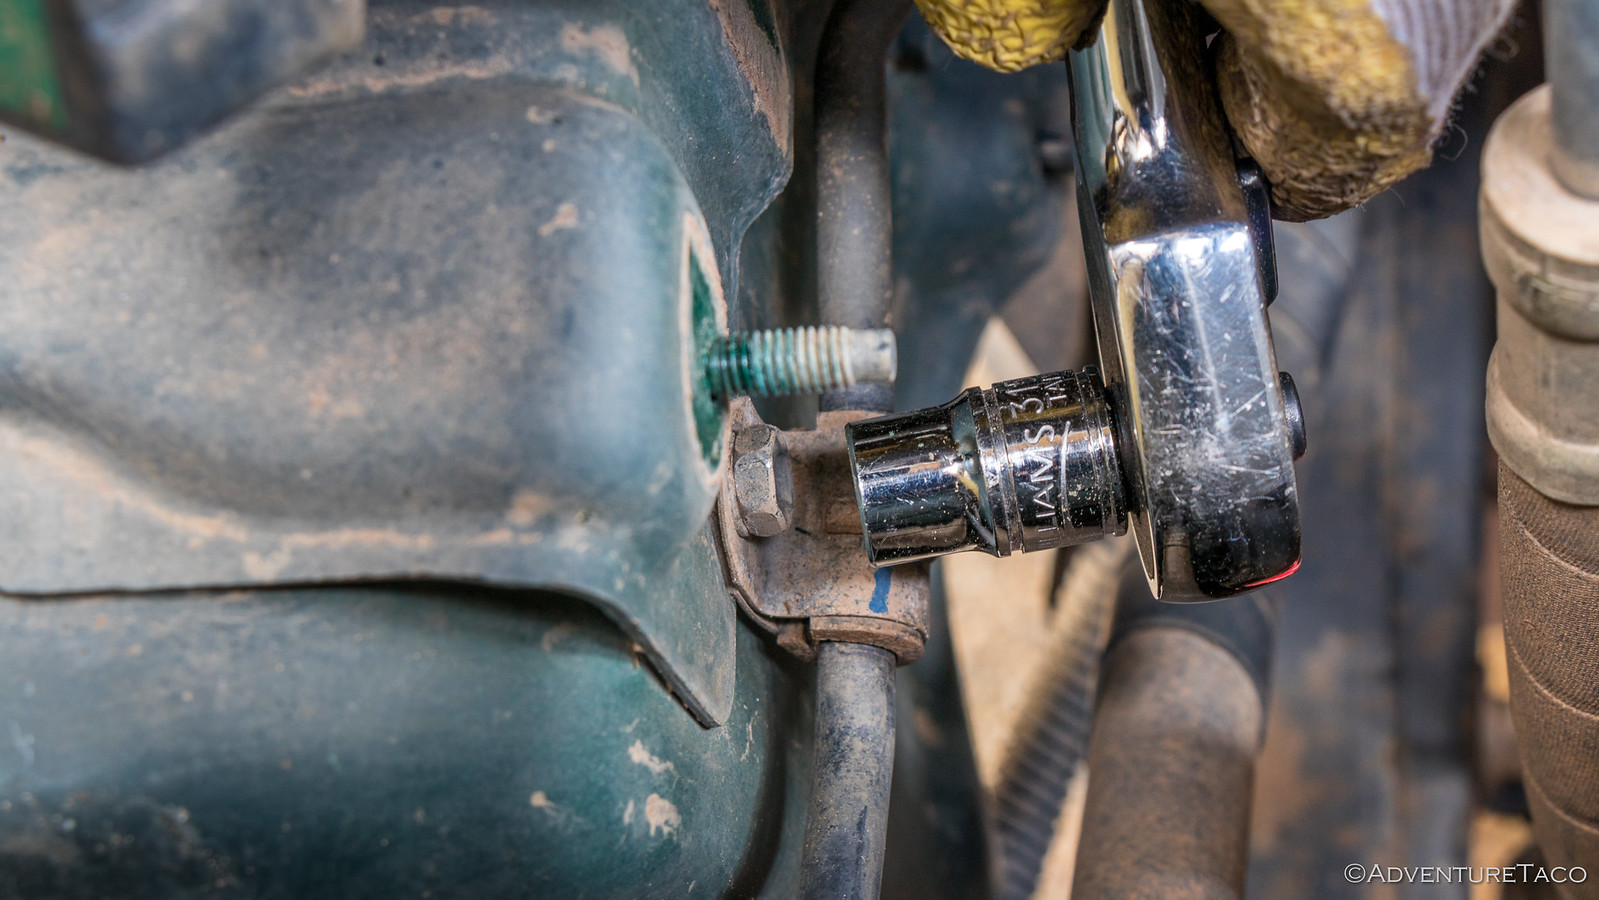
Having decided to remove the entire spindle on the driver side - since it seemed more straight forward, even if it was a bit more work - my next order of business was to remove the various brake and ABS speed sensors from the UCA and spindle.
And then the brake caliper and rotor, which I hung from the spring of the Toytec coilover so as to avoid any unnecessary tension on the brake line.
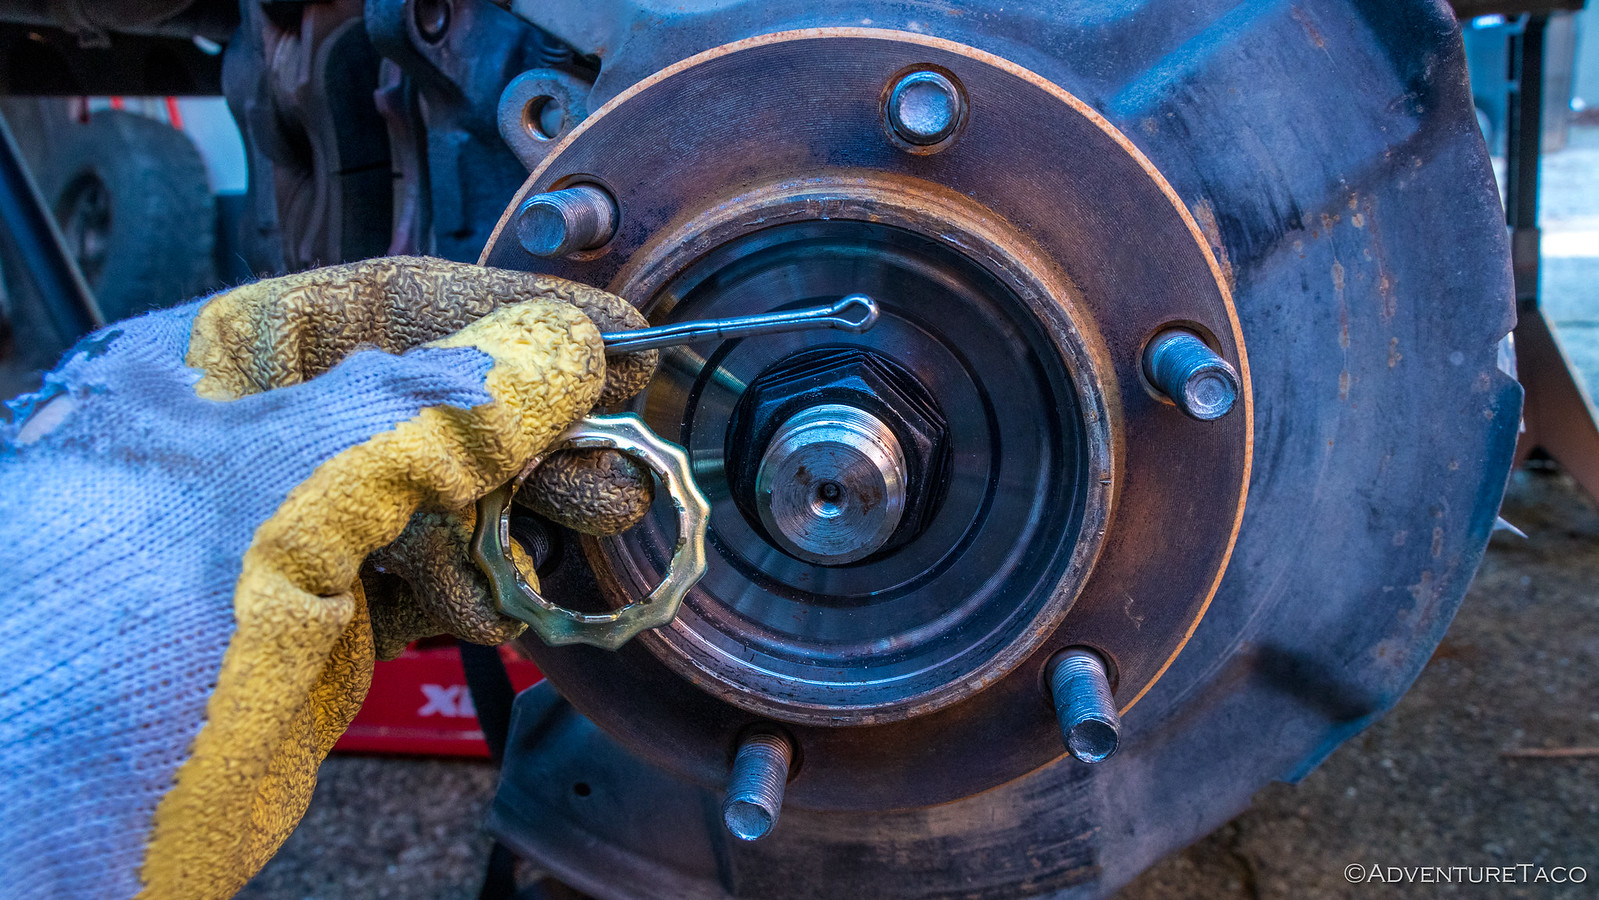
Then, it was off with the center hub and axle nut, and then finally the four lower ball joint bolts so that I could separate the spindle from the lower control arm. I always hate taking off the center hub - mine is still pretty tight and it always feels like it's extra difficult to get a screwdriver between it and the knuckle to pry them apart.
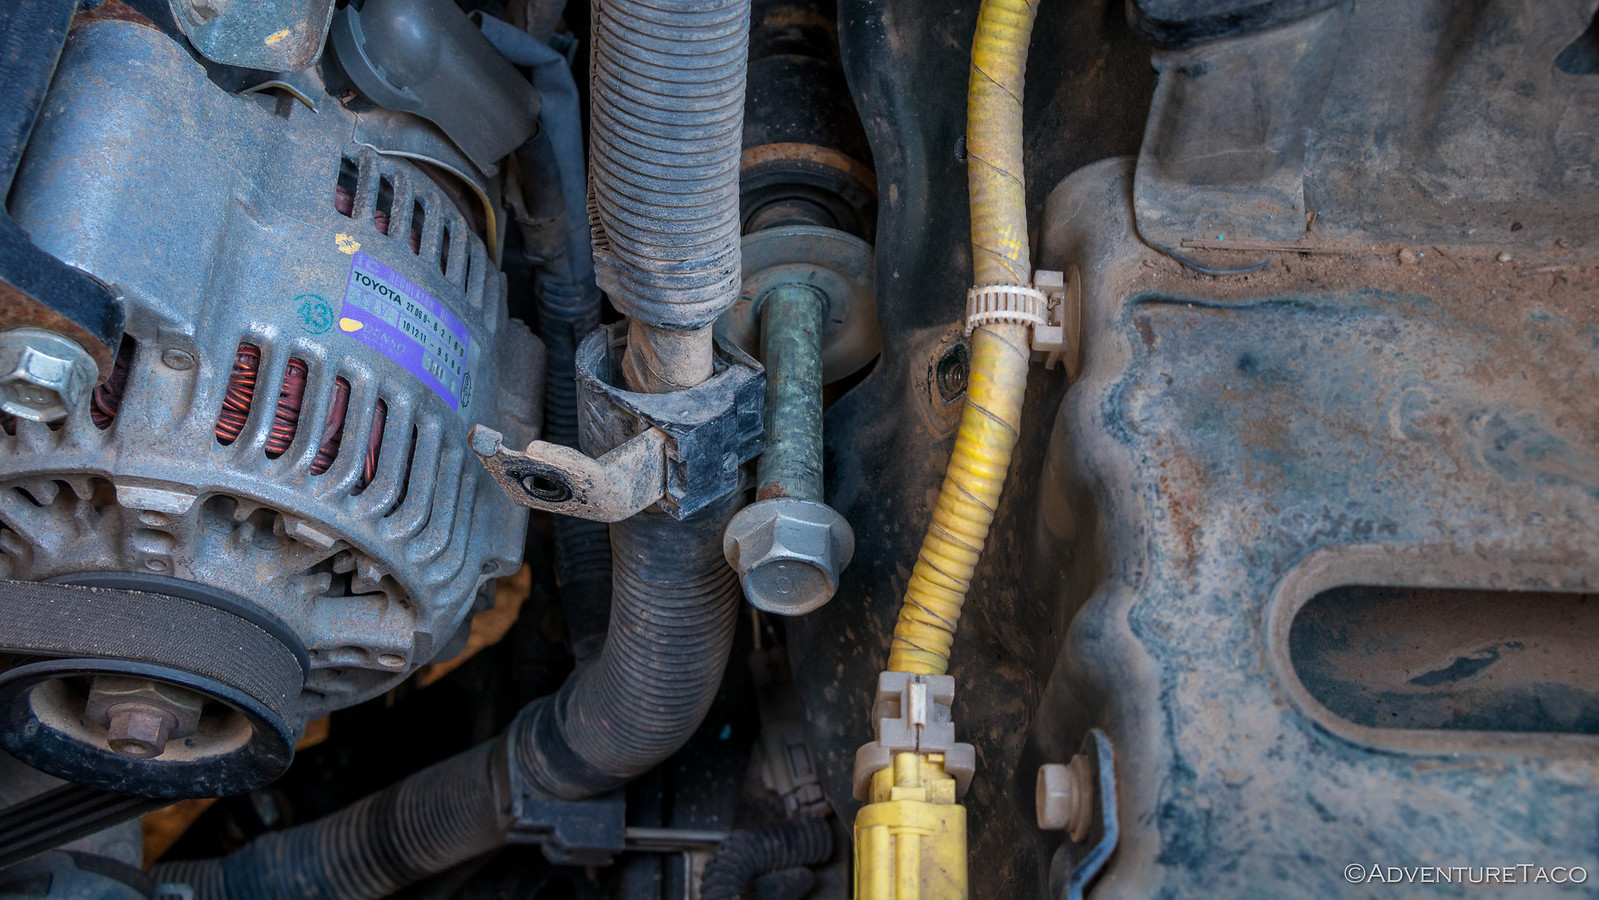
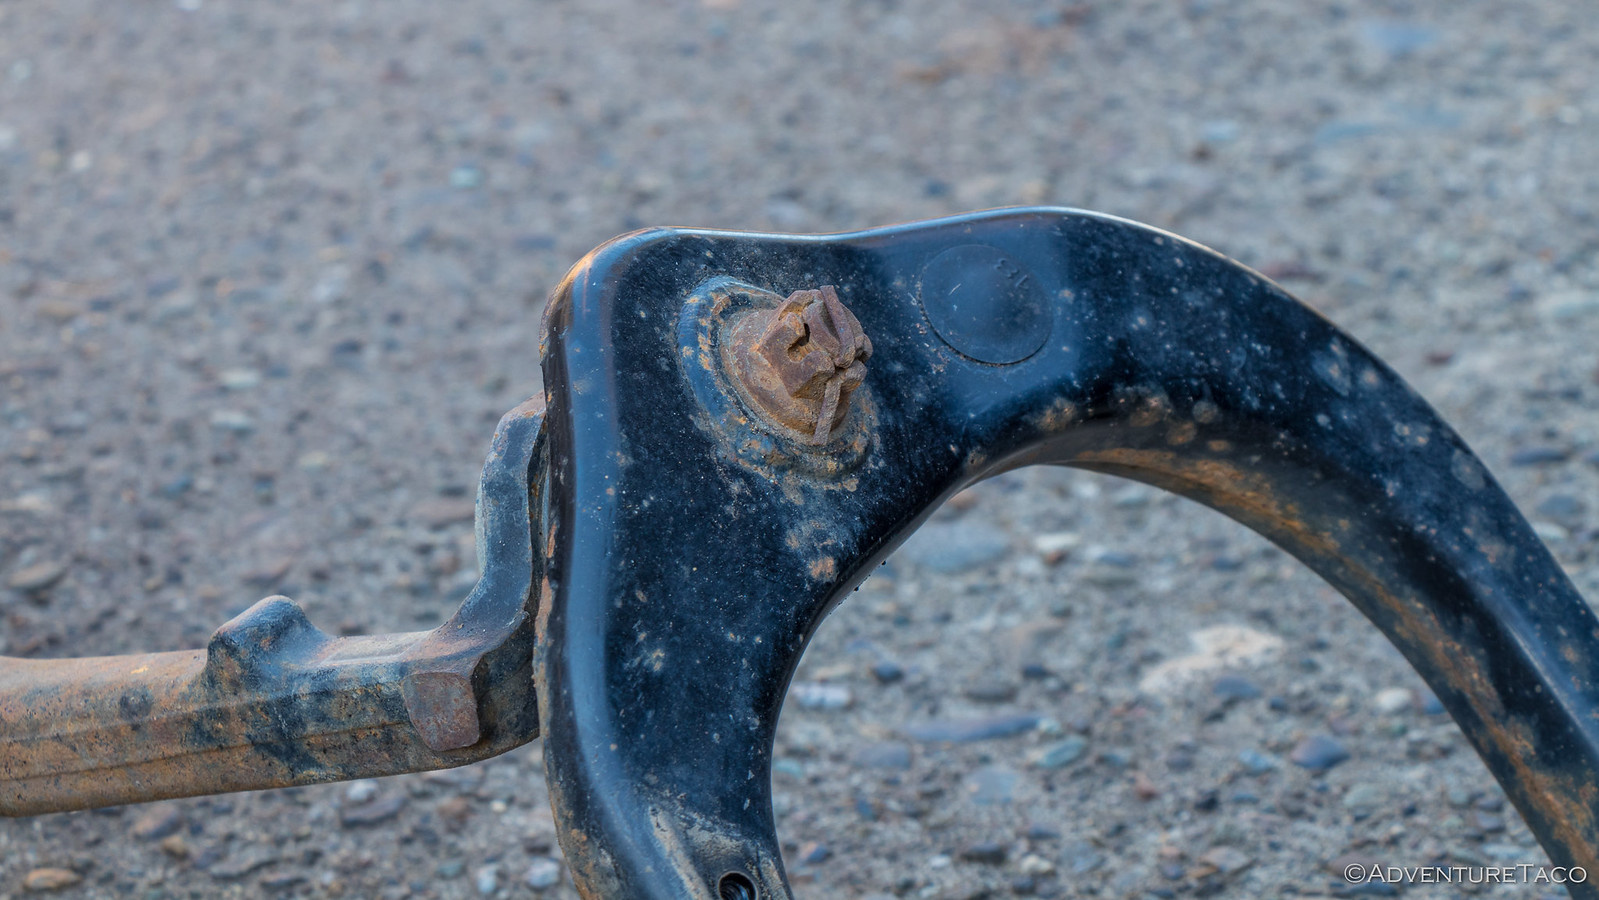
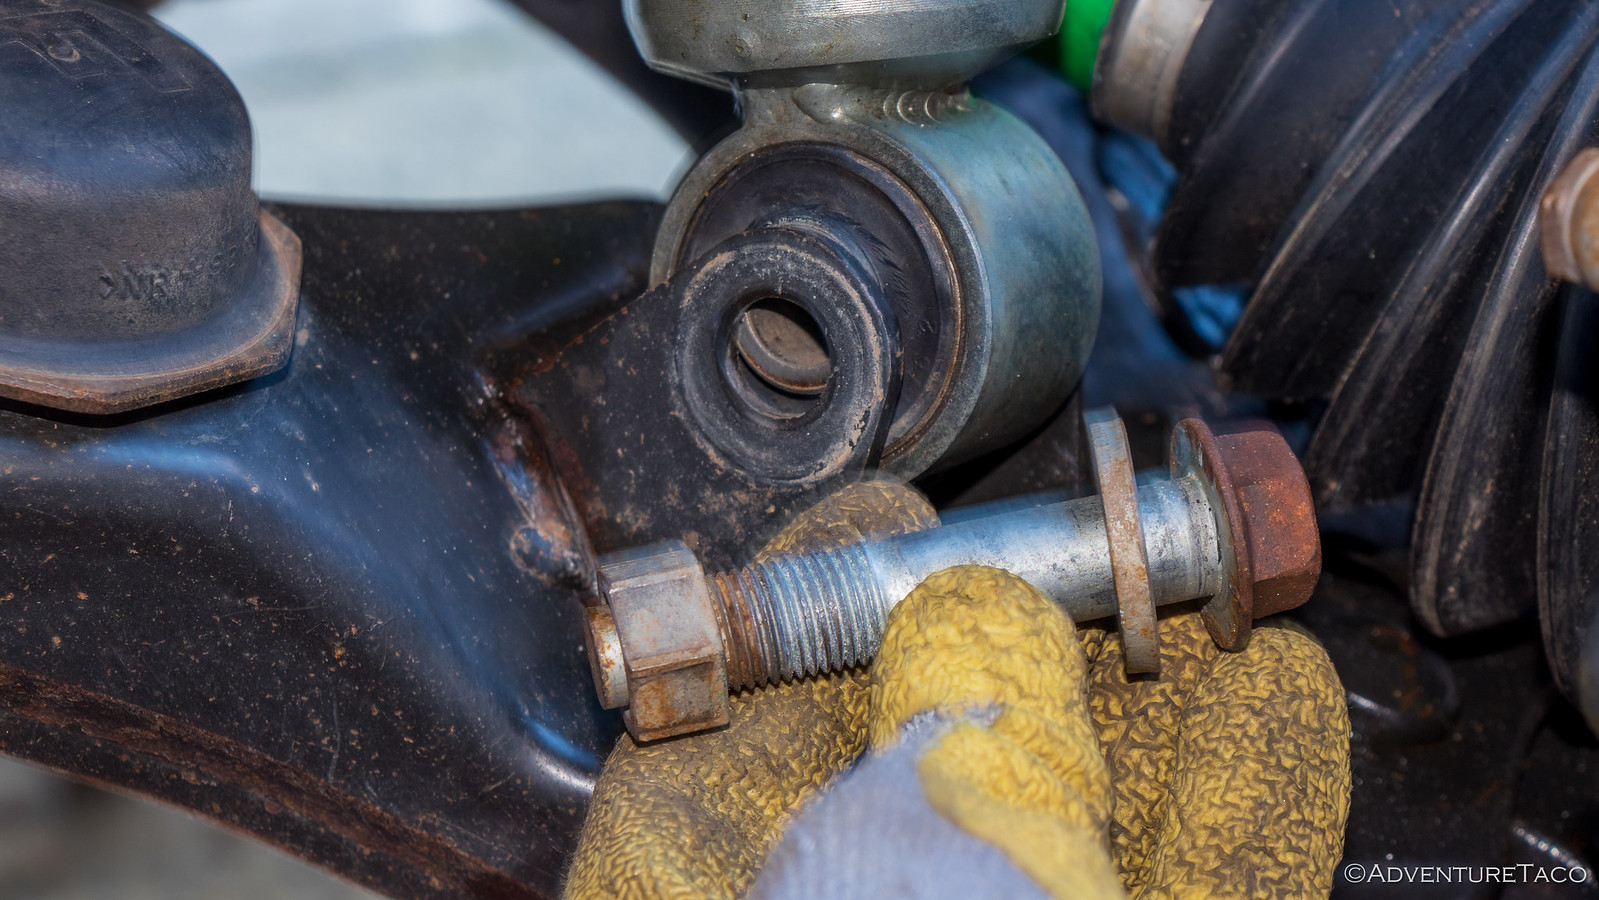
At this point, things were going swimmingly well I thought - the only thing left to do was to remove the long bolt that secures the upper control arm. Of course, it's just when things are going swimmingly that you run into something unexpected, and this time was no exception. I knew these bolts were difficult to access, but as I looked down into the engine bay I realized that I needed to remove the battery, yellow airbag sensor, and battery wiring harness in order to make room to extract the bolt.
More work, but it could definitely have been worse!


And with that, I was ready to remove the bolt and take everything out as a unit.
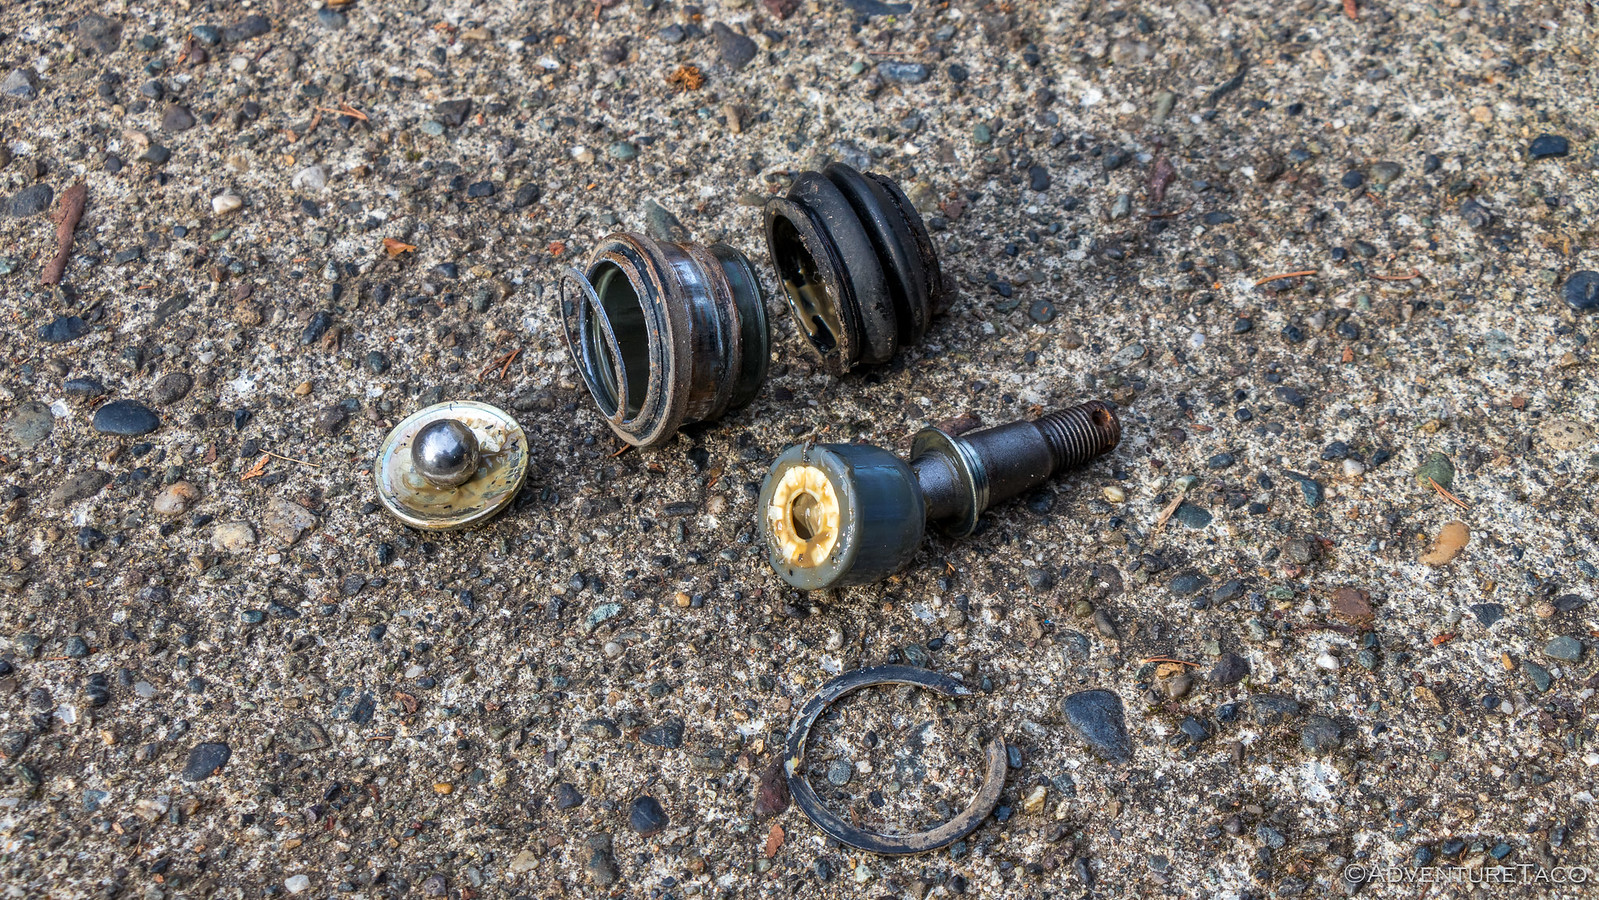
Then, I was faced with the impetuous behind this entire ordeal - the upper ball joint connection between the UCA and spindle.
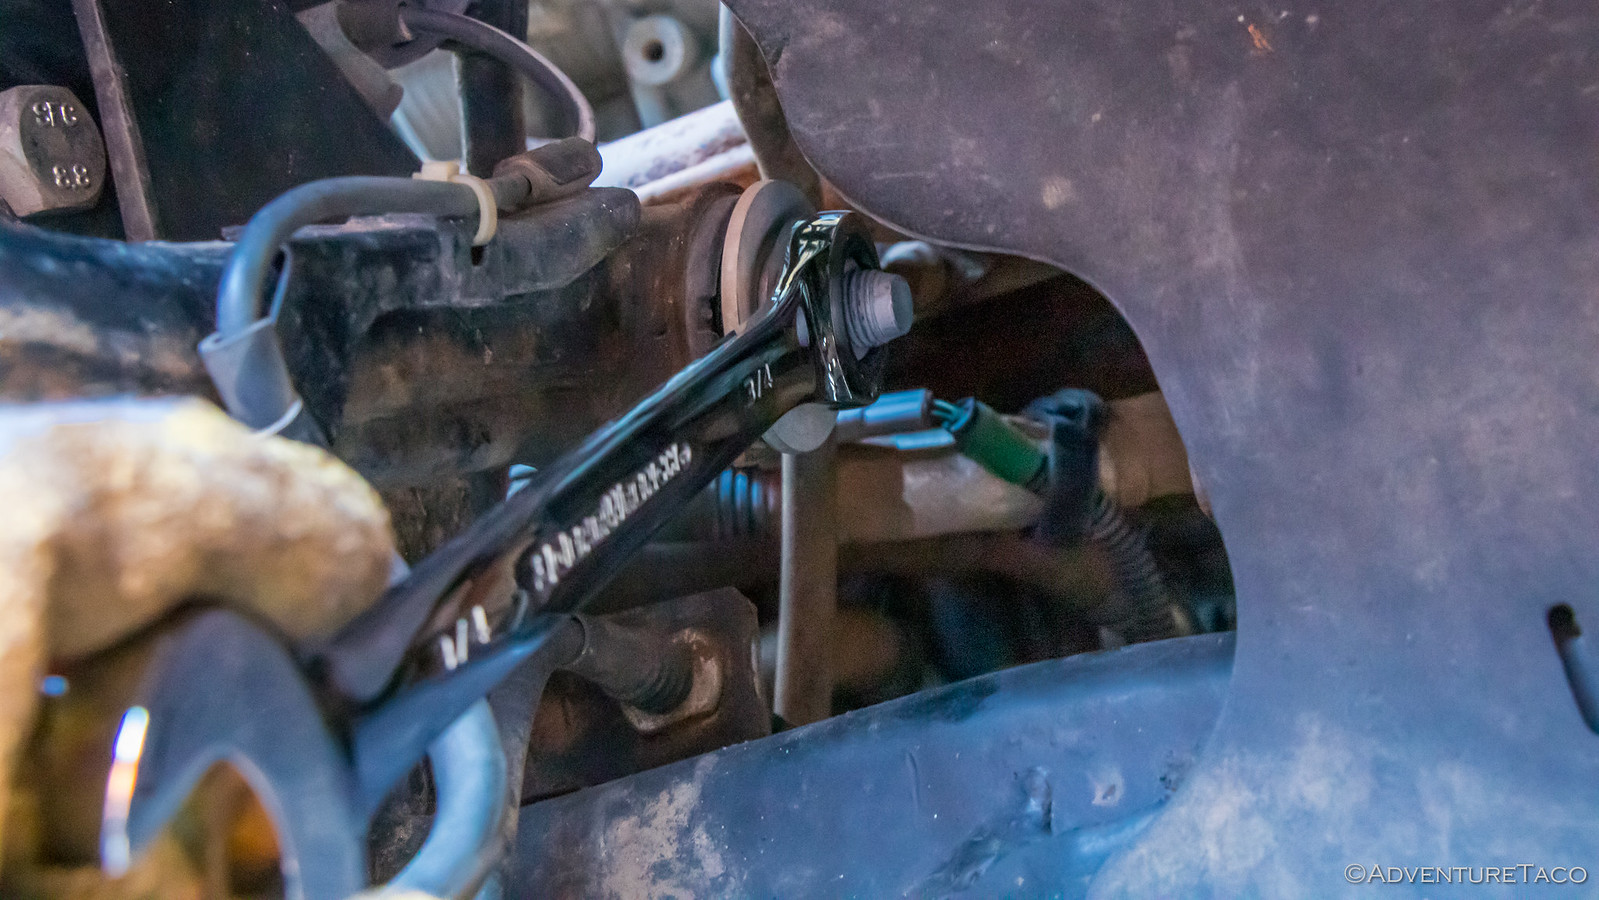
I pulled out the OTC 7503 tie rod puller from the OTC 6295 Front End Service Kit and lined everything up. Everything I'd heard suggested that I could be in for an explosive separation when the upper ball joint stud pushed out of the UCA - so I gingerly tightened the screw while squinting behind my safety glasses and ear plugs.
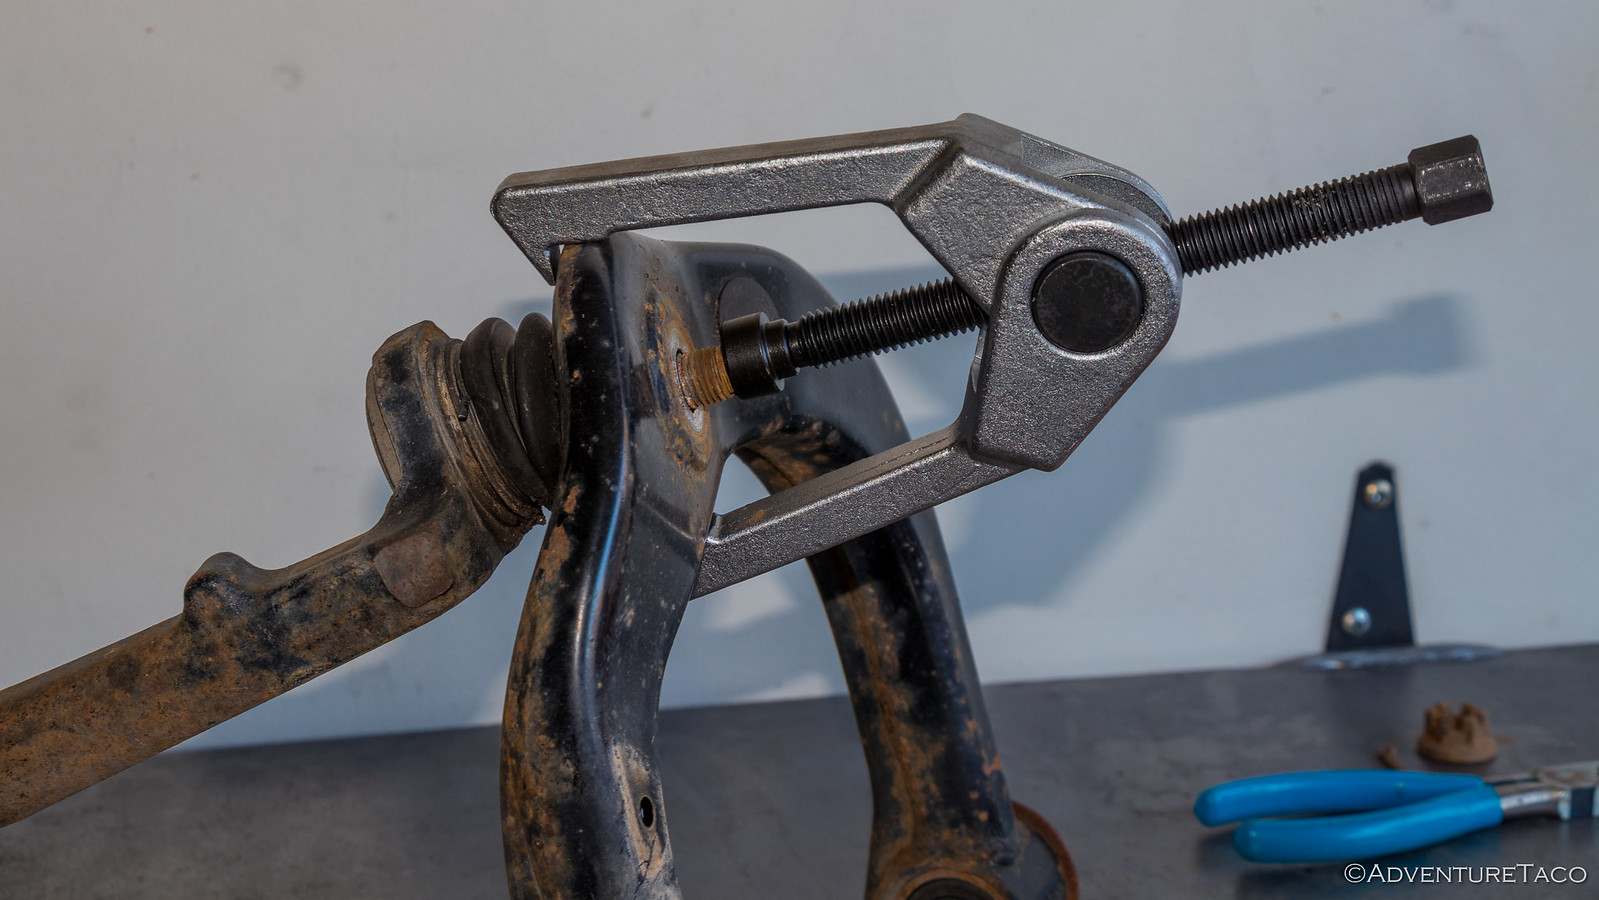
I eventually got that big explosion - parts and tools seemingly flying everywhere when the tension was released. So, after checking my pants, I reset for the next operation - pushing the upper ball joint out of the spindle using the OTC 7249 Ball Joint Service Kit and OTC 38354 Receiving cup for Toyota. Oh, and a big old impact wrench.
I wasn't totally sure this was going to work - I was pushing on the stud of the ball joint rather than on the rim of the cup - but after a few big impacts with the Milwaukee Mid-Torque, the joint pushed right out. Whew.
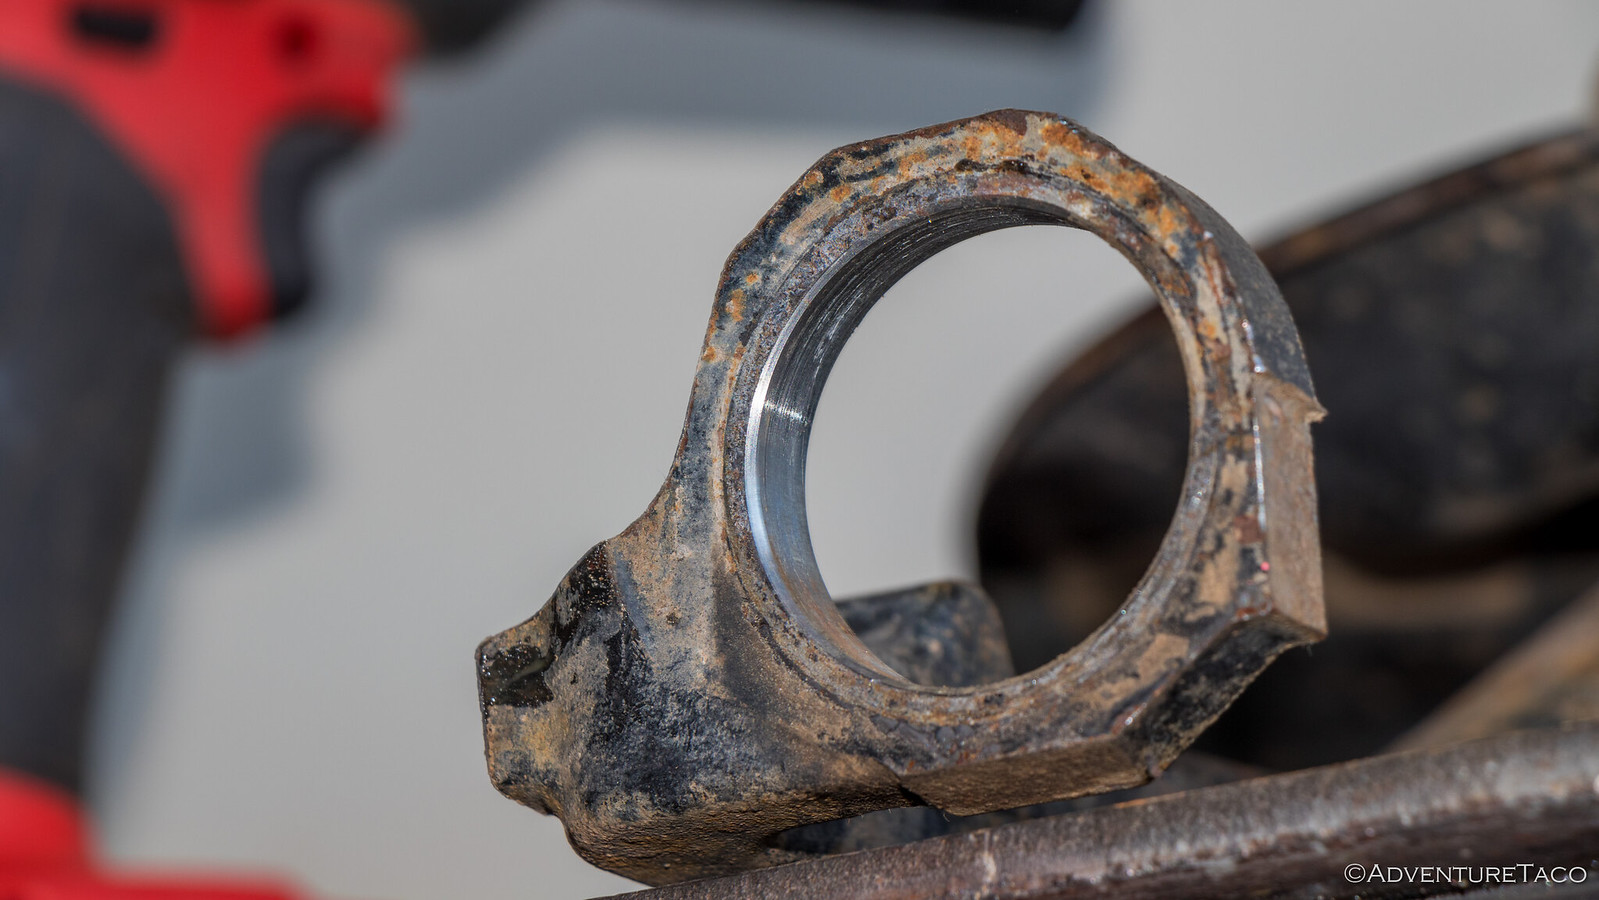
A bit of emery cloth cleaned up the inner surface nicely to accept the new SPC insert, which pushed in easily and was secured with a c-clip.
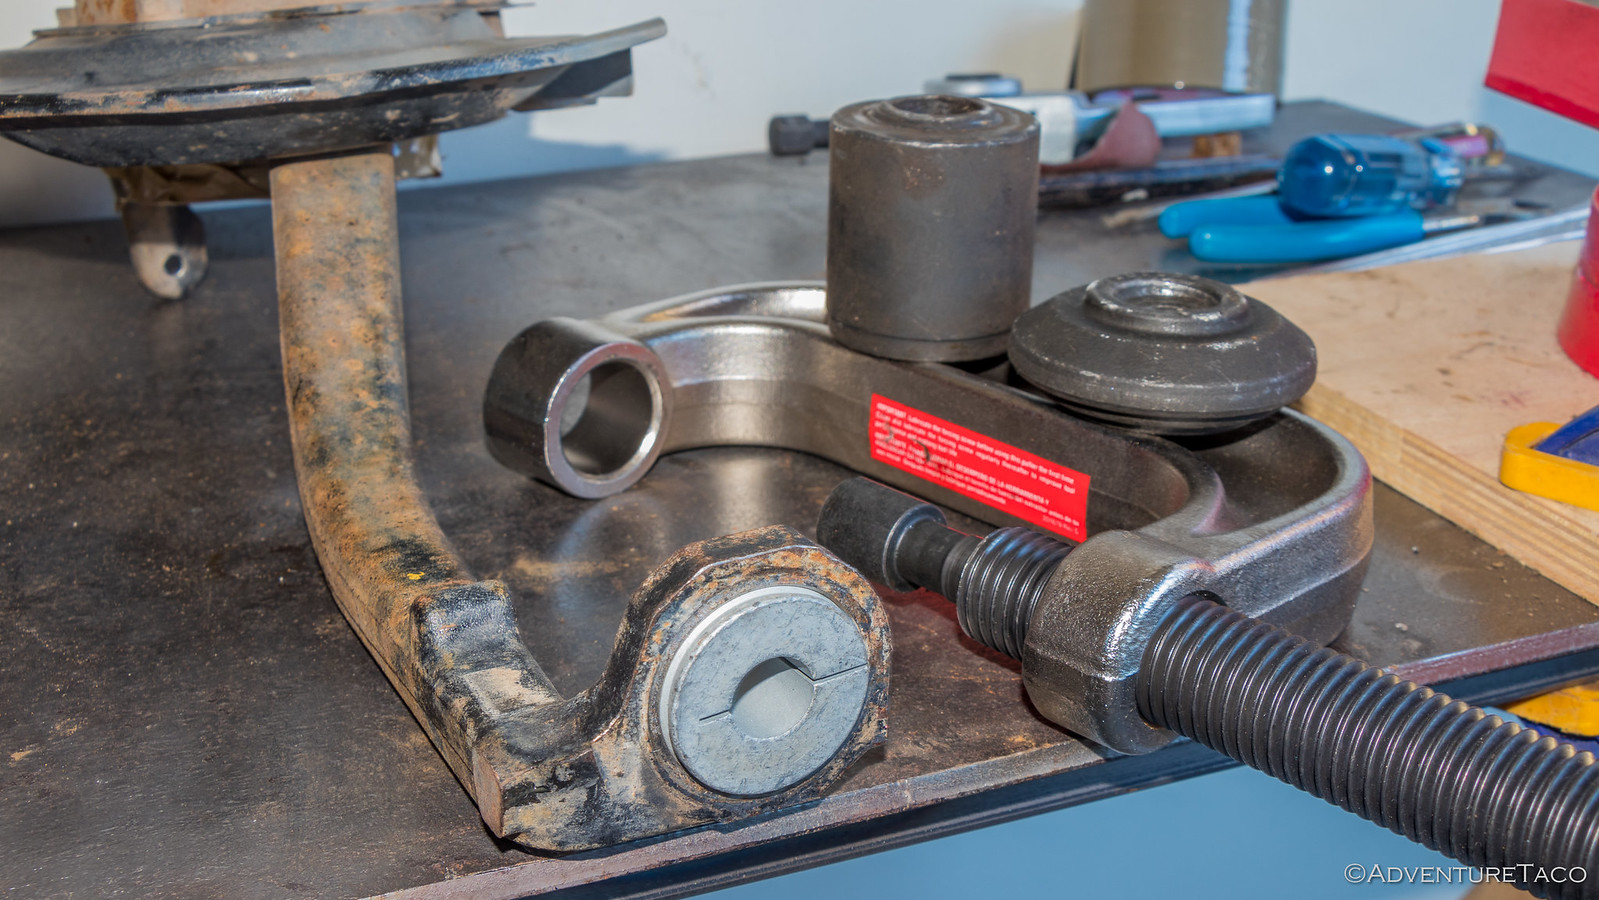
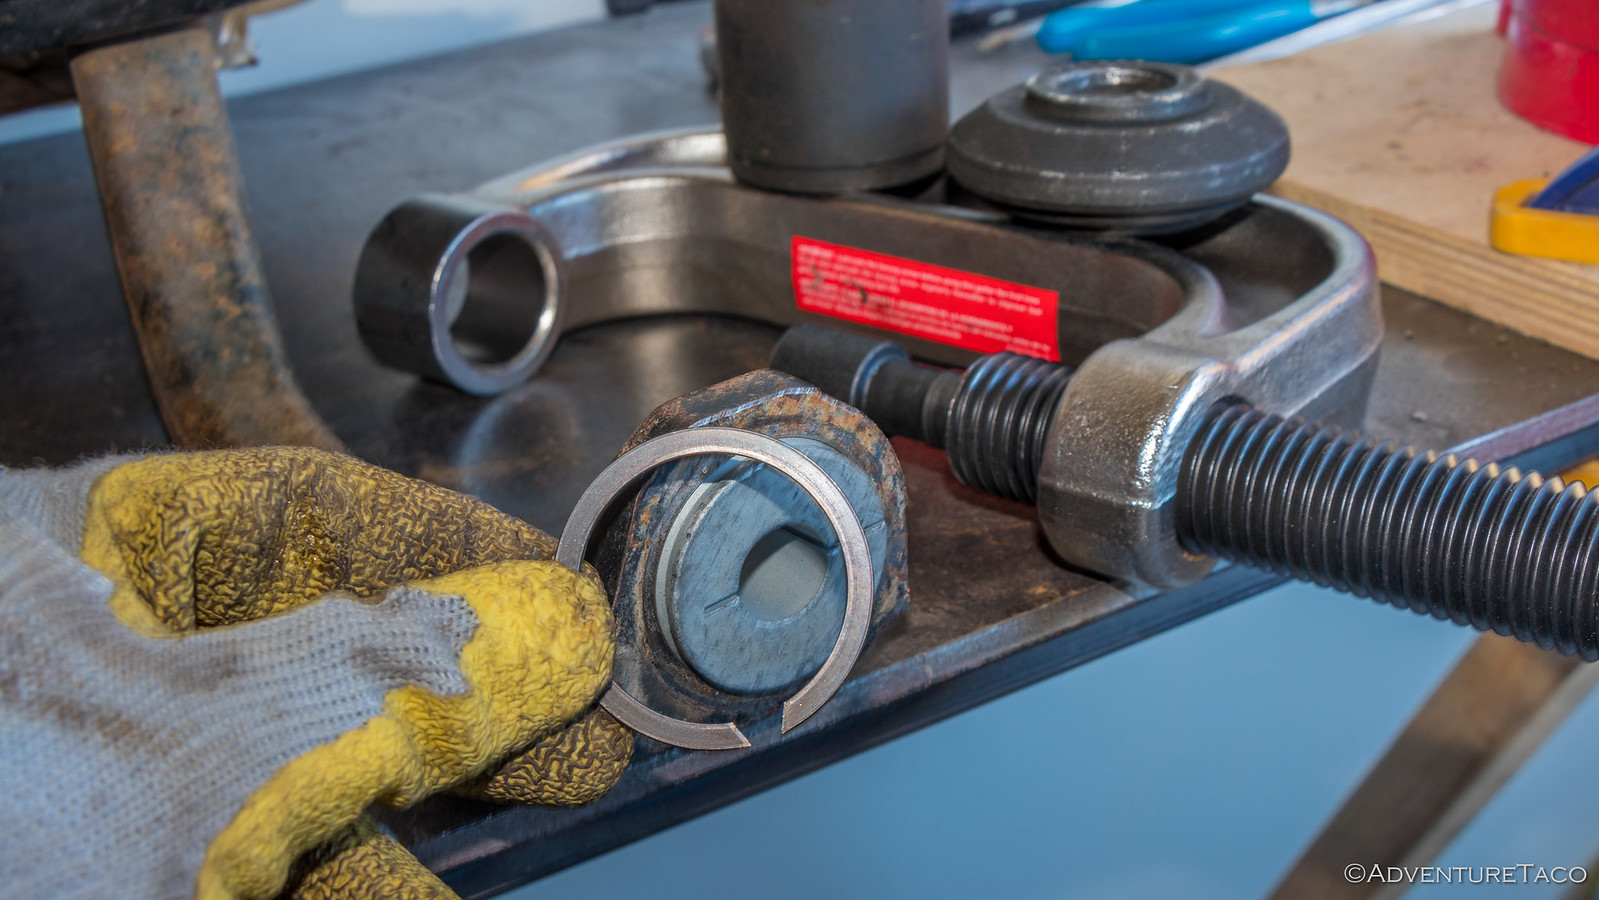
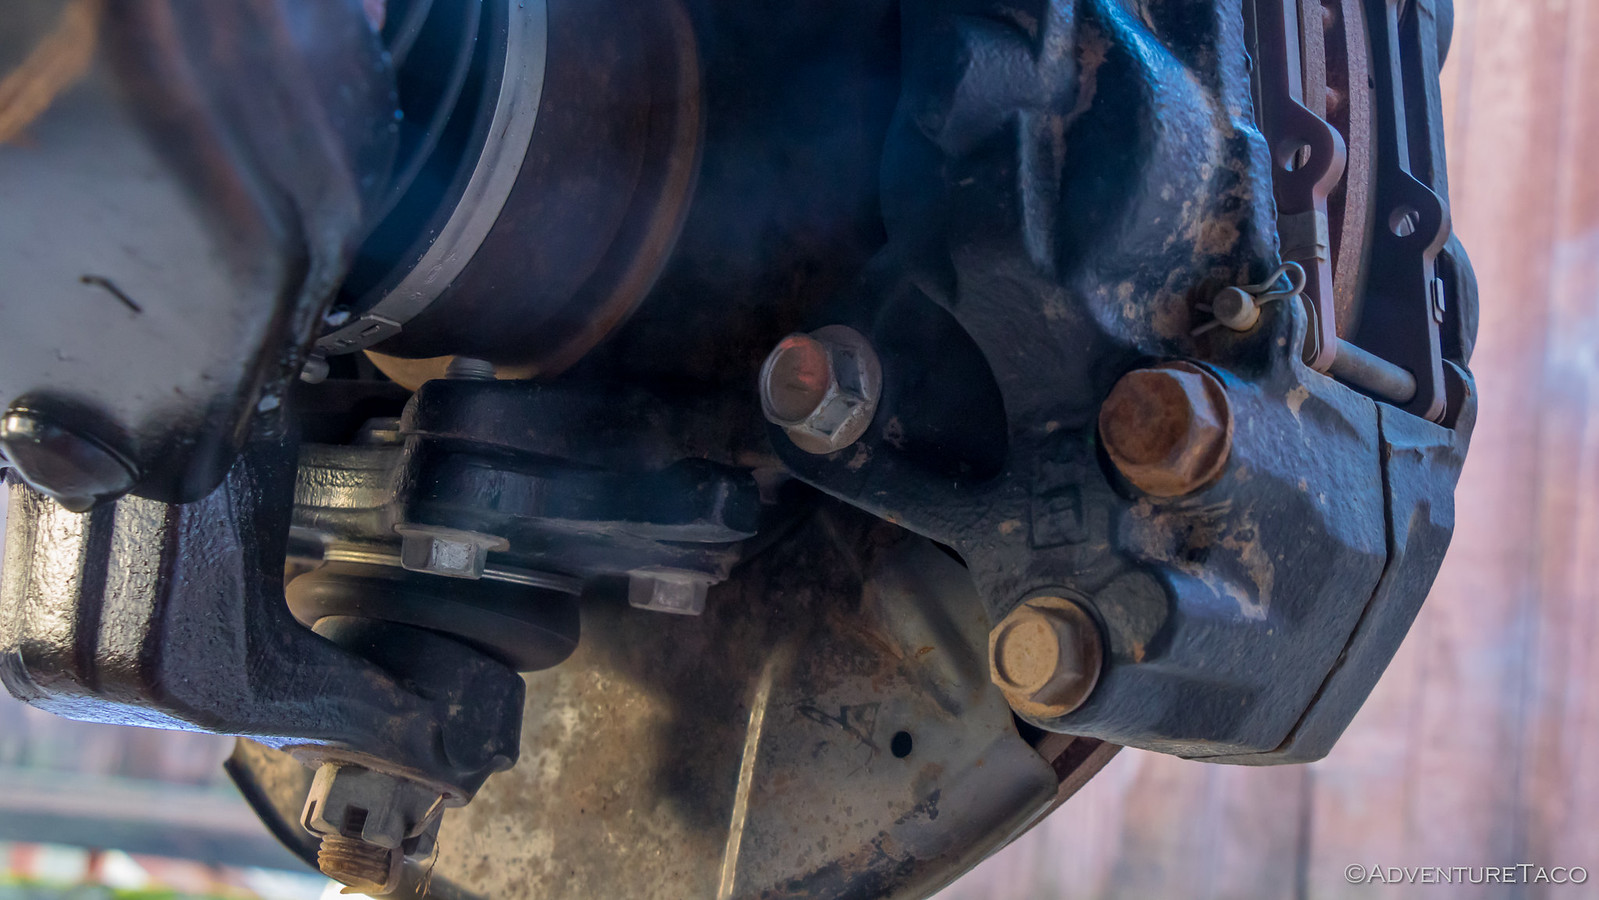
I knew I was on the home stretch now - the only thing left was to lubricate the SpecRide bushings with the supplied "super special™" grease, insert the metal sleeves, and install the arm onto the truck. Of course, there was also the re-installation of the entire spindle assembly - time consuming, but a straight forward process essentially the reverse of removal.

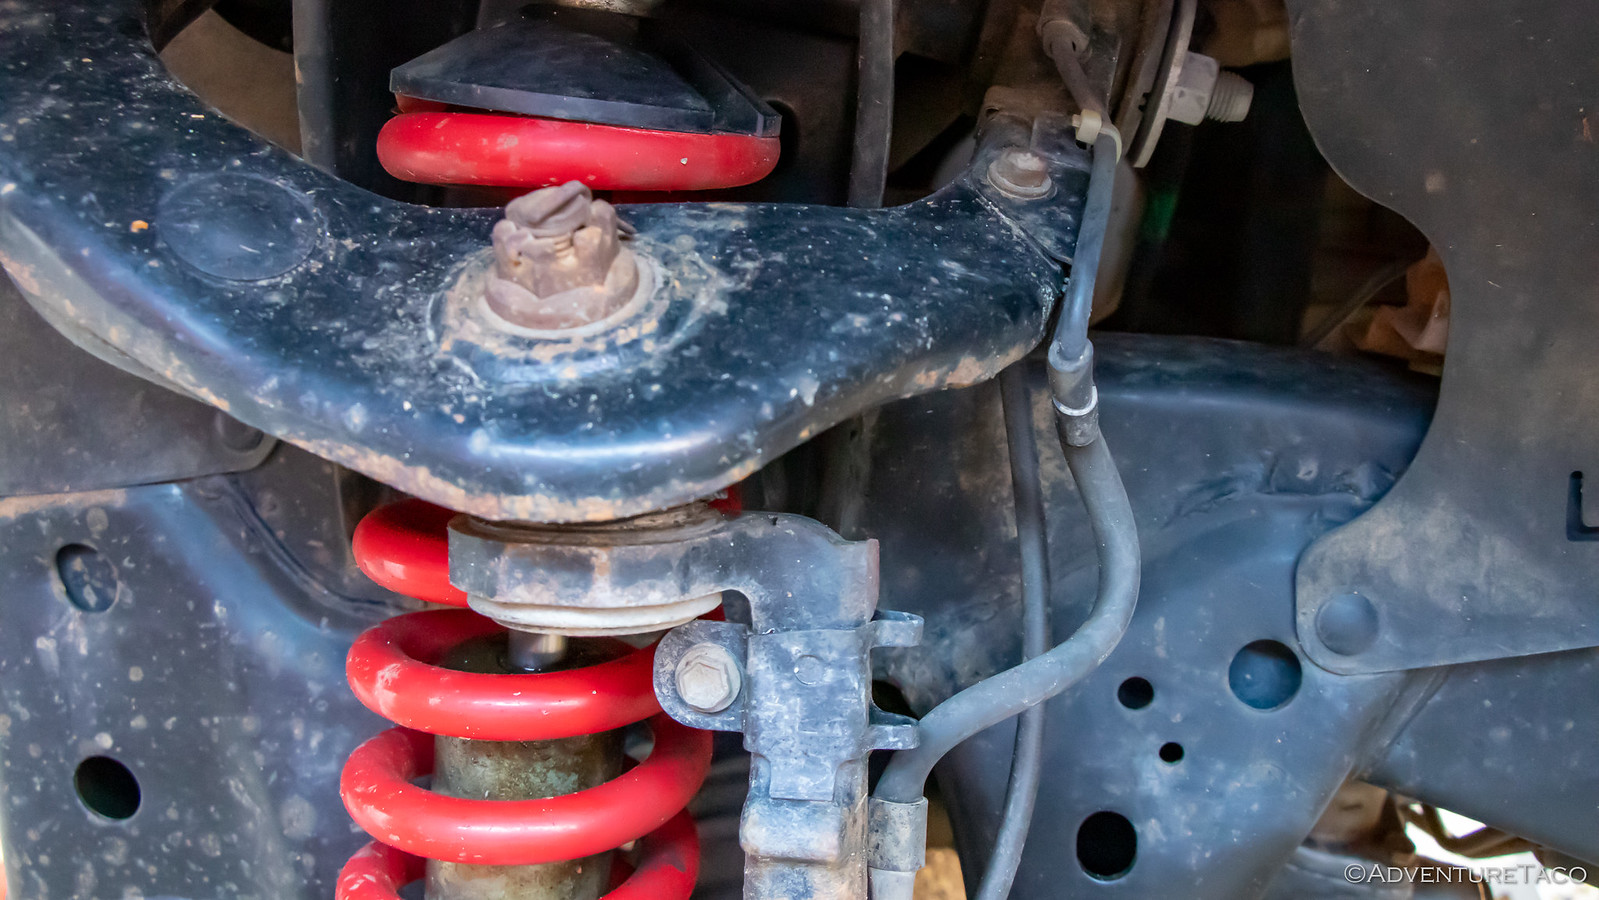
New SPC UCA installed, it was time to tackle the coilover replacement. This would be a similarly straight forward - though a bit shorter - process. I got started by removing the lower shock mount bolt, and the three nuts on the shock tower that secured the old coilover.

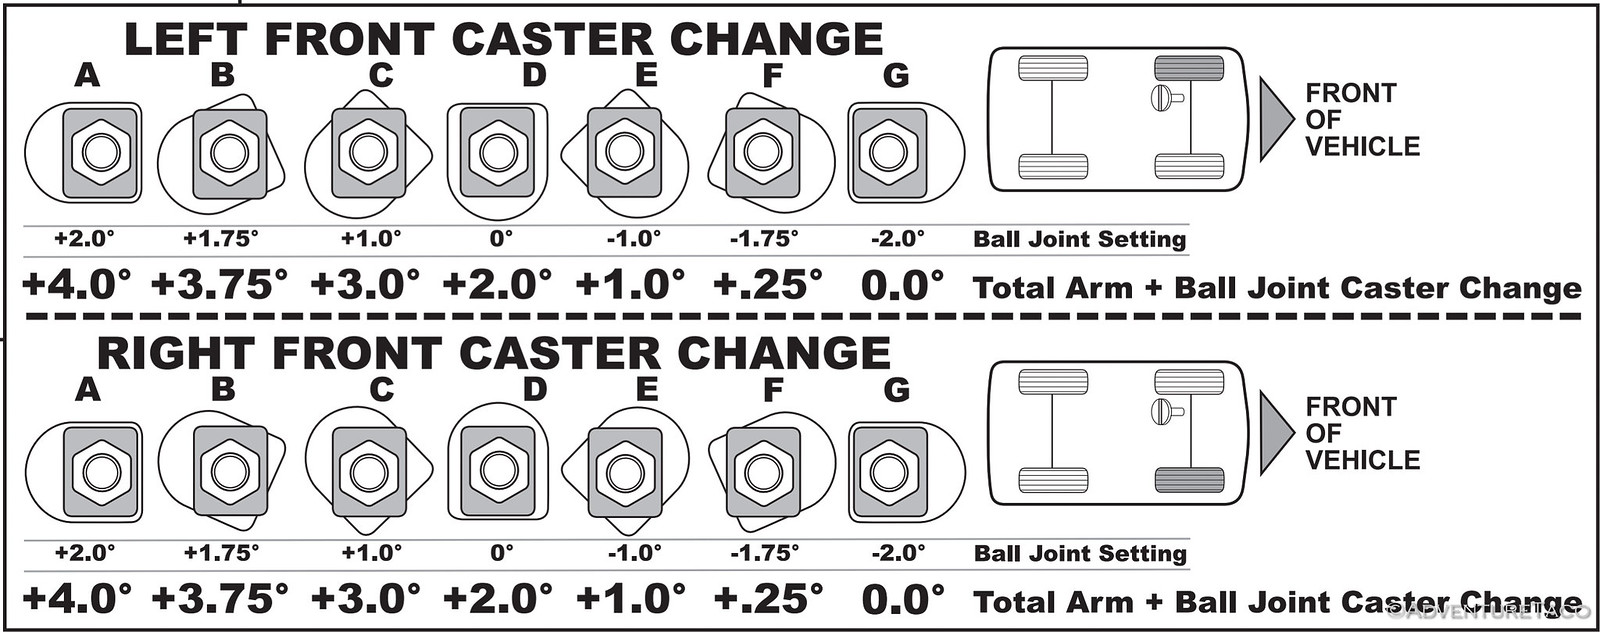
With the spring and shock removed, this was the time to check for any clearance issues I'd have with the new UCA setup. If there were any, I could use the SPC patented caster adjuster in the UCA to move the wheel forward up to ¾" - hopefully alleviating any rubbing.
I moved the floor jack under the lower control arm and pushed it up until the bump stop engaged.

Then, I took a look at the situation. It wasn't good - the SPC UCA had moved the wheel toward the rear of the wheel well, and the rubbing was quite bad when the wheel was turned.

So, I adjusted the caster forward as much as possible (setting G) and then lowered and removed the wheel - it was time to install the new ADS coilover! This went much more smoothly than my install of the Toytec BOSS coils - likely because I'm just more familiar with how the truck works - and within a few minutes I had both the upper and lower nuts and bolts in and torqued to spec.
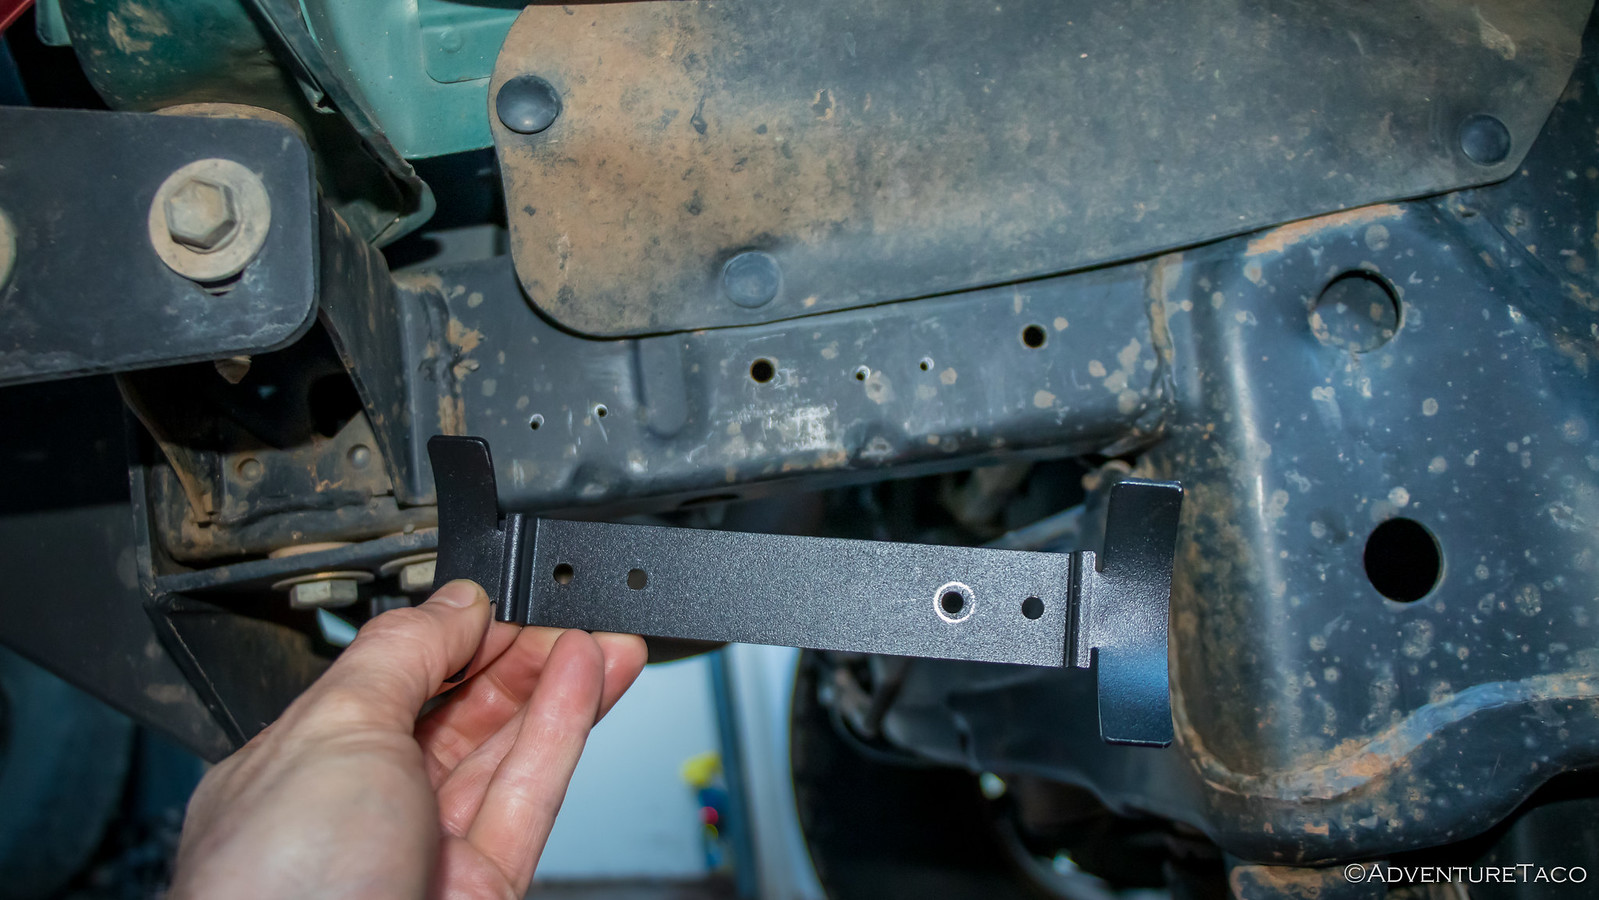
Last but not least, I had a "new part" to secure - the remote reservoir. With only one real place that it fit due to the length of the hose and space in the wheel well, all that stood between me and the finish line was drilling three holes in the frame for the bracket and then attaching the reservoir itself with some band clamps.

And with that, I was ready to hit some bumps. Except that I wasn't - 'cause well, I still had to do the passenger side and get an alignment.
Of course, I won't bore you will all that - frankly, I'm impressed if you've made it this far in the first place  - but I will highlight just a couple interesting points with the passenger side install. Because, you may recall that I was going to do it differently - for science - by leaving the spindle installed (to save time).
First of all - I found that getting the long UCA bolt out of the passenger side is most easily done by removing the air intake box as well as the yellow airbag sensor and a couple bolts that secure a brake line that's in the way of the bolt. With those things out of the way, the bolt slides right out.

As far as the experiment goes, there were really only two interesting pieces:
First - separating the UCA from the upper ball joint while the spindle is still attached. This process went easily enough, and I was less prone to needing a change of underwear, knowing what to expect the second time through.
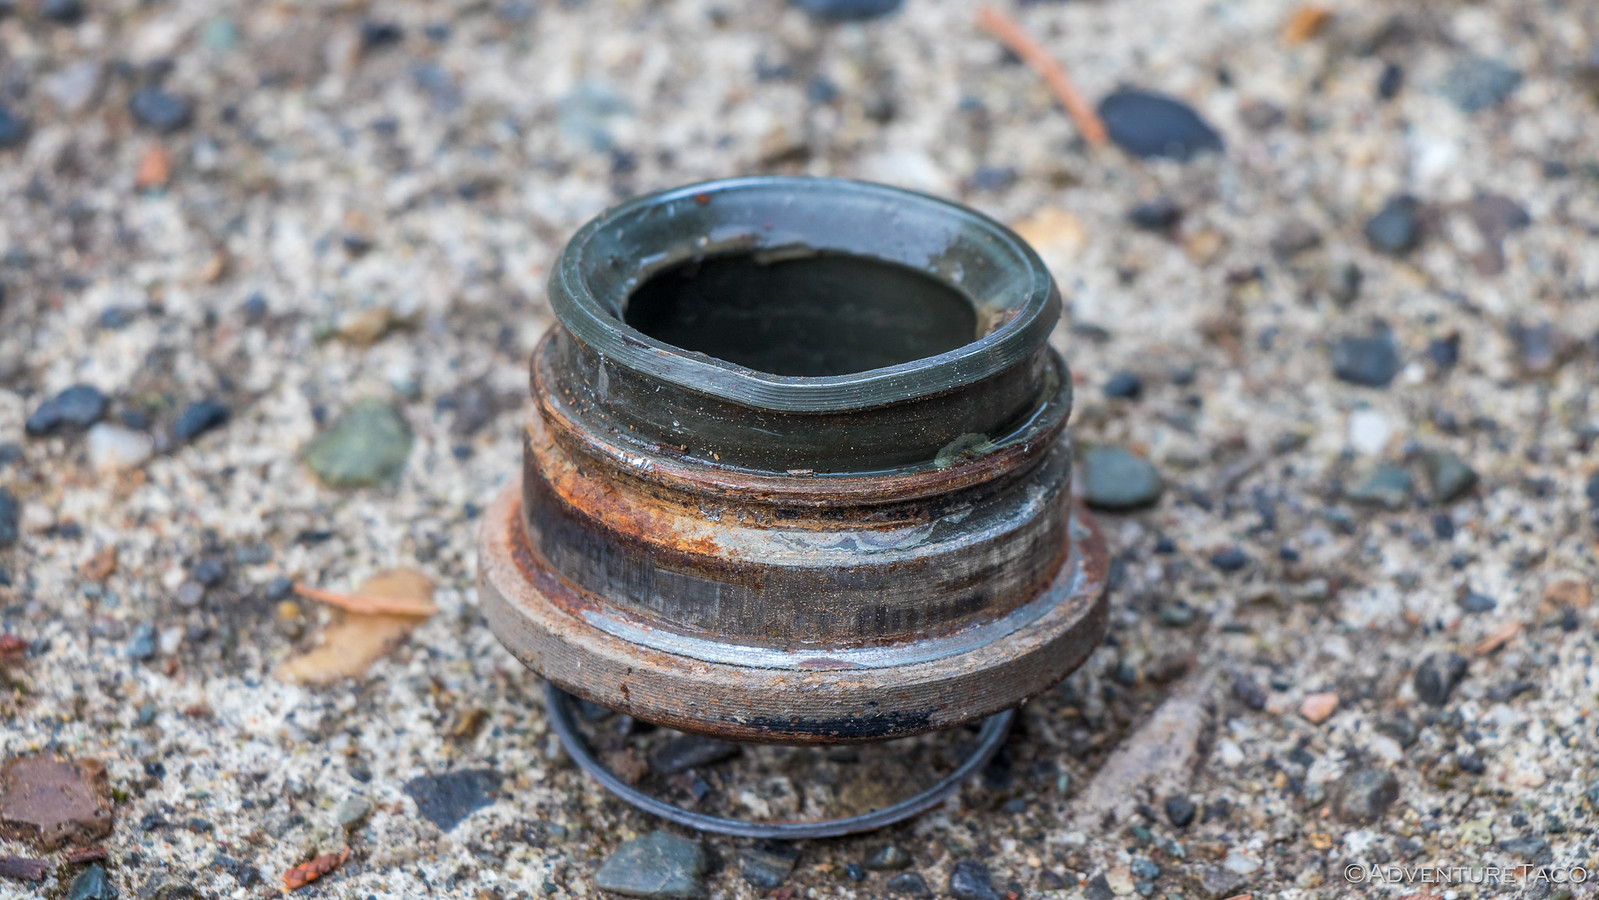
Second - pressing the ball joint out of the spindle. I was able to get the spindle angled out of the wheel well just enough to fit the C-clamp, receiving cup, and impact wrench. However, upon pressing out the ball joint, I actually ended up pressing the stud and ball through the bottom of the ball joint itself!
Yep. 
Luckily, I had the right sized cylinders and whatnot in the OTC 7249 Ball Joint Service Kit to press out the bottom of the ball joint out of the spindle, and hey - on the positive side I got to see the internal construction of the joint! Win.
One thing I noticed was that the cup of the ball joint was deformed in one spot, and this spot corresponded to where the stud of the ball joint had contacted it at full droop. I must have really bashed the passenger side at some point to accomplish this feat - a bit surprising given my standard operating speed of "slow."

At any rate, the rest of the passenger side install went smoothly, and I'd say that the experiment resulted in a truly spectacular result of "meh" - both methods work and neither is significantly better than the other. I guess if I had to recommend one or the other, I'd suggest that if you're working alone, take the spindle out entirely and if you have a partner in crime who can hold it while you position the various press components, you might as well leave it in.
Either way - in the end, you get the same thing: awesomeness.
Oh, and with the new components, I was interested to see how my height and droop were affected. Not much it turns out.
- Lift height measured from ground-to-frame at cab mount: before - 19"; after - 19 3/8", which I'm sure will settle a bit.
- Droop distance measured from ground-to-frame at cab mount: before - 21 3/4"; after - 22 1/2".

Impressive!!!!
I was wondering if you could tell me the spring rate and valving on your front ADS, as well as the valving for your new 10” Kings in the rear?
Are you satisfied with the initial setup, or are you still looking to do some more tweaking?
I use my Tacoma in a similar way, but I have an aluminum topper. I was always nervous leaving my stuff in the bed while I out hiking, etc.
Thank you!
Spring rate on the front ADS is 650lbs, and the valving is the standard valving from ADS. They like to ship that way so that they have a known starting point for adjustments.
I did feel like the pre-load was a bit much on the fronts, so I lowered it about 4 threads on the passenger side and 7 on the driver side (which was more pre-loaded, likely for Taco-lean), which seems quite a bit better to me.
On the rear, the 10" shocks are also ADS w/resis. Valving there is also the standard ADS valving, and seems *really good* to me.
There is some tweaking I need to do - largely with the resis up front - right now, the tires rub on them at full lock - see here: https://adventuretaco.com/rig-review-anza-borrego-ruining-around-in-utah-what-worked-and-what-didnt/
I also *technically* should install limit straps on all four corners.
Besides that though, I'm happy. Will be getting a lot of trail time though as summer comes, so I'll have a better sense at the end of fall as to what I need to do as far as tweaking goes. My plan is to rebuild these every 1-2 years given the number of miles I put on, and I may do 2 rebuilds after the first year as I'm getting stuff dialed in.
Cheers,
Thank you very much for the quick reply.
Regarding your comment regarding limit straps; do you feel your limiting the suspension droop with your shocks? With my current setup, I think I might “possibly” reach max extension on the front if I was really flying through some whoops type terrain, but I really never run the truck that hard through that sort of terrain. I just took delivery of my new Deaver leaf packs that were built to my request of stock plus 700 pounds in the rear (full time). I will have to wait until I break the packs apart and mount them to see what sort of droop measurement I end up with. I have been running a pair of OME Dakars and my standard load just was too much (on my bump stops too often).
One last question. Now that you have had your 4.88 gearing for awhile, do you still think it was the way to go? I’m really on the fence between the 4.56 and 4.88 ratios. I’m also currently running essentially 33” tires. I am not planning on any future tire size increases, although I am intrigued by the 34x10.5x17 Ko2 D Rated tires.
Thank you again for your time.
Both my front and rear shocks are my droop limiters. Definitely the way it "should" be in a properly tuned setup IMO...let me explain why...
Front - you don't want your UCA/LCAs to be limiting droop...that just means you've got bushings binding up - no good. Plus, your front shocks have significantly less travel than rear, so you want to get everything out of them that you can. That means they are going to be the limiting factor (until limit straps are installed to protect them).
Rear - I can get really close (within 1/4") to bottoming out the rear shocks, though they are protected from actual bottoming out via the bump stops. My leaf springs - custom Alcan's - have the ability to flex more than 10" however (not much more...maybe 11-12" in just the right circumstances) so there are a few cases where I could see the rear shocks limiting droop as well (again, until limit straps do).
For both front and rear, I don't often get into the situation where the shock is limiting travel - like you I keep my speeds reasonable - which is why straps are an "eventually" for me. I'm in no rush ?.
As for the gears - I love the 4.88's - very glad I didn’t go 4.56. On trail, they make things so much easier. The place where they don't shine is on the highway if you are a fast driver (I'm not). Getting up over 70mph, the RPMs really start to climb (up in the 3000-3400 range). I do most of my highway stuff at ~62-65 though, so it's not an issue for me...and frankly, our trucks love to run around 3000-3500rpm, so it's not hurting the truck regardless.
Oh, and if you have an auto, you'll like the gears even more and your RPMs will be about 300-500 lower than mine at a given speed.
With your current wheel set up, how close does your tire come to the UCA? I currently have F5's with 3.5" BS and 285/78R16's that will need replacing in a few months. I am getting a set of the same 4Runner rims you have and going back to 255/85R16's for a lighter package and reduced debris all over the side of my truck.
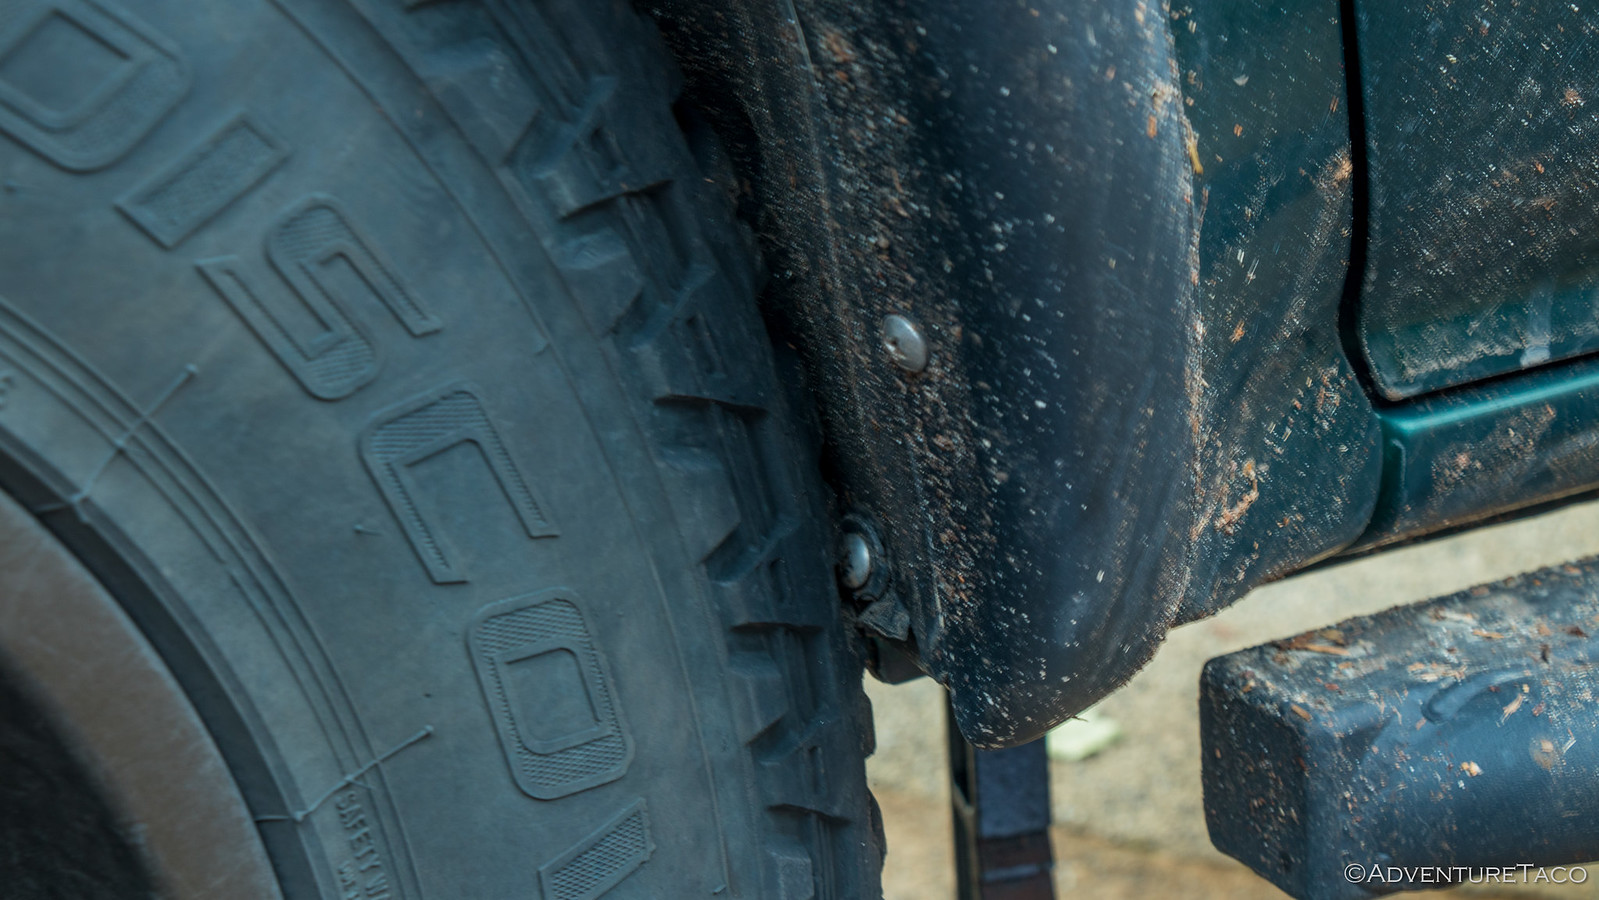
With the current setup - 4Runner 5-spoke wheels and the Cooper ST Maxx 255/85R16s, I don't really come close to rubbing the SPC UCA at all. In fact, rubbing with this setup is really pretty minimal - and here's why:
Also, the sizing makes it so there's not much (I have NONE) frame rubbing either, which is really nice. My tires at full lock are about 1.5" from the frame, no matter which direction I'm turning.
And the reduced mud - well, that's the best part! 🙂
Another fantastic write-up! You got me thinking a lot about upgrading my old worn-out 19-year-old stock suspension on my 2002 Tacoma 4x4 SR5. I do have 10-year-old 4600 Bilstein shocks and those served well over Toyota factory shocks. On the top of my list are the Bilstein 6112 shocks, and I have not decided on a leaf pack for my Tacoma. My Tacoma is off the road once a month, and I don't drive fast off-road just on the freeways as I live in SoCal. My Tacoma is my daily driver plus does house duties too. My wife has a Subaru Outback that I will eventually sell and replaced with a Toyota 4Runner.
The SPC UCAs are on my list too. I read lots of rave reviews on the ADS shocks and SPC UCAs, so you got a tough and sweet suspension.
Is there any kind of bushing or spacers at the lower coilover to LCA bolt? The ADS housing looks a lot more narrow than the stock assembly there. Thank you.
Hey Paul,
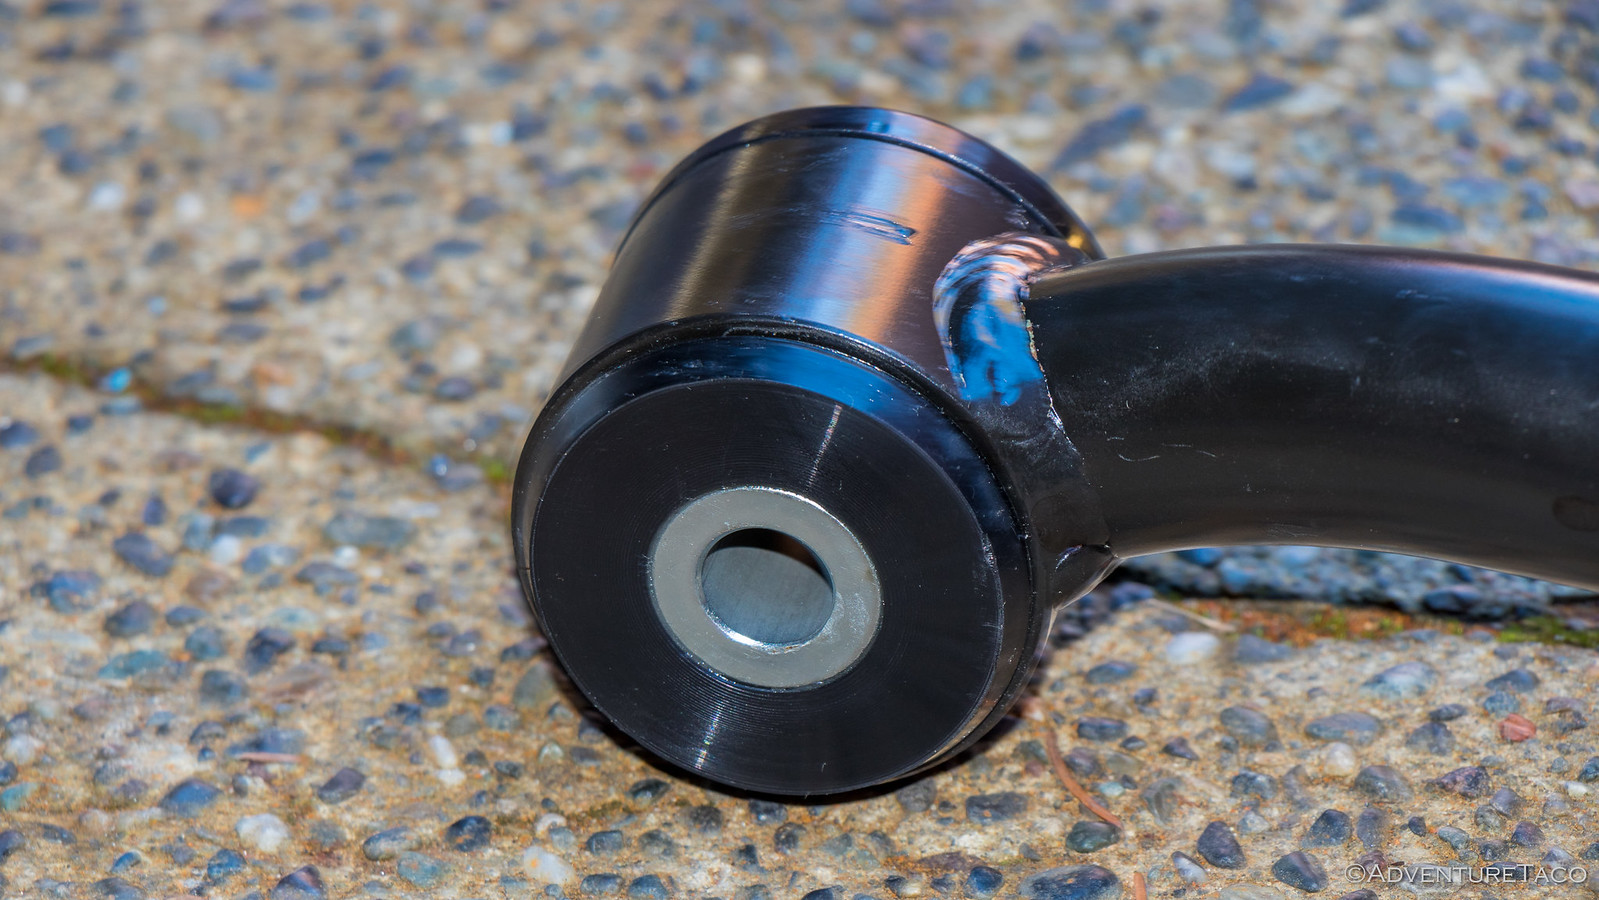
The ADS (and other similar set ups from King, Icon, Fox, etc.) coilovers are certainly built a little bit differently than the OEM-style shock eye that the Toytec setup used. On the Toytecs (and Bilstien, Old Man Emu, and other OEM-style) shock eye, a rubber bushing wraps a steel sleeve, and is fused to the outer steel housing. The inner steel sleeve is sandwiched between the tabs of the lower shock mount, and the rubber twists and turns as the shock moves through its travel. Eventually, this wears out the rubber. With the higher end racing shocks, the entire shock eye is metal (usually aluminum), and there is a spherical bearing (steel) that is press fit into the aluminum race. That bearing then pivots (per its design) as the shock moves through its range of motion. Because it's all metal, it's actually a stronger joint than the rubber one (albeit a little less "cushy on the tushy" since you don't have that 1/2" of rubber to absorb the bumps.
That said, the spherical bearings *do* require more maintenance than the rubber bushings. In the long run (many years), it can be cheaper to rebuild the racing shocks than to continue to replace the OEM-style, but of course the increased maintenance may not be for everyone. I show the details of the lower shock eye on the ADS shocks, as well as the maintenance and costs, here if you're interested: , and I walk through the entire rebuild process of a shock in this guide: Rebuilding/Revalving Smooth Body Shocks (ADS version). Hope that helps, shout if you have more questions!